If you’ve recently purchased a drone and are eager to take it for a spin, one of the first things you’ll need to do is pair it with a remote controller. This process may seem daunting at first, but with a few simple steps, you’ll be up and running in no time.
Step 1: Power on the Drone and the Remote Controller
The first step in pairing your drone with the remote controller is to turn both devices on. Ensure that the drone’s battery is fully charged and that the remote controller has fresh batteries or is fully charged as well. Once both devices are powered on, you’re ready to move on to the next step.
Step 2: Enable the Drone’s Wi-Fi
Most drones use Wi-Fi to establish a connection with the remote controller. To enable the Wi-Fi on your drone, consult the user manual or the manufacturer’s website for specific instructions. In general, you’ll need to access the drone’s settings and look for an option to enable or turn on the Wi-Fi. Once the Wi-Fi is enabled, the drone will start broadcasting a wireless signal.

Step 3: Connect the Remote Controller to the Drone
Now that the drone’s Wi-Fi is enabled, it’s time to connect the remote controller to the drone. On the remote controller, look for a button or a switch labeled “pair” or “connect.” Press this button or switch, and the remote controller will start scanning for available Wi-Fi networks. When the remote controller discovers the drone’s Wi-Fi signal, select it from the list of available networks.
Note: The name of the drone’s Wi-Fi network may vary depending on the model and manufacturer.
Once you’ve selected the drone’s Wi-Fi network, the remote controller will establish a connection with the drone. This may take a few seconds, so be patient. You’ll know the pairing process is successful when the remote controller’s display shows a live feed from the drone’s camera and all the controller’s functions are responsive.
Step 4: Test the Connection

Before you take your drone for a flight, it’s important to test the connection between the drone and the remote controller. Move the remote controller’s joysticks and verify that the corresponding movements are reflected on the drone. Additionally, check if the drone’s camera feed is clear and stable on the remote controller’s display.
By following these simple steps, you can easily pair your drone with a remote controller and start enjoying all the exciting features and capabilities your drone has to offer.
Understanding the Basics
Pairing your drone with a remote controller is an essential step to ensure a smooth and successful flight. Before diving into the process, it is important to have a basic understanding of how the pairing works and the components involved.
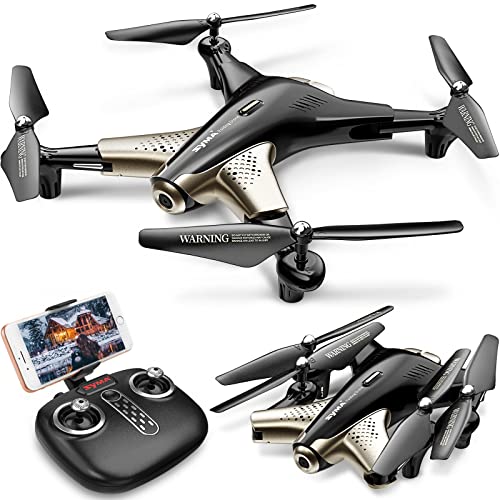
Drone
The drone is the main flying device that utilizes remote control signals to operate. It comes equipped with motors, propellers, sensors, and a receiver to communicate with the remote controller.
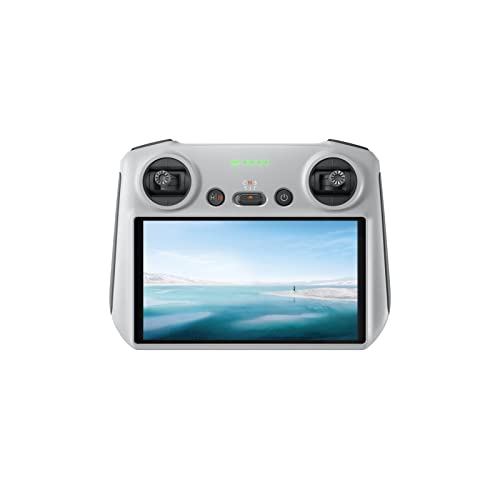
Remote Controller
The remote controller, also known as a transmitter, is the device you hold and use to control and navigate the drone. It sends signals to the drone telling it how to move and perform specific actions.

Frequency Bands
Both the drone and remote controller communicate using radio signals transmitted on specific frequency bands. These frequencies can vary depending on the region and the specific drone model.
Pairing Process
The pairing process typically involves turning on both the drone and remote controller and initiating the connection between them. This is typically done by pressing a specific combination of buttons or switches on both devices simultaneously.
LED Indicators

During the pairing process, LED indicators on both the drone and remote controller will provide visual feedback to indicate their pairing status. This can include blinking lights, solid lights, or specific color patterns, depending on the manufacturer and model.
Range and Distance
Understanding the maximum range and distance capabilities of your drone and remote controller is essential for a safe and reliable flight. This information can usually be found in the product manual or specifications provided by the manufacturer.
Signal Interference
Interference from other electronic devices or physical obstacles can disrupt the communication between the drone and remote controller. It is important to fly your drone in an open area away from potential sources of interference to ensure a stable and uninterrupted signal.

By having a solid understanding of the basics of drone pairing, you can confidently proceed with the process and enjoy the experience of flying your drone with a remote controller.
Checking the Compatibility
Before attempting to pair your drone with a remote controller, it is important to ensure that they are compatible. Not all drones are compatible with all remote controllers, so it is crucial to double-check before proceeding.
Here are some steps you can follow to check the compatibility:
- Refer to the drone’s user manual: The user manual should specify the compatible remote controllers for your drone model. Look for a list of recommended or compatible controllers.
- Check the drone manufacturer’s website: Visit the website of the drone manufacturer and navigate to the product page for your specific drone model. Look for a section on compatible remote controllers.
- Read online forums and communities: Online forums and communities dedicated to drones can be a valuable resource for finding information about compatibility. Search for discussions or threads related to your drone model and remote controller.
- Contact customer support: If you are still unsure about whether your drone is compatible with a specific remote controller, reach out to the customer support of the drone manufacturer. They should be able to provide you with the necessary information.
By taking the time to check the compatibility between your drone and remote controller, you can avoid any potential issues or frustrations when attempting to pair them together.
Preparing the Drone
Before you can pair your drone with the remote controller, it’s essential to ensure that your drone is ready for the pairing process. Follow these steps to prepare your drone:

1. Charge the Battery
Make sure your drone’s battery is fully charged before attempting to pair it with the remote controller. Most drones come with rechargeable batteries that need to be charged before use. Check the drone’s user manual for specific instructions on how to charge the battery.
2. Insert the Battery
Once the battery is fully charged, insert it into the drone’s battery compartment. Ensure that the battery is properly inserted and securely fastened in place. Incorrectly inserted batteries may prevent successful pairing with the remote controller.
3. Power on the Drone
After the battery is securely inserted, power on the drone according to the manufacturer’s instructions. This typically involves pressing a power button or flipping a switch. Wait for the drone’s lights or indicators to turn on, indicating that it has successfully powered on.
4. Check the Drone’s Settings
Before attempting to pair the drone with the remote controller, check the drone’s settings to ensure that it is in pairing mode or compatible with the remote controller you intend to use. Refer to the drone’s user manual for instructions on how to access and modify the settings.
By following these steps and properly preparing your drone, you will be ready to pair it with the remote controller and start using it for your aerial adventures.

Preparing the Remote Controller
Before you can pair your drone with the remote controller, you need to make sure you have everything set up correctly. Here are the steps to prepare the remote controller:
1. Charge the batteries
Ensure that both the drone and remote controller have fully charged batteries. This will prevent any unexpected power issues during the pairing process.
2. Turn on the remote controller
Press the power button on the remote controller to turn it on. Check the battery level on the controller’s display to ensure it has enough power to complete the pairing process.
3. Check the controller settings
Verify that the remote controller is set to the correct mode for your drone. Some controllers have different modes for different drones, so make sure you have selected the appropriate one.
Following these steps will help ensure a successful pairing process between your drone and the remote controller. Once you have completed these preparations, you can proceed to the next steps for pairing the two devices.
Pairing the Drone and Controller
When you first receive your drone and controller, you will need to pair them together before you can start flying. Pairing ensures that the drone and controller are communicating with each other properly.
To pair your drone and controller, follow these steps:
Step 1: Power on the Drone and Controller
Start by powering on both the drone and the controller. Make sure the batteries are fully charged for optimal performance.
Step 2: Enable Pairing Mode
Next, you will need to put your drone and controller into pairing mode. Refer to the user manual for your specific drone model to find out how to enable pairing mode.
Step 3: Connect the Drone and Controller
Once both the drone and controller are in pairing mode, the next step is to establish a connection between them. This can typically be done by pressing a specific button or using a specific gesture, as indicated in the user manual.
Step 4: Confirm the Connection
After initiating the pairing process, wait for the drone and controller to establish a connection. This could take a few seconds or longer, depending on your drone model.
Once the connection is established, you will typically see a confirmation message or indicator light on both the drone and controller, signaling that they are paired and ready to use.
| Drone Model | Pairing Instructions |
|---|---|
| Model X | Press and hold the pairing button on both the drone and controller simultaneously for 5 seconds. |
| Model Y | Swipe up on the controller screen and tap the pairing icon, then power on the drone within 10 seconds. |
| Model Z | Rotate the left joystick clockwise and the right joystick counterclockwise three times, then press the pairing button on the controller. |
Remember to consult the specific user manual for your drone and controller for accurate pairing instructions, as they may vary depending on the model.
Once you have successfully paired the drone and controller, you are ready to start exploring the skies and enjoying your drone’s capabilities.
Testing and Troubleshooting
Once you have successfully paired your drone with the remote controller, it is important to test the connection and troubleshoot any issues that may arise. Here are some steps you can take to ensure a smooth flying experience:
1. Range Test
Before taking your drone out for a flight, it is important to test the range of the remote controller. Make sure you have a clear line of sight and gradually increase the distance between the drone and the controller. If you notice any loss of signal or lag in control response, you may need to recalibrate the controller or adjust the position of the antennas.
2. Control Response Check
Once you have tested the range, it’s time to assess the responsiveness of the controls. Move the joysticks in different directions and observe how the drone reacts. Ensure that all the controls are functioning properly and that the drone responds accurately to your inputs. If you notice any lag or inconsistency, you may need to adjust the control sensitivity settings on your remote controller.
3. Flight Stability
Another important aspect to test is the flight stability of your drone. Take the drone for a short test flight and observe if it hovers steadily or drifts in a certain direction. Check if it maintains altitude well and if it is able to hold its position in gusty wind conditions. If you notice any stability issues, you may need to calibrate the drone’s internal sensors or adjust the flight settings.
4. Battery Life
Monitoring the battery life of your drone is essential for a safe and successful flight. Ensure that the battery is properly charged and check if the controller displays the battery level accurately. Conduct a test flight and note the flight time before the battery level gets critically low. If you experience any sudden drop-offs in battery life, you may need to replace the battery or contact the manufacturer for further assistance.
By following these testing and troubleshooting steps, you can ensure that your drone is properly paired with the remote controller and ready for an enjoyable flight experience.
Question-answer:
Is it difficult to pair a drone with a remote controller?
Pairing a drone with a remote controller is generally not difficult. Most drone manufacturers provide clear instructions on how to pair their products. However, the specific steps may vary depending on the brand and model of your drone and remote controller. It’s always best to consult the user manual for your specific devices to ensure you are following the correct pairing process. If you are unsure, you can also reach out to the manufacturer’s customer support for assistance.