
Having a pan tilt dome security camera is a valuable asset when it comes to safeguarding your home or business. This advanced surveillance technology allows you to monitor a wide area and control the camera’s movements remotely. In this article, we will guide you on how to effectively use and navigate a pan tilt dome security camera.
Firstly, it’s important to familiarize yourself with the different functions and features of the camera. The pan function allows the camera to move from left to right, covering a panoramic view of the area. The tilt function allows the camera to move up and down, adjusting the viewing angle. By combining these two functions, you can easily monitor all areas and ensure maximum security.
To control the movements of the camera, you can use a control panel or a mobile app. Many pan tilt dome security cameras come with intuitive interfaces that make it easy to adjust the camera’s position. Simply select the pan or tilt options on the control panel or app, and use the arrows or virtual joystick to move the camera accordingly.
Furthermore, some pan tilt dome security cameras offer additional features such as preset positions and tours. Preset positions allow you to save specific camera positions, such as entrance doors or parking lots, for quick access. Tours allow the camera to automatically move between different preset positions, providing continuous surveillance of multiple areas.
In conclusion, learning how to effectively use and navigate a pan tilt dome security camera is essential for optimal surveillance. Familiarize yourself with the camera’s functions, utilize the control panel or mobile app to control the camera’s movements, and take advantage of additional features such as preset positions and tours. By doing so, you can ensure the safety and security of your home or business.

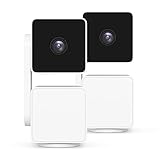
What is a Pan Tilt Dome Security Camera?
A pan tilt dome security camera is a type of surveillance camera that is designed to provide a flexible and comprehensive coverage of an area. It can pan horizontally (left and right), tilt vertically (up and down), and zoom in and out to capture detailed images and footage.
These cameras are typically installed in outdoor environments and are commonly used in commercial and industrial settings to monitor large areas, such as parking lots, warehouses, and manufacturing plants. They can also be used for residential applications to improve home security and provide peace of mind.
One of the main advantages of a pan tilt dome security camera is its ability to rotate and track objects or individuals in real time. This feature allows for continuous monitoring and ensures that no blind spots are left unattended. The cameras can be controlled remotely using a computer or a mobile device, allowing users to adjust the camera’s position and zoom level as needed.
In addition to their flexibility and control, pan tilt dome security cameras are also designed to be discreet. Typically, they are housed in a dome-shaped enclosure, which makes it difficult for potential intruders to determine where the camera is pointing. This feature helps to prevent vandalism and tampering.
Overall, a pan tilt dome security camera is an advanced surveillance tool that offers a wide range of monitoring capabilities. With its ability to pan, tilt, zoom, and track movements, it provides enhanced security and peace of mind for both commercial and residential applications.
Installation
Before you begin the installation process for your pan tilt dome security camera, it is important to gather all the necessary tools and materials. You will need:
- Pan tilt dome security camera
- Mounting bracket and screws
- Power adapter
- Network cable
- Drill and drill bits
- Screwdriver
- Level
Once you have all the necessary tools and materials, follow these steps to install your pan tilt dome security camera:
- Choose the location for your camera installation. Make sure it is an area where the camera has a clear view and coverage of the desired area.
- Use a level to ensure that the mounting bracket is straight before drilling any holes.
- Drill holes in the appropriate locations for the mounting bracket screws.
- Attach the mounting bracket to the wall or ceiling using the screws.
- Connect the power adapter to the camera and plug it into a power outlet.
- Connect the network cable to the camera and the network port on your router or network switch.
- Adjust the camera to the desired pan and tilt position using the control options provided.
Once you have completed these steps, your pan tilt dome security camera should be installed and ready to use. It is important to test the camera’s functionality and adjust the settings as needed to ensure optimal performance.
Choosing the Right Location
When installing a pan-tilt dome security camera, choosing the right location is crucial for maximizing its effectiveness. Here are a few factors to consider:
Field of View
One of the most important considerations is the camera’s field of view. You should choose a location that provides a wide coverage area, allowing the camera to capture as much of the surroundings as possible. Take into account any areas that require special attention or that might be vulnerable to intruders.

Height
The height at which the camera is installed is also important. Placing it at a higher position can offer better visibility and reduce the risk of tampering. On the other hand, positioning it too high may result in a loss of detail, making it harder to identify individuals or objects. Finding the right balance is essential.
Additionally, consider the accessibility of your chosen location. If the camera is placed high up, make sure that it can still be easily accessed for maintenance or adjustments.
Avoid placing the camera in locations where it can be easily reached or vandalized.
Lighting Conditions
The lighting conditions in the chosen location can significantly impact the camera’s performance. Make sure the area is well-lit or install additional lighting if necessary to ensure clear visibility both day and night. Avoid placing the camera directly towards bright light sources, as this can result in washed-out images or glare.
It is also important to consider if the camera is suitable for outdoor use. If applicable, choose a weather-proof dome camera to ensure it can withstand the elements.

By carefully considering these factors, you can select the optimal location for your pan-tilt dome security camera, enhancing its effectiveness in monitoring and enhancing the security of your premises.
Mounting the Camera
Before mounting the pan tilt dome security camera, it is important to carefully choose the best location for optimal surveillance coverage. The camera should be positioned in a way that allows it to capture a wide field of view, while also being discreetly placed so as not to draw attention.
First, find a suitable mounting surface, such as a wall or ceiling, that can support the weight of the camera. Make sure the surface is stable and secure enough to prevent any movement or vibration that could affect the camera’s performance.
Next, use a stud finder to locate a stud or solid structure in the wall or ceiling. Mark the center of the stud or structure as a reference point for mounting the camera. This will ensure that the camera is securely attached and will not come loose over time.
Once the reference point is marked, align the mounting plate of the camera with the reference point and attach it using the provided screws and anchors. Make sure the mounting plate is level and secure before proceeding.

After the mounting plate is securely in place, attach the camera to the mounting plate using the appropriate screws or brackets. Follow the manufacturer’s instructions for attaching the camera to ensure a proper fit.
Finally, adjust the pan and tilt settings of the camera to achieve the desired viewing angle. Use a monitor or mobile device connected to the camera’s interface to adjust the pan and tilt remotely if desired.
Remember to test the camera’s functionality after mounting to ensure it is capturing the desired footage and is properly positioned for optimal surveillance coverage.
Note: It is recommended to consult a professional or refer to the camera’s user manual for specific instructions and best practices for mounting the pan tilt dome security camera.
Setup
Setting up a pan tilt dome security camera can be done in a few simple steps. Follow the instructions below to get started:

1. Choose the Location
First, determine the ideal location for your camera. Look for a place that provides a wide field of view and covers the desired area. Ensure that the camera is mounted securely and protected from the elements.
2. Mount the Camera
Use the appropriate mounting hardware to securely mount the camera to the chosen location. Follow the manufacturer’s instructions for proper installation. Ensure that the camera is level and properly aligned for optimal performance.
3. Connect the Camera
Connect the camera to a power source using the provided power cable. If the camera supports network connectivity, connect it to the local network using an Ethernet cable or follow the camera’s wireless setup instructions.
4. Configure the Camera
Access the camera’s configuration interface using a web browser or dedicated software provided by the manufacturer. Follow the instructions to set up the camera’s resolution, motion detection, and other settings according to your preferences.
5. Test and Fine-Tune
Once the camera is fully configured, test its functionality by panning, tilting, and zooming to ensure smooth operation. Make any necessary adjustments to the camera’s position or settings to achieve the desired coverage and image quality.

6. Set Up Recording and Monitoring
If you intend to record and monitor the camera’s feed, set up a network video recorder (NVR) or a dedicated computer/server. Configure the recording schedule, storage options, and remote access to view and manage the camera feed.
7. Regular Maintenance
Regularly check the camera’s functionality, clean the lens if needed, and ensure that all connections are secure. Stay updated with firmware updates provided by the manufacturer to ensure the camera’s optimal performance and security.
By following these steps, you can easily set up and configure a pan tilt dome security camera for your specific surveillance needs.
| Step | Description |
|---|---|
| 1 | Choose the Location |
| 2 | Mount the Camera |
| 3 | Connect the Camera |
| 4 | Configure the Camera |
| 5 | Test and Fine-Tune |
| 6 | Set Up Recording and Monitoring |
| 7 | Regular Maintenance |
Connecting the Camera to a Network
To utilize the full potential of your pan tilt dome security camera, it is important to connect it to your network. Follow these steps to successfully set up the camera:
Step 1: Determine the Available Connection Options
Before connecting the camera, identify the available connection options. Most pan tilt dome security cameras support both wired and wireless options. Determine which method suits your needs best.
Step 2: Power on the Camera
Connect the camera to a power source using the included power adapter. Ensure that the camera is receiving power before proceeding with the network connection.
Step 3: Connect to Wired Network (if applicable)
If you have opted for a wired connection, use an Ethernet cable to connect the camera to your router. Insert one end of the cable into the camera’s Ethernet port and the other end into an available port on your router.
Step 4: Connect to Wireless Network (if applicable)
If you prefer a wireless connection, access the camera’s settings interface through a web browser on a computer connected to the same network. Locate the wireless settings section and select your network from the list of available networks. Enter the network password if prompted.
Step 5: Configure Network Settings (if necessary)
In case your camera requires manual network configuration, navigate to the network settings section in the camera’s interface. Enter the necessary information, such as IP address, subnet mask, and gateway. Consult the camera’s user manual for further guidance.
By following these steps, you will successfully connect your pan tilt dome security camera to a network, allowing you to remotely access and control it through various devices, ensuring the security of your premises.
Configuring the Camera’s Settings
Once you have installed your pan tilt dome security camera, it is important to configure the camera’s settings to ensure optimal performance and functionality. Here are the steps to follow:
1. Connect the camera to a power source and ensure it is properly connected to your network.
2. Open a web browser on your computer and enter the IP address of the camera in the address bar. This will allow you to access the camera’s web interface.
3. Log in to the camera’s web interface using the default username and password provided by the manufacturer. It is highly recommended to change the default login credentials for security purposes.
4. Once logged in, navigate to the settings page where you can configure various parameters of the camera. These settings may include image quality, resolution, frame rate, and motion detection sensitivity. Adjust these settings according to your specific requirements.
5. If your camera supports pan and tilt functionality, you can also configure the camera’s movement settings. This includes setting the speed and range of motion, as well as setting up presets for specific camera positions.
6. Additionally, you may have the option to set up email alerts or notifications when motion is detected. This can be useful for monitoring the camera remotely or receiving alerts in case of any suspicious activity.
7. Lastly, don’t forget to save your changes before exiting the camera’s web interface. This will ensure that your configurations are applied and saved for future use.
By following these steps, you can easily configure the settings of your pan tilt dome security camera, allowing you to customize its performance and enhance your overall surveillance experience.
Usage
1. Connect the power cable of the pan tilt dome security camera to a power source.
2. Connect the network cable of the camera to your router or network switch.
3. Install the camera management software on your computer. This software will allow you to control and configure the camera.
4. Open the camera management software and add the camera by entering its IP address or scanning for it on your network.
5. Once the camera is added, you can access its live feed and control its movement using the pan and tilt functions.
6. To pan the camera left or right, use the pan control buttons in the software or drag the on-screen joystick to the desired direction.
7. To tilt the camera up or down, use the tilt control buttons in the software or drag the on-screen joystick vertically.
8. You can also zoom in and out using the zoom control buttons or by scrolling the mouse wheel.
9. The camera may have additional features such as preset positions, motion detection, and automatic tracking. Refer to the camera’s user manual for detailed instructions on how to use these features.
10. Ensure that the camera is properly configured for your security needs, such as setting up recording schedules, enabling notifications, and adjusting image settings.
11. Regularly check the camera’s network connection and power supply to ensure uninterrupted functionality.
12. If you encounter any issues or need further assistance, consult the camera’s user manual or contact the manufacturer’s support team.
Controlling the Camera’s Movement
Once you have set up your pan tilt dome security camera, you can start controlling its movement using various methods.
1. Manual Control
You can manually control the camera’s movement using the controls provided on the camera itself or through a remote control. These controls typically include options to pan left or right, tilt up or down, zoom in or out, and to adjust the camera’s focus.
It is important to familiarize yourself with the camera’s control interface to effectively move the camera and adjust its settings.
2. Web Interface
Many pan tilt dome security cameras provide a web interface that allows you to control the camera’s movement remotely through a computer or smartphone. To access the web interface, you need to connect the camera to your local network and enter the camera’s IP address into a web browser.
Once logged into the web interface, you will have access to a range of controls that allow you to pan, tilt, zoom, and adjust other camera settings. The web interface may also offer additional features such as motion detection, scheduling, and video recording.
Make sure to change the default username and password for the camera’s web interface to ensure its security.
3. Mobile Apps
In addition to the web interface, some pan tilt dome security cameras have dedicated mobile apps that allow you to control the camera’s movement from your smartphone or tablet. These apps provide an intuitive interface with easy access to camera controls and advanced features.
You can download the camera’s mobile app from the app store compatible with your device’s operating system. Once installed, you can connect to the camera using the app and control its movement remotely.
It’s important to note that not all pan tilt dome security cameras come with a dedicated mobile app, so it’s essential to check the camera’s specifications and supported devices before purchase.
By utilizing the various methods mentioned above, you can easily control the movement of your pan tilt dome security camera to monitor specific areas and enhance the security of your premises.
Managing Security Footage
When operating a pan tilt dome security camera, it is important to effectively manage the footage it captures. This ensures that you can easily access and review the recordings whenever needed. Here are some guidelines for managing your security footage:
1. Storage Capacity
Before setting up your pan tilt dome security camera, consider the storage capacity of your recording device. Depending on the resolution and frame rate settings, the amount of storage required can vary. It is recommended to use a device with sufficient storage space to avoid running out of storage regularly.
2. Retention Period
Define a retention period for your security footage. This refers to the length of time that recordings are kept before being automatically deleted or overwritten. The retention period may be influenced by legal requirements or your organization’s policies. Make sure to set a retention period that complies with any relevant regulations and meets your needs.
3. Organization System
Develop an organization system for your security footage. This can include creating folders or categories based on location, date, or event. By organizing your recordings, you can quickly find specific footage when reviewing incidents or investigating events.
4. Regular Backups
Perform regular backups of your security footage to ensure its safety and availability in case of a system failure or loss. Consider using external storage devices or cloud-based solutions for backup purposes. This precautionary measure helps prevent permanent loss of crucial recordings.
5. Access Controls
Implement access controls to restrict who can view and manage the security footage. This helps maintain its confidentiality and integrity. Grant access only to authorized individuals and review access logs periodically to ensure proper usage and identify any potential security breaches.
6. Archive Important Footage
Identify and archive important footage separately from regular recordings. This can include incidents, accidents, or other critical events that may require later reference. Keeping this footage separate makes it easier to locate when needed and prevents accidental deletion or overwriting.
7. Regular Maintenance
Perform regular maintenance checks on your pan tilt dome security camera system. Check for any hardware or software issues, ensure proper functioning of recording devices, and conduct tests to verify the quality of the recorded footage. Regular maintenance helps prevent unexpected issues and ensures the reliability of your security system.
| Storage Capacity | Retention Period | Organization System | Regular Backups | Access Controls | Archive Important Footage | Regular Maintenance |
|---|---|---|---|---|---|---|
| Consider storage requirements | Define length of time to keep recordings | Create folders or categories | Backup footage regularly | Restrict access to authorized individuals | Identify and store critical events separately | Perform regular checks and maintenance |
FAQ,
What is a pan tilt dome security camera?
A pan tilt dome security camera is a type of surveillance camera that can be remotely controlled to move horizontally and vertically. It is encased in a dome-shaped housing to provide a discreet and vandal-resistant design.
What are the benefits of using a pan tilt dome security camera?
There are several benefits of using a pan tilt dome security camera. Firstly, its ability to pan and tilt provides a wider field of view, allowing you to monitor a larger area. Secondly, the dome housing offers protection against vandalism and harsh weather conditions. Lastly, the remote control functionality allows you to adjust the camera’s position and focus as needed.
How can I install a pan tilt dome security camera?
Installing a pan tilt dome security camera typically involves mounting the camera onto a stable surface, such as a ceiling or wall. You will need to run cables for power and video transmission, ensuring they are protected and hidden. It is also important to configure the camera’s settings and connect it to a compatible recording device or network. For detailed installation instructions, refer to the camera’s user manual or consult a professional installer.


