
Are you looking to improve the audio quality of your DSLR camera videos?
One effective way to achieve better audio is by using an external microphone. While most DSLR cameras have built-in microphones, they usually suffer from poor audio quality, picking up unwanted background noise.
In this article, we will guide you through the process of plugging a jack microphone into your DSLR camera, allowing you to capture clear and high-quality audio for your videos.
Step 1: Choose the Right Microphone
First, you need to choose the right microphone for your needs. There are various types of microphones available, such as shotgun microphones, lavalier microphones, and handheld microphones. Consider your specific requirements and the type of videos you will be shooting.
Step 2: Check the Audio Input on Your DSLR Camera
Before connecting the microphone, you need to check if your DSLR camera has a dedicated audio input jack. This is usually a 3.5mm port labeled “MIC” or “AUDIO IN.” Refer to your camera’s manual or specifications to confirm.
Step 3: Prepare the Microphone and Cable
Once you have chosen the microphone that fits your needs and confirmed the audio input on your camera, you can prepare the microphone and cable for connection. Ensure that the microphone is securely attached to its mount or clip, and untangle the cable to avoid any tangling issues during recording.

Step 4: Connect the Microphone to Your DSLR Camera
The next step is to connect the microphone to your DSLR camera. Take the cable and plug the jack into the audio input port on your camera. Make sure it fits snugly and is fully inserted to ensure a reliable connection.
Step 5: Adjust the Audio Settings on Your DSLR Camera
Finally, you need to adjust the audio settings on your DSLR camera. Access the camera’s menu and navigate to the audio settings or microphone input options. Set the input level according to your specific microphone and the audio levels you desire.
By following these steps, you can easily plug a jack microphone into your DSLR camera and enhance the audio quality of your videos. Remember to test the audio before starting your recording to ensure everything is working correctly.

Investing in a good quality external microphone can make a significant difference in the overall production value of your videos. Enjoy capturing clear and professional audio with your DSLR camera!
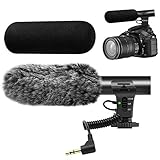
Choosing the Right Jack Microphone for DSLR Camera
When it comes to plugging a jack microphone into a DSLR camera, it’s important to choose the right microphone for your needs. Jack microphones are widely used for recording audio in a variety of situations, and they can be a great option for capturing high-quality sound directly into your camera.
Here are a few factors to consider when choosing the right jack microphone for your DSLR camera:
- Type of microphone: There are different types of jack microphones available, such as dynamic microphones, condenser microphones, and lavalier microphones. Each type has its strengths and weaknesses, so it’s important to choose the one that best suits your needs. Consider factors such as the intended use, environment, and audio quality requirements.
- Directionality: Jack microphones come in various directional patterns, including cardioid, omnidirectional, and shotgun. The directional pattern determines how the microphone picks up sound, so it’s essential to choose the right pattern for your specific recording situation. For example, a cardioid microphone is great for isolating sound in a noisy environment, while an omnidirectional microphone captures sound evenly from all directions.
- Connector compatibility: Make sure the jack microphone you choose is compatible with the input on your DSLR camera. Most DSLR cameras have a 3.5mm microphone input jack, but some may require an adapter. Double-check your camera’s specifications to ensure compatibility.
- Budget: Consider your budget when choosing a jack microphone for your DSLR camera. There are options available at various price points, so it’s essential to balance your needs with the available budget. Keep in mind that higher-priced microphones often offer better build quality and sound performance.
- Reviews and recommendations: Before making a final decision, read reviews and seek recommendations from professionals or other users who have experience with jack microphones for DSLR cameras. Their insights can provide valuable information and help you make an informed choice.
Remember that the right jack microphone for your DSLR camera will depend on your specific needs and preferences. Take the time to research and compare different options to find the perfect microphone for your recording setup.
Understanding the Different Types of Jack Microphones
When it comes to plugging a jack microphone into a DSLR camera, it’s important to understand the different types of jack microphones available. This will help you choose the right microphone for your needs and ensure that it is compatible with your camera.

The two main types of jack microphones are dynamic microphones and condenser microphones.
Dynamic Microphones:
Dynamic microphones are sturdy and versatile, making them ideal for live performances and outdoor recordings. They are less sensitive to sound and can handle high sound pressure levels, making them suitable for capturing loud sounds such as instruments and vocals on stage.
Dynamic microphones use a moving coil to generate an electrical signal when sound waves hit the diaphragm. They are known for their durability and can withstand rough handling and adverse conditions.
Condenser Microphones:

Condenser microphones are more sensitive and precise compared to dynamic microphones. They are commonly used in studio recordings and professional filmmaking. They are capable of capturing a wide range of frequencies and provide detailed and accurate sound reproduction.
Condenser microphones work by using a charged capacitor to convert sound waves into an electrical signal. They require a power source, either in the form of batteries or phantom power from the recording device.
In addition to dynamic and condenser microphones, there are also lavalier microphones, shotgun microphones, and wireless microphones, each with their own set of features and applications.
It’s important to note that not all cameras have a microphone input jack. Before attempting to plug in a microphone, make sure your camera has a dedicated microphone input or an audio input that can be adapted for microphone use.
Once you have chosen the right type of microphone and confirmed that your camera has a compatible input, you can proceed to plug in the microphone and start recording high-quality audio.

Tips for Connecting a Jack Microphone to a DSLR Camera
If you are looking to improve the audio quality of your videos, you may want to consider using a jack microphone with your DSLR camera. Here are some tips to help you successfully connect a jack microphone to your DSLR camera:
| Tips | Description |
|---|---|
| 1. Check compatibility | Before purchasing a jack microphone, make sure it is compatible with your specific DSLR camera model. Check the camera’s user manual or contact the manufacturer for compatibility information. |
| 2. Choose the right jack | There are different types of jack connectors, such as 3.5mm and 6.3mm. Ensure you select the correct jack size that matches your microphone and camera input. |
| 3. Use an adapter if needed | If your microphone has a different jack size than your camera input, you may need to use an adapter. Make sure the adapter is compatible with both the microphone and camera. |
| 4. Connect the microphone | When connecting the jack microphone to your DSLR camera, make sure both devices are turned off. Insert the jack into the camera’s microphone input jack, usually located on the side or front of the camera body. |
| 5. Adjust audio levels | Once the microphone is connected, turn on both the camera and microphone. Access the camera’s audio settings and adjust the input levels to ensure optimal audio quality. Test the audio levels by recording a sample video and play it back to check for any distortion or noise. |
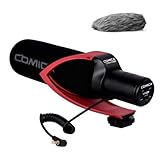
| 6. Use a windscreen | If you plan to use the microphone outdoors, consider using a windscreen to reduce wind noise. This accessory can help improve the audio quality in windy conditions. |
By following these tips, you can successfully connect a jack microphone to your DSLR camera and enhance the audio quality of your videos. Remember to always test the audio levels before recording important footage and make any necessary adjustments to ensure the best results.
Step-by-Step Guide to Plugging in a Jack Microphone
Using a jack microphone with your DSLR camera can greatly improve the audio quality of your videos. Whether you’re a vlogger, filmmaker or content creator, it’s essential to know how to properly plug in a jack microphone to your camera. Follow this step-by-step guide to ensure you’re set up for success.
What You’ll Need
- DSLR camera with a microphone input jack
- Jack microphone
- Audio cable with the appropriate connectors
Step 1: Identify the Microphone Input Jack
First, locate the microphone input jack on your DSLR camera. It is usually labeled with a microphone icon and may be located either on the side or at the front of the camera. Make sure your camera has a microphone input jack before proceeding with the following steps.
Step 2: Connect the Audio Cable
Take the audio cable and connect one end to the microphone jack of your DSLR camera, and the other end to the output jack of your jack microphone. Ensure the connections are secure to avoid any audio interruptions or loose connections during recording.

Step 3: Configure the Audio Levels
Once the microphone is securely plugged in, turn on your DSLR camera and navigate to the audio settings. Adjust the audio levels accordingly to ensure optimal recording quality. It’s important to test the audio levels before recording to avoid any distortions or unwanted noise.
Step 4: Test the Microphone
Before you start filming, it’s crucial to do a quick audio test to ensure the microphone is functioning properly. Record a short sample video or audio clip while monitoring the audio levels. Listen back to the recording and make any necessary adjustments to the microphone position or audio levels.
Step 5: Start Recording
With the jack microphone properly plugged in and tested, you’re ready to start recording your video with improved audio quality. Take your time to set up your shot, frame your subject, and press the record button on your DSLR camera. Don’t forget to monitor the audio levels throughout the recording to ensure consistent and clear sound.
By following these step-by-step instructions, you can easily plug in a jack microphone to your DSLR camera and capture high-quality audio for your videos. Remember to always double-check your connections and audio levels before recording to achieve the best results. Happy filming!
Common Problems and Solutions for Jack Microphone Connection
When connecting a jack microphone to a DSLR camera, there are a few common problems that can arise. Understanding these issues and their solutions can help ensure a successful connection and improve the audio quality of your recordings.
1. No Sound or Low Volume
If you are not getting any sound or the volume level is too low when using a jack microphone with your DSLR camera, there are a few possible reasons for this.
First, check if the microphone is securely plugged into the camera’s microphone input jack. Sometimes, it may appear connected, but it’s not fully inserted, resulting in incomplete contact and low or no audio signal. Reinsert the jack ensuring a tight connection.
Second, check the camera’s audio settings. Make sure that the microphone input level is not set too low. Increase the microphone input level and test it again to see if the volume improves.
If the above steps do not solve the problem, try using a different microphone or testing the microphone on another device to determine if the issue lies with the microphone itself.
2. Background Noise or Interference
Another common issue when using jack microphones with DSLR cameras is background noise or interference.
To reduce background noise, ensure that the microphone is positioned close to the sound source and away from any potential sources of interference, such as electrical equipment or noisy environments. Additionally, consider using a microphone with a directional pickup pattern, such as a cardioid microphone, to help minimize unwanted noise from the surroundings.
If you are still experiencing interference or noise, you can try using an audio adapter or an external audio recorder. These solutions can provide better audio quality and reduce the impact of noise or interference from the camera itself.
3. Compatibility Issues
Compatibility is another factor to consider when connecting a jack microphone to a DSLR camera.
Some DSLR cameras may have specific requirements or limitations regarding the use of external microphones. Make sure that your camera supports a microphone input through the jack. Consult the camera’s manual or manufacturer’s website to verify compatibility.
Additionally, ensure that you are using a compatible jack plug size. Most DSLR cameras use a 3.5mm jack, but some may require a different size. Using an incorrect jack plug size can result in a poor or no connection.

By addressing these common problems and implementing the suggested solutions, you can optimize the connection between your jack microphone and DSLR camera, resulting in improved audio quality and overall recording experience.
Troubleshooting Tips for Jack Microphone Compatibility
If you are trying to connect a jack microphone to your DSLR camera and experiencing compatibility issues, here are some troubleshooting tips that can help:
| Possible Issue | Solution |
|---|---|
| Microphone not recognized by the camera | Ensure that the microphone is securely plugged into the camera’s microphone jack. Check if the microphone is compatible with your camera model. Try using a different microphone to see if the issue is with the microphone itself. |
| No audio recorded or low-quality audio | Check the camera’s audio settings and make sure the microphone is selected as the input source. Adjust the microphone’s volume levels if necessary. Use an external audio recorder and sync the audio with the video in post-production for better audio quality. |
| Interference or noise in the audio | Keep the microphone away from electrically noisy sources such as smartphones, Wi-Fi routers, or fluorescent lights. Use a shielded cable to reduce electromagnetic interference. Consider using a microphone with better isolation capabilities. |
| Audio out of sync with video | If you experience audio synchronization issues, try recording a separate audio track using an external audio recorder and sync it with the video in post-production. Use dedicated software or video editing tools to adjust the audio sync if needed. |
| No audio levels displayed on the camera | Some DSLR cameras might not display audio levels when using an external microphone. In this case, consider using an external audio recorder or a preamplifier with audio level indicators for better control over the audio recording. |
Remember to consult your camera’s user manual for specific instructions and recommendations regarding microphone compatibility and settings. Experimenting with different setups and equipment can also help you find the best solution for your specific needs.
Benefits of Using a Jack Microphone with a DSLR Camera
When it comes to recording audio with a DSLR camera, using a jack microphone can provide several benefits that improve the overall sound quality and enhance the user experience. Whether you are a professional videographer or a content creator, using a jack microphone can take your audio recording to the next level.
1. Improved Sound Quality
One of the main advantages of using a jack microphone with a DSLR camera is the improved sound quality it offers. Built-in camera microphones are often limited in capturing clear and crisp audio, especially in noisy environments. By plugging in a jack microphone, you can greatly reduce unwanted background noise and capture sound with higher fidelity.
2. Versatility
Another benefit of using a jack microphone is its versatility. Jack microphones come in various types and styles, such as lavalier microphones, shotgun microphones, or handheld microphones. This allows you to choose the microphone that best suits your specific recording needs. Whether you are recording interviews, vlogs, or documentaries, there is a jack microphone available to meet your requirements.
Additionally, jack microphones can be easily detached and replaced with other audio equipment, such as headphones or external audio recorders, giving you greater flexibility in capturing and monitoring your audio.
Conclusion
Using a jack microphone with a DSLR camera offers numerous benefits, including improved sound quality and versatility. By investing in a high-quality jack microphone, you can enhance your audio recording capabilities and capture professional-grade sound for your videos or projects.
Question-answer:
Can I use a jack microphone with my DSLR camera?
Yes, you can use a jack microphone with your DSLR camera as long as it has a microphone input jack.
What kind of jack cable do I need to connect a microphone to a DSLR camera?
You will need a 3.5mm TRS (Tip, Ring, Sleeve) jack cable to connect a microphone to a DSLR camera. This is the standard type of jack cable used for audio connections.


