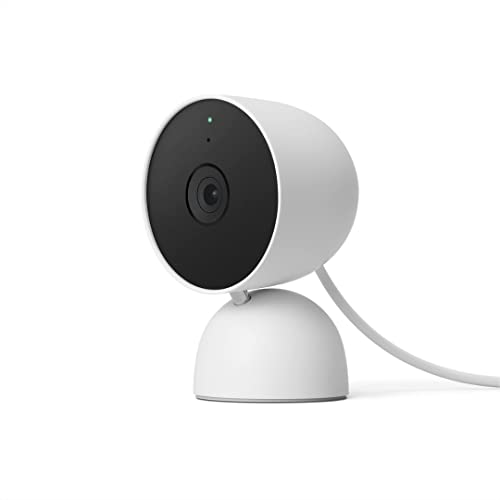
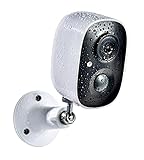
Outdoor security cameras are an essential part of any home security system. They provide an extra layer of protection by monitoring the perimeter of your property and deterring potential intruders. However, in order for outdoor security cameras to be effective, it is crucial to position them correctly.
1. Consider the entry points: Start by identifying the main entry points to your property, such as doors, windows, and gates. These are the areas that potential intruders are most likely to target. Place your cameras in strategic locations that cover these entry points, ensuring that you have a clear view of anyone entering or exiting your property.
2. Optimize the field of view: When positioning your outdoor security cameras, it is important to consider the field of view. The camera should be able to capture a wide angle to cover as much of the area as possible. Avoid any obstructions, such as trees or bushes, that could limit the camera’s field of view.
3. Install at the right height: The height at which you install your outdoor security cameras is crucial. Ideally, they should be placed at a height of 9 to 10 feet above the ground. This ensures that the cameras are out of reach and have a clear view of the surrounding area. Additionally, it is important to tilt the cameras downwards slightly to capture the best angle.

4. Consider lighting conditions: Outdoor security cameras need proper lighting to capture clear footage. Position your cameras in areas where they are not affected by direct sunlight, as it can cause glare and washed-out footage. If possible, install cameras with infrared capabilities or add additional lighting to improve visibility during nighttime.
By following these tips, you can ensure that your outdoor security cameras are positioned in the most effective way. Remember to regularly check and maintain your cameras to ensure they are working properly and providing the security you need.
Choose the Right Location
When it comes to positioning your outdoor security cameras, choosing the right location is crucial. A well-placed camera can provide optimal coverage and ensure the safety of your property.
Consider the following factors:
1. Visibility: Place the camera in a location where it has a clear line of sight and can capture a wide area. Avoid obstructions such as trees or shrubs that may block the camera’s view.
2. Entry points: Install cameras near entry points such as doors, windows, or garage entrances. These are common areas where intruders may try to gain access to your property.

3. Height: Mount the camera at a suitable height to capture facial features and other identifying details. Typically, a height of 9 to 10 feet is recommended.
4. Lighting conditions: Consider the lighting conditions in the area where you plan to install the camera. Ensure that there is adequate lighting for clear footage, especially during nighttime.
5. Weather resistance: Choose a location that is sheltered from extreme weather conditions to protect the camera from damage. Look for cameras that are specifically designed for outdoor use.
Use the table below to evaluate potential camera locations:
| Location | Visibility | Entry Points | Height | Lighting | Weather Resistance |
|---|---|---|---|---|---|
| Front door | High | Yes | 9 feet | Good | Yes |
| Backyard | Medium | No | 10 feet | Poor | Yes |
| Garage | High | Yes | 9 feet | Good | Yes |
| Side entrance | Medium | Yes | 10 feet | Fair | Yes |
By considering these factors and evaluating potential camera locations, you can ensure that your outdoor security cameras are well-positioned for maximum effectiveness.
Determine the Best Angle
When positioning outdoor security cameras, it is important to determine the best angle to effectively monitor the intended area. Here are some factors to consider:

- Field of view: Determine the field of view of the camera and the areas you want to monitor. This will help you determine the ideal angle and placement for maximum coverage.
- Height: Consider the height at which you will position the camera. Mounting it at a higher level can provide a wider view and help reduce the risk of tampering or vandalism.
- Obstructions: Take into account any potential obstructions that may hinder the camera’s view, such as trees, walls, or other structures. Make sure the camera has a clear line of sight to the intended area.
- Lighting: Consider the lighting conditions of the area during the day and night. Ensure the camera is positioned in a way that it is not facing directly into bright lights or direct sun, as this may affect the quality of the footage.
- Accessibility: Consider the accessibility of the camera for maintenance and adjustments. Ensure it is easily reachable for cleaning or repositioning when necessary.
By considering these factors, you can determine the best angle for your outdoor security cameras, ensuring optimal coverage and enhanced security for your property.
Consider the Lighting
When positioning outdoor security cameras, considering the lighting conditions is essential for capturing clear footage.
First, you should assess the natural lighting in the area. Too much direct sunlight can cause glare, making it difficult to see the details in the footage. On the other hand, insufficient lighting can result in dark and grainy images.
Additionally, you should also consider the artificial lighting sources in the vicinity. Streetlights, porch lights, or any other type of outdoor lighting can affect the camera’s performance. If the lights are too bright or too close to the camera, they may wash out the image or create shadows. Make sure to position the camera in a way that takes into account these potential obstructions and the camera’s ability to adjust to different lighting conditions.
Pro Tip: Opt for cameras that have a wide dynamic range (WDR) or a high dynamic range (HDR) feature. These cameras can handle challenging lighting conditions by processing the bright and dark areas of the image separately, resulting in clearer footage.

By considering the lighting conditions, you can ensure that your outdoor security cameras are optimally positioned for capturing high-quality footage.
Check for Obstructions
Before installing outdoor security cameras, it is important to check for any potential obstructions that may interfere with their effectiveness. These obstructions can include trees, shrubs, buildings, and other objects that can block the camera’s field of view or provide hiding spots for intruders.
Here are some steps to follow while checking for obstructions:
- Survey the area where you plan to install the cameras and identify any potential obstructions.
- Make sure there are no large trees or branches that could obstruct the camera’s view or allow intruders to hide behind.
- Check for any buildings or structures that may block the camera’s line of sight to the areas you want to monitor.
- Ensure that there are no bushes or shrubs that can obscure the camera’s view or provide cover for intruders.
- Consider the position of existing lights and other outdoor fixtures that may cast shadows or create glare, which can affect the camera’s image quality.
- If you find any obstructions, try to adjust the camera’s position or find an alternative location that offers a clear and unobstructed view of the area.
By checking for obstructions and ensuring a clear line of sight, you can maximize the effectiveness of your outdoor security cameras and increase the overall security of your property.
Set the Proper Height
When positioning outdoor security cameras, it is crucial to set the proper height for maximum effectiveness. Ideally, the camera should be mounted at a height between 9 and 10 feet from the ground. This allows the camera to capture a wide field of view while also providing convenience for maintenance and adjustments.
Mounting the camera too low can result in limited coverage and an increased risk of vandalism or tampering. On the other hand, placing the camera too high may result in capturing less detailed images and difficulties in accessing the camera for maintenance.
When selecting the height, it is important to consider the specific features of your outdoor space. You should aim to position the camera at a height that captures the most vulnerable areas of your property, such as the entrances, driveways, or other areas where unauthorized access is more likely to occur.
Tip: It is also recommended to angle the camera slightly downward to ensure better facial recognition and reduce the risk of glare from direct sunlight.
By setting the proper height for your outdoor security cameras, you can enhance the surveillance capabilities of your system and ensure maximum coverage and protection for your property.
Secure the Camera
Ensuring that your outdoor security camera is securely mounted is crucial for its effectiveness. Here are some tips to consider:

- Choose a sturdy mount: Invest in a high-quality mount that can withstand different weather conditions and potential tampering.
- Position the camera out of reach: Mount the camera high enough so that it is not easily accessible to intruders. Make sure that there are no obstructions that can be used to climb up and reach the camera.
- Use tamper-proof screws: Opt for tamper-proof screws or bolts when mounting the camera. This will help prevent unauthorized removal or tampering.
- Protect the cables: Conceal the camera cables or consider using armored cables that are resistant to cuts and vandalism.
- Consider a lockbox: If you live in an area with a high risk of theft or vandalism, consider using a lockbox to protect the camera and its components.
- Regularly check and maintain: Perform regular checks on the camera and its mounting to ensure that everything is still secure and functioning properly. Make any necessary adjustments or repairs as needed.
By following these tips, you can help ensure that your outdoor security camera remains securely in place and continues to provide reliable surveillance for your property.
Connect to Power Source
Once you have determined the best location for your outdoor security camera, the next step is to connect it to a power source. Most outdoor security cameras require a power supply to operate, so you will need to make sure you have a nearby power outlet or an alternative power source available.
If there is an accessible power outlet nearby, you can simply connect the camera’s power adapter to the outlet using an extension cord, if necessary. Make sure the power adapter has a waterproof or weatherproof housing and is designed for outdoor use to ensure its safety and longevity.
If there is no power outlet in close proximity to your camera’s location, you may need to explore other options. One option is to use a power over Ethernet (PoE) adapter, which allows you to power the camera using an Ethernet cable connected to a PoE switch or injector. This can be a convenient solution if you have a network infrastructure in place or if you are installing multiple cameras and want to simplify the wiring process.
| Power Connection Options | Pros | Cons |
|---|---|---|
| Power Outlet | Convenient and easy to set up if available | May require the use of an extension cord, limited by the distance to the nearest outlet |
| Power over Ethernet (PoE) | Allows for power and data transmission over a single cable, simplifying the wiring process | Requires a PoE switch or injector and compatible camera |
| Battery or Solar Power | Does not require a nearby power source | May require regular battery replacements or maintenance for solar power |
Before connecting the camera to a power source, carefully read the manufacturer’s instructions to ensure proper installation and to avoid damaging the camera or voiding the warranty. Additionally, make sure to follow any applicable local building codes and regulations regarding the installation of outdoor security cameras.

Test the Camera
Before completing the installation process, it is essential to test the camera to ensure that it is functioning properly and capturing the desired footage. Follow these steps to test your outdoor security camera:
- Power on the camera and make sure it is connected to the network.
- Position yourself in the area where you want the camera to monitor.
- Access the camera’s control panel or app on your smartphone, tablet, or computer.
- Check the camera’s live feed to verify that the image is clear and the field of view covers the intended area.
- Adjust the camera’s position, angle, or zoom if necessary to optimize the viewing area.
- Enable any motion detection settings to ensure that the camera captures video footage when there is activity in the monitored area.
- Test the camera’s night vision capability by ensuring that the captured image is clear in low-light conditions.
- Verify that the camera is recording and saving footage to the designated storage device or cloud-based platform.
By testing the camera before completing the installation, you can address any issues, such as poor image quality or incorrect positioning, and make necessary adjustments to ensure optimal surveillance coverage. This step is crucial in ensuring that your outdoor security camera effectively fulfills its purpose of providing reliable security monitoring.
FAQ,
What are the best locations to position outdoor security cameras?
The best locations to position outdoor security cameras are at entry points such as doors and windows, driveway, backyard, and any other areas where there is a high risk of intrusion or suspicious activity.
Should I install outdoor security cameras at the front and back of my house?
Yes, it is recommended to install outdoor security cameras both at the front and back of your house. This ensures that you have complete coverage of all entry points and can monitor any suspicious activity from any direction.
At what height should outdoor security cameras be positioned?
Outdoor security cameras should be positioned at a height of 9-10 feet above the ground. This height provides the best angle for capturing facial features and other important details while also ensuring that the cameras are out of reach.

Are there any specific angles to consider when positioning outdoor security cameras?
When positioning outdoor security cameras, it is important to consider capturing wide angles to cover larger areas. Additionally, try to avoid pointing the cameras directly at bright light sources to avoid glare and ensure clear footage.
Can outdoor security cameras be easily tampered with or stolen?
Outdoor security cameras can be targets for theft or tampering. To prevent this, it is recommended to position the cameras out of reach, install them at higher heights, and use tamper-proof mounting brackets. Additionally, make sure to choose cameras with durable and weatherproof construction.