With advancements in technology, it has become easier than ever to monitor your home or business premises using security cameras. These cameras are not only useful for capturing important footage for evidence, but they also provide real-time monitoring capabilities.
If you’re looking to post a live feed from your security camera, you’re in luck. There are various methods available that allow you to easily share the live footage with others, whether it’s for surveillance purposes or just to keep an eye on your property while you’re away.
One option is to use a dedicated security camera app. Many security camera manufacturers offer their own apps that allow you to connect to your camera and view the live feed remotely. These apps usually require you to create an account and log in, and they provide a user-friendly interface for accessing your camera’s live feed from anywhere in the world.
Another option is to use a streaming platform. If you’re familiar with platforms like YouTube or Twitch, you may already know that they allow users to stream live video content. Some security cameras offer integration with these platforms, allowing you to stream your camera’s live feed directly to your desired channel. This is a great option if you want to share the live footage with a large audience or if you want to keep an archive of your recordings.

Lastly, you can also use a network video recorder (NVR) for live feed posting. NVRs are devices that are specifically designed for recording and managing security camera footage. Some NVRs come with built-in features that allow you to share the live feed over the internet. With a few simple configurations, you can access your camera’s live feed using a web browser or a dedicated app.
Regardless of the method you choose, it’s essential to ensure the security of your live feed. Make sure to enable strong passwords, use encryption when available, and regularly update the software of your security camera to protect against any vulnerabilities. By following these steps, you can confidently post your security camera’s live feed and have peace of mind knowing that your property is being monitored effectively.
How to Connect a Security Camera to Post Live Feed
Connecting a security camera to post live feed is essential for monitoring your property and ensuring its safety. Whether you want to keep an eye on your home or office, follow these steps to establish a reliable connection:
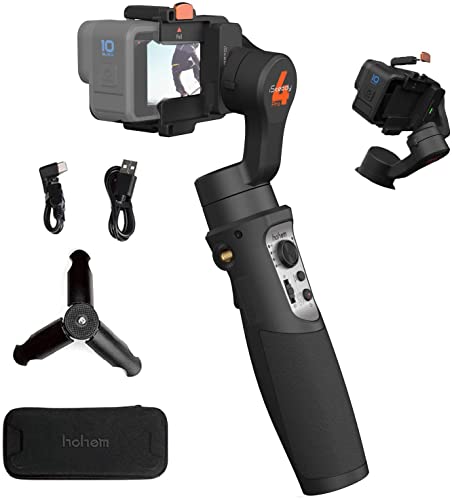
1. Choose a Security Camera: Select a security camera that best suits your needs and budget. Consider factors such as image quality, night vision capabilities, and connectivity options.
2. Install the Camera: Follow the manufacturer’s instructions to install the security camera in the desired location. Ensure that it has a clear view of the area you want to monitor.

3. Connect the Camera to Your Network: Most modern security cameras can connect to your home or office network through Wi-Fi or Ethernet. Follow the camera’s instructions to connect it to your network.
4. Configure the Camera: Access the camera’s settings using a web browser or a dedicated app. Set up important parameters such as the camera’s username and password, resolution, and motion detection settings.
5. Set up Port Forwarding: If you want to access the camera’s live feed remotely, you may need to set up port forwarding on your router. Consult your router’s manual or manufacturer’s website for instructions.
6. Choose a Platform to Post the Live Feed: There are several platforms available for posting your security camera’s live feed. Options include dedicated security camera apps, cloud services, or social media platforms.
7. Set up Live Streaming: Depending on the platform you choose, you may need to set up live streaming using the camera’s credentials. Follow the platform’s instructions to configure the live feed.

8. Test and Monitor: After completing the setup, test your live feed to ensure it is functioning correctly. Monitor the feed periodically to check for any issues and make necessary adjustments.
By following these steps, you can easily connect your security camera to post a live feed, allowing you to monitor your property from anywhere at any time.
Selecting the Right Camera
When it comes to setting up a live feed from your security camera, selecting the right camera is crucial. You’ll want to choose a camera that meets your specific needs and requirements. Here are a few factors to consider:
1. Resolution
The resolution of the camera determines the clarity and quality of the live feed. You should aim for a camera with a high resolution, such as 1080p or higher, to ensure that you can clearly see the details in the footage.
2. Field of View
The field of view refers to the area that the camera can cover. Depending on your needs, you may want to choose a camera with a wide field of view to monitor a large area or a camera with a narrow field of view for a more focused surveillance.

Keep in mind that some cameras may have adjustable lenses or the ability to pan, tilt, and zoom, allowing you to customize the field of view as needed.
3. Night Vision
If you need to monitor your premises during nighttime or low-light conditions, consider a camera with good night vision capabilities. Look for cameras with infrared LEDs or other night vision technology that can capture clear images even in complete darkness.
Additionally, check the range of the camera’s night vision to ensure it covers the desired surveillance area effectively.
4. Connectivity Options
Consider how the camera will connect to your network or recording device. Some cameras use Wi-Fi, while others require an Ethernet connection. If you plan to set up multiple cameras, ensure that the camera supports the connectivity option you prefer and that your network can handle the bandwidth requirements.
5. Motion Detection and Alerts
For added security, choose a camera with built-in motion detection capabilities. This feature allows the camera to send alerts or trigger recordings whenever it detects movement in the surveillance area. Look for cameras with customizable sensitivity settings and the ability to send alerts to your mobile device or email.
By considering these factors, you can effectively select the right camera for your live feed needs and ensure optimal security monitoring of your premises.
Choosing the Ideal Location
When it comes to setting up a security camera, finding the perfect location is crucial. Here are some important factors to consider when choosing the ideal location for your security camera:
1. Coverage Area
Determine the area you want the camera to cover. This will depend on the purpose of your camera. If you want to monitor the front entrance of your house, make sure the camera is positioned to capture the entire area.
Tip: Consider the camera’s field of view and make sure it will cover the desired area effectively.
2. Accessibility
Ensure that the camera is easily accessible for maintenance and adjustments. It should be placed in a location where you can easily reach it when needed.

Tip: Avoid mounting the camera too high or in hard-to-reach places.
3. Lighting
Take into account the lighting conditions of the area. You want to avoid placing the camera in direct sunlight or in areas with excessive backlighting, as this can impact the quality of the footage.
Tip: Test the camera’s view during different times of the day to ensure good lighting conditions.
4. Privacy
Be mindful of privacy concerns when choosing the camera’s location. Avoid pointing the camera directly into your neighbor’s property or areas where privacy is expected.
Tip: Adjust the camera’s angle to avoid capturing any private areas.

By carefully considering these factors, you can choose the ideal location for your security camera, ensuring optimal coverage and performance.
Installing the Camera
Before you can post a live feed from your security camera, you need to make sure it is properly installed. Here are the steps to follow:
1. Choose the location:
Find a suitable location where you want to install the camera. It should have a clear view of the area you want to monitor.
2. Mount the camera:
Use the mounting brackets provided with the camera to securely attach it to a wall or ceiling. Make sure it is positioned at the desired angle.
3. Connect the cables:
Connect the camera to a power source using the provided power adapter. Then, connect the camera to your network using an Ethernet cable or Wi-Fi connection, depending on the camera model.
4. Configure the camera:
Follow the manufacturer’s instructions to set up the camera. This may involve accessing the camera’s settings via a web browser or a dedicated mobile app.
5. Test the camera:
Once the camera is installed and configured, test it to make sure the live feed is working properly. Check if you can access the video stream on your computer or mobile device.
6. Secure the camera:
To protect your camera from unauthorized access, set up a strong password for the camera’s administration account. Regularly update the firmware to ensure it has the latest security patches.
By following these steps, you will have your security camera installed and ready to post a live feed.

Connecting to the Network
Before you can post a live feed from your security camera, you need to ensure that it is properly connected to the network. Here are the steps to follow:
1. Check your Internet Connection
Make sure that your security camera is connected to a stable and reliable internet connection. This can be done by checking the modem or router that provides your internet service. Ensure that the modem/router is turned on and functioning properly. If you are unsure about your connection status, contact your internet service provider for assistance.
2. Connect the Camera to the Network
Most security cameras can be connected to the network using either an Ethernet cable or through a wireless connection.
If you are using an Ethernet cable, simply connect one end of the cable to the camera and the other end to an available Ethernet port on your modem/router.
If your camera supports wireless connectivity, you will need to access its settings menu and follow the instructions to connect it to your Wi-Fi network. Typically, you will need to enter your Wi-Fi network name (SSID) and password to establish the connection.
Note: It is recommended to use a strong password for your Wi-Fi network to ensure the security of your camera feed.
3. Configure Camera Settings
Once your camera is connected to the network, you may need to access its settings menu to configure some additional parameters. This may include setting up motion detection, adjusting image quality, or enabling remote access.
Refer to the user manual or manufacturer’s website for detailed instructions on how to access and configure your camera’s settings.
By following these steps, you should be able to successfully connect your security camera to the network and post a live feed. If you encounter any issues during the process, consult the camera’s documentation or seek professional assistance.
Configuring the Camera Settings
Before you can start live streaming from your security camera, you need to configure the camera settings. Here are the steps you need to follow:
Step 1: Access the camera settings by logging into the camera’s web interface. To do this, open your web browser and enter the camera’s IP address in the address bar.
Step 2: Once you have accessed the camera’s web interface, navigate to the settings section. The location of this section may vary depending on the camera model.
Step 3: In the settings section, you will find various options to configure the camera. Some of the key settings you need to configure include:
– Video Resolution: Choose the desired video resolution for your live feed. Higher resolutions generally provide better quality, but they may require more bandwidth.
– Frame Rate: Set the frame rate for your live stream. Higher frame rates result in smoother video, but they also require more bandwidth.
– Compression Format: Select the compression format for your video stream. Popular formats include H.264 and MPEG-4.
Step 4: After configuring the settings, make sure to save the changes. Look for a “Save” or “Apply” button in the camera’s web interface and click on it to save the settings.
Step 5: Once the settings are saved, your camera will be ready to stream live video. You can now proceed to set up the live feed on your chosen platform.
Note: It is recommended to consult the camera’s user manual or manufacturer’s website for specific instructions on configuring the camera settings as they may vary between different camera models.
Setting Up a Network Stream
If you want to post a live feed from your security camera, you need to set up a network stream. Here is a step-by-step guide on how to do it:
Step 1: Connect your security camera to your network. Make sure the camera is properly connected to your network router using an Ethernet cable.
Step 2: Find the IP address of your security camera. Most security cameras have a built-in configuration tool that allows you to find the camera’s IP address. Alternatively, you can check the user manual or contact the manufacturer for assistance.
Step 3: Set up port forwarding on your router. Port forwarding allows external devices to access your security camera’s stream. Open your router’s configuration page and find the port forwarding settings. Add a new rule and enter the IP address of your security camera, as well as the port number you want to use for the stream (e.g., 80 for HTTP).
Step 4: Configure the security camera’s stream settings. Access the camera’s configuration page using its IP address in a web browser. Look for the stream settings and configure them according to your preferences. Make sure the stream is set to be accessible through the specified port number.
Step 5: Test the network stream. Open a web browser on a device connected to the same network as your security camera, and enter the public IP address of your router followed by the port number you set up for the stream (e.g., http://yourpublicIP:80). If everything is set up correctly, you should see the live feed from your security camera.
By following these steps, you can easily set up a network stream for your security camera and post the live feed for remote viewing. Enjoy the added convenience and peace of mind that comes with being able to monitor your property anytime, anywhere.
Testing the Live Feed
Once you have set up your security camera and configured the live feed, it is important to test it to ensure everything is working correctly. Follow these steps to test the live feed:
Step 1: Check Camera Connection
Make sure that the camera is properly connected to the network or the DVR/NVR. Ensure that all cables are securely plugged in and that there are no loose connections.
Step 2: Access the Live Feed
Using a web browser or dedicated surveillance software, access the live feed of the camera. Enter the username and password that you have set up during the configuration process. If you are accessing the live feed remotely, ensure that you have opened the necessary ports and that you have a stable internet connection.
Note: Some cameras may require specific plugins or software to be installed in order to view the live feed. Make sure that you have the necessary software installed on your device.
Step 3: Check Live Video
Once you have accessed the live feed, check if the video is displayed correctly. Verify that the camera is capturing the intended area and that the video quality is satisfactory.
Step 4: Adjust Camera Settings
If you are not satisfied with the video quality or if you want to make any adjustments, navigate to the camera settings. Experiment with different settings such as brightness, contrast, or resolution to achieve the desired results.
Tip: It may be helpful to consult the camera’s user manual or the manufacturer’s website for detailed instructions on adjusting settings.
Step 5: Test Additional Features
Depending on the capabilities of your security camera, you may have additional features such as motion detection, audio recording, or pan/tilt/zoom functionality. Test these features to ensure they are working properly.
By following these steps and thoroughly testing the live feed, you can ensure that your security camera is functioning correctly and capturing the necessary footage.
Monitoring the Live Feed
Once you have set up your security camera and configured the necessary settings, it’s time to monitor the live feed. Here’s how you can do it:
1. Accessing the Camera Interface
To monitor the live feed from your security camera, you need to access the camera’s interface using a web browser or a dedicated camera monitoring software. The specific steps may vary depending on the camera model, so make sure to refer to the camera’s user manual for detailed instructions.
2. Logging in to the Camera
Once you have accessed the camera’s interface, you will be prompted to log in. Enter the username and password that you have set during the initial setup process. If you haven’t changed the default login credentials, consult the user manual for the default username and password.
After logging in, you should be able to see the live feed from your security camera on the interface.
It is important to note that some security cameras support remote monitoring, which allows you to access the live feed from anywhere using a smartphone or a computer with an internet connection. If your camera supports this feature, you may need to set up remote access by configuring port forwarding or using a cloud-based service provided by the camera manufacturer.
Monitoring the live feed from your security camera can help you keep an eye on your property and ensure the safety of your home or business. Whether you are at home or away, you can easily access the live feed and stay informed about any suspicious activities or events.
FAQ,
What is a security camera live feed?
A security camera live feed is a real-time video stream that is transmitted from a security camera to a monitoring device, such as a computer or a smartphone, allowing users to view the live video feed from the camera.
What equipment do I need to post a live feed from a security camera?
To post a live feed from a security camera, you will need a security camera, a stable internet connection, a recording device (such as a computer or a network video recorder), and a streaming platform or software to broadcast the live video feed.
How do I connect my security camera to the internet for live streaming?
To connect your security camera to the internet for live streaming, you will need to ensure that your camera supports internet connectivity. Most modern security cameras have built-in Wi-Fi capabilities or can be connected to the internet via Ethernet cables. You will need to follow the instructions provided by the camera manufacturer to connect it to your local network and configure the internet settings.
Can I post a live feed from a security camera on social media?
Yes, you can post a live feed from a security camera on social media platforms. Many security cameras come with integrations or apps that allow you to directly share the live feed on popular social media platforms such as Facebook or YouTube. Alternatively, you can use streaming software or platforms that support social media integration to achieve the same result.
Are there any privacy concerns when posting a live feed from a security camera?
Yes, there are privacy concerns when posting a live feed from a security camera. It is important to be aware of laws and regulations regarding video surveillance and privacy in your area. Additionally, it is recommended to secure your camera’s live feed with strong passwords and encryption to prevent unauthorized access to the feed.