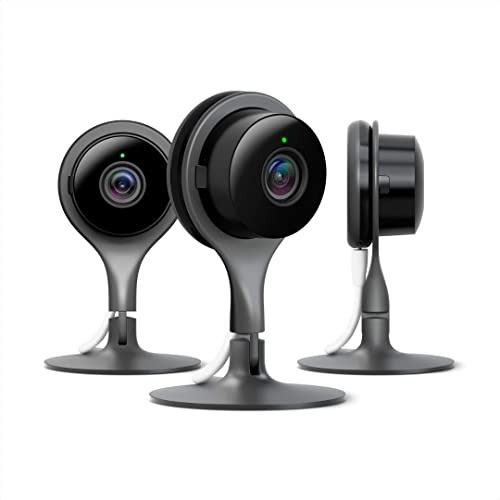
Welcome to our guide on how to power your Nest security camera! The Nest security camera is a popular choice for homeowners who want to keep an eye on their property, whether they are at home or away. One of the most important aspects of setting up your Nest camera is ensuring that it is powered correctly. In this article, we will walk you through the different options for powering your Nest camera and provide step-by-step instructions for each method.
Option 1: Powering via AC outlet
If you have an AC outlet nearby, the easiest way to power your Nest camera is by plugging it into the outlet. To do this, first, locate a suitable spot to mount your camera within the range of the outlet. Next, connect the included power adapter to the camera’s power port. Then, simply plug the adapter into the AC outlet. Ensure that the outlet is properly grounded and has a stable power supply. This method provides a reliable power source for your Nest camera, allowing it to operate continuously without the need for battery replacements or recharging.
Note: Make sure you have access to an AC outlet that is not controlled by a light switch or timer, as this can interrupt the power supply to your camera.
Option 2: Powering via Ethernet cable
If you prefer a wired connection and have an Ethernet cable available, you can power your Nest camera using the Ethernet cable itself. This method eliminates the need for a separate power adapter and allows you to connect your camera directly to your router. To do this, first, ensure that your router supports Power over Ethernet (PoE) and that your camera is PoE compatible. Then, connect one end of the Ethernet cable to the camera’s power port and the other end to a PoE-enabled Ethernet port on your router. This method provides both power and data connectivity to your Nest camera, making it a convenient solution for those who want a wired setup.
Note: Make sure to check your camera’s user manual or consult Nest’s official website for information on specific compatibility requirements for PoE setup.
By following these simple methods, you can ensure that your Nest security camera is powered effectively and ready to provide you with the peace of mind that comes with knowing your property is protected. Choose the power option that suits your needs best and enjoy the advanced security features offered by Nest cameras.
The Importance of Powering Your Nest Security Camera
Powering your Nest security camera is an essential step in ensuring the smooth and uninterrupted operation of your home security system. Whether you have a Nest Cam Indoor or Nest Cam Outdoor, providing a reliable power source is crucial for round-the-clock surveillance and peace of mind.
Continuous Surveillance
By properly powering your Nest security camera, you can ensure continuous surveillance of your home or property. Whether you are away at work, on vacation, or simply want to keep an eye on things while you are inside, a powered camera allows you to monitor activity in real-time. Without a reliable power source, your camera may not function when you need it most, leaving your home vulnerable to potential risks.

Extended Functionality
Powering your Nest security camera also extends its functionality and allows it to perform its full range of features effectively. Many advanced features, such as 24/7 live streaming, two-way audio, and intelligent motion detection, rely on a stable power supply. With a powered camera, you can take advantage of these features to gain a deeper understanding of what is happening in and around your home.
In addition, a powered camera ensures that your footage is continually recorded and saved, providing valuable evidence in the event of an incident. Without power, your camera may not be able to capture critical moments, compromising your ability to protect your property and loved ones.
Therefore, it is essential to choose the right power source for your Nest security camera and ensure it is properly connected and maintained. By doing so, you can maximize the effectiveness of your home security system and enjoy the peace of mind that comes with knowing your property is protected.
Understanding the Different Power Options
The Nest security camera offers several power options, depending on your specific needs and setup. Understanding these different power options is essential to ensure that your camera is powered properly and functions correctly.
1. Power over Ethernet (PoE)
Power over Ethernet, or PoE, is a power option that allows you to power your Nest security camera using an Ethernet cable. This option is beneficial if you have an Ethernet cable available near the location where you plan to install your camera. It eliminates the need for a separate power cable and simplifies the installation process.
2. Standard Power Plug
If you don’t have the option to use PoE, the Nest security camera can be powered using a standard power plug. This option requires you to connect the camera to a power outlet using the provided power adapter. Make sure to place the camera near an available power outlet for easy access.
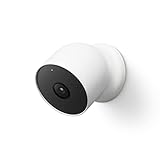
3. Battery-Powered
For added flexibility, some models of the Nest security camera are battery-powered. This option allows you to place the camera in locations where running a power cable may be challenging or impractical. The battery-powered cameras typically have rechargeable batteries that can last for several months, depending on usage.
No matter which power option you choose, it’s important to ensure that your camera has a stable power source to prevent interruptions in the camera’s performance. Regularly check the power supply and battery levels to ensure that your Nest security camera is operating optimally.
How to Choose the Right Power Source
When it comes to powering your Nest security camera, it is important to choose the right power source that will provide reliable and consistent power. Here are some factors to consider when selecting the right power source for your camera:
| 1. Power Outlet | Ensure that your camera is located near a power outlet. This will make it easier to connect your camera to a power source and eliminate the need for long extension cords. |
| 2. Type of Power Source | There are several options to choose from, including AC power, battery power, or solar power. AC power is the most common and reliable option, as it can provide a continuous source of power to your camera. Battery power is a more flexible option, allowing you to place your camera in areas without access to power outlets. Solar power is an eco-friendly option that utilizes sunlight to charge the camera’s battery. |
| 3. Power Cord Length | Consider the distance between the power outlet and the camera location. Ensure that the power cord is long enough to reach the camera without any tension or strain. |
| 4. Power Supply Rating | Check the power supply rating to ensure that it is compatible with your camera’s power requirements. The power supply should provide enough voltage and current to power the camera without any issues. |
| 5. Backup Power | Consider having a backup power source, such as a battery pack or an uninterruptible power supply (UPS), in case of power outages. This will ensure that your camera remains functional even during unforeseen circumstances. |
By carefully considering these factors, you can choose the right power source for your Nest security camera, ensuring that it remains powered and functional at all times.
Step-by-Step Guide to Powering Your Nest Security Camera
Powering your Nest security camera is a straightforward process that can be completed in just a few steps. This guide will walk you through the process to ensure a successful installation.
Step 1: Determine Power Source
The first step is to determine the power source for your Nest security camera. There are two options available: using a wired connection or using a battery pack.
Step 2: Wired Connection
If you choose to use a wired connection, you will need to find a suitable power outlet near the desired location for your camera. Plug the camera’s power cord into the outlet and ensure it is securely connected.
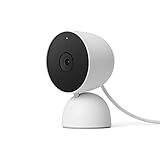
Step 3: Battery Pack
If you opt for a battery pack, you will need to purchase the Nest Power Connector (sold separately). Connect the Power Connector to the back of your camera and insert the battery pack into the connector. Ensure that the battery pack is fully charged before proceeding.
Step 4: Mount the Camera
Once you have successfully powered your Nest security camera, it’s time to mount it in your desired location. Follow the instructions provided by Nest to securely mount the camera on a wall, ceiling, or other suitable surface.

Step 5: Connect to Nest App
After mounting the camera, you will need to connect it to the Nest app on your phone or tablet. Follow the prompts in the app to create an account or sign in to your existing account. Once logged in, the app will guide you through the process of adding your camera to your home network.
By following these simple steps, you can easily power and install your Nest security camera, providing you with peace of mind and enhanced home security.
Common Issues with Powering Your Nest Security Camera
If you are experiencing any issues with powering your Nest Security Camera, there are a few common problems that could be causing the problem. Here are some troubleshooting steps that you can follow:
| Potential Issue | Explanation | Solution |
|---|---|---|
| No Power | If your camera is not receiving any power, make sure that it is properly plugged into a working power outlet. | Check the power outlet and try using a different outlet. Ensure that the power cable is securely connected to the camera. |
| Intermittent Power | If your camera is experiencing intermittent power interruptions, there may be an issue with the power cable or the power outlet. | Check the power cable for any damage or fraying. Try using a different power cable or power adapter, and test the camera on a different power outlet. |
| Power Adapter Compatibility | Using a power adapter that is not compatible with your Nest Security Camera can cause power issues. | Make sure you are using the correct power adapter that is recommended for your specific camera model. |
| Power Loss During Setup | If your camera loses power during the initial setup process, it can cause issues with the camera’s functionality. | Ensure that the camera is plugged into a stable power source during the setup process. Restart the setup process if necessary. |
| Software Issues | In some cases, software glitches or updates can impact the power functionality of your Nest Security Camera. | Check for any available firmware updates for your camera and make sure you have the latest version of the Nest app installed. |
If you have followed these troubleshooting steps and are still experiencing power issues with your Nest Security Camera, it is recommended to contact Nest customer support for further assistance.
Tips for Maximizing the Power Efficiency of Your Nest Security Camera
When it comes to powering your Nest security camera, there are a few tips and tricks you can follow to ensure maximum power efficiency. By optimizing the camera’s power usage, you can extend the battery life and reduce the need for frequent charging. Here are some tips for getting the most out of your Nest security camera:

1. Optimize Camera Placement
Proper camera placement is crucial for maximizing power efficiency. Make sure to position your Nest security camera in an area where it has a clear view of the desired location but is not exposed to excessive motion or activity. This will minimize unnecessary recording, which can drain the camera’s battery.
2. Adjust Motion Detection Settings
The default motion detection settings on your Nest security camera may be too sensitive, leading to unnecessary recordings and power drain. Take the time to adjust the motion detection sensitivity and customize the activity zones to focus on the areas that matter most. By fine-tuning these settings, you can avoid constant recording and preserve battery life.
3. Enable Power Saving Mode
Nest security cameras come with a power saving mode that can significantly improve battery life. When enabled, this mode reduces the camera’s power consumption by adjusting the brightness of the LED ring and disabling certain features that are not essential for basic functionality. Be sure to enable power saving mode to extend the camera’s battery life.
4. Utilize Scheduled Recording
If you don’t need continuous recording, consider using scheduled recording to further conserve power. With scheduled recording, you can specify specific timeframes when the camera should be actively recording. This way, you can optimize power usage by only capturing footage during designated periods.
5. Regularly Update Firmware
Keeping your Nest security camera’s firmware up to date is crucial for not only optimal performance but also power efficiency. Firmware updates often include bug fixes and improvements that can enhance the camera’s power management capabilities. Make sure to regularly check for firmware updates and install them promptly.

By following these tips, you can ensure that your Nest security camera operates at maximum power efficiency, providing reliable surveillance while minimizing the need for frequent charging.
FAQ,
What are the different ways to power a Nest security camera?
There are several different ways to power a Nest security camera. One option is to use the included power adapter and plug it into a standard electrical outlet. Another option is to use a Power over Ethernet (PoE) adapter, which allows you to power the camera using an Ethernet cable connected to a PoE switch or injector. Additionally, you can use a rechargeable battery pack specifically designed for Nest cameras if you need a portable power option.
Can I power my Nest security camera using solar power?
Yes, you can power your Nest security camera using solar power. There are solar panel options available that are specifically designed to work with Nest cameras. These solar panels typically come with a built-in battery pack, so they can charge the camera during the day and provide power throughout the night. This is a great option if you want to use your camera in an area where there is no access to a standard electrical outlet.