When it comes to outdoor security cameras, finding a reliable power source can be a challenge. Thankfully, there is a solution that you may not have considered – using a bell as a power source. By using a few simple steps and some innovative thinking, you can utilize the power from your bell to keep your security camera running smoothly.
Firstly, it’s important to understand that not all bells will work for this purpose. You need to select a bell that has a continuous power source, such as an electric bell. This type of bell constantly receives power, making it suitable for powering other devices like security cameras.
Next, you will need to connect your security camera to the bell’s power source. This can be done by splicing the wires from your camera into the wires of the bell. Be sure to follow the manufacturer’s instructions for both the camera and the bell to ensure that the connection is secure and safe.
Once your camera is connected to the bell’s power source, it’s important to test the system to make sure everything is functioning properly. Turn on the bell and check if the camera receives power and starts working. If there are any issues, double-check all connections and consult the instruction manuals for troubleshooting guidelines.

Using a bell as a power source for your outdoor security camera can be a cost-effective and practical solution. It allows you to have a constant power source without the need for complicated electrical installations or frequent battery replacements. So if you’re looking to power your security camera outside, don’t overlook the potential of using a bell – it might just be the solution you’ve been searching for.
Outdoor Security Camera: How to Power It Using a Bell
Powering an outdoor security camera can be a challenge, especially if you don’t have access to a nearby power source. One clever solution is to use a bell as a power source for your camera. This ingenious method allows you to harness mechanical energy to generate electricity and keep your camera running.
What You’ll Need
Before you start, gather the following materials:
- A bell
- An electric generator
- Wires
- A battery
- A voltage regulator
Steps to Powering Your Camera
Follow these steps to power your outdoor security camera using a bell:
- Attach the electric generator to the bell securely.
- Connect the wires from the electric generator to the battery.
- Attach the voltage regulator to the battery to control the electricity flow.
- Connect the camera to the voltage regulator using the appropriate wires.
- Securely mount the camera and adjust its position for optimal coverage.
- Test the setup by ringing the bell and ensuring that the camera receives power.
Benefits of Using a Bell as a Power Source
Using a bell as a power source for your outdoor security camera offers several advantages:
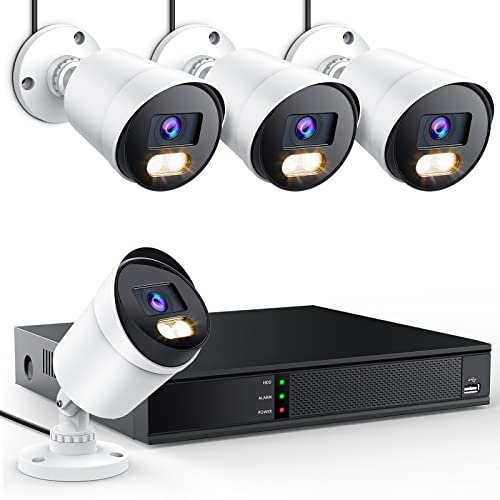
![KAMEP [Upgraded] Wireless WiFi Video Doorbell Camera with Chime HD 1080P Waterproof Home Security Doorbell Camera Battery Powered with 2-Way Audio, Motion Detection,IR,Wide Angle,Cloud Storage](https://m.media-amazon.com/images/I/413ZkL-QKqL._SL160_.jpg)
| Advantages | Explanation |
|---|---|
| Environmentally Friendly | By harnessing mechanical energy, you reduce your reliance on traditional power sources and help to decrease your carbon footprint. |
| Cost-Effective | Using a bell as a power source is a cost-effective solution, as it eliminates the need for additional electrical infrastructure. |
| Reliability | With a bell-powered camera, you don’t have to worry about power outages or electrical malfunctions. |
By following these steps and utilizing a bell as a power source, you can easily and effectively power your outdoor security camera. Enjoy the peace of mind that comes with knowing your property is protected without the need for complicated wiring or electrical installations.
Understanding the Need for Power
The power supply is a critical factor to consider when installing a security camera outside using a bell. Without a reliable power source, the camera will be rendered useless. Therefore, understanding the need for power is essential.
Outdoor security cameras require a constant supply of electricity to function properly. Unlike indoor cameras that can be connected to power outlets, outdoor cameras need a more robust and weatherproof power source to endure the elements. This is where a bell comes into play.
Weatherproofing
Outdoor security cameras need to withstand rain, snow, wind, and other environmental factors. A bell is designed to be weatherproof, protecting the power supply from harsh conditions. It ensures that water and dust cannot damage the wiring or the camera itself.
Continuous Power
A power outage can leave your security camera vulnerable, compromising the safety of your property. By connecting the camera to a bell, you can ensure a continuous power supply. A bell is equipped with a backup battery or can be connected to an uninterruptible power supply (UPS), ensuring that your camera remains powered even during power outages.

In conclusion, understanding the need for power is crucial when using a bell to power an outdoor security camera. A bell provides weatherproofing and ensures a continuous power supply, allowing your camera to function optimally and keep your property safe.
Choosing the Right Security Camera
When it comes to protecting your property and ensuring the safety of your family and belongings, investing in a security camera is a wise decision. With the wide range of options available in the market, it’s essential to choose the right security camera that meets your specific needs and requirements.
Here are a few factors to consider when selecting a security camera:
1. Outdoor or Indoor
Determine whether you need a security camera for indoor or outdoor use. Outdoor cameras are designed to withstand harsh weather conditions, such as rain, snow, and extreme temperatures. On the other hand, indoor cameras are more suitable for monitoring the inside of your property.
2. Resolution and Quality
The resolution and image quality of the security camera play a crucial role in capturing clear and detailed footage. Higher resolution cameras offer better image clarity and allow you to zoom in without losing quality. Consider opting for cameras with at least 1080p resolution for optimal results.

Other important factors to consider include:
- 3. Field of View: Determine the coverage area you need and choose a camera with a suitable field of view to capture that area effectively.
- 4. Night Vision: If you require surveillance during nighttime, ensure the camera comes with infrared night vision capabilities.
- 5. Connectivity: Decide whether you prefer a wired or wireless camera system based on your property’s layout and your preferences.
- 6. Motion Detection: Look for cameras with motion detection technology that can send alerts to your smartphone or computer when motion is detected.
By considering these factors and understanding your specific requirements, you can choose the right security camera that offers enhanced protection and peace of mind.
Bell Power Options for Security Cameras
When it comes to powering security cameras outside, using a bell as a power source can be a convenient and effective option. With the right setup, you can ensure that your security cameras are always powered and monitoring your property.
1. Hardwiring
One option for powering your security cameras using a bell is to hardwire them directly to the bell’s power supply. This requires some electrical knowledge and skills. You will need to run electrical wires from the bell to the cameras and install the necessary connectors. This method ensures a consistent power supply and eliminates the need for battery replacements.
Note: It is important to consult a professional electrician or someone knowledgeable in electrical work to ensure proper safety and installation procedures.

2. Power over Ethernet (PoE)
An alternative option for powering your security cameras using a bell is to utilize a Power over Ethernet (PoE) setup. This method utilizes the existing Ethernet cable infrastructure to transmit both data and power to the cameras. By connecting the bell’s power supply to a PoE switch or injector, the power can be distributed to the cameras through the Ethernet cables.
Benefits of using PoE:
- Easy installation: Utilizing existing Ethernet cables simplifies the setup process.
- Scalability: PoE supports multiple cameras, allowing for future expansions.
- Centralized power management: The PoE switch or injector provides centralized power control.
Using a bell as a power source for your security cameras outside can provide a reliable and convenient solution. Whether you choose to hardwire the cameras to the bell’s power supply or utilize a PoE setup, it is crucial to ensure the proper installation and safety precautions are taken.
Steps to Powering Your Security Camera with a Bell
Security cameras are an essential part of any outdoor surveillance system. They help to ensure the safety and security of your property by monitoring the area for any suspicious activity. Powering your security camera with a bell is a great way to simplify the installation process and ensure that your camera is always functioning properly.
Step 1: Gather the Necessary Equipment
To power your security camera with a bell, you will need a few essential pieces of equipment:

| Equipment | Description |
|---|---|
| Security Camera | A high-quality outdoor security camera that is compatible with your bell system. |
| Bell Transformer | A transformer that converts the voltage from your electrical system to a lower voltage suitable for your security camera. |
| Bell Chime | A bell chime that will be used to power your security camera. |
| Power Cable | A power cable that connects the bell chime to your security camera. |
| Wiring Accessories | Various wiring accessories, such as wire nuts and electrical tape, to ensure a secure connection between the components. |
Step 2: Choose the Right Location
Before you start the installation process, it’s important to choose the right location for your security camera. Look for an area that provides a clear view of the area you want to monitor and has access to a power source.
Step 3: Install the Bell Transformer
The bell transformer should be installed near the power source. Follow the manufacturer’s instructions to connect the transformer to your electrical system. Make sure to turn off the power before making any electrical connections.
Step 4: Connect the Bell Chime
Once the bell transformer is installed, connect the bell chime to the transformer using the provided power cable. Ensure that the connections are secure and that the bell chime is receiving power.
Step 5: Connect the Security Camera
Finally, connect the security camera to the bell chime using the power cable. Make sure to follow the manufacturer’s instructions for your specific camera model.
Once all the connections are made, turn on the power and test the system to ensure that the security camera is receiving power and functioning properly.

By following these steps, you can power your security camera with a bell and have a reliable surveillance system for your outdoor area.
Proper Installation of the Bell Power System
When it comes to powering your security camera outside using a bell, proper installation of the bell power system is crucial for ensuring the camera has a reliable and continuous power source. Here are some important steps to follow:
Step 1: Choose the Right Bell Power System
Before starting the installation process, make sure you have chosen the right bell power system for your security camera. Consider the power requirements of the camera and the distance between the bell and the camera. It is recommended to use a bell power system that is compatible with your camera model and comes with the necessary voltage output.
Step 2: Identify the Ideal Location
Next, identify the ideal location for installing the bell power system. Ensure that the location is protected from harsh weather conditions and is close enough to the camera for an easy connection. It is also essential to place the bell power system near a power outlet for convenient access to electricity.
Step 3: Mount the Bell Power System
Once you have identified the perfect location, mount the bell power system securely using the provided mounting hardware. Ensure that the bell power system is placed on a stable surface and is protected from potential tampering or damage.

Step 4: Connect the Power Supply
After mounting the bell power system, connect the power supply to the system. Make sure to follow the manufacturer’s instructions for proper wiring and connection. Double-check the connections to avoid any loose or exposed wires, which could lead to a power failure or safety hazards.
Step 5: Connect the Camera
Once the bell power system is connected to the power supply, it’s time to connect the security camera. Follow the camera’s manual to properly connect it to the bell power system. Ensure that all the connections are secure and properly insulated to avoid any power fluctuations or damage to the camera.
Step 6: Test and Monitor
After completing the installation process, it is crucial to test the bell power system and monitor the camera’s power source. Check if the camera is receiving a stable power supply and if the bell power system is functioning correctly. Regularly monitor the power source to ensure consistent and uninterrupted power supply to the security camera.
By following these steps for the proper installation of the bell power system, you can ensure that your security camera outside will have a reliable and continuous power source, providing you with peace of mind and enhanced security.
Troubleshooting Common Issues
If you are encountering any issues with powering your security camera outside using a bell, here are some common problems and their possible solutions:
| Issue | Possible Solution |
|---|---|
| No power to the camera | Check if the bell’s power source is functioning properly. Test the outlet or power supply to ensure it is providing the correct voltage. Also, ensure that all power cables are securely connected. |
| Poor video quality | Make sure that the camera is positioned correctly and has a clear line of sight. Adjust the camera angle if necessary. Additionally, check the camera’s resolution settings and adjust them for better image quality. |
| Camera not connecting to the network | Ensure that the camera is properly connected to the network via Wi-Fi or Ethernet cable. Check the network settings on the camera and make sure they match your network configuration. Restart the camera and router if necessary. |
| Camera offline or disconnecting frequently | Check the Wi-Fi signal strength in the area where the camera is installed. Weak signals can cause disconnections. If possible, move the camera closer to the router or install a Wi-Fi extender. Update the camera’s firmware to the latest version and reset the camera if needed. |
| Poor night vision | Ensure that there are no obstructions, such as dirt or dust, covering the camera’s infrared (IR) LEDs. Clean the camera lens if necessary. Adjust the camera’s IR sensitivity settings for better night vision performance. |
| Camera not recording | Check the camera’s storage settings and make sure that it has enough free space to record. If using an SD card, ensure that it is properly inserted and functioning. Restart the camera and check if the recording function is enabled. |
If you are still experiencing issues after troubleshooting, it is recommended to consult the camera’s user manual or contact the manufacturer for further assistance.
Additional Tips for Outdoor Security Cameras
When installing outdoor security cameras, there are a few additional tips to keep in mind to ensure the best results:
1. Placement
Selecting the right location for your outdoor security camera is crucial. Make sure to choose an area that covers the widest possible field of view while still capturing the most important areas. Positioning the camera at a higher elevation can also help minimize the risk of it being tampered with or damaged.
2. Weather Resistance
Ensure that the security camera you choose is weatherproof and designed specifically for outdoor use. Look for cameras with an IP rating, which indicates their level of resistance against dust and water. A higher IP rating, such as IP66, is ideal for outdoor installations.
3. Proper Wiring
When powering your outdoor security camera, it’s important to use the appropriate wiring method. Consider using a conduit or armored cable to protect the wiring from the elements and potential damage. This will help ensure that the camera remains functional even in harsh weather conditions.

4. Night Vision
If you plan on monitoring your property at night, make sure your outdoor security camera has night vision capabilities. Look for cameras with infrared LEDs or low-light sensors, as these will provide better visibility in the dark.
Remember to regularly check and clean your outdoor security camera to maintain optimal performance and avoid any obstructions that may affect its functionality.
Following these tips will help you maximize the effectiveness of your outdoor security camera system and ensure that your property is well-protected.
FAQ,
Can I use a doorbell to power my security camera outside?
Yes, you can use a doorbell to power your security camera outside. Most video doorbells are designed to power both the doorbell itself and an accompanying camera, allowing you to monitor the area outside your door.
How does a doorbell power a security camera?
A doorbell powers a security camera by providing it with a constant electrical supply. The doorbell is wired into your home’s existing electrical system and acts as a power source for the camera. This eliminates the need for separate batteries or wiring for the camera itself.
What are the benefits of using a doorbell to power a security camera outside?
Using a doorbell to power your security camera outside has several benefits. Firstly, it eliminates the need for separate power sources or batteries for the camera, saving you time and money. Additionally, by using the existing doorbell wiring, you can seamlessly integrate the camera into your home’s security system. Finally, having both the doorbell and camera powered by the same source ensures they are always working together and reduces the risk of power failures or disruptions.