
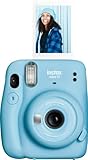
Capturing memories with an instant camera is a wonderful way to preserve special moments. The joy of watching a photo develop right before your eyes is truly magical. Once you’ve taken those perfect pictures, you may wonder how to print them out and keep them for years to come. In this article, we will guide you through the process of printing photos from an instant camera.
Step 1: Prepare Your Instant Camera Photos
Before printing your instant camera photos, it’s essential to ensure they are in the best condition possible. Check for any smudges or fingerprints on the prints, as these can affect the print quality. Gently wipe the photos with a clean, lint-free cloth or use compressed air to remove any dust particles. Taking care of your photos beforehand will ensure that you get the best results when printing.
Note: If your instant camera prints are digital, you can skip this step and proceed to Step 2.
Step 2: Choose a Photo Printer

There are several options available for printing your instant camera photos. One option is to use a portable photo printer designed specifically for instant camera prints. These printers are usually compact, lightweight, and easy to use. Another option is to send your photos to a photo lab or use an online photo printing service. Research different printing options and choose the one that suits your needs and budget.
Note: The quality of the prints will depend on the printer and paper used. It’s worth investing in high-quality photo paper for the best results.
Printing Photos: A Step-by-Step Guide for Instant Cameras
Instant cameras have regained popularity in recent years, allowing users to capture and print photos on the spot. In this guide, we will walk you through the process of printing photos from your instant camera, ensuring you have a physical copy of your cherished memories.
Step 1: Load the film
Before you can print any photos, you need to make sure your instant camera is loaded with film. Refer to your camera’s manual for specific instructions on how to load the film cartridge. Once the film is loaded, close the camera back securely.

Step 2: Frame your shot
When you’re ready to take a photo, look through the viewfinder and adjust the framing. Keep in mind that instant cameras may have a slightly different field of view compared to other cameras, so take this into account when composing your shot.
Step 3: Capture the moment
After framing your shot, press the shutter button to capture the moment. Depending on the model of your instant camera, the photo may eject immediately or stay inside the camera until manually released.
Step 4: Wait for the photo to develop
Once the photo is ejected from the camera, be patient and allow it to develop. Different instant film types have varying development times, typically ranging from a few seconds to several minutes. Avoid touching the image during this process as it may damage the print.
Step 5: Store the photo properly
Once the photo has fully developed, store it in a cool, dry place away from direct sunlight. Instant photos are susceptible to fading and discoloration, so proper storage is essential for preserving their quality.
Step 6: Share and enjoy
Now that your photo is printed and stored safely, it’s time to share and enjoy it! Display it in a frame, create a scrapbook, or give it as a gift to a loved one. The possibilities are endless!

| Step | Description |
|---|---|
| Step 1 | Load the film |
| Step 2 | Frame your shot |
| Step 3 | Capture the moment |
| Step 4 | Wait for the photo to develop |
| Step 5 | Store the photo properly |
| Step 6 | Share and enjoy |
Choosing the Right Photo Paper
When it comes to printing photos from your instant camera, selecting the right photo paper is essential to achieve the best results. Here are a few things to consider when choosing the perfect photo paper for your needs.
Paper Size
First and foremost, you need to decide on the size of the photo prints you want. Instant cameras typically produce small-sized prints, so make sure to choose paper that is compatible with your camera’s print size. Common sizes include 2×3 inches, 3×4 inches, and 4×6 inches.
Finish and Coating
The finish and coating of the photo paper will determine the overall look and feel of your prints. Glossy finishes are known for their vibrant and shiny appearance, while matte finishes offer a more subtle and understated look. Consider your personal preferences and the desired effect you want to achieve when selecting the finish.
Additionally, photo papers may come with different coatings, such as resin or pigment-based coatings. Resin-coated papers are more resistant to fingerprints and smudges, making them ideal for handling and displaying, while pigment-based coatings provide better archival quality and longevity.
Print Quality and Compatibility

Make sure the photo paper you choose is compatible with your instant camera to ensure optimal print quality. Some cameras may have specific paper recommendations to achieve the best results, so check the manufacturer’s guidelines before making a decision.
Consider the resolution and color reproduction capabilities of the paper as well. High-quality photo papers will offer excellent sharpness, color accuracy, and fade resistance, resulting in stunning prints that can stand the test of time.
Remember to always follow the instructions provided by the paper manufacturer for proper handling and printing.
By considering factors such as paper size, finish, coating, and print quality, you can choose the right photo paper for your instant camera that will bring your memories to life and provide lasting enjoyment.
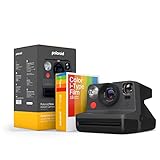
Preparing Your Instant Camera
Before you can start printing photos from your instant camera, it’s important to properly prepare the device. This will ensure that you get high-quality prints and avoid any technical issues. Here are a few steps to follow:
1. Load the Film
The first step is to load the film into your instant camera. Check the user manual to find the exact instructions for your specific camera model. In general, you will need to open the film compartment and insert the film cartridge. Make sure to follow any specific guidelines for loading the film correctly, such as aligning the arrows or matching the film markings.
2. Check the Battery
Next, check the battery to ensure that it has enough power to operate the camera. Most instant cameras use AA or AAA batteries. Open the battery compartment and check for any corrosion or loose connections. If needed, replace the batteries with fresh ones. It’s also a good idea to carry extra batteries with you in case the current ones run out during a photo session.
Once you have completed these steps, your instant camera will be ready for use. You can then start capturing and printing your favourite moments with ease!
Taking High-Quality Photos
When it comes to capturing moments, having high-quality photos from your instant camera is important. Here are some tips to help you achieve the best results:
- Clean the lens: Before taking any photos, make sure to clean the lens of your instant camera. Dust, smudges, or fingerprints can affect the clarity of your images.
- Find good lighting: Lighting plays a crucial role in photography. Look for natural light sources or well-lit areas to ensure your photos are well-exposed and vibrant. Avoid harsh overhead lighting or direct sunlight, as it can cause shadows and overexposure.
- Focus on composition: Take a moment to think about the composition of your photo. Consider the rule of thirds, leading lines, and other techniques to create visually pleasing images.
- Experiment with angles and perspectives: Don’t be afraid to get creative with your compositions. Try shooting from different angles or perspectives to add interest and depth to your photos.
- Pick the right subject: Choose subjects that are visually appealing and interesting. Whether it’s a beautiful landscape, a candid shot of a loved one, or an architectural marvel, a captivating subject can make all the difference in your photos.
- Pay attention to the background: The background of your photo can either enhance or detract from the overall composition. Make sure there are no distractions or clutter in the background that could take away from the main subject.
- Use the right settings: Familiarize yourself with the settings of your instant camera. Adjust the exposure, focus, and other settings based on the lighting conditions and desired effect.
- Take your time: Don’t rush the process. Take your time to set up the shot, compose it carefully, and make any necessary adjustments. Patience and attention to detail can result in stunning photos.
- Review and edit: Once you’ve taken your photos, take the time to review them on a larger screen. Use photo editing tools to enhance colors, crop, or make any necessary adjustments to achieve the desired result.
By following these tips, you can ensure that you capture high-quality photos with your instant camera and create lasting memories. Happy shooting!

Developing Your Instant Photos
Once you have taken a photo with your instant camera, the next step is to develop the photo. Developing instant photos is a straightforward process, and here are the steps to follow:
- Wait for the photo to fully eject from the camera. This usually takes a few seconds.
- Avoid shaking or bending the photo while it is developing to ensure a clear image.
- Find a flat surface to place the photo on.
- Allow the photo to develop for the recommended time, which is usually around 5-10 minutes.
- Avoid exposing the developing photo to direct sunlight or excessive heat, as it can affect the quality of the image.
- Once the photo is fully developed, you can enjoy and share it with others.
Developing instant photos is an exciting part of using an instant camera. It brings the memories captured in the photo to life and allows you to relive those special moments. So take your time, follow the steps carefully, and enjoy your instant photos!
Storing and Displaying Your Prints
Once you have printed your photos from your instant camera, it’s important to store and display them properly to ensure their longevity and to show them off to your family and friends. Here are some tips to help you store and display your prints:
1. Use acid-free photo albums: Acidic materials can damage your prints over time. Therefore, it’s important to use acid-free photo albums to store your instant camera prints. This will help protect your photos from fading, discoloration, and deterioration.
2. Handle the prints with care: To avoid fingerprints and smudges, handle your prints with clean hands or wear white cotton gloves. This will help preserve the quality of your prints and prevent any damage from occurring.
3. Avoid direct sunlight: UV rays from direct sunlight can fade and damage your prints. To ensure their longevity, it’s best to display your prints away from direct sunlight. Consider placing them in a well-lit area or framing them behind UV-blocking glass to protect them from harmful rays.
4. Frame your favorite prints: For a more polished and professional look, consider framing your favorite instant camera prints. This will not only protect them but also make them a focal point in your home or office. Choose frames that complement the style and colors of your prints, creating a cohesive and aesthetically pleasing display.
5. Rotate your displays: To keep your display fresh and interesting, consider rotating your prints regularly. This will allow you to showcase different photos and prevent any one print from being exposed to prolonged light or environmental conditions.
6. Share your prints: Lastly, don’t forget to share your prints with your loved ones! Whether it’s creating a photo wall, sending prints as gifts, or organizing a photo album to share during gatherings, sharing your prints is a wonderful way to cherish memories and bring joy to others.
By following these tips, you can ensure that your instant camera prints are stored and displayed in a way that preserves their quality and allows you to enjoy them for years to come.
Tips for Maintaining Your Instant Camera
Keeping your instant camera in good condition is essential for capturing beautiful photos and making memories that will last a lifetime. Here are some tips to help you maintain your instant camera:
Clean your camera regularly
- Use a soft, lint-free cloth to wipe the exterior of your camera. Avoid using harsh chemicals or abrasive materials that may damage the surface.
- Remove any dust or debris from the lens using a small blower or a soft brush. Be gentle to avoid scratching the lens.
- If there are fingerprints or smudges on the lens, use a lens cleaning solution and a microfiber cloth to gently wipe them away.
Store your camera properly
- When not in use, keep your camera in a cool, dry place, away from direct sunlight and extreme temperatures. High heat or humidity can damage the camera’s internal components.
- Consider using a camera bag or case to protect your instant camera from bumps, scratches, and dust when carrying it around.
- If your camera uses film cartridges, store them in a cool, dry place to preserve their quality. Avoid exposing them to heat or moisture.
Handle your camera with care
- Avoid dropping or knocking your camera, as this may cause internal damage or affect the quality of your photos.
- When loading film cartridges, make sure your hands are clean and dry to prevent accidental moisture or dirt from getting inside the camera.
- Be cautious when opening the film compartment, as direct exposure to light can ruin your film. Follow the instructions provided by your camera’s manufacturer.
By following these tips, you can extend the lifespan of your instant camera and ensure that it continues to produce high-quality photos for years to come.
Question-answer:
What is an instant camera?
An instant camera is a type of camera that produces a physical print of the photo immediately after it is taken.
What kind of film does an instant camera use?
An instant camera uses instant film that develops the photo within minutes.
Can I print photos from an instant camera at home?
No, you cannot print photos from an instant camera at home as the film needs special chemicals to develop the photo.
How can I print photos from an instant camera?
To print photos from an instant camera, you need to take the film to a photo processing lab where they have the necessary equipment to develop the photo.


