
Finding the perfect angle and capturing stunning photos is an art in itself. While having a state-of-the-art digital camera is important, knowing how to properly hold it can make all the difference in the world. Whether you’re an amateur photographer or a seasoned pro, understanding the right way to hold and stabilize your camera can greatly enhance the quality of your photographs.
Why is it important to hold your digital camera correctly?
When it comes to photography, stability is key. Holding your camera properly is the foundation for capturing sharp, well-focused images. By maintaining a steady grip, you reduce the risk of camera shake, which can lead to blurry or distorted photos. Additionally, holding your camera correctly can help minimize fatigue, allowing you to shoot for extended periods without compromising your comfort or the quality of your work.
So, how exactly should you hold a digital camera?
The most common and effective technique is to hold the camera with both hands. Begin by gripping the right-hand side of the camera with your right hand, ensuring your fingers are ready to access the shutter button and dials. With your left hand, cradle the lens from below, providing additional support and stability. Make sure to keep your elbows tucked in close to your body to minimize movement and maximize control over your camera.

Understanding the basics of holding a digital camera
Properly holding a digital camera is essential to capturing clear and steady photos. By mastering the correct grip and posture, you can enhance the quality of your images and avoid camera shake. Here are key points to remember:
1. Grip the camera with both hands
Hold the camera with both hands to increase stability and minimize camera shake. Place your right hand on the camera grip and wrap your fingers around it, with your index finger resting on the shutter button. Support the lens with your left hand, cradling it from the bottom.
2. Keep your elbows tucked in
Position your elbows close to your body to add further stability. This helps to reduce the chances of camera shake caused by arm movements. Keeping your elbows tucked in also improves your overall balance while holding the camera.
3. Stand with a stable stance
Adopt a stable posture by standing with your feet shoulder-width apart. This provides a solid foundation and helps you stay balanced while holding the camera. Avoid standing on tiptoes or shifting your weight excessively, as this may result in instability.
4. Use a neck strap
Always use a neck strap to prevent accidental drops. Place the strap around your neck and adjust it so that the camera rests comfortably against your chest when not in use. This ensures that the camera is securely attached to you and prevents accidents.
5. Be mindful of your breathing
Take a deep breath, exhale gently, and hold your breath for a moment as you press the shutter button. This technique helps minimize the subtle camera movements caused by breathing, resulting in sharper images, especially in low-light situations or when using slower shutter speeds.
By following these basics of holding a digital camera, you will have more control over your shots and improve the overall quality of your photographs. Practice regularly to develop a stable and comfortable grip, and experiment with different shooting techniques to further enhance your photography skills.
Choosing the right grip and hand placement
When it comes to holding a digital camera, the right grip and hand placement can make a significant difference in the quality of your photographs. Not only does it ensure stability, but it also allows you to have better control over the camera’s functions. Here are some tips to help you choose the right grip and hand placement:
1. Hold the camera with both hands
To achieve stability and minimize camera shake, it’s essential to hold the camera with both hands. Use your right hand to grip the camera’s right side or handle, while your left hand supports the camera from underneath. This grip provides balance and allows you to have a steady shot.
2. Keep your elbows close to your body
By keeping your elbows close to your body while holding the camera, you create a stable base for the camera to rest on. This helps reduce camera shake and ensures smoother image capture. Avoid fully extending your arms or holding the camera away from your body, as this can lead to unstable shots.

3. Use your left hand to support the lens
Your left hand should be placed underneath the lens to provide additional support. This allows you to have better control over zooming and focusing, especially if you are using a heavier lens. Keep your fingers relaxed but firm, ensuring that you’re not blocking any buttons or dials.
4. Avoid gripping the camera too tightly
While it’s important to have a firm grip on the camera, avoid gripping it too tightly. A tight grip can lead to muscle tension and shakiness, which may result in blurry photos. Find a balance between a secure hold and keeping your hands relaxed.
5. Experiment with different hand placements
Everyone’s hands are different, so it’s worth experimenting with different hand placements to find what feels most comfortable and stable for you. Try adjusting the positioning of your fingers, thumb, and palm until you find the grip that gives you maximum control and reduces fatigue.
Remember, the right grip and hand placement can significantly improve the quality of your photos. Practice regularly to develop muscle memory and ensure a steady hold every time you use your digital camera.
Finding the ideal balance for stability
When it comes to holding a digital camera, finding the ideal balance is crucial for stability. A well-balanced camera allows you to have better control over your shots and reduces the risk of camera shake, resulting in sharper and more professional-looking images.

1. Grip the camera with both hands
Start by gripping the camera with both hands. Place your right hand on the camera grip, with your index finger resting lightly on the shutter button. Use your left hand to support the weight of the camera by cradling the lens from underneath.
Tip: Avoid gripping the camera too tightly, as it can lead to shaky hands and unstable shots.
2. Stand with a wide stance
To further enhance stability, stand with a wide stance. Position your feet shoulder-width apart and slightly bend your knees. This posture helps to anchor your body and minimizes any unwanted movements that could cause camera shake.
Tip: If possible, lean against a wall or solid object to provide additional support and stability.
When holding a camera, finding the ideal balance between holding the camera with both hands and standing with a wide stance is essential for stability. By following these tips, you can improve your technique and capture clearer and sharper images with your digital camera.

Maintaining a relaxed posture for long shoots
When you are engaged in long photo shoots, it is important to maintain a relaxed posture to prevent muscle strain and fatigue. Here are some tips to help you maintain a comfortable position while using your digital camera:
1. Stand with your feet shoulder-width apart
Keeping your feet shoulder-width apart provides a stable base and helps distribute your body weight evenly.
2. Relax your shoulders
Tense shoulders can lead to discomfort and fatigue. Make a conscious effort to relax your shoulders and keep them down when holding the camera.
| Tip | Description |
|---|---|
| 3. Use two hands | Hold the camera with both hands to provide better stability and control. Use your dominant hand to grip the camera handle and your other hand to support the lens. |
| 4. Position your elbows close to your body | Tuck your elbows in to help reduce strain on your arms and shoulders. This also helps to stabilize the camera and prevent shaky shots. |
| 5. Take breaks and stretch | It’s important to take regular breaks during long shoots. Use this time to relax your muscles and stretch to relieve any tension or stiffness. |
By maintaining a relaxed posture and following these tips, you can enhance your shooting experience and prevent discomfort or injuries during long photo sessions.
Using the camera’s built-in stabilization features
When it comes to holding a digital camera properly, it’s not just about your grip and posture. Many modern cameras come with built-in stabilization features that can help you capture sharp and steady images, even in challenging shooting conditions.
Here are some ways to utilize your camera’s stabilization features:
-
Optical Image Stabilization (OIS)
Some cameras have optical image stabilization, which compensates for camera shake by physically moving lens elements. This feature is particularly useful when shooting handheld in low-light situations or when using longer focal lengths. To take advantage of OIS, simply activate it in your camera settings or through a dedicated switch on your lens.
-
In-body Image Stabilization (IBIS)
Other cameras have in-body image stabilization, also known as IBIS. This technology uses sensors inside the camera body to detect and counteract any camera movement. IBIS is advantageous because it works with any lens attached to the camera, allowing you to shoot with a wider range of lenses without sacrificing image quality. Simply enable IBIS in your camera’s menu system to make the most of this feature.
-
Electronic Image Stabilization (EIS)
In addition to OIS and IBIS, some cameras offer electronic image stabilization. EIS digitally corrects for camera shake by utilizing software algorithms to analyze the video feed. This feature is especially beneficial when recording video on the move or in situations where a tripod is not available. Consult your camera’s user manual to learn how to access and configure EIS.
Remember that while these stabilization features can help reduce camera shake, they are not a substitute for proper camera holding techniques. It’s crucial to maintain a steady grip and avoid unnecessary hand movements for the best results.
Avoiding common mistakes that lead to camera shake
Camera shake can result in blurry photos and decrease the overall image quality. To capture clear and sharp images, it is crucial to avoid common mistakes that lead to camera shake. Here are some tips to help you prevent camera shake:
1. Holding the camera correctly
Properly gripping your digital camera is essential to minimize camera shake. Hold the camera with both hands, ensuring a steady grip. Place your right hand on the camera grip, with your index finger lightly resting on the shutter button. Use your left hand to support the bottom of the camera. This technique provides stability and reduces the chances of camera shake.
2. Stabilizing your body
Unsteady body movements can contribute to camera shake. To avoid this, stand with your feet shoulder-width apart and slightly bend your knees. Tuck your elbows into your sides to provide additional stability. If possible, lean against a stable object such as a wall or a tree to further stabilize your body.

3. Using a tripod or monopod
When shooting in low light situations or using a long telephoto lens, it can be beneficial to use a tripod or a monopod to eliminate camera shake altogether. These accessories provide a stable support for your camera and allow you to capture sharp images even in challenging conditions.
Remember: Even if you’re using a tripod, it’s important to lightly press the shutter button to avoid inadvertently causing camera shake. Use the camera’s self-timer or a remote shutter release for even more stability.
By following these tips, you can significantly reduce camera shake and improve the overall quality of your photos. Practice these techniques regularly to ensure consistently sharp and clear images.
Adjusting your grip for different shooting angles
Properly holding a digital camera is essential for capturing clear and steady photos. However, it is also important to adjust your grip for different shooting angles to ensure that you have full control over the camera and can capture the best possible shots. Here are some tips on how to adjust your grip for different shooting angles:
|
High angle: When shooting from a high angle, such as when taking photos of a tall building or a group of people from above, it is important to hold the camera with both hands for stability. Place your elbows against your body to provide extra support and hold the camera firmly but not too tightly. |
Low angle: For low-angle shots, like when photographing a subject from a low position or capturing a dramatic perspective, you may need to adjust your grip to maintain stability. Hold the camera with both hands and consider using your elbows or knees for support. This will help you maintain control and avoid camera shake. |
|
Portrait orientation: When shooting in portrait orientation, where the camera is held vertically, it is important to adjust your hand placement to maintain a steady grip. Consider using your left hand to support the weight of the camera and use your right hand to operate the shutter button and adjust settings. This grip will give you more control and reduce the risk of camera shake. |
|
|
Landscape orientation: For landscape shots, where the camera is held horizontally, try using both hands to hold the camera for better stability. Keep your elbows against your body and grip the camera firmly with your right hand while supporting the lens with your left hand. This grip will help you maintain control and capture sharp images. |
Overhead shot: When shooting an overhead shot, such as when photographing food or flat lay compositions, it may be challenging to hold the camera at a comfortable angle. Consider using a tripod or a camera mount to avoid straining your arms and to ensure that you have a steady grip. This will enable you to focus on composition without compromising the quality of your photos. |
By adjusting your grip for different shooting angles, you can improve your stability, control, and ultimately, the quality of your photographs. Practice these techniques, experiment, and find the grip that works best for each shooting scenario. Keep in mind that everyone has a unique shooting style, so don’t be afraid to adapt these tips to suit your individual preferences.
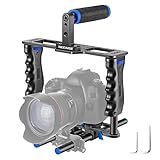
Using Additional Accessories for Better Camera Support
Properly holding a digital camera is essential for capturing steady and sharp photos. However, in some situations, you may want to enhance the stability and support of your camera even further by using additional accessories. These accessories can help you achieve better results, especially in challenging shooting conditions or when using heavier lenses.
Here are a few accessories that can improve the camera’s support:
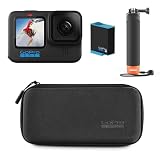
- Tripod: A tripod is a three-legged stand that provides excellent stability to your camera. It allows you to keep the camera steady when shooting long exposures, low-light situations, and when using telephoto lenses. Tripods are available in various sizes and materials, so choose one that suits your needs and budget.
- Monopod: Similar to a tripod, a monopod is a single-legged support that offers better stability compared to handheld shooting. It is a practical accessory for photographers who need mobility while maintaining some level of support. Monopods are lightweight and easy to carry around, making them ideal for sports and wildlife photography.
- Gimbal Head: A gimbal head is a specialized tripod head designed for supporting telephoto lenses and providing smooth camera movement in all directions. It eliminates the weight imbalance and allows you to pan and tilt the camera effortlessly, making it perfect for wildlife and bird photography.
- Camera Strap: Using a camera strap can offer additional support and security when handheld shooting. It helps distribute the weight of the camera and reduces the risk of accidental drops. Look for a strap that is comfortable and adjustable to fit your body and shooting style.
- Camera Stabilizer: If you frequently shoot handheld videos or require extra stability, consider using a camera stabilizer. These devices minimize camera shakes and allow you to capture smoother footage. There are various types of stabilizers available, including handheld gimbals, shoulder rigs, and body-mounted stabilizers.
By utilizing these additional accessories, you can significantly improve the stability and support of your digital camera. Experiment with different combinations and find what works best for your specific shooting style and needs. Remember, a stable camera setup will result in sharper, better-quality images.
Disclaimer: Please note that product recommendations are solely for illustrative purposes and do not constitute an endorsement.
Practicing proper camera handling techniques for better results
Mastering the art of holding a digital camera is essential for capturing stunning photographs. By practicing proper camera handling techniques, you can improve your stability, reduce shaking, and ultimately achieve better results. Here are some tips to help you develop good habits when holding your camera:
-
Maintain a firm grip
Hold the camera with both hands, ensuring a secure grip. Use your right hand to cradle the grip and your left hand to support the camera from underneath. This allows for better control and stability, minimizing the risk of camera shake.
-
Keep your elbows tucked in
By keeping your elbows close to your body, you create a solid foundation for the camera, reducing the likelihood of shaky shots. This technique helps maintain balance and stability, especially when shooting with heavy or long lenses.
-
Breathe and relax
Take a deep breath before pressing the shutter button and relax your body as much as possible. Tension can cause unnecessary shaking, so it’s important to be mindful of your body and keep it as steady as possible.
-
Use your camera’s built-in stabilizer
If your camera has a built-in stabilizer or image stabilization feature, make sure it’s activated. This can compensate for minor movements and vibrations, resulting in sharper images even when shooting handheld.
-
Experiment with different shooting positions
While maintaining a stable grip is important, don’t be afraid to experiment with different shooting positions. Depending on the situation, you may find that holding the camera above your head, at waist level, or on the ground can lead to unique and interesting compositions.
Remember, practicing proper camera handling techniques takes time. It’s a skill that can be developed through regular use and conscious effort. So grab your camera, head out, and start honing your skills!
Question-answer:
What is the correct way to hold a digital camera?
The correct way to hold a digital camera is to grip it with both hands, using one hand to hold the body of the camera and the other hand to support the lens. This provides stability and helps to reduce camera shake.
Should I use a camera strap when holding a digital camera?
Yes, it is recommended to use a camera strap when holding a digital camera. This helps to prevent accidental drops and provides an extra level of security. The strap should be worn around the neck or across the shoulder for easy access to the camera.
How can I hold a digital camera to minimize the risk of blurry photos?
To minimize the risk of blurry photos, it is important to hold the digital camera with a firm grip and keep your elbows close to your body for stability. You should also try to maintain a steady posture and avoid sudden movements while taking photos. Additionally, using a tripod or other camera stabilizing equipment can further reduce camera shake.
Should I use the viewfinder or the LCD screen to compose my shots?
Whether to use the viewfinder or the LCD screen to compose shots is a matter of personal preference. However, using the viewfinder can provide a more stable grip and help to minimize camera shake. The LCD screen is useful for shooting at different angles or when you need to view the live preview of your shot.


