Are you tired of taking photos in low light conditions and ending up with dark, grainy images? Don’t worry, there’s a solution! By adding a flash to your iPhone camera, you can take stunning photos even in the darkest environments. In this article, we will guide you through the steps to put a flash on your iPhone camera and enhance your photography skills.
Step 1: Find a compatible flash attachment for your iPhone. There are various options available in the market, ranging from pocket-sized LED lights to professional-grade external flash units. Make sure to choose one that suits your needs and budget.
Step 2: Attach the flash to your iPhone. Depending on the type of flash you’ve chosen, you may need to connect it via the iPhone’s lightning port or attach it to the top of your iPhone using a mount. Follow the manufacturer’s instructions to ensure the flash is securely attached.
Step 3: Adjust the flash settings on your iPhone. Once the flash is attached, go to your iPhone’s camera settings and enable the external flash option. This will allow your iPhone to recognize and sync with the attached flash, ensuring optimal lighting conditions for your photos.
Step 4: Test the flash. To check if the flash is working correctly, open your iPhone’s camera app and take a photo in a low light environment. The flash should illuminate the subject and help you capture a well-exposed image. If the photo appears too bright or dark, adjust the flash settings accordingly until you achieve the desired results.
Step 5: Experiment and have fun! Now that you have a flash on your iPhone camera, take advantage of this newfound capability and explore different photography techniques. Try capturing portraits, landscapes, or even creative light painting images. With the added flash, the possibilities are endless!
So, don’t let low light conditions limit your photography skills. Follow these steps to put a flash on your iPhone camera and take your photography to the next level. Get ready to capture stunning photos, no matter the lighting situation!
Find a compatible flash accessory
There are several flash accessories available in the market that are compatible with iPhone cameras. Here are a few options to consider:
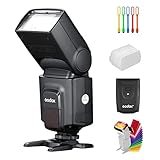
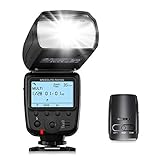
- External Flash: Look for external flashes that are specifically designed for iPhone cameras. These flashes can be easily attached to your iPhone and provide additional light for better photography in low-light conditions.
- Bluetooth Flash: Another option is a Bluetooth flash that can be controlled wirelessly using your iPhone. These flashes are compact and can be easily carried around.
- LED Ring Light: LED ring lights are also a popular accessory for iPhone cameras. They can be attached to your iPhone and provide uniform lighting for better photos and videos.
When looking for a compatible flash accessory, make sure to check the compatibility information, as some accessories may only work with specific iPhone models. Additionally, consider the features and settings that the flash accessory offers, such as adjustable brightness levels and flash modes.
Ensure your iPhone is properly mounted
Before using a flash on your iPhone camera, it is important to ensure that your iPhone is properly mounted. Mounting your iPhone securely will help prevent accidental damage and ensure stable and consistent lighting for your photos.

Step 1: Find a stable surface to mount your iPhone on. This could be a tripod, a stable table or desk, or any other surface that can hold your iPhone securely.
Step 2: Position your iPhone so that the camera is facing the subject you want to photograph. Make sure the camera lens is not obstructed by any objects or fingers.
Step 3: If you are using a tripod, secure the iPhone to the tripod mount. If you are using a stable surface, make sure that the iPhone is securely placed and will not move or fall during use.
Step 4: Adjust the angle and height of the mounted iPhone as needed to frame your subject properly. You can adjust the tripod legs or the position of the stable surface to achieve the desired angle and height.
Step 5: Once your iPhone is securely mounted and properly positioned, you can proceed to use a flash on your iPhone camera to enhance your photos.
Remember to always follow the manufacturer’s instructions for mounting your iPhone and any additional accessories used for mounting. Taking the time to properly mount your iPhone will help ensure the best results when using a flash on your iPhone camera.
Connect the flash accessory to your iPhone
Adding a flash accessory to your iPhone camera can greatly improve the quality of your photos, especially in low light situations. Here’s how you can connect a flash accessory to your iPhone:
- Locate the flash accessory you wish to use. There are various types available, ranging from small LED lights to more sophisticated external flashes.
- Ensure that your flash accessory is fully charged or has fresh batteries installed.
- Connect the flash accessory to your iPhone using the appropriate connection method. Some flash accessories may connect to the iPhone’s Lightning port, while others may connect via Bluetooth or a dedicated app.
- If your flash accessory uses the Lightning port, simply plug it into the port on the bottom of your iPhone. Ensure that the connection is secure.
- If your flash accessory connects via Bluetooth or a dedicated app, follow the manufacturer’s instructions to pair it with your iPhone.
- Once the flash accessory is connected, check that it is recognized by your iPhone. You may need to open the camera app and adjust the flash settings to enable the external flash.
- Test the flash accessory by taking a few test shots in different lighting conditions. Adjust the flash settings as needed to achieve the desired lighting effect.
- When you are finished using the flash accessory, disconnect it from your iPhone. If it uses the Lightning port, simply unplug it. For Bluetooth or app-connected accessories, follow the manufacturer’s instructions to disconnect.
Connecting a flash accessory to your iPhone can enhance your photography and allow you to capture high-quality images in a wider range of lighting conditions. Experiment with different flash settings and techniques to get the best results for your photos.
Adjust the flash settings on your iPhone
If you want to improve your iPhone camera’s low light performance or add more light to your photos, adjusting the flash settings can be a great option. The iPhone camera has a built-in flash that can be customized according to your preferences. Follow the steps below to adjust the flash settings on your iPhone:
- Open the Camera app on your iPhone. You can find it on your home screen.
- Locate the flash icon at the top-left corner of the screen.
If the flash icon is yellow, it means the flash is set to auto mode, which means that the iPhone will automatically determine whether or not to use the flash based on the lighting conditions.

If the flash icon is white, it means the flash is off. This means that the flash will not fire regardless of the lighting conditions.
If the flash icon is yellow with a lightning bolt, it means the flash is set to on. This means that the flash will always fire, regardless of the lighting conditions.
- To change the flash settings, simply tap on the flash icon to cycle through different flash modes.
You can choose between Auto, On, and Off depending on your preference and the lighting conditions.
Auto mode is recommended for most situations as it allows the iPhone to decide when to use the flash. On mode is useful when you want the flash to fire every time you take a photo, and Off mode is useful when you want to disable the flash completely.
By adjusting the flash settings on your iPhone, you can take better photos in low light conditions and have more control over the lighting in your pictures.

Test the flash on your iPhone camera
Once you have installed a flash app on your iPhone, it’s important to test the flash to make sure it’s working properly. Follow these steps to test the flash on your iPhone camera:
1. Launch the flash app on your iPhone.
2. Open the camera on your iPhone by tapping the Camera app icon.
3. Switch to the rear-facing camera by tapping the icon in the top right corner of the screen.
4. Look for a lightning bolt icon on the screen. This indicates that the flash is enabled.

5. Tap the shutter button to take a photo.
6. Review the photo to see if the flash worked properly. If the photo is well-lit and there are no dark areas, the flash is working correctly.
7. If the photo is dark or there are areas that are not well-lit, try adjusting the flash settings in the app. Some flash apps have adjustable brightness levels or different flash modes (such as auto, on, or off).
8. Take another test photo after making adjustments to see if the flash is working as desired.
By following these steps, you can ensure that the flash on your iPhone camera is functioning properly and can capture well-lit photos in low light situations.

Troubleshooting common flash issues on iPhone
If you are experiencing issues with the flash on your iPhone camera, there are a few troubleshooting steps you can try to resolve the problem. Here are some common flash issues and their potential solutions:
| Issue | Potential Solution |
|---|---|
| Flash not working at all | – Check if the flash is enabled in the Camera app settings.
– Make sure the flash is not obstructed by a case or cover. – Restart your iPhone and try using the flash again. – Update your iPhone to the latest iOS version. – If none of the above steps work, contact Apple Support for further assistance. |
| Weak flash | – Clean the flash lens to ensure there is no dirt or debris obstructing it.
– Adjust the flash intensity in the Camera app settings. – Make sure there is enough battery power to support the flash. – Try using the flash in a darker environment for better results. |
| Flash causing red-eye effect | – Enable the anti-red-eye feature in the Camera app settings.
– If the problem persists, avoid using the flash directly on the subject’s eyes. – Use an external flash attachment or diffuser to reduce the red-eye effect. – Correct any red-eye issues in post-processing using photo editing apps. |
| Flash not synchronized with the camera | – Ensure there is no delay set in the Camera app settings for flash synchronization.
– Restart your iPhone and check if the synchronization issue is resolved. – Reset all settings on your iPhone to default and try using the flash again. – If the problem persists, contact Apple Support for further assistance. |
By following these troubleshooting steps, you should be able to resolve common flash issues on your iPhone camera. If the problem persists, it is recommended to seek professional help or contact Apple Support for further assistance.
FAQ
Is it possible to add a flash to the iPhone camera?
Yes, it is possible to add a flash to the iPhone camera. There are various external flash options available in the market that are compatible with iPhones. These external flashes can be easily attached to the iPhone and provide additional light for better photography in low-light situations.
What are some popular external flash options for the iPhone?
There are several popular external flash options available for the iPhone. Some of the popular ones are the Lume Cube, Godox A1, and Yongnuo YN968EX-RT. These external flashes provide adjustable brightness levels and can be easily attached to the iPhone via the lightning port or a compatible mount. They offer a great solution for improving low-light photography with the iPhone.