
In today’s modern world, smartphones have become an integral part of our lives. They offer us convenience, connectivity, and countless features that make our day-to-day tasks easier. Among these features is the camera, which has evolved to capture stunning photos and videos. However, one common issue that smartphone users often face is low-light photography. Fortunately, there are various ways to put light on your iPhone camera and enhance the quality of your photos.
One of the simplest ways to improve low-light photography on your iPhone is by adjusting the camera settings. By default, the camera app on your iPhone automatically adjusts the exposure level based on the available light. However, you can manually control the exposure by tapping on the screen to focus on a specific area and then swiping up or down to adjust the exposure level. This will allow more light to enter the camera sensor, resulting in brighter and clearer photos.
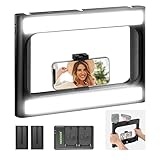
Another method to add light to your iPhone camera is by using external lighting accessories. There are various lighting options available in the market, such as attachable LED lights and clip-on ring lights. These accessories can be easily attached to your iPhone and provide additional light for capturing well-lit photos and videos in low-light conditions. Additionally, some lighting accessories come with adjustable brightness levels, allowing you to customize the amount of light according to your needs.
In addition to adjusting the camera settings and using external lighting accessories, you can also take advantage of the built-in features of the iPhone camera app. One such feature is the flash, which can be used to illuminate the subject in low-light situations. To activate the flash, simply tap on the lightning bolt icon in the camera app and choose the desired flash mode. Keep in mind that using the flash too close to the subject may result in overexposed photos, so it’s important to find the right distance and angle for optimal lighting.
With these tips and techniques, you can easily put light on your iPhone camera and capture stunning photos and videos, even in dimly lit environments. Whether you’re a professional photographer or simply someone who enjoys taking pictures, the ability to enhance low-light photography on your iPhone can greatly improve the quality of your shots and make your memories even more vibrant and memorable.

Why is it important?
Having the ability to put light on your iPhone camera is important for several reasons:
- Improved visibility: Adding light to your iPhone camera allows you to capture well-lit photos and videos, even in low light conditions. This ensures that your subjects are clear, properly exposed, and free of unwanted noise.
- Better image quality: When shooting in dark environments, the lack of light can result in grainy and blurry images. By illuminating the scene with additional light, you can enhance the image quality, making it sharper and more vibrant.
- Expanded creative possibilities: Adding light to your iPhone camera opens up a whole new world of creative possibilities. You can experiment with different lighting techniques, play with shadows and highlights, and create unique and visually captivating images.
- Enhanced versatility: With a well-lit iPhone camera, you can capture clear and detailed photos and videos in a wide range of settings, such as concerts, parties, or outdoor adventures. It allows you to document your experiences with confidence and share them with others.
- Selfie improvement: Adding light to your iPhone camera is especially useful for taking selfies. It helps to eliminate unflattering shadows on your face, ensures consistent and balanced lighting, and enables you to achieve the perfect selfie every time.
Overall, having the ability to put light on your iPhone camera can significantly enhance your photography and videography experience, allowing you to capture stunning images and videos in various lighting conditions.
Benefits of putting light on iPhone camera
Adding a light source to your iPhone camera has numerous benefits that can greatly enhance your photography experience. Whether you are a professional photographer or simply enjoy taking photos for personal use, having additional light can make a significant difference in the quality of your pictures.
1. Improved low-light photography: One of the biggest advantages of adding light to your iPhone camera is the ability to capture high-quality photos in low-light conditions. By illuminating the subject, you can eliminate the graininess and noise often associated with low-light photography, resulting in clearer and sharper images.
2. Enhanced details and colors: When shooting in low-light situations, details and colors can often become muted or washed out. By adding light, you can bring out the intricate details and vibrant colors in your subject, resulting in more visually appealing photos.

3. Better control over shadows and highlights: Adding light to your iPhone camera also gives you more control over the lighting conditions of your photos. You can adjust the position and intensity of the light source to minimize harsh shadows or highlight certain features of your subject, creating a more balanced and visually appealing image.
4. Versatility in various shooting scenarios: Whether you are photographing portraits, still life, landscapes, or macro subjects, having a light source on your iPhone camera allows you to adapt to different shooting scenarios. You can experiment with different lighting techniques and create unique effects to suit your artistic vision.
5. Enhanced creativity: By adding light to your iPhone camera, you open up a new realm of creative possibilities. You can experiment with different lighting angles, color gels, and light modifiers to create stunning and artistic photos that stand out from the crowd.
Overall, adding light to your iPhone camera can greatly improve the quality of your photos, allowing you to capture moments with greater clarity, detail, and creativity. So go ahead and explore the world of photography with enhanced lighting capabilities!
Section 1: Available Methods
When it comes to putting light on your iPhone camera, there are several methods you can try. Each method has its own advantages and limitations, so it’s important to choose the one that best suits your needs.

1. Built-in Flash
The most common way to add light to your iPhone camera is by using the built-in flash. To activate the flash, simply open the camera app and tap the lightning bolt icon. This will illuminate the scene with a burst of light, helping you capture well-lit photos even in dark environments. However, keep in mind that the built-in flash can sometimes produce harsh lighting and may not be suitable for all situations.
2. External LED Light
If you need a more versatile lighting solution, you can consider using an external LED light. These lights are specifically designed for smartphones and can be attached to your iPhone’s camera using a mount or clip. They provide a softer and more natural-looking light compared to the built-in flash, making them great for portrait photography or when you need more control over the lighting conditions. However, using an external LED light may require an additional investment and may not be as convenient to carry around.
These are just two of the available methods for putting light on your iPhone camera. Depending on your specific needs and preferences, you may also explore other options such as using a reflector or a light diffuser. Remember to experiment with different methods and lighting setups to achieve the desired results in your photography.
Using the iPhone flashlight
If you need to add light to your iPhone camera for better photos or videos in low light conditions, you can use the built-in flashlight feature. The iPhone flashlight can also be useful in various other situations, such as finding your way in the dark or searching for items.
To turn on the flashlight on your iPhone, follow these simple steps:
| Step 1: | Unlock your iPhone by pressing the home button or using Face ID. |
| Step 2: | Swipe up from the bottom of the screen to access Control Center. |
| Step 3: | On the Control Center, you will find the flashlight icon. Tap on it to turn on the flashlight. |
| Step 4: | To turn off the flashlight, follow the same steps and tap on the flashlight icon again. |
Note that the flashlight will automatically turn off when you turn off your iPhone or restart it.
Additionally, you can also use Siri to control the flashlight on your iPhone. Simply activate Siri by pressing and holding the home button or saying “Hey Siri” (on supported models), and say “Turn on flashlight” or “Turn off flashlight” to control the flashlight.
The iPhone flashlight provides a convenient way to add light when needed, and it can be easily accessed through the Control Center or Siri. Make sure to use it responsibly and only when necessary to conserve battery life.
Using external light sources
If you find that the built-in flash on your iPhone camera is not sufficient for your needs, you can consider using external light sources to improve the lighting conditions. Here are a few options you can explore:
1. Continuous LED lights
Continuous LED lights are a popular choice for photographers and videographers as they provide a constant source of lighting. They come in a variety of sizes and power options, allowing you to choose the one that best suits your needs. You can easily attach these lights to your iPhone using special accessories or stands.

2. Ring lights
Ring lights are circular-shaped lights that fit around the lens of your iPhone camera. They provide a soft and even light that helps eliminate shadows on your subject’s face. They are particularly popular for portrait photography and vlogging.
When using external light sources, make sure to position them in such a way that they enhance the lighting on your subject without causing glare or shadows. Experiment with different angles and distances to achieve the desired effect. Additionally, you can also use light modifiers such as diffusers or reflectors to further control the quality and direction of the light.
Remember that using external light sources may require some additional accessories or adapters to connect them to your iPhone camera. It’s important to check compatibility and ensure that the lighting setup is securely attached to your device.
Section 2: Steps to put light on iPhone camera
Adding light to your iPhone camera can be a useful feature when you need better visibility in low-light situations. Here are some steps to follow:
-
Step 1: Access the Control Center
Start by swiping up from the bottom of your iPhone screen to open the Control Center. The Control Center is a quick access menu that provides various settings and controls.
-
Step 2: Enable the Flashlight
Once the Control Center is open, you will see a flashlight icon at the bottom left corner of the screen. Tap on the flashlight icon to enable it. This will turn on the LED flash on your iPhone, which can be used as a torch.
-
Step 3: Position the Light Source
After turning on the flashlight, position the light source near the camera lens. This will provide additional light to your photos or videos and help improve visibility in low-light conditions.
-
Step 4: Adjust the Light Intensity
If the default brightness of the flashlight is too harsh, you can adjust the light intensity. Simply swipe up or down on the flashlight icon in the Control Center to increase or decrease the brightness accordingly.
-
Step 5: Use External Light Sources
If the built-in flashlight on your iPhone is not sufficient, you can consider using external light sources. There are various iPhone camera accessories available in the market, such as LED lights or clip-on light attachments, that can further enhance the lighting conditions.
By following these steps, you can easily put light on your iPhone camera and capture well-lit photos or videos even in dimly lit environments.

Step 1: Adjust the exposure level
One way to put light on your iPhone camera is by adjusting the exposure level. The exposure level determines how much light the camera sensor will capture, resulting in either brighter or darker photos.
To adjust the exposure level, follow these steps:
1. Open the Camera app
Launch the Camera app on your iPhone by tapping on the camera icon on your home screen or swiping left from the lock screen.
2. Tap to focus on your subject
When the camera app is open, choose the subject you want to photograph and tap on it. This will focus the camera on the selected subject and adjust the exposure level accordingly.
Note: The exposure level is automatically adjusted when you tap to focus, but you can also manually adjust it if needed.

3. Adjust the exposure slider
Once you have tapped to focus, you will see a yellow square or a sun icon next to the focus point. To manually adjust the exposure level, tap on the sun icon or the yellow square and slide your finger up or down on the screen.
Pro tip: Sliding your finger upwards will increase the exposure, making the photo brighter, while sliding downwards will decrease the exposure, making the photo darker.
By following these steps, you can easily adjust the exposure level on your iPhone camera and put more light on your photos.
Step 2: Use the iPhone flashlight
Another option for putting light on your iPhone camera is to utilize the built-in flashlight function. Here’s how you can do it:
- Access the Control Center by swiping down from the top right corner of your iPhone screen.
- Locate the flashlight icon, which looks like a small lightning bolt.
- Tap on the flashlight icon to toggle it on. This will activate the LED flash on the back of your iPhone.
- With the flashlight turned on, point the back of your iPhone towards the subject you want to capture.
- Open the Camera app.
- Take your photo or video as usual, and the flashlight will provide extra brightness to illuminate your subject.
This method can be especially useful when you need additional light in low-light situations, such as at night or in dimly lit environments. Just be mindful of the distance between your iPhone and the subject to avoid overexposure and harsh lighting.
FAQ
Can I add a light to my iPhone camera?
Yes, you can add a light to your iPhone camera. There are many external lights available in the market that can be attached to your iPhone. These lights provide additional lighting when taking photos or videos in low light conditions.
What is the best light for iPhone photography?
There are several great options for lights that can enhance your iPhone photography. Some popular choices include clip-on ring lights, portable LED lights, and studio lighting setups. The best light for you will depend on your specific needs and budget.


