
When it comes to keeping your home or business secure, security cameras are an essential tool. They provide an extra layer of protection by allowing you to monitor what’s happening at your property, even when you’re not there. And with the advent of the internet, setting up security cameras has never been easier.
Putting security cameras on the internet allows you to access live feeds and recorded footage remotely, from anywhere in the world. This means you can keep an eye on your property even when you’re on vacation or at work. In this article, we’ll walk you through the steps to connect your security cameras to the internet and ensure that your property stays safe and secure.
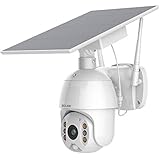
To put your security cameras on the internet, you’ll need a few things. First, you’ll need one or more security cameras. There are many different options available, ranging from simple wireless cameras to more advanced systems with multiple cameras and features such as night vision and motion detection. Choose the cameras that best suit your needs and budget.
Next, you’ll need a reliable internet connection. The cameras will transmit the video feed over the internet, so it’s important to have a stable and high-speed connection. A wired connection is generally more reliable than a wireless one, but if you’re using wireless cameras, make sure your Wi-Fi network is secure and password-protected to prevent unauthorized access.

Once you have your cameras and internet connection in place, you’ll need to install the cameras and configure them to connect to the internet. This typically involves connecting the cameras to a power source, mounting them in the desired locations, and following the manufacturer’s instructions to connect them to your Wi-Fi network or Ethernet router. You may also need to set up an online account or install software on your computer or smartphone to access the camera feeds.
Setting up security cameras for internet use
If you want to ensure the security of your home or office, setting up security cameras and connecting them to the internet can provide you with added peace of mind. By following a few simple steps, you can easily set up your security cameras for internet use.
Choose the right cameras
Before setting up your security cameras, it is important to select the right ones for your needs. Consider factors such as resolution, field of view, night vision capabilities, and whether the cameras are suitable for indoor or outdoor use. Once you have chosen the cameras, make sure they are compatible with internet connectivity.
Connect the cameras to your network
Start by connecting your security cameras to your network. Most cameras can be connected using an Ethernet cable or through Wi-Fi. If using an Ethernet cable, connect one end of the cable to the camera and the other end to your router or network switch. If using Wi-Fi, follow the manufacturer’s instructions to connect the camera to your network.
Once the cameras are connected to your network, you may need to configure the camera’s settings using the manufacturer’s software or app. This may include setting up a username and password for security purposes.

Set up port forwarding
In order to access your security cameras over the internet, you will need to set up port forwarding on your router. This allows the camera’s video feed to be accessible remotely. Consult your router’s manual for instructions on how to set up port forwarding. Typically, this involves accessing your router’s settings through a web interface and configuring the port forwarding settings.
Use a dynamic DNS service
If your internet service provider assigns you a dynamic IP address, which can change over time, you may need to use a dynamic DNS service. This service assigns a domain name to your IP address, allowing you to access your security cameras using a consistent URL, even if your IP address changes. There are many dynamic DNS service providers available, and their setup instructions will vary.
Access your cameras remotely
Once port forwarding and dynamic DNS are set up, you can access your security cameras remotely using a computer or mobile device. Open a web browser and enter the dynamic DNS domain name or your public IP address followed by the port number you set up for the cameras. You may be prompted to enter your username and password to view the cameras’ video feed.
It is important to note that setting up security cameras for internet use may pose security risks if not done properly. Ensure you keep your cameras’ software up to date, use strong passwords, and regularly monitor your network for any suspicious activity.
- Choose the right cameras
- Connect the cameras to your network
- Set up port forwarding
- Use a dynamic DNS service
- Access your cameras remotely
Choosing the appropriate security cameras
When it comes to setting up security cameras on the internet, choosing the right cameras for your specific needs is crucial. Here are some important factors to consider when selecting security cameras:

Resolution: The resolution of the camera determines the image quality it can provide. Higher resolution cameras produce clearer and more detailed images, allowing you to identify objects and people more easily. Consider your specific requirements and choose cameras with the appropriate resolution.
Field of view: The field of view refers to the area that the camera can capture. Determine the coverage area you need and choose cameras with the appropriate field of view to ensure maximum coverage.
Low light performance: If you need surveillance in low light conditions, consider cameras with good low light performance. Look for cameras with a low lux rating or infrared capabilities to ensure they can capture clear images even in dimly lit environments.
Remote access: Make sure the security cameras you choose offer remote access capabilities. This will allow you to monitor your cameras from anywhere using a mobile device or computer, providing you with peace of mind and the ability to react quickly if any suspicious activities are detected.
Weather resistance: If you plan to install cameras outdoors, ensure they have weather resistant features. Look for cameras with an IP rating that indicates their resistance to dust and water, ensuring they can withstand various weather conditions.

Storage: Determine how much storage capacity you require for your security footage. Consider whether you want to store the recordings locally or in the cloud. Choose cameras that offer the storage options that best align with your needs.
By considering these factors and choosing security cameras that meet your specific requirements, you can ensure effective surveillance and peace of mind when putting your security cameras on the internet.
Installing security cameras
Installing security cameras is an essential step in securing your property and monitoring activities. Follow these steps to set up your security cameras for internet access:
1. Decide on camera locations: Determine the areas you want to monitor and choose suitable locations for your cameras. Consider factors such as visibility, lighting, and coverage.
2. Purchase the right cameras: Select cameras that suit your needs, such as indoor or outdoor cameras, wired or wireless options, and resolution requirements.
![[3TB HDD+Vehcle/Human Detection]Hiseeu 5MP 8ch Wired Security Camera System Home CCTV Camera Security System w/8pcs Security Cameras Outdoor&Indoor,Remote Access,Motion Detect,Night Vision,24/7 Record](https://m.media-amazon.com/images/I/41w4nCtADFL._SL160_.jpg)
3. Plan the camera layout: Sketch a diagram of your property and indicate camera locations. Plan the wiring routes if using wired cameras.
4. Install power sources: Ensure that each camera has a power source nearby. Use electrical outlets or install power cables and adapters.
5. Mount the cameras: Follow the manufacturer’s instructions to mount the cameras securely. Use brackets, mounts, or screws to attach the cameras to walls, ceilings, or other surfaces.
6. Connect the cameras: If using wired cameras, run the necessary cables from each camera to the central recording location or switch. Connect the cables securely to avoid signal loss. For wireless cameras, follow the manufacturer’s instructions to connect them to your Wi-Fi network.
7. Configure the cameras: Access the camera’s settings interface via a computer or mobile device. Set up the camera’s internet connection, adjust the resolution and frame rate, and customize other settings based on your preferences.

8. Set up remote access: Configure the cameras to allow remote access over the internet. Set strong passwords and enable encryption to protect your camera feed from unauthorized access.
9. Test the system: Verify that the cameras are functioning correctly by accessing the live feed and testing various camera features. Make any necessary adjustments to optimize performance.
| Note: | If you are unsure about any aspect of the installation process, consult an expert or refer to the manufacturer’s documentation. |
By following these steps, you can successfully install security cameras and ensure that your property is well-protected and monitored.
Connecting Security Cameras to Internet
Security cameras are an essential component of any comprehensive security system. By connecting your security cameras to the internet, you can monitor your premises remotely and ensure the safety of your property at all times. In this guide, we will walk you through the steps of connecting your security cameras to the internet for seamless surveillance.
Step 1: Choose the Right Security Camera
Before you can connect your security cameras to the internet, it is crucial to choose the right camera for your needs. Consider factors such as resolution, field of view, night vision capabilities, and weatherproof features. Select a camera that aligns with your specific requirements and supports an internet connection.

Step 2: Set Up Your Network
Next, ensure that you have a stable and reliable internet connection. Set up your network router and configure it to provide a secure and steady Wi-Fi signal. Choose a strong password for your network to prevent unauthorized access.
Step 3: Connect Camera to Network
Once your network is ready, connect your security camera to the network. Most modern security cameras support Wi-Fi connectivity. Follow the manufacturer’s instructions to connect the camera to your network wirelessly. Make sure the camera is within the range of your Wi-Fi signal for optimal performance.
Step 4: Configure Camera Settings
After connecting the camera to the network, access its configuration settings. This can usually be done through a web interface or a dedicated mobile app provided by the camera manufacturer. Configure the camera’s settings, including network settings, resolution, motion detection, and recording preferences.
Step 5: Test Remote Access
Once the camera is properly configured, test remote access to confirm that you can view the camera’s feed from a remote location. Install the camera’s mobile app or access the web interface from a computer outside your network. Enter the necessary credentials to access the camera and ensure that the live feed is displaying correctly.
Step 6: Enhance Security
To ensure the safety of your camera feed, it is crucial to enhance its security. Change the default login credentials to unique and strong passwords. Enable encryption and authentication features, such as Secure Socket Layer (SSL) and two-factor authentication. Regularly update the camera’s firmware to protect against potential vulnerabilities.

| Benefits of Connecting Security Cameras to the Internet: |
|---|
| 1. Remote monitoring and access to live camera feeds |
| 2. Notification alerts for motion detection or unusual activity |
| 3. Ability to store camera footage in the cloud for easy access and backup |
| 4. Integration with other smart home devices |
| 5. Enhanced security through encryption and authentication features |
By following these steps and taking necessary security measures, you can successfully connect your security cameras to the internet. Enjoy the convenience and peace of mind that remote access and monitoring provide for your property.
Configuring security camera settings
To secure your property and keep an eye on things, it’s crucial to properly configure your security camera settings. Here are some steps to guide you:
1. Set up a secure network:
Before configuring your security cameras, make sure your network is secure. Set a strong password for your router, enable encryption, and change default login credentials. This will help prevent unauthorized access to your cameras and footage.
2. Connect the camera to your network:
Most security cameras can be connected to your network via Ethernet or Wi-Fi. Consult the camera’s manual to find the best method for your device. Once connected, assign a static IP address to your camera to ensure stability and ease of access.
3. Configure camera settings:
Access your camera’s settings interface through a web browser or manufacturer-provided software. Here you can tweak various settings, such as resolution, frame rate, and motion detection sensitivity. Be sure to enable encryption, set recording schedules, and configure alerts for maximum security.
4. Enable remote access:
If you want to view your camera’s live feed remotely, you’ll need to enable remote access. This typically involves setting up port forwarding in your router’s settings or using a cloud service provided by the camera manufacturer. Remember to change the default login credentials to further enhance security.
5. Regularly update firmware:
Manufacturers often release firmware updates to address security vulnerabilities and improve performance. Regularly check for firmware updates and install them to ensure your cameras are protected against the latest threats.
6. Test your setup:
Once you’ve configured your security camera settings, thoroughly test your setup to ensure everything is working correctly. Check the camera’s live feed, review recorded footage, and test any motion detection or alert features. Make any necessary adjustments for optimal performance.
By following these steps and regularly maintaining your security cameras, you can ensure the safety and security of your property.
Ensuring Security Camera Network Privacy
When setting up security cameras on the internet, it’s crucial to prioritize network privacy to protect sensitive information and maintain a secure environment. Here are some essential steps to ensure security camera network privacy:
1. Change Default Passwords: The first and most important step is to change the default passwords of your security cameras. Default passwords are widely known and can be easily exploited by unauthorized individuals. Create strong and unique passwords for each camera to prevent unauthorized access.
2. Regularly Update Firmware: Stay updated with the latest firmware releases from the camera manufacturer. Firmware updates often include security patches and improvements that enhance the overall security of your camera system. Regularly check for updates and install them promptly.
3. Use Encrypted Connections: Ensure that your security cameras use encrypted connections, such as SSL/TLS, when transmitting data over the internet. Encrypted connections provide an additional layer of security, making it difficult for attackers to intercept and decipher the transmitted data.
4. Implement Network Segmentation: Separate your security camera network from other devices on your home or business network. By implementing network segmentation, you can isolate the camera network, reducing the risk of unauthorized access to other critical devices or data within your network.
5. Secure Wi-Fi Networks: If your cameras connect to your Wi-Fi network, make sure you secure your Wi-Fi with a strong password and encrypted protocols such as WPA2. Restrict access to your Wi-Fi network by disabling guest networks and enabling MAC address filtering.
6. Regular System Audits: Periodically review your security camera system settings and configurations to ensure they align with your desired privacy and security requirements. Conducting system audits helps identify vulnerabilities or misconfigurations that may put your camera network at risk.
7. Limit Remote Access: Minimize remote access to your security camera network to authorized individuals only. Avoid exposing your camera system to the public internet if possible. If remote access is necessary, use secure methods such as Virtual Private Networks (VPNs) or secure remote access applications.
8. Disable Unnecessary Features: Disable any unnecessary features or services on your security cameras that you don’t use regularly. Disabling unused features reduces the attack surface and minimizes the risk of potential vulnerabilities that can be exploited by attackers.
9. Regularly Monitor and Review Log Files: Monitor and review the log files generated by your security cameras regularly. Log files can provide valuable insights into potential security breaches or suspicious activities. Promptly respond to any anomalies detected in the log files.
Conclusion
By following these steps, you can ensure the privacy and security of your security camera network. It’s important to consistently review and update your camera system’s security measures to stay ahead of potential threats and vulnerabilities.
Monitoring security cameras remotely
With the advancement of technology, it is now possible to monitor security cameras remotely from any location with an internet connection. This allows users to keep an eye on their properties at all times and ensure the safety and security of their premises.
Here are the steps to set up remote monitoring for security cameras:
1. Choose the right security camera system
Before setting up remote monitoring, it is important to choose the right security camera system. Look for a system that offers remote access and supports internet connectivity. Make sure the cameras have the necessary features such as high-resolution video, night vision, and motion detection.
2. Install the security cameras
Once you have chosen the right security camera system, install the cameras in the desired locations. Ensure that they have a clear view of the areas you want to monitor and are securely mounted.
3. Connect the cameras to the internet
To access the security cameras remotely, they need to be connected to the internet. This can be done by connecting the cameras to a Wi-Fi network or using an Ethernet cable to connect them directly to the router. Follow the manufacturer’s instructions to set up the internet connection for the cameras.
4. Set up remote viewing software
Once the cameras are connected to the internet, you need to set up remote viewing software on your computer or mobile device. This software allows you to access the cameras and view the live feed remotely. Follow the manufacturer’s instructions to install and configure the remote viewing software.
5. Secure the remote access
It is important to secure the remote access to the security cameras to prevent unauthorized access. Set up strong passwords for the cameras and the remote viewing software. Enable encryption if available and regularly update the software to ensure the latest security patches are installed.
6. Test the remote access
Before relying on the remote access for monitoring, test it to ensure everything is working correctly. Check if you can access the cameras from a different network and verify that the live feed is clear and stable.
| Advantages | Disadvantages |
|---|---|
| Ability to monitor properties from any location | Potential for technical issues that may affect remote access |
| Increased security and peace of mind | Dependence on internet connection for remote monitoring |
| Remote access to recorded footage | Possible privacy concerns |
By following these steps, you can easily set up remote monitoring for your security cameras and have peace of mind knowing that you can keep an eye on your property, even when you are not physically present.
FAQ,
What is the importance of putting security cameras on the internet?
Putting security cameras on the internet is important as it allows you to access and monitor your cameras remotely from any location. This means that you can keep an eye on your home or business even when you’re not physically there. It also provides you with a way to store and review footage, making it easier to identify any suspicious activity or potential threats.
How can I connect my security cameras to the internet?
To connect your security cameras to the internet, you will need to follow a few steps. First, make sure your cameras are compatible with internet connectivity. Then, connect the cameras to a network video recorder (NVR) or a digital video recorder (DVR) using Ethernet cables. Next, connect the NVR or DVR to your router using an Ethernet cable. Finally, configure your router to allow remote access to the cameras, either by using a dynamic DNS service or by opening the necessary ports on your router.
Are there any risks associated with putting security cameras on the internet?
Yes, there are some risks associated with putting security cameras on the internet. One of the main risks is the potential for unauthorized access to your cameras. If proper security measures are not in place, hackers may be able to gain access to your cameras and view your private footage. To minimize this risk, it is important to ensure that your cameras have strong passwords and that your network is secure. Additionally, keeping your cameras’ firmware up to date can help protect against known vulnerabilities.


