
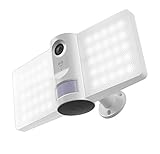
Genie security cameras are a reliable and efficient way to protect your home or business. However, there may be times when you need to reconnect your camera due to network issues or other technical difficulties. In this article, we will guide you through the steps to successfully reconnect your Genie security camera.
Firstly, ensure that you have a stable internet connection. A weak or unstable connection can lead to interruptions in the camera’s feed. Make sure that your Wi-Fi network is strong and functioning properly. If you are using an Ethernet connection, check the cables for any damage or loose connections.
Next, locate the power source for your Genie security camera and ensure that it is plugged in and receiving power. Check the power outlet and make sure it is working. If the camera is battery-powered, ensure that the batteries are properly installed and have enough charge.
If you have confirmed that the power and internet connections are stable, you can proceed to reconnect the Genie security camera. Open the Genie camera app on your device or access the camera’s web interface using a web browser. Follow the on-screen instructions to reconnect the camera to your network.
During the reconnection process, you may be prompted to input your Wi-Fi password or perform a factory reset on the camera. Follow the instructions provided carefully. Once the camera is successfully reconnected, you should be able to access the live feed and control the camera’s settings through the app or web interface.

In conclusion, reconnecting your Genie security camera is a straightforward process. By ensuring a stable internet connection, checking the power source, and following the provided instructions, you can easily restore the connection and continue monitoring your property with peace of mind.
How to Reconnect Genie Security Camera
If you are experiencing issues with your Genie security camera and need to reconnect it, follow these steps:
| Step | Description |
|---|---|
| 1 | Make sure that your Genie security camera is powered on and connected to a reliable power source. Check if the power cable is securely plugged in. |
| 2 | Ensure that your camera is connected to your Wi-Fi network. Check if the Wi-Fi signal is strong enough and if there are no obstacles blocking the connection. |
| 3 | If you are using a wireless camera, make sure that the camera’s antenna is properly attached and positioned for optimal signal reception. |
| 4 | Restart your Genie security camera by unplugging it from the power source, waiting for a few seconds, and plugging it back in. This can help resolve any temporary connectivity issues. |
| 5 | If you have changed your Wi-Fi network or router, you will need to update the camera settings. Refer to the camera’s user manual or the manufacturer’s website for specific instructions on how to do this. |
| 6 | If none of the above steps work, you may need to reset your Genie security camera to its factory settings. Again, consult the camera’s user manual or the manufacturer’s website for guidance on how to perform a reset. |
| 7 | If you are still unable to reconnect your Genie security camera, it is recommended to contact the manufacturer’s customer support for further assistance. They should be able to troubleshoot the issue and provide you with a solution. |
By following these steps, you should be able to reconnect your Genie security camera and ensure its proper functionality.
Check Power Connection
If your Genie security camera is not reconnecting, the first step is to check the power connection. A loose or disconnected power cable can prevent the camera from turning on and connecting to the network.
Start by verifying that the power adapter is properly plugged into an electrical outlet. Make sure there is power coming from the outlet by plugging in a different device. If the device receives power, move on to the next step.

Check Cable Connections
Inspect the power cable that connects the camera to the power adapter. Look for any signs of damage or fraying. Make sure the cable is securely connected to both the camera and the power adapter.
If the power cable appears to be damaged, it may need to be replaced. Contact the manufacturer or check the camera’s user manual for information on obtaining a replacement cable.
Power Cycle the Camera
If the power cable is in good condition and securely connected, try power cycling the camera. This can help resolve any temporary issues that may be causing the disconnection.
To power cycle the camera, disconnect the power cable from both the camera and the power adapter. Wait for about 10 seconds before reconnecting the cable. Plug the power adapter back into the electrical outlet and check if the camera reconnects.
If the camera still does not reconnect, there may be another issue causing the problem. In this case, it is recommended to contact the manufacturer’s customer support for further assistance.

Reset the Camera
If you are experiencing issues with your Genie security camera and need to reconnect it, resetting the camera may help resolve the problem. To reset the camera, follow these steps:
- Locate the reset button: The reset button is usually found on the back or bottom of the camera. It is a small, recessed button that can be pressed with a paperclip or similar tool.
- Press and hold the reset button: Use a paperclip or similar tool to press and hold the reset button for about 10 seconds.
- Release the reset button: After holding the reset button for 10 seconds, release it.
- Wait for the camera to reset: The camera will take a moment to reset itself. During this time, you may see the camera’s lights flashing.
- Reconnect the camera: Once the camera has finished resetting, you can proceed to reconnect it to your network using the Genie security camera’s app or software.
Note: Resetting the camera will erase any custom configurations or settings you may have previously set up. After the reset, you will need to set up the camera again as if it were new. Make sure to refer to the camera’s user manual or the manufacturer’s website for detailed instructions on how to reconnect the camera after resetting it.
Check Network Cable
Before attempting to reconnect your Genie security camera, it’s important to check the network cable connection to ensure it is properly connected and not damaged. This step is crucial as the camera won’t be able to establish a connection if the network cable is faulty.
To check the network cable, follow these steps:
- Locate the network cable that connects the camera to the router or network switch.
- Inspect the cable for any visible signs of damage such as cuts, frayed ends, or bent pins.
- If the cable appears to be damaged, replace it with a new one. Make sure to use a high-quality Ethernet cable suitable for your Genie security camera.
- If the cable is intact, firmly plug it back into the camera’s network port and the router or network switch port.
- Ensure that the cable is securely connected on both ends. Give it a slight tug to make sure it doesn’t come loose.
- Once the cable is securely connected, power on the camera and wait for it to go through the boot-up process.
After checking and properly connecting the network cable, proceed to reconnect the Genie security camera following the manufacturer’s instructions.

Verify Network Settings
Before reconnecting your Genie security camera, it is important to verify the network settings to ensure that the camera can connect to your network. Follow these steps to check the network settings:
- Access the camera’s settings by logging into the camera’s web interface. To do this, open a web browser and enter the camera’s IP address. You can find the IP address in the camera’s user manual or by using a network scanning tool.
- Once you have accessed the camera’s settings, navigate to the network settings section.
- Check the IP address, subnet mask, gateway, and DNS settings. Make sure they are correctly configured for your network. If you are unsure about the correct settings, you can contact your network administrator or internet service provider for assistance.
- If your camera supports Wi-Fi, make sure the Wi-Fi settings are also configured correctly. Check the SSID (network name), authentication type, and password.
- Ensure that the camera is on the same network as the device you are using to access its settings. If the camera and device are on different networks, they will not be able to communicate with each other.
Once you have verified the network settings, you can proceed with reconnecting your Genie security camera. Following these steps will help ensure a successful connection to your network and proper functioning of your security camera.
Update Firmware
Updating the firmware of your Genie security camera is an important task that ensures your camera is running the latest software version with added features, improvements, and bug fixes. Here are the steps to update the firmware:
Step 1: Check for Updates
First, you need to check if there is an available firmware update for your Genie security camera. Visit the Genie official website or check the Genie mobile app for any new firmware releases. It is recommended to regularly check for updates to keep your camera up to date.
Step 2: Download the Firmware
Once you have identified the latest firmware version for your camera, download the firmware file from the Genie website or app. Make sure to download the correct firmware version compatible with your specific camera model.

Step 3: Prepare the Firmware Update
Next, extract the firmware file from the downloaded package and save it to your computer. Connect your computer to the same network as the Genie security camera using an Ethernet cable or Wi-Fi connection.
Step 4: Access the Camera’s Web Interface
Open a web browser on your computer and enter the IP address of your Genie security camera. This will give you access to the camera’s web interface, where you can make configuration changes and update the firmware.
Step 5: Update the Firmware
Once you are logged into the camera’s web interface, locate the firmware update section. Click on the “Browse” or “Select File” button and navigate to the location where you saved the firmware file. Select the firmware file and click on the “Update” button to start the firmware update process.
Step 6: Wait for the Update
During the firmware update process, do not turn off the power to the camera or disconnect it from the network. Wait for the update to complete, which may take a few minutes. The camera will reboot after the update is finished.
Step 7: Verify the Update
After the camera has rebooted, log back into the web interface and check the firmware version to ensure that the update was successful. If the firmware version matches the latest version you downloaded earlier, then the update was successful.

| Troubleshooting Tips: |
|---|
| If the firmware update fails, try the following: |
| – Check if you have downloaded the correct firmware version. |
| – Ensure that your computer is properly connected to the camera’s network. |
| – Disable any firewall or antivirus software that may be blocking the update. |
| – Restart both the camera and your computer before attempting the update again. |
Restart Network Devices
One of the first troubleshooting steps when trying to reconnect your Genie security camera is to restart your network devices. This simple action can often resolve connectivity issues and help establish a stable connection between your camera and your network.
To restart your network devices, follow these steps:
Step 1: Power Off
Start by powering off your modem, router, and any other devices that are connected to your network. This can be done by unplugging them from the power source.
Step 2: Wait
Wait for at least 30 seconds before proceeding to the next step. This allows enough time for the devices to fully power off and reset.
Step 3: Power On
After the waiting period, plug in your modem, router, and other network devices back into the power source. Wait for them to fully boot up and establish a connection.

If you have any additional devices that extend or boost your network, such as Wi-Fi extenders or repeaters, make sure to restart them as well.
Once your network devices are powered on and connected, check if your Genie security camera has regained its connection. If not, you can move on to other troubleshooting steps or consult the camera’s user manual for further instructions.
Note: It’s also a good idea to check if your network devices are running the latest firmware or software updates. Updating them to the latest version can often fix any known bugs or vulnerabilities that may be causing connectivity issues.
In conclusion, restarting your network devices is a simple yet effective step in reconnecting your Genie security camera. By power cycling your modem, router, and other network devices, you can often resolve common connectivity problems and establish a stable connection between your camera and your network.
Troubleshoot Wi-Fi Signal
If you’re having trouble reconnecting your Genie security camera, it may be due to a weak Wi-Fi signal. Here are some steps to troubleshoot and improve your Wi-Fi signal:
1. Check Wi-Fi Signal Strength
Start by checking the Wi-Fi signal strength on your camera. The signal strength should be at least 70% for a reliable connection. If the signal is weak, you may need to move your camera closer to your Wi-Fi router or consider using a Wi-Fi range extender.
2. Move Your Router
Relocating your Wi-Fi router to a central location in your home can help improve the signal strength. Avoid placing the router near large metal objects or walls that can block the signal. Additionally, ensure that there are no other electronic devices or appliances interfering with the router’s signal.
3. Change Wi-Fi Channel
If your Wi-Fi signal is being interfered with by other nearby networks, changing the Wi-Fi channel on your router may help. Log in to your router’s admin panel and navigate to the Wi-Fi settings. Try switching to a less crowded channel to avoid interference.
4. Update Router Firmware
Ensuring that your router’s firmware is up to date can also help improve Wi-Fi signal strength and stability. Check the manufacturer’s website for any available firmware updates and follow their instructions to update your router.
5. Reset Wi-Fi Settings
If all else fails, you can try resetting the Wi-Fi settings on your Genie security camera. Consult the camera’s manual or contact the manufacturer for specific instructions on how to do this. After resetting the Wi-Fi settings, go through the initial setup process again to reconnect the camera to your Wi-Fi network.
By following these troubleshooting steps, you should be able to improve your Wi-Fi signal and successfully reconnect your Genie security camera.
| Problem | Solution |
|---|---|
| Weak Wi-Fi signal | Move camera closer to router or use a range extender |
| Signal interference | Change Wi-Fi channel or relocate router |
| Outdated router firmware | Update router firmware |
| Camera not connecting | Reset Wi-Fi settings on camera |
Contact Genie Support
If you are experiencing any issues while reconnecting your Genie Security Camera, it is recommended to reach out to Genie Support for assistance. Their dedicated support team is available to guide you through the process and troubleshoot any problems you may encounter.
To get in touch with Genie Support, you can follow the steps below:
Step 1: Visit the Genie Security website
Go to the official Genie Security website by typing “www.geniesecurity.com” in your web browser’s address bar and hit Enter.
Step 2: Navigate to the Support section
Once you are on the Genie Security website, look for the “Support” or “Contact” section. It is usually located in the top or bottom navigation menu.

Step 3: Find the contact information
Within the Support section, you should find the contact information for Genie Support. This may include a phone number, email address, or a contact form that you can fill out with your query.
Step 4: Reach out to Genie Support
Choose the method of contact that is most convenient for you and reach out to Genie Support. Provide them with a detailed description of the issue you are facing while reconnecting your Genie Security Camera.
By contacting Genie Support, you will receive expert guidance and assistance to help you resolve the issue and reconnect your security camera successfully.
Look for Professional Help
If you have tried all the troubleshooting steps mentioned above and still cannot reconnect your Genie security camera, it may be time to seek professional help. Sometimes, technical issues can be complex and require the expertise of a trained technician.
By consulting a professional, you can ensure that your Genie security camera is properly configured and connected to your network. They can diagnose any potential hardware or software issues and provide a solution that best fits your specific situation.
Professional technicians have the necessary tools and knowledge to troubleshoot and resolve any connectivity problems with your Genie security camera. They can also offer guidance on how to prevent similar issues in the future, ensuring that your camera remains operational and secure.
When looking for professional help, make sure to choose a reputable and experienced technician or company. You can ask for recommendations from friends, family, or online forums. Take the time to research and read customer reviews to ensure that you are choosing a reliable professional who can provide the assistance you need.
While it may involve an additional cost, seeking professional help can save you time and frustration in the long run. It will give you peace of mind knowing that your Genie security camera is properly connected and working as intended.


