
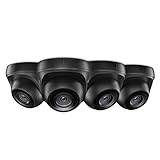
If you own a Sannce 1080p security camera, you may be wondering how to record the footage it captures. Having the ability to record and store the footage from your security camera is crucial for monitoring your property and keeping your loved ones safe. In this article, we will guide you through the process of recording using your Sannce 1080p security camera.
Step 1: Set up your Sannce 1080p security camera
Before you can start recording, you need to set up your Sannce 1080p security camera. Follow the manufacturer’s instructions to mount the camera in the desired location and connect it to your Wi-Fi network. Make sure you have a stable internet connection to ensure smooth and uninterrupted recording.
Step 2: Download the Sannce Vision app
The Sannce Vision app is the key to recording and accessing the footage from your Sannce 1080p security camera. Download the app from the App Store or Google Play Store, depending on your smartphone’s operating system. Install the app and grant it the necessary permissions.

Step 3: Connect your camera to the Sannce Vision app
Launch the Sannce Vision app on your smartphone and follow the on-screen instructions to connect your Sannce 1080p security camera. Make sure your smartphone is connected to the same Wi-Fi network as your camera. Once connected, you should see the live feed from your camera on the app’s home screen.
Step 4: Enable recording on the Sannce Vision app
Now that your camera is connected to the Sannce Vision app, it’s time to enable recording. Go to the app’s settings and look for the “Recording” or “Storage” option. From there, you can set the desired recording mode, such as continuous recording or motion-triggered recording. You can also adjust the recording quality and storage options.
Step 5: Access and manage recorded footage

Once your Sannce 1080p security camera starts recording, you can access and manage the recorded footage through the Sannce Vision app. Simply go to the app’s playback or video gallery section to view and download the recorded videos. You can also delete or share the footage directly from the app.
By following these steps, you can easily record footage from your Sannce 1080p security camera and ensure the safety and security of your property. Remember to regularly check and manage your recorded footage to stay informed about any activities in the monitored area.
How to Record Sannce 1080p Security Camera
If you have a Sannce 1080p security camera and want to learn how to record footage, this guide will walk you through the process step by step.
Step 1: Set up your Sannce 1080p security camera
The first step is to properly set up your Sannce 1080p security camera. Follow the manufacturer’s instructions to ensure it is correctly installed and connected to your network.
Step 2: Access the camera’s interface
To record footage from your Sannce 1080p security camera, you need to access its camera interface. Open a web browser on your computer and enter the IP address of the camera into the address bar.

Step 3: Log in to the camera
Once you have accessed the camera’s interface, you will be prompted to log in. Enter the username and password that you set during the initial setup process.
Step 4: Navigate to the recording settings
Once logged in, navigate to the recording settings section of the camera’s interface. This may be located under the “Settings” or “Configuration” tab.
Step 5: Configure the recording options
Within the recording settings, you will have options to configure how and when the camera records. Choose the desired recording mode (continuous, motion detection, or scheduled) and adjust the settings according to your preferences.
Step 6: Set up storage
Before you can start recording, you need to set up storage for the footage. This can be done by inserting a memory card into the camera or connecting an external storage device, such as a hard drive or network-attached storage (NAS) device.
Step 7: Start recording
Once the recording settings and storage have been configured, you can start recording. Simply click the “Start Recording” button or enable the recording mode you have chosen.

That’s it! Your Sannce 1080p security camera will now begin recording according to the settings you have chosen. Remember to regularly check the recording and storage status to ensure everything is functioning properly.
Setting Up Your Sannce 1080p Security Camera
Installing a Sannce 1080p security camera is a great way to enhance the security of your home or office. By following the simple steps below, you can have your camera up and running in no time.
Step 1: Unboxing and Checking Contents
Start by unboxing your Sannce 1080p security camera and checking the contents of the package. Make sure you have all the necessary components, including the camera, power adapter, Ethernet cable, and mounting hardware.
Step 2: Mounting the Camera
Decide on the best location for your security camera. It is recommended to place it high up and out of reach to deter tampering. Use the included mounting hardware to attach the camera securely to a wall or ceiling.
Step 3: Connecting the Camera
Connect the camera to a power outlet using the provided power adapter. Then, use the Ethernet cable to connect the camera to your router or network switch. Make sure to follow the instructions provided with your camera for the specific setup process.

Step 4: Configuring the Camera
Once the camera is connected, you need to configure it. This typically involves accessing the camera’s settings through a web interface. Follow the instructions provided with your camera to access the settings and customize them according to your preferences.
Step 5: Testing the Camera
After configuring the camera, it’s important to test it to ensure everything is working correctly. Use a smartphone or computer to access the camera’s live feed and check the video quality. Make any necessary adjustments to the camera’s positioning or settings if needed.
With these simple steps, you can easily set up your Sannce 1080p security camera and start enjoying enhanced security for your property. Remember to consult the user manual or contact Sannce support if you encounter any difficulties during the setup process.
Connecting Your Sannce 1080p Security Camera to a Recording Device
If you have a Sannce 1080p security camera and want to record the footage it captures, you will need to connect the camera to a recording device. This can be done in several simple steps.
Step 1: Choose a suitable recording device.

There are various options available for recording the footage from your Sannce 1080p security camera. You can use a DVR (Digital Video Recorder), an NVR (Network Video Recorder), or even a computer with specialized video recording software. Consider your specific needs and budget when selecting a recording device.
Step 2: Connect the camera to the recording device.
Using the provided cables, connect the output port of your Sannce 1080p security camera to the input port of your chosen recording device. Make sure to tighten the connections to ensure a stable and reliable connection.
Step 3: Configure the recording device.
Once the camera is physically connected to the recording device, you will need to configure the settings on the recording device to enable recording from the Sannce 1080p security camera. This may involve setting up the camera channels, establishing the camera as a source, and adjusting the recording schedule or motion detection settings.
Step 4: Test the setup.
After configuring the recording device, test the setup by checking if the camera’s footage is being recorded properly. Monitor the recording device’s interface or playback options to ensure that the camera’s footage is being captured as expected.
Step 5: Adjust settings as needed.
If you encounter any issues or want to make changes to the recording settings, refer to the user manual or online resources provided by the manufacturer of the recording device. Make any necessary adjustments to ensure optimal recording performance.
Following these steps, you can easily connect your Sannce 1080p security camera to a recording device and start capturing the valuable footage it captures. Enjoy the peace of mind knowing that your security camera is recording and protecting your home or business.
Choosing the Right Recording Device for Your Sannce 1080p Security Camera
When it comes to keeping your property safe and secure, a Sannce 1080p security camera is an excellent choice. With its high-definition video quality and advanced features, it provides you with peace of mind knowing that your property is being monitored. However, in order to make the most of your security camera, you need to choose the right recording device to store and access your footage.
Here are a few factors to consider when selecting the recording device for your Sannce 1080p security camera:
Storage Capacity: Look for a recording device that offers ample storage capacity to store your video footage. The size of the storage device will depend on the number of cameras you have and how long you want to keep the recordings.
Connectivity Options: Check if the recording device has different connectivity options, such as Ethernet or Wi-Fi, to ensure seamless communication with your Sannce 1080p security camera. This will allow you to easily access the footage from your computer or smartphone.
Remote Access: Opt for a recording device that offers remote access functionality. This feature will enable you to view your camera’s live feed and access recorded footage from anywhere in the world, as long as you have an internet connection.
Backup Options: It’s always a good idea to choose a recording device that allows for automatic backups. This way, you can rest assured that your footage is safe, even in the event of a power outage or system failure.
User-Friendly Interface: Look for a recording device with a user-friendly interface. It should be easy to navigate and set up, allowing you to quickly access the features and settings you need.
By taking these factors into consideration, you can select the right recording device for your Sannce 1080p security camera. This will ensure that you have a reliable and efficient system in place to monitor and protect your property.
Configuring the Recording Settings for Your Sannce 1080p Security Camera
Setting up the recording settings for your Sannce 1080p security camera is an important step in ensuring that you capture the footage you need for monitoring and surveillance purposes. By properly configuring the settings, you can customize when and how your camera records, ensuring that you never miss any important events.
Accessing the Configuration Interface
To configure the recording settings on your Sannce 1080p security camera, you will need to access the configuration interface. This can typically be done by entering the camera’s IP address into a web browser on a computer connected to the same network as the camera.
Configuring the Recording Schedule
Once in the configuration interface, navigate to the recording settings section. Here, you can set up a recording schedule that suits your needs. You can specify specific days and times when you want the camera to record, or you can choose continuous recording if you prefer to capture footage around the clock.
You may also have the option to enable motion detection recording. When enabled, the camera will only record when it detects motion in its field of view. This can be useful for conserving storage space and only capturing relevant footage.
Adjusting the Recording Quality and Resolution
In the recording settings section, you may also be able to adjust the quality and resolution of the recorded footage. Higher quality settings will result in larger file sizes and may require more storage space, but they will also provide clearer and more detailed video. Find the balance that works best for your needs.
Reviewing and Managing Recorded Footage
Finally, make sure to set up a storage location for the recorded footage and establish a regular reviewing and management process. This can involve backing up the footage to a separate storage device or cloud storage, as well as deleting unnecessary footage to free up space for new recordings.
| Recording Setting | Description |
|---|---|
| Recording Schedule | Set specific days and times for the camera to record or choose continuous recording. |
| Motion Detection | Enable motion detection recording to capture footage only when motion is detected. |
| Recording Quality | Adjust the quality setting to balance file size and video clarity. |
| Storage Management | Establish a process for reviewing and managing recorded footage, including storage backup and deletion. |
Securing the Recorded Footage from Your Sannce 1080p Security Camera
When it comes to the security of your home or business, the footage recorded by your Sannce 1080p security camera is invaluable. However, it’s important to take steps to secure this footage to prevent unauthorized access and ensure its integrity. Here are some tips to help you secure the recorded footage from your Sannce 1080p security camera:
Create Strong Passwords
One of the simplest yet most effective ways to secure the recorded footage is to create strong, unique passwords for your Sannce 1080p security camera system. Avoid using common passwords or personal information that can be easily guessed. Instead, use a combination of uppercase and lowercase letters, numbers, and symbols. Regularly update your passwords to stay one step ahead of potential threats.
Enable Encryption
Enabling encryption on your Sannce 1080p security camera system adds an extra layer of security to your recorded footage. Encryption ensures that the data is scrambled and can only be unscrambled with the proper encryption key. This makes it much more difficult for hackers to access the footage even if they manage to gain unauthorized access to your system.
Keep Firmware Updated
Regularly updating the firmware of your Sannce 1080p security camera system is crucial for maintaining its security. Firmware updates often include security patches that address known vulnerabilities. By keeping your firmware up to date, you can ensure that your system is protected against the latest threats.
Limit Access to the System
Controlling access to your Sannce 1080p security camera system is essential for securing the recorded footage. Only grant access to trusted individuals who have a legitimate need for accessing the footage. Consider implementing multi-factor authentication to further protect against unauthorized access.
In conclusion, securing the recorded footage from your Sannce 1080p security camera is vital for maintaining the privacy and integrity of your surveillance system. By following these tips, you can enhance the security of your footage and ensure that it remains protected from unauthorized access.
Backing Up the Recorded Footage from Your Sannce 1080p Security Camera
Once you have set up your Sannce 1080p security camera and started recording, it’s essential to back up the recorded footage regularly to ensure its safety and easy access. In this guide, we will walk you through the process of backing up the recorded footage from your Sannce 1080p security camera.
Step 1: Prepare a Storage Device
Before you can begin backing up the footage, you will need to have a storage device ready. This can be an external hard drive, a USB flash drive, or a network-attached storage (NAS) device. Ensure that the storage device has enough space to accommodate the recorded footage.
Step 2: Connect the Storage Device to Your Computer
Connect the storage device to your computer using the appropriate cable or port. Ensure that the device is recognized by your computer and accessible. If necessary, install any drivers or software provided by the manufacturer to enable the connection.
Step 3: Locate the Recorded Footage
Access the recorded footage on your Sannce 1080p security camera. This can usually be done through a web-based interface or a dedicated app provided by the manufacturer. Navigate to the storage location where the footage is stored.
Step 4: Copy the Footage to the Storage Device
Select the desired footage files or folders and copy them to the connected storage device. You can do this by right-clicking on the files or folders and choosing the “Copy” option, then paste them into the storage device’s folder or directory.
Step 5: Verify the Backup
Once the copying process is complete, safely disconnect the storage device from your computer. Before proceeding, it is recommended to verify the backup by opening some of the copied footage on a different device to ensure that it plays correctly.
Congratulations! You have successfully backed up the recorded footage from your Sannce 1080p security camera. By regularly following this process, you can ensure that your footage is safe and easily accessible whenever you need it.
Accessing and Viewing the Recorded Footage from Your Sannce 1080p Security Camera
After setting up your Sannce 1080p security camera, you may want to access and view the recorded footage for surveillance or evidentiary purposes. Here are the steps to follow:
Step 1: Install the software
Begin by installing the software or app provided by Sannce for accessing your security camera. You can find it on their website or through an app store on your mobile device.
Step 2: Connect to your camera
Open the app or software and log in using your account details or create a new account if you haven’t already. After logging in, you will be prompted to add your Sannce 1080p security camera to the app.
Step 3: Configure camera settings
Once your camera is connected, you may need to configure the settings. This includes naming your camera, adjusting video quality, enabling motion detection, and setting up recording schedules. Make sure to save the changes when you are done.
Step 4: Access the recorded footage
With your camera set up, you can now access the recorded footage. Open the app or software and navigate to the camera’s feed. Look for a playback or recorded footage option, usually indicated by a calendar or timeline icon.
Step 5: View and search footage
In the playback or recorded footage section, you can view and search through the recorded videos. Depending on the app or software, you may have various options such as selecting a specific date and time or using a search tool to find specific events or activities.
Step 6: Download or save footage
If you need to save or download any of the recorded footage, most apps or software allow you to do so. Look for options like “Save” or “Download” that will export the footage to your device’s storage.
Step 7: Adjust playback settings
While viewing the recorded footage, you can adjust the playback settings. These settings may include options like zooming in, adjusting playback speed, or toggling between multiple camera views if you have more than one Sannce 1080p security camera.
By following these steps, you can easily access and view the recorded footage from your Sannce 1080p security camera. Remember to consult the user manual or the Sannce website for specific instructions related to your camera model.
Troubleshooting Recording Issues with Your Sannce 1080p Security Camera
If you are experiencing difficulties with recording on your Sannce 1080p security camera, there are a few steps you can take to troubleshoot the issue. Below are some common problems and their solutions:
- No recordings are being saved:
- Check if the recording storage device, such as an SD card or a hard drive, is correctly installed and has sufficient space.
- Ensure that the storage device is properly formatted and compatible with your camera.
- Verify that the recording settings are configured correctly. Access the camera’s menu settings and make sure recording is enabled for the desired time intervals.
- Restart the camera and check if the issue persists.
- If the problem continues, try using a different storage device to determine if the original one is faulty.
- Recordings are choppy or freeze:
- Check your internet connection. A stable and high-speed connection is essential for smooth video playback.
- Make sure that the camera’s firmware is up to date. Visit the Sannce website and download any available firmware updates for your model.
- Reduce the number of simultaneous recordings. Multiple recordings can strain the camera’s resources and cause performance issues.
- Ensure that the camera is not overheating. High temperatures can affect the camera’s performance and cause video interruptions.
- Recordings are blurry or low quality:
- Check the camera lens for any dirt, dust, or smudges. Clean the lens gently with a microfiber cloth.
- Adjust the focus or zoom settings if your camera allows manual adjustments.
- Verify that the camera resolution is set to 1080p. Lower resolutions may result in reduced video quality.
- If your camera supports it, enable any image enhancement features that can improve the clarity of the recordings.
If you have exhausted all troubleshooting steps and are still experiencing issues with recording on your Sannce 1080p security camera, it may be necessary to contact Sannce customer support for further assistance. They will be able to provide tailored troubleshooting solutions or arrange for a repair or replacement if needed.
Tips and Tricks for Enhancing the Recording Quality of Your Sannce 1080p Security Camera
If you want to improve the recording quality of your Sannce 1080p security camera, there are a few tips and tricks you can try. These simple adjustments can enhance the clarity and accuracy of the footage captured by your camera, giving you better surveillance capabilities.
1. Positioning Your Camera
The positioning of your camera plays a significant role in the quality of the recorded footage. Make sure to mount the camera at an optimal height and angle to capture the desired area effectively. Avoid obstructions such as walls or trees that may interfere with the camera’s view.
2. Adjusting Camera Settings
Take advantage of the camera’s settings to optimize the recording quality. Adjust the resolution to the highest available option, which is typically 1080p for a Sannce 1080p security camera. You can also experiment with other settings such as brightness, contrast, and saturation to find the best balance for your specific environment.
| Setting | Tips |
|---|---|
| Brightness | Increase for low light conditions, decrease for bright areas. |
| Contrast | Adjust to enhance the difference between light and dark areas. |
| Saturation | Find the best level to avoid over-saturation or washed-out colors. |
3. Proper Lighting
Ensure that your camera has adequate lighting to capture clear footage. Install proper outdoor lighting if necessary, or consider using infrared illuminators for night vision capabilities. Avoid positioning the camera directly facing bright light sources, as this can cause glare and affect the image quality.
4. Regular Cleaning and Maintenance
Keep your camera lens clean and free from dirt, dust, or any other obstructions. Regularly check for any loose connections or physical damages. Clean the lens with a microfiber cloth and use compressed air to remove any debris that may accumulate over time. Regular maintenance can help maintain the camera’s performance and image quality.
By following these tips and tricks, you can enhance the recording quality of your Sannce 1080p security camera, allowing you to capture clear and accurate footage for your surveillance needs.
FAQ,
What is the best way to record Sannce 1080p security camera footage?
There are a few options for recording Sannce 1080p security camera footage. One option is to use a digital video recorder (DVR) that is compatible with the camera. This allows you to easily store and access the recorded footage. Another option is to connect the camera to a computer or laptop and use software to record and save the footage. Additionally, some Sannce cameras have built-in SD card slots, which allow you to record directly to an SD card.
Can I record Sannce 1080p security camera footage on a cloud storage?
Yes, it is possible to record Sannce 1080p security camera footage on a cloud storage. However, this will require a compatible cloud storage service that supports video recording. You will need to set up an account with the cloud storage provider and follow their instructions for connecting your camera and configuring the recording settings. Keep in mind that cloud storage may require a subscription fee and may have limitations on the amount of storage available.
How much storage space is needed to record Sannce 1080p security camera footage?
The amount of storage space needed to record Sannce 1080p security camera footage depends on several factors, including the length of time you wish to retain the footage and the video compression settings of the camera. In general, 1080p footage will take up more storage space compared to lower resolution footage. As a rough estimate, you can expect to use around 1-2 gigabytes of storage space per hour of recorded footage. It’s always a good idea to have ample storage space available to avoid running out of storage unexpectedly.
What are the recommended video compression settings for recording Sannce 1080p security camera footage?
The recommended video compression settings for recording Sannce 1080p security camera footage will depend on your specific needs and preferences. However, a commonly used compression format for high-quality video recording is H.264. This format provides a good balance between video quality and file size. It’s also worth considering the frame rate and bitrate settings of the camera. Higher frame rates and bitrates will result in smoother and more detailed footage, but will also require more storage space. Ultimately, it’s important to test different settings and find the right balance for your needs.
Can I access and view the recorded Sannce 1080p security camera footage remotely?
Yes, it is possible to access and view the recorded Sannce 1080p security camera footage remotely. Many Sannce cameras come with mobile apps or web interfaces that allow you to remotely connect to the camera and view the live or recorded footage. To do this, you will need to set up the camera for remote access, typically by configuring port forwarding on your router and creating an account with the camera manufacturer’s cloud service. Once set up, you can access the footage from anywhere using your smartphone, tablet, or computer.


