If you’re a photography enthusiast who loves using a mirrorless camera, dealing with dust on your camera’s sensor can be a frustrating and time-consuming task. Dust particles can find their way into your camera body and settle on the sensor, leading to unsightly spots on your images. However, learning how to properly remove dust from your mirrorless camera can help you maintain the quality of your photographs.
The first step in removing dust from your mirrorless camera is to ensure you have a clean and controlled environment. Dust particles are more likely to settle on your camera’s sensor in a dusty environment, so it’s important to work in a clean area. Choose a room with minimal dust and close any windows or doors to prevent dust from entering.
Next, you’ll want to prepare your camera for cleaning. Start by turning off your camera and removing the lens. This will expose the sensor, which is where the dust particles may have settled. It’s important to handle the sensor with care, as it is a delicate and sensitive component.
Once you’re ready to clean the sensor, you’ll need a few tools. One of the most commonly used tools is a blower brush, which can help remove loose dust particles. Gently use the blower brush to blow air onto the sensor, moving in a smooth and controlled motion. Be careful not to touch the sensor with the brush, as this can cause damage.

In conclusion, learning how to effectively remove dust from your mirrorless camera is essential for maintaining the quality of your photographs. By working in a clean environment, preparing your camera properly, and using the right tools, you can keep your camera’s sensor dust-free and ensure your images are clear and spotless.
Preparing the camera
Before you begin removing dust from your mirrorless camera, it’s important to properly prepare the camera to ensure that you don’t damage any sensitive components. Follow these steps:
Gather the necessary tools:
- Microfiber cloth or lens cleaning paper
- Camera blower brush
- Cleaning solution specifically designed for camera lenses (if needed)
- Cotton swabs (optional)
Choose a clean and dust-free area:
Find a well-lit area with minimal airflow to minimize the chances of additional dust particles settling on the camera while you’re working on it.
Turn off the camera:
Make sure the camera is turned off before you start cleaning to avoid any accidental button presses or damage to the camera’s internal components.
Remove the lens:
If you have a lens attached to your mirrorless camera, carefully remove it by pressing the lens release button and twisting the lens counterclockwise.
![MRGLAS 2+2 Packs for Samsung Galaxy S22 Ultra Privacy Screen Protector 6.8" with Camera Lens Protector [Auto Alignment Cabin/Dust Removal] Anti Spy Film, 100% Fingerprint ID Compatible, Case Friendly](https://m.media-amazon.com/images/I/514+qStUQcL._SL160_.jpg)
Inspect the lens and camera body:
Take a close look at both the lens and camera body to identify any visible dust or dirt particles. This will help you determine the areas that require cleaning.
By properly preparing your camera before cleaning, you’ll minimize the risk of causing any damage and ensure a more effective dust removal process.
Removing the lens
To remove dust from your mirrorless camera, you first need to remove the lens. Follow these steps to safely detach the lens from your camera:
- Turn off the camera: Before removing the lens, make sure your camera is turned off to avoid any damage.
- Release the lens lock: Locate the lens release button on your camera body. Press and hold the button, then rotate the lens counterclockwise to unlock it.
- Gently remove the lens: Hold the camera body with one hand and use your other hand to support the lens. Carefully pull the lens away from the camera body while keeping it level to avoid any unnecessary motion.
- Protect the lens and camera body: Once the lens is detached, it’s essential to protect both the lens and camera body from dust and debris. Place a lens cap on the back of the lens and a body cap on the camera body.
With the lens removed, you can now proceed to clean the sensor and other parts of your mirrorless camera to remove any dust particles.

Identifying the Dust Spots
When cleaning the mirrorless camera, it is important to first identify the dust spots that need to be removed. Dust spots are small particles that have settled on the camera’s sensor, lens, or other internal components. They usually appear as black or dark spots in the images captured by the camera.
Here are a few methods to help you identify the dust spots:

- Visual Inspection: Carefully examine the images taken with your camera, especially those captured with a small aperture or a bright background. Zoom in on the images on a computer or tablet screen to get a better view of any dust spots. Look for tiny black dots that appear consistently in multiple images.
- Manual Sensor Cleaning: If you suspect dust on the camera’s sensor, follow the manufacturer’s instructions to access and inspect the sensor. Use a magnifying glass and a bright light source to examine the sensor surface for any visible dust particles.
- Dust Mapping: Some mirrorless cameras have a feature called “sensor dust mapping” that creates a map of any dust spots on the sensor. Refer to your camera’s user manual to see if this feature is available and how to access it. This can be a helpful tool to identify and locate dust spots.
Once you have identified the dust spots, you can proceed with the appropriate cleaning method to remove them from your mirrorless camera.
Using a blower
One of the safest and most effective tools for removing dust from a mirrorless camera is a blower. A blower is a small device that uses a burst of air to dislodge dust particles from the camera’s surface. It is important to use a blower specifically designed for camera cleaning to avoid introducing additional contaminants that could damage the sensor or lens.
To use a blower, follow these steps:
| Step | Description |
|---|---|
| 1 | Switch off the camera and remove any lenses. |
| 2 | Hold the camera with the lens mount facing downwards to prevent dust from falling back onto the sensor. |
| 3 | Remove the lens cap from the blower and ensure that it is clean and free of debris. |
| 4 | Gently squeeze the blower to expel a burst of air, aiming it at the camera’s sensor or lens. |
| 5 | Repeat the process as necessary, using short bursts of air to avoid introducing moisture or other contaminants. |
| 6 | Inspect the camera’s sensor or lens for any remaining dust particles. If necessary, repeat the blowing process or use other cleaning methods. |
Using a blower is a quick and easy way to remove dust from a mirrorless camera without the need for direct contact or harsh cleaning solutions. However, it is important to exercise caution and avoid using excessive force, as this could cause damage to the camera’s delicate components.
Cleaning the Sensor
If you notice dust or debris on your mirrorless camera’s sensor, it’s important to clean it properly to ensure the best image quality. Cleaning the sensor can be a delicate process, so be sure to follow these steps carefully:

- Turn off the camera: Before cleaning the sensor, turn off your camera to avoid any accidental damage.
- Use a blower: Start by using a blower to remove any loose dust or particles on the sensor’s surface. Hold the camera with the lens mount facing downward and gently squeeze the blower’s bulb to release a stream of air onto the sensor. This should dislodge most of the loose dust.
- Clean with a sensor cleaning swab: If the blower doesn’t remove all the dust, you can use a sensor cleaning swab to gently wipe the sensor’s surface. Make sure to use a swab specifically designed for camera sensors and follow the instructions provided by the manufacturer. Apply a few drops of sensor cleaning solution to the swab and then, while holding the camera with the lens mount facing downward, carefully swipe the swab across the sensor in one smooth motion. Avoid applying too much pressure or wiping the same area multiple times, as this can cause damage.
- Inspect the sensor: After cleaning, inspect the sensor to check if all the dust has been removed. You can do this by using the camera’s built-in sensor cleaning function or by taking a test shot of a blank white surface and zooming in to check for any remaining dust spots.
Note: If you’re unsure about cleaning the sensor yourself, it’s always best to consult a professional camera technician to avoid any potential damage.
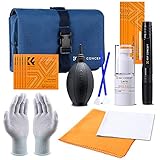
Using a sensor cleaning kit
If you prefer a hands-on approach and want to clean your mirrorless camera’s sensor yourself, you can use a sensor cleaning kit. This kit typically includes a blower, sensor cleaning swabs, and a cleaning solution.
Before you begin, make sure to turn off your camera and remove the lens. It’s also a good idea to fully charge your camera battery, as the cleaning process may take some time.
1. Start by using the blower to remove any loose dust or debris from the camera sensor. Hold the camera upside down to prevent any dust from falling back in.
| Camera Sensor | |
| Dust or debris |
2. Once you’ve blown away the loose dust, carefully remove a sensor cleaning swab from its packaging. Make sure to only touch the handle of the swab and avoid touching the cleaning surface.

3. Apply a few drops of the cleaning solution to the swab, making sure to follow the manufacturer’s instructions. Too much solution can cause streaks on the sensor, so use it sparingly.
4. Gently wipe the swab across the camera sensor in one direction, from top to bottom. Avoid applying too much pressure, as this could damage the sensor.
5. After swiping across the sensor, dispose of the used swab and repeat the process if necessary. It’s important to use a new swab for each cleaning to prevent any residual debris from being transferred back onto the sensor.
6. Once you’re satisfied with the cleaning, give the camera sensor a final blast of air using the blower to remove any remaining particles.
7. Replace the lens on your camera and turn it back on. Take a test shot to check if any dust spots are still visible. If there are, you may need to repeat the cleaning process or consider professional sensor cleaning.

Remember to always follow the manufacturer’s instructions when using a sensor cleaning kit and take extra care not to damage the camera sensor. If you’re unsure about the process, it’s best to seek the help of a professional camera technician.
Cleaning the viewfinder
The viewfinder of a mirrorless camera is an important component that allows you to compose your shots and see exactly what the lens sees. However, over time it can collect dust, making it difficult to see clearly through the viewfinder. Here are some steps to clean the viewfinder:
1. Turn off the camera: Before cleaning the viewfinder, make sure the camera is turned off to avoid any mishaps or accidental damage.
2. Use a blower brush: Gently blow air onto the viewfinder to remove any loose dust particles. Start from the outside and move towards the center.
3. Use a soft microfiber cloth: If there are still dust particles remaining, use a soft microfiber cloth to gently wipe the viewfinder. Make sure the cloth is clean and free of any dirt or debris that could scratch the surface.
4. Avoid using liquid cleaners: It is recommended to avoid using any liquid cleaners on the viewfinder as they can potentially damage the coating or electronic components. Stick to dry cleaning methods only.
5. Be cautious around sensitive areas: When cleaning the viewfinder, be careful around sensitive areas such as the diopter adjustment dial or any buttons or switches located near the viewfinder. Use caution not to press too hard or accidentally move any settings.
6. Regular maintenance: To prevent dust buildup in the future, it is important to regularly clean the viewfinder and keep the camera stored in a clean and dust-free environment.
Remember, the viewfinder is a delicate component of your mirrorless camera, so always handle it with care. If you are unsure about cleaning it yourself, it is best to consult a professional or the camera manufacturer for assistance.
Cleaning the mirror
One crucial part of cleaning a mirrorless camera is ensuring that the mirror is free from dust and debris. The mirror is responsible for reflecting the image from the lens to the electronic viewfinder or the image sensor, so any dirt on the mirror can negatively affect the resulting image.
To clean the mirror, you will need a few supplies:
- A blower brush
- A lens cleaning solution
- A microfiber cloth
Start by using the blower brush to remove any loose dust or debris from the mirror. Gently squeeze the rubber bulb to force a blast of air onto the mirror’s surface, sweeping away any unwanted particles.
If there are stubborn spots that cannot be removed with the blower brush alone, you can wet the corner of the microfiber cloth with a small amount of lens cleaning solution. Be sure to use a lens cleaning solution that is specifically designed for camera equipment.
While holding the camera body securely with one hand, lightly wipe the mirror’s surface with the dampened corner of the cloth. Use gentle, circular motions to remove the dirt or smudges. Avoid applying too much pressure as this could damage the delicate mirror surface.
Once you have thoroughly cleaned the mirror, use the dry portion of the microfiber cloth to gently wipe away any residual moisture or cleaning solution. Take care not to leave streaks or lint behind.

Remember to clean the mirror in a well-lit area and avoid touching the mirror directly with your fingers to prevent leaving oil or smudges. Regularly cleaning the mirror will help ensure optimal image quality and extend the lifespan of your camera.
Checking for dust after cleaning
Once you have cleaned the mirrorless camera, it is important to check for any remaining dust or debris to ensure that your camera is fully cleaned and ready for use. Here are a few steps to follow when checking for dust:
1. Use a lint-free cloth or lens cleaning brush
Gently wipe the camera’s lens and sensor with a lint-free cloth or use a lens cleaning brush to remove any visible dust or debris. Be careful not to apply too much pressure as this can damage the lens or sensor.
2. Inspect the camera’s viewfinder
Look through the camera’s viewfinder and check for any visible dust or smudges. If you see anything, use a blower or lens cleaning brush to remove it.
3. Check the LCD screen
Inspect the camera’s LCD screen for any dust or fingerprints. Use a lint-free cloth to gently wipe away any dirt or smudges. Avoid using excessive pressure or cleaning solutions that can potentially damage the screen.
4. Test the camera
Turn on the camera and take a few test shots to ensure that there are no remaining dust particles affecting the image quality. Review the images on your computer or camera’s LCD screen to check for any signs of dust or debris.
Remember that cleaning your mirrorless camera should be done in a controlled and dust-free environment. If you notice persistent dust issues or are unsure about cleaning the camera yourself, it is recommended to consult with a professional camera technician.
Putting the lens back on
After cleaning the dust from your mirrorless camera’s lens, it’s important to correctly put the lens back on to ensure proper functionality. Follow these steps to reattach the lens:
- Hold the lens: Start by holding the lens correctly. Use both hands to hold the lens barrel and be careful not to touch the glass or any other sensitive parts.
- Align the lens: Look for the lens mount on the camera body and align the lens with it. The lens mount is usually located on the front of the camera.
- Rotate the lens: Gently rotate the lens clockwise until you feel it lock into place. Make sure that the lens is securely attached and doesn’t wobble.
- Check the connection: Once the lens is attached, check the electrical connection between the camera and the lens. Ensure that the metal contacts on both the camera body and the lens are clean and properly aligned.
Caution:
Be careful not to force the lens onto the camera body or overtighten it, as this could damage the lens mount or the camera itself. Take your time and ensure a gentle, but secure, connection.
Final thoughts:
By following these steps, you have successfully reattached the lens to your mirrorless camera. Now you can continue taking clear and beautiful photos without worrying about dust affecting your images.
FAQ
What is the best way to remove dust from a mirrorless camera?
The best way to remove dust from a mirrorless camera is to start by turning off the camera and removing the lens. Then, use a clean, soft brush or a blower to gently remove any loose dust particles from the camera’s sensor and the lens. Avoid using compressed air or any abrasive materials, as they can cause damage to the camera.
Can I use a microfiber cloth to remove dust from my mirrorless camera?
Using a microfiber cloth to remove dust from a mirrorless camera is not recommended. Microfiber cloths can potentially scratch the camera’s sensor or lens, which can lead to permanent damage. It is best to use a soft brush or a blower specifically designed for camera cleaning.
Is it necessary to clean the camera’s sensor to remove dust?
Cleaning the camera’s sensor can be necessary if there is a significant amount of dust or debris affecting image quality. However, it is important to exercise caution when cleaning the sensor, as it is a delicate and sensitive component. It is recommended to consult the camera’s user manual or seek professional assistance to properly clean the sensor.
How often should I clean my mirrorless camera to remove dust?
The frequency of cleaning a mirrorless camera to remove dust depends on individual usage and environmental conditions. If you frequently change lenses or shoot in dusty environments, it is recommended to clean the camera more often. As a general guideline, cleaning the camera every few months or when you notice a decline in image quality is a good practice.
Are there any preventive measures to reduce dust accumulation on a mirrorless camera?
Yes, there are several preventive measures to reduce dust accumulation on a mirrorless camera. Some of these measures include using lens caps when not in use, avoiding changing lenses in dusty environments, minimizing exposure to extreme temperature and humidity conditions, and storing the camera in a clean and dry environment when not in use.