
If you own an iPhone XS Max, you know how important the camera is for capturing those special moments. However, accidents happen, and the back camera glass can get cracked or shattered. Don’t worry, though, because replacing the back camera glass on your iPhone XS Max is a lot easier than you might think.
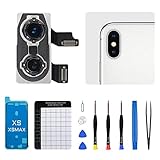
The first thing you’ll need to do is gather the necessary tools for the job. You’ll need a replacement back camera glass, a small screwdriver set, a hairdryer or heat gun, a suction cup, and a pry tool. Make sure you have these tools handy so you can start the repair process smoothly.
Once you have the necessary tools, you can begin the process of replacing the back camera glass. Start by heating the back of your iPhone XS Max with a hairdryer or heat gun to soften the adhesive that holds the glass in place. Be careful not to overheat the phone, as this can cause damage. Use the suction cup to gently lift the broken glass, and then use the pry tool to carefully remove any remaining adhesive.
Importance of replacing back camera glass on iPhone XS Max
The back camera glass on an iPhone XS Max plays a crucial role in ensuring the quality and functionality of the device’s camera. It serves as a protective barrier, shielding the delicate camera components from dust, moisture, and other environmental factors that could potentially damage the camera.
Over time, the back camera glass can get scratched, cracked, or shattered due to accidental drops, bumps, or regular wear and tear. These damages not only compromise the aesthetic appeal of the device but also pose a risk to the camera’s performance.
Replacing the back camera glass on your iPhone XS Max is essential to maintain the camera’s integrity. Here are a few reasons why it’s important:
1. Protection against external elements
The back camera glass acts as a protective layer that shields the camera lens and sensor from dust, dirt, and moisture. Without this protection, these elements can accumulate on the lens, leading to blurry photos, reduced image quality, and potential damage to the camera components.
2. Preserving image quality
A damaged or cracked back camera glass can impact the quality of the photos and videos taken with your iPhone XS Max. It can cause light leakage, lens distortion, or other issues that result in blurry images, loss of detail, or color inaccuracies. By replacing the back camera glass, you can restore the camera’s original quality and ensure optimal image capture.
Overall, replacing the back camera glass on your iPhone XS Max is crucial for maintaining the functionality and performance of the device’s camera. It protects the camera components from external elements and preserves the image quality, allowing you to capture clear and stunning photos and videos.
Tools required for replacing back camera glass
To successfully replace the back camera glass on your iPhone XS Max, you will need the following tools:

- Small Phillips screwdriver
- Prying tool (such as a plastic spudger)
- Heat gun or hairdryer
- Gloves
- Adhesive remover or isopropyl alcohol
- Microfiber cloth
- Tweezers
- New back camera glass replacement
Having these tools on hand will ensure that you have the necessary equipment to carefully remove the broken back camera glass and replace it with a new one without causing any damage to the device.
Precautions before starting the replacement process
Before you begin replacing the back camera glass of your iPhone XS Max, it is important to take certain precautions to ensure a successful and safe repair process. These precautions will help prevent any further damage to your device and ensure the replacement goes smoothly.
1. Gather the necessary tools
Make sure you have all the necessary tools required for the replacement process. This may include a small screwdriver, a pry tool, a heat gun or hairdryer, and a replacement camera glass.
2. Power off your iPhone
Before you start working on your iPhone XS Max, it is crucial to power it off completely. This will help prevent any accidental damage and ensure your safety during the repair process.
3. Work in a clean and well-lit area
Find a clean and well-lit workspace to perform the replacement. A clean environment will help prevent any dust or debris from getting inside your device, while good lighting will allow you to see the details clearly.

4. Take photos or notes
Before you disassemble your iPhone, take detailed photos or notes of each step. This will serve as a helpful reference when reassembling the device after the replacement.
5. Be gentle and patient
During the replacement process, it is important to handle the components and tools with care. Use gentle force when prying off the old camera glass and ensure you have enough patience to complete the repair process without rushing.
6. Follow a reliable tutorial
Make sure to follow a reliable tutorial or guide that provides step-by-step instructions for the specific model of your iPhone XS Max. This will ensure you are following the correct procedure and avoid any unnecessary mistakes.
7. Use proper protective gear
For your safety, it is advisable to wear gloves and protective eyewear during the replacement process. This will protect your hands and eyes from any potential hazards.
By taking these precautions, you can increase the chances of a successful camera glass replacement without causing any further damage to your iPhone XS Max.

Step-by-step guide to replace back camera glass on iPhone XS Max
Replacing the back camera glass on your iPhone XS Max may seem like a daunting task, but with the right tools and careful instructions, you can do it yourself. Here’s a step-by-step guide to help you through the process:
Step 1: Gather the necessary tools
Before you begin, make sure you have all the tools you need. These include:
- Replacement back camera glass: You can purchase this online or from a reputable mobile repair store.
- Small screwdriver set: You’ll need Phillips and pentalobe screwdrivers to remove the necessary screws.
- Plastic opening tools: These will help you to safely remove the back cover and camera glass.
- Adhesive strips: These will be used to secure the new camera glass in place.
- Tweezers: These will come in handy for handling small screws and other delicate components.
- Heat gun or hairdryer: This will be used to soften the adhesive and make it easier to remove the back cover.
- Cleaning cloth: You’ll need this to remove any dirt or debris from the camera area.
Step 2: Prepare your work area
Find a clean, well-lit and clutter-free area to work on your iPhone XS Max. This will help you keep track of small components and avoid any accidental damage.
It’s also a good idea to lay down a soft cloth or towel to protect the back of your phone from getting scratched while you work.
Step 3: Power off your iPhone
Before you begin the repair process, it’s important to turn off your iPhone XS Max to avoid any electrical mishaps.

To power off your iPhone, press and hold the side button until the “slide to power off” option appears. Swipe the slider to power off your device.
Step 4: Remove the back cover
Use a heat gun or hairdryer to warm up the back cover of your iPhone XS Max. This will soften the adhesive and make it easier to remove.
Start by applying heat to the edges of the back cover. Then, use a plastic opening tool to gently pry the cover off. Take your time and be patient, as it can be a delicate process.
Once the back cover is lifted, carefully lift it off the rest of the phone and set it aside.
Step 5: Remove the broken camera glass
With the back cover removed, you’ll now have access to the back camera glass. Use a plastic opening tool or tweezers to gently pry the broken glass out.

Be cautious not to apply too much pressure or force, as this could damage the camera module. If necessary, you can use a cleaning cloth to remove any remaining adhesive or debris.
Step 6: Install the new camera glass
Take your replacement camera glass and carefully align it with the opening on the back of the iPhone XS Max.
Once aligned, press gently on the glass to help it adhere to the adhesive strips and secure it in place. Make sure it is flush with the surrounding area.
Step 7: Reattach the back cover
Carefully place the back cover back onto the iPhone XS Max, aligning it with the edges. Apply even pressure to the cover to ensure it is properly seated and adhered.
Step 8: Test the camera
Once the back cover is securely in place, power on your iPhone XS Max and test the camera functionality. Open the camera app and check if it is working properly.

If everything is working as expected, congratulations! You have successfully replaced the back camera glass on your iPhone XS Max.
Remember, if you’re not confident in performing this repair yourself, it’s always a good idea to seek professional help from a mobile repair specialist.
Removing the old back camera glass
Before you begin, make sure you have all the necessary tools and a clean working area. Here are the steps to remove the old back camera glass from your iPhone XS Max:
- Power off your iPhone and remove the SIM card tray.
- Use a pentalobe screwdriver to remove the two screws at the bottom of your iPhone.
- Apply heat to the back of your iPhone using a heat gun or a hairdryer set to medium heat. This will soften the adhesive holding the back glass in place.
- Use a suction cup to create an initial gap between the back glass and the frame. Be careful not to apply too much pressure to avoid damaging the glass.
- Insert a plastic pick into the gap and gently slide it along the edges of the back glass to loosen the adhesive. Repeat this step on all sides until the back glass is loose enough to be removed.
- Slowly lift the back glass away from the frame, taking care not to pull too hard as there are delicate ribbon cables still connected underneath.
- Disconnect the ribbon cables for the camera module and any other components attached to the back glass.
- Once all the cables are disconnected, you can completely remove the old back camera glass from your iPhone XS Max.
Remember to keep track of the screws and small components you remove during the process. This will make reassembly much easier. Take your time and be patient to avoid any accidental damage. Now you are ready to install the new back camera glass on your iPhone XS Max!
Cleaning the camera area
Before proceeding with the replacement of the back camera glass on your iPhone XS Max, it is essential to clean the camera area properly. This will ensure that there are no dirt, dust, or fingerprints that can affect the image quality and the adhesive bond.
Here are the steps to clean the camera area:
- Gently remove the existing back camera glass using a soft cloth or a tool specifically designed for this purpose. Be careful not to scratch or damage the camera lens underneath.
- Use a lint-free microfiber cloth slightly dampened with isopropyl alcohol (above 70% concentration) to wipe the camera lens and the surrounding area. Ensure that you don’t apply excessive pressure to avoid damaging the lens.
- Inspect the camera lens for any remaining dirt, smudges, or fingerprints. If necessary, use a clean cotton swab or a lens cleaning solution to carefully remove them.
- Once the camera lens and the surrounding area are clean, use a dry lint-free microfiber cloth to wipe away any excess moisture. Make sure that no fibers or particles are left behind.
- Take a moment to inspect the camera area again to ensure it is completely clean and free from any residue. This will guarantee a proper fit and optimal performance of the new back camera glass.
By following these steps, you will prepare the camera area for the replacement of the back camera glass on your iPhone XS Max. Performing this task with care and attention will help maintain the integrity and functionality of your device’s camera.
Installing the new back camera glass
Once you have removed the old back camera glass, it’s time to install the new one. Follow these steps to ensure a successful replacement:
- Carefully unpack the new back camera glass.
- Clean the camera lens area on your iPhone XS Max using a microfiber cloth to remove any dirt or debris.
- Peel off the adhesive backing from the new camera glass.
- Align the new camera glass with the camera lens area on your iPhone, making sure the holes are correctly positioned.
- Press the new camera glass down firmly to secure it in place. Apply even pressure to ensure proper adhesion.
- Use a clean microfiber cloth to wipe away any fingerprints or smudges on the new camera glass.
Once the new camera glass is installed, make sure to test the camera to ensure it is functioning correctly. Open the camera app and take a few test photos or videos to verify that the new camera glass is working properly.
Remember, it is recommended to take your iPhone XS Max to a professional technician or an authorized Apple service center if you are not confident in replacing the back camera glass yourself. Mishandling or improper installation may cause further damage to your device.
Testing the camera functionality
After replacing the back camera glass on your iPhone XS Max, it is important to test the camera functionality to ensure everything is working properly.
To test the camera, follow these steps:
- Open the camera app on your iPhone.
- Switch between different camera modes, such as photo, video, and portrait mode, to check if they are functioning correctly.
- Take a few test photos and videos to see if the camera is capturing images and recording videos properly.
- Check the quality of the images and videos by zooming in and inspecting for any blurriness or distortion.
- Try using the front-facing camera to see if it is working as well.
- Test any additional camera features, such as slo-mo, time-lapse, and panorama, to ensure they are functioning correctly.
- Check if the camera flash is working properly by taking photos in low-light conditions.
If you notice any issues with the camera functionality, such as blurriness, autofocus problems, or any other abnormalities, you may need to recheck the installation of the back camera glass or seek professional help. It is important to have a fully functional camera on your iPhone XS Max for capturing high-quality photos and videos.
Tips for maintaining the back camera glass
Maintaining the back camera glass on your iPhone XS Max is crucial to ensure high-quality photographs and videos. Here are some useful tips to help you keep the camera glass in pristine condition:
|
1. Use a protective case: |
Invest in a high-quality protective case that covers the back of your iPhone XS Max. A case will provide an extra layer of protection for the camera glass, reducing the chance of scratches or cracks. |
|
2. Clean gently: |
When cleaning the camera glass, use a microfiber cloth or a lens cleaning solution specifically designed for electronics. Avoid using abrasive materials or harsh chemicals, as they can damage the glass. |
|
3. Avoid touching the glass: |
Try to avoid touching the camera glass with your fingers. Fingerprints and smudges can affect the quality of your photos and videos, so it’s best to use a soft cloth or a lens cleaning pen to remove any marks. |
|
4. Keep away from sharp objects: |
Avoid placing your iPhone XS Max near sharp objects like keys or coins, as they can potentially scratch the camera glass. It’s advisable to store your device in a separate pocket or compartment to minimize the risk of damage. |
|
5. Be cautious during repairs: |
If you need to replace the back camera glass on your iPhone XS Max or any repairs involving the camera, seek professional assistance. Attempting to fix it yourself can lead to further damage or void your warranty. |
By following these tips, you can maintain the back camera glass on your iPhone XS Max in excellent condition, ensuring that you capture stunning photos and videos every time.
FAQ
What is the process of replacing the back camera glass on iPhone XS Max?
The process of replacing the back camera glass on iPhone XS Max involves several steps. First, you need to remove the old broken glass. This can be done by heating the glass with a hairdryer to loosen the adhesive, and then carefully prying it off with a tool. Once the old glass is removed, you can clean the area to remove any remaining adhesive. Next, you need to apply a new adhesive to the back camera glass and carefully place it on the camera lens. Finally, you need to press down firmly to ensure that the new glass is securely attached.
Can I replace the back camera glass on iPhone XS Max myself?
Yes, you can replace the back camera glass on iPhone XS Max yourself, but it requires some technical skills and the right tools. It is a delicate process that involves heating the glass to remove it and then applying a new adhesive to attach the new glass. If you feel comfortable doing it yourself and have the necessary tools, you can definitely give it a try. However, if you are not confident in your abilities, it is best to take it to a professional repair service to avoid causing further damage to your phone.


