If you own a Swann smart security camera and are facing issues with its functionality, resetting the camera might be the solution you need. Resetting the camera can help resolve problems such as connectivity issues, camera freezes, or unresponsiveness. It is essential to know the correct procedure for resetting your Swann smart security camera to avoid any potential complications.
Step 1: Locate the Reset Button
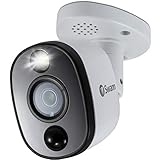
First, you need to locate the reset button on your Swann smart security camera. Typically, the reset button is located on the back or base of the camera. Look for a small hole or a button labeled “Reset” or “Reboot.” It is crucial to refer to your camera’s user manual or the manufacturer’s website to find the exact location of the reset button.
Step 2: Press and Hold the Reset Button
Once you have located the reset button, use a small, pointed object such as a paperclip or a pin to press and hold the button. While pressing the reset button, make sure to keep it depressed for a continuous period of time, usually around 10 to 15 seconds. This will initiate the reset process for your Swann smart security camera.
Step 3: Wait for the Camera to Reset
After holding the reset button for the specified time, release the button and wait for the camera to reset. The camera may take a few minutes to complete the reset process. During this time, it is essential not to interrupt the process, as it can lead to further complications.
Please note that resetting your Swann smart security camera will erase all previously saved settings and configurations. After the reset, you will need to reconfigure your camera according to your preferences.
Following these simple steps should help you reset your Swann smart security camera effectively. If the issues persist even after resetting the camera, it is advisable to contact Swann’s customer support for further assistance.
Disconnecting Power Supply
Before resetting your Swann smart security camera, it is important to disconnect the power supply to ensure a safe and clean reset process.

To disconnect the power supply, follow these steps:
- Locate the power cable that is connected to your Swann smart security camera.
- Find the power outlet or power adapter that the camera is plugged into.
- Unplug the power cable from the power outlet or power adapter.
By disconnecting the power supply, you ensure that the camera is completely powered off and that any residual power is discharged. This allows for a complete and successful reset of the camera.
Once you have disconnected the power supply, you can proceed with the reset process for your Swann smart security camera.
Locating Reset Button
If you need to reset your Swann smart security camera, you will first need to locate the reset button on the device. The reset button is usually located on the back or bottom of the camera. It is a small button that may be recessed inside a small hole. To reset the camera, you will need to use a pointed object, such as a paperclip or a pin, to press and hold the reset button for about 10 seconds.
Pressing and Holding Reset Button
Note: Resetting your Swann smart security camera will revert all settings back to factory defaults, including the camera’s Wi-Fi network configuration and login credentials. Before proceeding with the reset process, make sure you have a record of the camera’s current settings and be aware that resetting will disconnect the camera from your existing Wi-Fi network.

To reset your Swann smart security camera, follow these steps:
- Locate the reset button on the camera.
- Using a small, pointed object such as a paperclip or pin, press and hold the reset button for approximately 10 seconds.
- Release the reset button after 10 seconds.
- The camera’s LED lights should flash momentarily, indicating that the reset process has started.
- Wait for the camera to complete the reset process. This may take a few minutes.
- Once the reset process is complete, the camera’s LED lights should stop flashing and return to a steady state.
Note: If the camera’s LED lights do not stop flashing after a few minutes, repeat the reset process.
After the reset process is finished, you can proceed with setting up your Swann smart security camera again, including connecting it to your Wi-Fi network and configuring any desired settings.
Reconnecting Power Supply
If you need to reset your Swann smart security camera, one of the first things you should try is reconnecting the power supply. This simple step can sometimes resolve issues and get your camera back up and running.
To reconnect the power supply, follow these steps:

| Step | Description |
|---|---|
| Step 1 | Locate the power adapter that came with your Swann smart security camera. The power adapter should be connected to a power outlet. |
| Step 2 | Unplug the power adapter from the power outlet. |
| Step 3 | Wait for about 10 seconds. |
| Step 4 | Plug the power adapter back into the power outlet. |
| Step 5 | Check if the camera powers on and starts functioning properly. |
If reconnecting the power supply does not resolve the issue or if you continue to have problems with your Swann smart security camera, you may need to try other troubleshooting steps or contact Swann technical support for further assistance.
Waiting for System to Restart
After initiating the reset process on your Swann smart security camera, you will need to wait for the system to restart. This process may take a few minutes, so it is important to be patient and avoid interrupting the reset.
During this waiting period, the camera will go through a series of steps to reset itself and restore its default settings. The LED lights on the camera may blink or change colors, indicating that the reset process is in progress.
It is recommended to keep an eye on the camera during this time to ensure that it restarts correctly. Avoid performing any additional actions on the camera or its associated app until the reset process is complete.
Once the system has finished restarting, it will be ready for you to set up again. You can follow the manufacturer’s instructions to connect the camera to your network, configure the settings, and start using it for monitoring your home or property.

Configuring the Camera
Once you have reset your Swann Smart Security Camera, you will need to configure it again to ensure it is set up correctly.
Step 1: Connect to Wi-Fi
The first step is to connect the camera to your Wi-Fi network. This can usually be done through the camera’s mobile app or web interface. Follow the instructions provided by Swann to connect the camera to your Wi-Fi network. Make sure you have the correct Wi-Fi credentials on hand.
Step 2: Set up Camera Settings
After connecting to Wi-Fi, you will need to set up the camera settings according to your preferences. This includes configuring features such as motion detection, audio detection, notifications, and recording schedules. Refer to the camera’s user manual or the Swann support website for detailed instructions on how to configure these settings.
Step 3: Test and Adjust
Once the camera is configured, it is important to test and adjust the settings to ensure everything is working as expected. Test the camera’s live view, motion detection, and recording capabilities to ensure they are functioning properly. If needed, make any necessary adjustments to the camera’s position or settings to optimize its performance.
Remember to keep the camera’s firmware up to date by regularly checking for updates on the Swann website or through the camera’s app. Keeping the firmware updated ensures that your camera has the latest security patches and features.

By following these steps, you can successfully configure your Swann Smart Security Camera after resetting it, allowing you to continue monitoring and securing your property with peace of mind.
Testing the Reset
After performing a reset on your Swann Smart Security Camera, it is important to test the functionality of the camera to ensure that the reset was successful. Follow these steps to test the reset:
Step 1: Power On the Camera
Make sure the camera is properly connected to a power source and turned on.
Step 2: Check the Camera’s LED Indicator
Observe the LED indicator on the camera. If the LED is flashing or showing a solid green light, it means the camera is successfully powered on.
Step 3: Confirm the Camera’s Connection
Ensure that the camera is connected to your Wi-Fi network. You can do this by checking the Wi-Fi icon on the camera’s display or using the Swann Security app to see if the camera is listed as a connected device.

Step 4: Access the Camera’s Live Feed
Open the Swann Security app or web interface and locate the camera in the device list. Tap on the camera to access its live feed. If the camera’s live feed is visible, it means the reset was successful.
Step 5: Test Additional Camera Functions
Try out different camera functions such as pan, tilt, zoom, or audio. Make sure all the functions are working fine after the reset.
Step 6: Review Camera’s Recording and Alert Settings
Check the camera’s recording and alert settings to ensure they are configured as per your preferences. Test the recording and alert features by triggering any motion detection or sound detection and verify if the camera is recording and sending alerts accordingly.
If the camera passes all these tests and is functioning as expected, it indicates a successful reset. However, if you encounter any issues or the camera fails to function correctly, you may need to repeat the reset process or contact Swann support for further assistance.
| Step | Description |
|---|---|
| Step 1 | Power On the Camera |
| Step 2 | Check the Camera’s LED Indicator |
| Step 3 | Confirm the Camera’s Connection |
| Step 4 | Access the Camera’s Live Feed |
| Step 5 | Test Additional Camera Functions |
| Step 6 | Review Camera’s Recording and Alert Settings |
FAQ,
What is a Swann smart security camera?
A Swann smart security camera is a surveillance camera that can be connected to a smartphone or computer for remote monitoring.