
Installing an outdoor security camera is an essential step in ensuring the safety and security of your property. However, one of the challenges you may face is determining how to route power to your camera. While some cameras are wireless and run on batteries, many outdoor security cameras require a reliable power source to function effectively.
Here are some tips to help you route power to your outdoor security camera:
1. Choose the right power source: Before installing your outdoor security camera, you need to identify a suitable power source. The most common options include an electrical outlet, a power adapter, or a Power over Ethernet (PoE) switch. Consider the distance between the camera and the power source to ensure a stable and consistent power supply.
2. Plan your cable route: Once you have determined the power source, plan the cable route from the camera to the power source. Keep in mind any obstacles or terrain that may pose challenges. Avoid exposing the cables to extreme weather conditions or potential damage.

3. Use waterproof connectors: Outdoor security cameras are exposed to various weather conditions, so it’s vital to use waterproof connectors when routing power cables. These connectors help protect the cables from moisture, ensuring a long-lasting and reliable power connection.
4. Conceal the cables: To maintain a clean and professional appearance, consider concealing the power cables. You can use conduit, cable covers, or even bury the cables underground. This not only protects the cables from damage but also enhances the overall security of your camera setup.
By following these tips, you can effectively route power to your outdoor security camera, ensuring its optimal performance and maximizing the safety and security of your property.
Choosing the Right Outdoor Security Camera
When it comes to selecting an outdoor security camera, there are a few key factors to consider. These factors can help you determine the best camera for your specific needs and ensure that you have a reliable and effective security system.
| 1. Weatherproofing | One of the most important factors to consider when choosing an outdoor security camera is its ability to withstand various weather conditions. Look for cameras that have a high weatherproof rating, such as IP65 or higher, to ensure they are protected from rain, snow, and extreme temperatures. |
| 2. Resolution | The resolution of the camera is another crucial factor. A higher resolution camera will provide clearer and more detailed images, allowing you to better identify individuals and objects. Look for cameras with at least 1080p resolution for optimal video quality. |
| 3. Night Vision | If you want to monitor your premises during nighttime, choosing a camera with good night vision capabilities is essential. Look for cameras with infrared LEDs that provide clear imaging even in complete darkness. The range of the night vision should also be considered. |
| 4. Power Source | Consider how the camera will be powered. Some outdoor security cameras come with a built-in battery, while others need to be connected to a power source. Choose a camera with a power source option that suits your needs and is convenient to install and maintain. |
| 5. Field of View | The field of view of a security camera determines how much area it can cover. Depending on your specific requirements, you may need a camera with a wide-angle lens or a camera with a narrower field of view to focus on specific areas. Consider the size of the area you are looking to monitor when choosing the field of view. |
By considering these factors and carefully selecting the right outdoor security camera, you can ensure that you have a reliable and efficient security system that meets your specific needs.

Understanding the Power Requirements
When it comes to installing an outdoor security camera, understanding the power requirements is crucial. This will ensure that you have the proper power source and wiring in place to effectively power the camera.
Most outdoor security cameras require a power source, typically in the form of a power adapter or a power over Ethernet (PoE) injector. It’s important to check the requirements of your specific camera model to determine which type of power source it requires.
If your camera uses a power adapter, you will need to locate a nearby electrical outlet to plug it into. This may require the use of an extension cord or the installation of a new electrical outlet in the desired location.
On the other hand, if your camera uses PoE, you will need to ensure that your network switch or PoE injector is capable of providing the necessary power. PoE eliminates the need for a separate power supply and allows the camera to receive power and data through a single Ethernet cable.
It’s also important to consider the distance between the camera and the power source. If the camera is located far away from an electrical outlet or network switch, you may need to use signal booster or extenders to ensure that the power reaches the camera effectively.

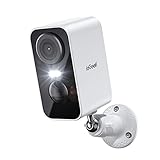
Lastly, it’s worth noting that some outdoor security cameras are battery-powered or solar-powered, eliminating the need for a wired power source. These cameras rely on rechargeable batteries or solar panels to provide the necessary power. If you opt for a battery-powered or solar-powered camera, be sure to regularly check and maintain the power source to ensure continuous operation.
Evaluating Power Source Options
When it comes to routing power to your outdoor security camera, it is essential to carefully evaluate your power source options. Choosing the right power source will ensure the reliability and effectiveness of your camera system.
1. Hardwired Connection: One of the most reliable power source options for outdoor security cameras is a hardwired connection. This involves running a power cable directly from your electrical panel to the camera location. Hardwired connections provide a consistent and uninterrupted power supply, ensuring your camera is always functional.
2. Solar Power: Another increasingly popular option for outdoor security cameras is solar power. Solar panels can harness the energy from the sun and convert it into electricity, which can power your camera. Solar-powered cameras are best suited for locations with ample sunlight and can be an eco-friendly and cost-effective solution.
3. Battery Powered: If a hardwired connection or solar power is not feasible for your outdoor security camera setup, battery-powered cameras can be an alternative. These cameras use rechargeable batteries as their power source, eliminating the need for direct wiring. However, it is important to regularly check and recharge the batteries to ensure uninterrupted camera operation.

4. Power over Ethernet (PoE): Power over Ethernet is a technology that allows power and data transmission over a single Ethernet cable. If you have an existing Ethernet network, PoE can be an efficient way to power your outdoor camera, as it eliminates the need for separate power cables. PoE injectors or switches are required to deliver power to the camera.
When evaluating power source options for your outdoor security camera, consider factors such as reliability, ease of installation, and cost. Assess your specific requirements and the environment where the camera will be installed to make an informed decision.
Using a Standard Power Outlet
If you have a standard power outlet near the location where you want to install your outdoor security camera, it can be a convenient and straightforward option for routing power. Here are some steps to follow:
Step 1: Choose the Right Power Adapter
Before connecting your camera to a power outlet, ensure that you have the correct power adapter for your camera model. The power adapter should match the voltage and current requirements of your camera to avoid any damage.
Step 2: Locate the Nearest Power Outlet
Identify the nearest power outlet to your desired camera location. It should be within a reasonable distance to avoid issues with cable length.

Step 3: Measure the Distance
Measure the distance between the power outlet and the camera installation location. This will help you determine the length of the power cable you will need.
Step 4: Purchase a Weatherproof Power Cable
Once you know the length required, purchase a weatherproof power cable that is long enough to reach from the power outlet to your camera location. Weatherproof cables are designed to withstand outdoor conditions, ensuring safety and reliability.
Step 5: Connect the Power Cable
Connect one end of the power cable to the power outlet and the other end to the power input of your camera. Ensure the connections are secure and tight to prevent any power interruptions.
Step 6: Organize and Conceal the Cable
After connecting the power cable, neatly organize and conceal it along the wall or surface to avoid any tripping hazards or damage. You can use clips or cable channels designed for this purpose.
Using a standard power outlet eliminates the need for complex wiring or hiring an electrician, making it a cost-effective and user-friendly method to route power to your outdoor security camera.
Utilizing PoE Technology
Power over Ethernet (PoE) technology is a convenient and efficient way to provide power to outdoor security cameras. PoE combines power and data into a single cable, eliminating the need for separate power and network connections. This simplifies installation and reduces clutter.
When using PoE, it is important to ensure that your security camera supports this technology. Many modern cameras are PoE compatible, but some older models may require an adapter or additional equipment.
To utilize PoE, you will need a PoE switch or a PoE injector. A PoE switch is a network switch that is equipped with PoE ports, allowing you to connect your cameras directly to the switch. A PoE injector, on the other hand, is a device that adds PoE capabilities to non-PoE devices. You would connect the injector to your network switch or router, and then connect your cameras to the injector.
PoE technology can support power and data transmission over long distances, making it suitable for outdoor installations. However, it is important to consider the power requirements of your cameras and the length of cable runs to ensure that the PoE switch or injector can deliver sufficient power.
When routing power to your outdoor security camera using PoE, you will need to run Ethernet cables from the PoE switch or injector to each camera. These cables should be weatherproof and rated for outdoor use. It is recommended to bury or conceal the cables to protect them from the elements and potential tampering.

Overall, utilizing PoE technology provides a convenient and cost-effective solution for powering your outdoor security cameras. It simplifies installation, reduces the number of cables needed, and allows for easy remote monitoring and management of your cameras.
Installing a Dedicated Power Line
If you want to ensure a reliable power supply for your outdoor security camera, it is recommended to install a dedicated power line. This will prevent any issues with the camera losing power due to other devices or appliances connected to the same circuit.
Before starting the installation process, make sure to check your local building codes and regulations regarding electrical work. If you are not confident in your ability to complete the installation safely, it is advisable to hire a licensed electrician.
Here are the main steps to install a dedicated power line for your outdoor security camera:
| Step 1: | Choose a location for the power source. Ideally, this should be a weatherproof electrical outlet located near the camera’s mounting location. |
| Step 2: | Turn off the power to the circuit that will be used for the dedicated power line. This can be done at the circuit breaker panel. |
| Step 3: | Remove the cover plate from the weatherproof electrical outlet and confirm that the power is off using a non-contact voltage tester. |
| Step 4: | Attach a conduit box to the outlet box using screws, ensuring a secure fit. |
| Step 5: | Run a length of conduit from the conduit box to the camera’s mounting location, allowing for extra length to accommodate any bends or turns. |
| Step 6: | Secure the conduit to the wall or other surfaces using appropriate clamps or brackets. |
| Step 7: | At the camera’s mounting location, install a conduit box and connect it to the conduit using appropriate fittings. |
| Step 8: | Install a weatherproof junction box near the camera’s mounting location to provide a safe connection point for the camera’s power supply. |
| Step 9: | Run the power cable through the conduit from the weatherproof junction box to the camera’s power input. |
| Step 10: | Make the necessary electrical connections at both the weatherproof junction box and the camera’s power input, following the manufacturer’s instructions. |
| Step 11: | Test the camera to ensure it receives power correctly. |
| Step 12: | Once everything is working properly, secure all the connections and cover the conduit with appropriate weatherproofing materials. |
By following these steps, you can install a dedicated power line for your outdoor security camera, ensuring a reliable and uninterrupted power supply.

Opting for Solar Power
One of the most convenient and environmentally friendly ways to route power to an outdoor security camera is by using solar power. Solar power offers several advantages over traditional wired or battery-powered options.
Here are some reasons why you should consider opting for solar power:
- Cost-effective: Installing a solar panel may require an initial investment, but in the long run, it can save you money on electricity bills. Solar power is a renewable energy source, which means you won’t have to rely on expensive batteries or constantly replace them.
- Easy installation: Solar-powered security cameras are typically wireless, which makes installation a breeze. You won’t have to deal with complicated wiring or rely on an electrical outlet that may not be nearby.
- Continuous power supply: As long as there is sunlight, your outdoor security camera will receive a continuous power supply. This means you won’t have to worry about power interruptions or your camera running out of battery.
- Environmentally friendly: Solar power is a clean and sustainable energy source. By using solar power for your outdoor security camera, you’ll be reducing your carbon footprint and contributing to a greener environment.
- Flexibility: Solar-powered cameras can be installed in areas where running wires would be difficult or not feasible. This gives you more flexibility in choosing the best location for your camera.
When opting for solar power, make sure to choose a high-quality solar panel and a camera system that is designed to be powered by solar energy. Additionally, consider the location of your camera to ensure it receives enough sunlight throughout the day for optimal performance.
Considering Battery-Powered Cameras
If you are looking for a convenient and flexible option for your outdoor security camera, battery-powered cameras are worth considering. These cameras eliminate the need for extensive wiring and can be easily installed in any location without the hassle of running power cables.
When choosing a battery-powered camera, there are several factors to consider:
Battery Life
One of the most important considerations is the battery life of the camera. Look for a camera that offers a long battery life, ideally lasting several months or more, depending on your usage. This will ensure that you don’t have to constantly recharge or replace the batteries.
Power Saving Features
Battery-powered cameras often come with power-saving features that help extend battery life. These features can include motion detection, which only activates the camera when it detects movement, and sleep mode, which shuts down the camera when it is not in use. Look for cameras that offer these types of energy-saving options.
Weather Resistance
Since these cameras will be installed outdoors, it is important to choose one that is weather-resistant and can withstand various weather conditions. Look for cameras with an IP65 or higher rating, which ensures protection against dust and water.
Installation and Placement

Battery-powered cameras offer flexibility in terms of installation and placement. You can mount them on walls, trees, or other surfaces without worrying about nearby power outlets. Consider the camera’s mounting options and make sure it fits your desired location.
Overall, battery-powered cameras provide an easy and wire-free solution for outdoor security. They offer flexibility in terms of installation, are powered by long-lasting batteries, and come with power-saving features. Consider these factors when choosing a battery-powered camera to ensure it meets your specific needs.
Ensuring Proper Wiring and Connections
When routing power to an outdoor security camera, it is crucial to ensure proper wiring and connections for the camera to function efficiently and reliably. Follow these steps to ensure a successful installation:
- Choose the appropriate power source: Select a power source that matches the camera’s voltage requirements. It is essential to use a power source specifically designed for outdoor use, ensuring it is weatherproof and protected against potential damage.
- Plan the cable route: Before starting the installation, carefully plan the cable route. Consider potential obstacles and choose the most direct path for the cable from the power source to the camera.
- Secure the cables: It is important to secure the cables properly to prevent them from being damaged by the elements or accidental pulling. Use cable clips or conduit to secure the cables along the planned route.
- Use waterproof connectors: To protect the connections from moisture and water damage, make sure to use waterproof connectors. These connectors will help maintain a reliable and secure connection, even in extreme weather conditions.
- Test the connections: After connecting the power cables to the camera, test the connections to ensure everything is functioning correctly. Use a multimeter or similar device to verify proper voltage and continuity.
- Consider surge protection: Outdoor security cameras are susceptible to power surges, which can damage the camera or other connected devices. Install surge protection devices, such as surge protectors or voltage regulators, to safeguard your camera from potential electrical fluctuations.
By following these steps and taking necessary precautions, you can ensure proper wiring and connections for your outdoor security camera. This will result in reliable power delivery and optimal camera performance, allowing you to monitor your property effectively.
Hiring a Professional Electrician
Installing an outdoor security camera can be a complex task that involves routing power to the camera location. While it may be tempting to attempt this task yourself to save money, hiring a professional electrician is always the best choice. Here are a few reasons why:
| Knowledge and Expertise | A professional electrician has the knowledge and expertise to handle the intricate wiring and electrical systems involved in routing power to an outdoor security camera. They are trained to ensure that the installation is done safely and according to local building codes. |
| Time and Efficiency | Hiring a professional electrician allows you to save time and ensures that the job is done efficiently. They have the right tools and equipment to complete the installation quickly and accurately, saving you the hassle of figuring it out on your own. |
| Safety | Working with electricity can be dangerous, especially if you don’t have experience. A professional electrician knows how to handle electrical hazards and can prevent accidents or injuries during the installation process. |
| Insurance and Guarantees | When you hire a professional electrician, they usually have liability insurance that covers any damages or accidents that may occur during the installation. Additionally, they may provide guarantees on their work, giving you peace of mind knowing that you’re protected. |
In conclusion, hiring a professional electrician is the best way to ensure the safe and proper installation of power for your outdoor security camera. Their knowledge, expertise, and commitment to safety make them the ideal choice for this task. Don’t take any chances when it comes to electricity, leave it to the professionals.
FAQ,
What is an outdoor security camera?
An outdoor security camera is a device that is installed outside of a building or property to monitor and record activity. It is designed to capture video footage in order to provide security and surveillance.
Why do I need to route power to my outdoor security camera?
You need to route power to your outdoor security camera in order to ensure that it has a reliable source of electricity. This is important for the camera to function properly and continuously monitor your property.
What are the different ways to route power to an outdoor security camera?
There are several ways to route power to an outdoor security camera. One option is to use a wired connection and run power cables from an indoor power source to the camera. Another option is to use Power over Ethernet (PoE) technology, which allows both power and data to be transmitted over a single Ethernet cable. Additionally, there are wireless security cameras that can be powered by batteries or solar panels.


