
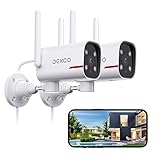
If you are looking to enhance the security of your property, installing security cameras is a wise decision. However, one of the challenges many people face is running the camera wires from the outdoor area to the indoors. This task might seem daunting, but with the right guidance, you can easily tackle it yourself.
First and foremost, it’s crucial to plan the route for your camera wires. Take into consideration the shortest and most convenient path, while also ensuring that the wires are hidden and protected to maintain the aesthetics of your property. Remember to measure the distance accurately, as this will determine the length of wire you will need.
Once the route is planned, it’s time to gather the necessary tools and materials. You will need a drill, screwdriver, wire cutter/stripper, electrical tape, and cable clips. Additionally, it’s recommended to use outdoor-rated cables to ensure durability and protection against weather conditions.
Before drilling any holes, make sure to check for any existing wiring or pipes in the walls. Use a stud finder to locate studs, and avoid drilling through them. Once you have determined the ideal location for the holes, drill a small pilot hole to ensure it’s in the right spot. Then, using a hole saw or a drill bit, create a hole large enough for the cable to fit through.
After drilling the holes, feed the camera wire through from the outdoor to the indoor area. To keep the wire secure and prevent any damage, use cable clips to attach it to the walls or ceiling. Ensure the wire is not strained or pulled too tightly, as this can affect the camera’s performance.

Finally, connect the camera wire to the appropriate ports on both the outdoor and indoor ends. Use electrical tape or wire nuts to secure the connections and protect them from moisture. Test the camera to ensure it’s functioning properly before securing any loose wires or closing up any holes.
Running security camera wire from the outdoor to the indoor area requires careful planning and execution. By following these steps and taking your time, you can successfully install your security cameras and provide an added layer of protection to your property.
Why You Need Security Camera Wire From Outdoor to Indoor
Installing security cameras can greatly enhance the safety and security of your property. Whether you want to monitor your home or business, having a reliable and efficient surveillance system is essential. One important aspect of setting up your security cameras is properly wiring them from the outdoor to the indoor areas.
Here are a few reasons why you need security camera wire from outdoor to indoor:
- Extended Coverage: Running security camera wire from outdoor to indoor allows you to extend the coverage of your surveillance system. By connecting outdoor cameras to your indoor monitoring station, you can keep an eye on a larger area, including your property’s perimeter and outdoor spaces.
- Protecting Sensitive Equipment: Many indoor locations, such as control rooms or security offices, have sensitive equipment that needs to be protected and monitored. Running security camera wire from outdoor to indoor enables you to keep an eye on these areas and ensure the safety of your equipment from potential threats.
- Recording Evidence: In the event of a crime or security breach, having clear and recorded footage is crucial for gathering evidence and identifying perpetrators. By connecting outdoor cameras to your indoor recording devices, you can ensure that all footage is captured and stored securely.
- Seamless Integration: Running security camera wire from outdoor to indoor allows for seamless integration of your surveillance system. By connecting all cameras through a central monitoring station, you can easily access and control your entire security system from one location.
Overall, running security camera wire from outdoor to indoor is essential for maximizing the effectiveness of your surveillance system. It helps extend coverage, protect sensitive equipment, record evidence, and ensure seamless integration. So, make sure to plan and install the necessary wiring to enhance the security of your property.

Step 1: Planning
Installing security cameras involves careful planning to ensure optimal placement and functionality. Before proceeding with the wire installation, it’s important to take the following steps:
1. Determine the camera locations:
Identify the areas where you want to install the security cameras. Consider areas that need monitoring, such as entrances, driveways, and vulnerable spots around your property.
Draw a layout of your property, marking the desired camera locations. Take into account factors such as the camera’s field of view and the distance from the cameras to the recording device.
2. Choose a suitable route:
Decide on a route for running the camera wire from the outdoor to the indoor area. Look for existing openings or conduits that can be used to minimize visible wire or potential damage.
Avoid running the wires through areas with extreme temperature fluctuations, as this can affect their performance. To maintain a clean appearance and protect the wires, consider running them through walls, ceilings, or under floors if possible.

Additionally, ensure that the route doesn’t interfere with existing electrical wires, cables, or plumbing systems to avoid any potential hazards.
3. Measure and calculate:
Measure the total length of camera wire needed for each location. Add extra length for future flexibility or unexpected obstacles.
Consider the length limitations specified by the camera manufacturer and follow any specific guidelines they provide. This ensures that the signal quality remains reliable and does not degrade over longer distances.
Calculate the overall wire length required to connect the cameras to the recording device, accounting for any corners or height differences along the chosen route.
By carefully planning and measuring, you can ensure a successful installation and minimize any potential issues or rework later on.

Determine the Best Route for Running the Wire
Before you start running the security camera wire from outdoor to indoor, it’s important to determine the best route for the wire to ensure maximum efficiency and protection. Here are a few steps to help you determine the optimal route:
- Inspect the Exterior of Your House: Take a walk around the exterior of your house and look for potential routes for the wire. Look for areas with minimal obstructions and where the wire can be hidden or protected.
- Identify Access Points: Identify the access points where the wire will need to enter the house. This could be through a wall, window, or door.
- Consider Existing Wiring: If you have existing wiring for other purposes, such as electrical wiring or cable TV, consider utilizing those routes to avoid running additional wires.
- Measure the Distance: Measure the distance between the outdoor and indoor locations where the wire needs to be run. This will help you determine the length of wire you need to purchase.
- Plan for Potential Obstacles: Take note of any potential obstacles that may be in the way, such as trees, shrubs, or fences. Plan your route to avoid these obstacles or find ways to hide the wire.
- Choose Concealed Locations: Whenever possible, choose concealed locations to run the wire. This will help protect the wire from the elements and potential tampering.
- Select the Appropriate Wiring Method: Depending on the distance and the specific requirements of your security system, you may need to choose between wired or wireless options. Consider the pros and cons of each method before making a decision.
By following these steps and carefully planning the route for running the wire, you can ensure a professional and efficient installation of your security camera system.
Step 2: Gather the Necessary Tools and Materials
Before starting the process of running the security camera wire from outdoor to indoor, it is important to gather all the necessary tools and materials. This will ensure that you have everything you need to complete the installation smoothly.
Here are the tools and materials you will need:
- Security camera wire
- Power drill
- Drill bits of various sizes
- Electrician’s fish tape or a stiff wire
- The proper connectors for connecting the wire to the camera and the power source
- A ladder or step stool
- Electrical tape
- Wire cutters
- Screwdriver
- Measuring tape
- Pencil or marker
- Zip ties or cable clips
Make sure you have all these tools and materials before starting the installation process. It is important to have the right tools to ensure a safe and efficient installation.
What You’ll Need
To run security camera wire from outdoor to indoor, you will need the following materials:

- Security camera wire: Make sure to choose the appropriate type and length of wire for your specific needs.
- Drill: You will need a drill to create holes in walls or other surfaces to run the wire through.
- Drill bits: Different sizes of drill bits may be needed depending on the size of the holes required.
- Cable clips: These will be used to secure the wire to walls or other surfaces.
- Fish tape: A flexible tool used to guide and pull the wire through tight spaces.
- Wire connectors: These will be required to connect the camera to the wire and the wire to the power source.
- Drywall saw: If you need to cut through drywall to run the wire, a drywall saw will be necessary.
- Tape measure: Use a tape measure to accurately measure the length of wire needed.
- Screwdriver or electric screwdriver: Depending on the type of screws used to secure the camera, you may need a screwdriver or electric screwdriver.
- Wire cutter/stripper: These tools will be needed to cut and strip the wire as necessary.
- Electrical tape: Use electrical tape to secure and protect any exposed wires or connections.
- Stud finder: This will help you locate studs or other structures within the walls to avoid damaging them.
- Pencil or marker: Use a pencil or marker to mark the locations where you want to drill holes or place cable clips.
- Wireless camera system (optional): If you prefer not to run wires, you can use a wireless camera system instead.
Step 3: Prepare the Outdoor and Indoor Areas
Before you start running the security camera wire, you need to prepare both the outdoor and indoor areas where the wire will be installed. Follow these steps to ensure a smooth installation:
Outdoor Area Preparation
- Identify the best location for the security camera on the outside of your home. Consider factors such as visibility, coverage area, and accessibility.
- Clean the area where the camera will be mounted to remove any dirt, debris, or obstructions.
- Drill a hole in the wall or ceiling near the camera location for the wire to pass through. Make sure the hole is large enough to fit the wire without causing any damage.
- Apply silicone sealant around the hole to prevent water from seeping into your home.
- Secure the camera mount to the wall or ceiling using the appropriate screws and fasteners. Make sure the mount is sturdy and level.
- Attach the camera to the mount and adjust its position and angle as needed to achieve the desired view.
Indoor Area Preparation
- Identify a suitable location inside your home where the security camera wire will be connected to your recording or monitoring device. This can be a room or area with easy access to power outlets and your recording device.
- Clear any obstructions or clutter around the chosen location to create a clean and organized work area.
- Ensure there is enough space and clearance for the wire to be routed from the outdoor camera location to the indoor connection point.
- Choose an appropriate route for running the wire, taking into consideration any obstacles or potential hazards.
- Use cable clips or adhesive hooks to secure the wire along the chosen route and prevent it from dangling or getting tangled.
- Position your recording or monitoring device near the connection point and ensure it is easily accessible for future maintenance or adjustments.
By properly preparing the outdoor and indoor areas, you can ensure a successful and efficient installation of your security camera wire.
Preparing the Outdoor Area
Before running the security camera wire from outdoor to indoor, it is important to prepare the outdoor area properly. This will ensure that the wire is protected and can function effectively. Here are the steps to follow:
| 1. | Plan the route: Assess the outdoor area and determine the best route for running the wire. Consider factors such as the location of the security camera, the distance to the indoor area, and any obstacles that may be in the way. |
| 2. | Check for obstructions: Look for any obstructions that may hinder the wire installation process. These can include trees, shrubs, or structures. Trim any vegetation or remove any obstacles that may block the pathway. |
| 3. | Protect the wire: It is crucial to protect the wire from the elements, animals, and potential damage. Use a weatherproof conduit or cable to encase the wire and shield it from moisture, UV rays, and physical harm. |
| 4. | Bury the wire: If possible, burying the wire underground is the best way to protect it and maintain a neater appearance. Dig a trench along the planned route, ensuring it is deep enough to avoid accidental damage from gardening tools or machinery. |
| 5. | Secure the wire: Once the wire is in place, use cable clips or brackets to secure it along the route. This will prevent it from sagging or getting tangled, ensuring that it remains in good condition and provides a steady signal. |
| 6. | Test the connection: Before completing the installation, test the connection to ensure the wire is functioning correctly. Connect the security camera to the indoor system and check for a clear and uninterrupted video feed. |
By properly preparing the outdoor area before running the security camera wire, you can ensure a reliable and long-lasting surveillance system.
Preparing the Indoor Area
Before running the security camera wire from outdoor to indoor, it is important to properly prepare the indoor area where the wire will be connected and routed. Here are some steps to follow:

1. Choose a Suitable Location
Select a location indoors where you want to install and connect your security camera. It should be near a power outlet and provide a clear view of the area you want to monitor. Make sure the location is easily accessible and has enough space to accommodate the camera and any necessary equipment.
2. Clear the Area
Clear any obstructions or clutter in the chosen location. Remove any furniture, decorations, or other objects that may get in the way of installing the camera and running the wire. Ensure that the area is clean and free from any potential hazards that could interfere with the installation process.
3. Plan the Route
Map out the route for the security camera wire from where it will enter the indoor area to the location of the camera. Consider factors such as walls, ceilings, and other obstacles that may need to be traversed. Take measurements and identify any potential challenges or difficulties that may arise during the installation process.
4. Gather Tools and Equipment
Collect all the necessary tools and equipment you will need to install and connect the security camera. This may include a drill, screws, screwdriver, wire cutter/stripper, cable clips, and a ladder. Having all the required tools and equipment ready beforehand will make the installation process smoother and more efficient.
By properly preparing the indoor area before running the security camera wire, you can ensure a successful and secure installation. Taking the time to choose a suitable location, clear the area, plan the route, and gather the necessary tools will help make the installation process as hassle-free as possible.
FAQ,
What tools do I need to run security camera wire from outdoor to indoor?
To run security camera wire from outdoor to indoor, you will need a few tools such as a power drill, a fish tape or wire puller, a cable stripper, crimping tools, and electrical tape.
Can I run security camera wire through the walls?
Yes, you can run security camera wire through the walls. It is recommended to use a fish tape or wire puller to guide the wire through the walls and minimize any damage to the walls.
Do I need to bury the security camera wire?
If you are running the security camera wire outdoors, it is recommended to bury it to protect it from weather conditions and potential damage. You can bury the wire underground or use a conduit to provide extra protection.
How do I connect the security camera wire to the power source indoors?
To connect the security camera wire to the power source indoors, you will need to strip the ends of the wire, match the corresponding wires (positive to positive and negative to negative), and use crimping tools or connectors to secure the connection. It is important to follow the manufacturer’s instructions and ensure a proper and safe connection.
What is the recommended cable for security camera wire?
The recommended cable for security camera wire is a coaxial cable. Coaxial cables are commonly used for transmitting video and audio signals and provide good signal quality and durability. It is important to choose a cable that is suitable for outdoor use and meets the requirements of your security camera system.


