
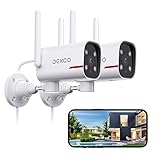
Outdoor security cameras are essential for protecting your property and providing peace of mind. However, one of the challenges of installing outdoor cameras is running the necessary wires. Running wires for outdoor security cameras requires careful planning and execution to ensure the cameras are properly connected and the wires are hidden or protected from the elements.
Before you begin running wires for your outdoor security cameras, it’s important to determine the best locations for the cameras. Consider the areas you want to monitor and the best vantage points for capturing footage. Once you have identified the locations, you can then plan the best routes for running the wires.
First, assess the existing infrastructure of your property, such as walls, roofs, or fences, which can provide convenient pathways for running the wires. Look for any existing holes or conduits that can be utilized. If there are no existing pathways, you may need to create them. This can involve drilling holes through walls or using conduits to protect the wires.
When running wires for outdoor security cameras, ensure that the cables are securely fastened and protected from the elements. Use cable clips, zip ties, or conduit clamps to secure the wires along the chosen route. Additionally, consider using waterproof cables or wrapping the cables in waterproof tape or conduit to further protect them from rain, snow, or extreme temperatures.
Running wires for outdoor security cameras may require some patience and careful planning, but it is a crucial step in ensuring the effectiveness and reliability of your camera system. By following these steps and taking the necessary precautions, you can successfully run wires for your outdoor security cameras and enjoy enhanced peace of mind.

How to Run Wires for Outdoor Security Cameras
Installing outdoor security cameras can greatly enhance the safety and security of your property. However, one of the key challenges in the installation process is running the wires. In this guide, we will walk you through the steps to safely run the wires for your outdoor security cameras.
1. Plan Your Camera Placement
Before you start running wires, it’s crucial to plan where you want to place your cameras. Consider the areas that need the most surveillance coverage and identify the best locations for optimal visibility. This will help determine the length of wire needed and the path it should follow.
2. Choose the Right Cable
When it comes to wiring outdoor security cameras, it’s important to select the right cable that can withstand the elements. Opt for high-quality, waterproof and UV-resistant cables specifically designed for outdoor use. This will ensure durability and longevity of your camera system.
3. Use Conduits or Cable Clips
To protect the wires from damage and exposure to weather conditions, consider using conduits or cable clips. These will securely hold the cables in place and prevent them from getting tangled or accidentally dislodged. This also helps to maintain a neat and professional-looking installation.
4. Connect the Cables to Power and Network
Once the wires are properly routed, it’s time to connect them to power and network sources. Depending on the type of camera you have, this may involve feeding the cables through a power supply box or connecting them directly to your network video recorder. Make sure to follow the manufacturer’s instructions for proper installation.

Note: If you’re not comfortable working with electrical wiring, it is recommended to hire a professional electrician to assist with the installation process.
5. Test the System
After connecting the camera cables, it’s crucial to test the system to ensure everything is working properly. Check the camera’s feed on your monitor or smartphone to verify the quality of the video and make any necessary adjustments.
Remember, running wires for outdoor security cameras requires careful planning and attention to detail. By following these steps, you can ensure a successful and reliable camera installation that provides enhanced security for your property.
Choosing the Right Location
Choosing the right location for your outdoor security cameras is crucial to ensure maximum coverage and effectiveness. Here are some factors to consider:
Visibility: The camera should be placed in an area with clear visibility of the target area. Avoid obstructions such as trees, bushes, or walls that could block the camera’s view.

Height: Mount the camera at a height that provides a broad view of the area while ensuring it is out of reach from potential vandalism or tampering. This will also help to avoid any accidental damage.
Accessibility: Consider the ease of access for maintenance and repairs. Make sure the camera is placed in a location that allows for easy cleaning, adjustment, and cable management.
Lighting: Place the camera in an area with proper lighting. Avoid pointing the camera directly towards bright lights or glare that could obscure the view. Consider installing outdoor lighting to improve visibility and deter potential intruders.
Weatherproof: Ensure that the camera is weatherproof and built to withstand the elements. Look for cameras with an IP rating to ensure they are protected against dust and water.
Neighborhood: Take into considerations the privacy of your neighbors and comply with any local regulations regarding surveillance cameras. Be mindful of aiming the camera away from private property to respect others’ privacy.

By carefully selecting the right location for your outdoor security cameras, you can ensure optimal performance and peace of mind knowing that your property is protected.
Measuring and Planning
Before running wires for your outdoor security cameras, it’s important to measure and plan out your installation. This will help ensure that you have enough wire to reach from your camera positions to your recording device or monitor, as well as identify any obstacles or challenges you may face along the way.
Here are some steps to help you measure and plan for running wires:
- Start by determining the locations where you want to install your security cameras. Consider areas that need monitoring such as entrances, driveways, and backyards.
- Take measurements from each camera location to the recording device or monitor. This will give you an idea of the length of wire you will need for each camera.
- Consider potential obstacles or challenges in your installation. For example, if you need to pass wires through walls or around corners, you may need to plan accordingly.
- Choose the type of wire that is suitable for your installation. There are different types of wires available, including coaxial cables and Ethernet cables. Research and select the appropriate one based on your needs.
- Plan the route where you will run the wires. It’s often best to follow existing paths, such as electrical conduit or gutters, to minimize visible wires and potential damage.
- Take note of any additional equipment you may need, such as cable clips or conduit, to secure and protect the wires along the installation route.
By measuring and planning your installation before running wires for your outdoor security cameras, you can ensure a smooth and successful setup. This will help you avoid any setbacks or issues during the installation process and ensure that your cameras are properly positioned for optimal security monitoring.
Preparing the Camera Mount
Before you start running the wires for your outdoor security cameras, it is important to properly prepare the camera mount. This ensures that your cameras are installed securely and have the ideal vantage point for capturing footage.

1. Choose the Right Location
Begin by selecting the best location for your camera mount. Consider areas that provide a clear view of the areas you want to monitor, such as entrances, driveways, or vulnerable spots around your property. Make sure the chosen location is easily accessible for maintenance and adjustments.
2. Mounting Surface
Inspect the surface where the camera will be mounted to ensure it is structurally sound and can support the weight of the camera. Common mounting surfaces include exterior walls, eaves, or soffits. Use a stud finder to locate studs or joists that can provide added stability.
Pro Tip: If you are mounting the camera on a brick or concrete wall, use anchors or masonry screws to ensure a secure installation.
3. Camera Angle and Positioning
Consider the desired camera angle and positioning. It is recommended to aim the camera slightly downward to capture a wider view. This will provide broader coverage and make it easier to identify any potential threats. Adjust the angle as needed during installation to achieve the desired field of view.
Pro Tip: Avoid obstructions such as tree branches, awnings, or other structures that can obstruct the camera’s view.

By properly preparing the camera mount, you can ensure your outdoor security cameras are installed correctly for maximum effectiveness and coverage. This will help protect your property and provide peace of mind.
Drilling Holes and Running the Wires
Once you have determined the best locations for your outdoor security cameras, the next step is to drill holes and run the wires for a clean and professional installation. Follow these steps to ensure a successful installation:
1. Gather the necessary tools and materials
Before you begin drilling holes and running the wires, make sure you have all the necessary tools and materials. This may include a power drill, drill bits, a cable fish tape, a wire stripper, a screwdriver, cable clips, and waterproof conduit.
2. Plan your wiring route
Before you start drilling, plan out the route for your wires. Consider the shortest and most direct path from your camera to the power supply or recording device. Avoid areas with high foot traffic or potential obstructions.
3. Drill holes
Using a power drill and appropriate drill bit for the surface, carefully drill a hole near the camera mounting location. Make sure the hole is wide enough to accommodate the cables and wires.
Once you have drilled the hole, insert a cable fish tape and push it through the hole until it reaches the desired destination. This will make it easier to pull the wires through.
4. Run the wires
Attach the wires to the cable fish tape and carefully pull them through the drilled hole. Be gentle to avoid damaging the wires or the camera.
If you need to run wires along the exterior walls, use cable clips to secure them in place. This will help protect the wires from weather conditions and prevent them from becoming a tripping hazard.
5. Use waterproof conduit
If you are running wires through areas that are exposed to the elements, such as an outdoor wall or an eave, it is recommended to use waterproof conduit to protect the wires from moisture and other potential damages.
Feed the wires through the conduit and secure it to the wall using appropriate clips or brackets.
Remember to leave some slack in the wires near the camera and at the power supply or recording device to allow for future adjustments or maintenance.
By following these steps and taking proper precautions, you can safely drill holes and run wires for your outdoor security cameras, ensuring a tidy and secure installation.
Securing the Wires
Once you have run the wires for your outdoor security cameras, it is important to properly secure them to ensure they are protected from damage and tampering. Here are some tips on how to securely fasten and conceal your camera wires:
- Use cable clips or adhesive hooks: Use cable clips or adhesive hooks to secure the camera wires along the wall or ceiling. This will keep them organized and prevent them from hanging loosely.
- Conceal wires in conduits: If possible, run the camera wires through conduits or tubing to protect them from weather conditions and potential vandalism. This will provide an added layer of security.
- Bury wires underground: If you have the option, consider burying the camera wires underground. This will keep them hidden and protected from potential damage. Make sure to use proper burial-rated cables for this purpose.
- Paint the wires: If the wires are visible and cannot be concealed, consider painting them to blend in with the wall or surrounding area. This will make them less noticeable and reduce the risk of tampering.
- Securely fasten wire connections: Ensure that all wire connections, such as junction boxes or terminal blocks, are securely fastened and protected from environmental factors. This will prevent any accidental disconnections or damage to the wires.
By properly securing the wires for your outdoor security cameras, you can ensure they are protected and function optimally for long-term surveillance and security. Remember to follow any applicable local regulations or guidelines when running and securing camera wires.
Connecting the Wires to the Camera
After properly running the wires for your outdoor security cameras, the next step is to connect them to the cameras themselves.
Step 1: Prepare the Camera
First, you need to make sure that your camera is ready for the wire connection. Depending on the camera model, you may need to open the camera housing or remove a cover to access the wire connection ports. Refer to the camera’s instruction manual for specific guidance.
Step 2: Strip the Wire
Using a wire stripper tool, carefully strip the outer insulation from the end of the wire, exposing the individual wires inside. Ensure that you strip just enough insulation to reveal the bare wire without damaging the inner conductors.
Step 3: Attach the Wires
Identify the corresponding wire terminals on the camera, usually labeled as positive (+) and negative (-). Match the positive wire with the positive terminal and the negative wire with the negative terminal.
Insert the exposed wire ends into the appropriate terminals and tighten the screws or terminals to secure the connection. Ensure that the wires are securely attached and there is no loose connection that could cause issues with the camera’s performance.
Step 4: Test the Connection
Once the wires are connected, it is essential to test the connection. Turn on your camera and check if the live video feed is transmitting correctly. Also, make sure that the camera is receiving power without any voltage drop or interruption.
If you encounter any issues during the testing, double-check the wire connections and ensure they are properly attached. You may need to re-strip and reconnect the wires if necessary.
By properly connecting the wires to your outdoor security camera, you can ensure a reliable and stable connection that will allow the camera to function effectively and provide you with the desired surveillance and security.
Connecting the Wires to the Power Source
Once you have determined the best location for your outdoor security camera, it’s time to connect the wires to the power source. Before beginning this process, make sure you have all the necessary tools and equipment, including a power supply, wires, and connectors. Here are the steps to follow:
Step 1: Choose a Power Source
First, you need to choose a suitable power source for your outdoor security camera. This can be an existing electrical outlet, a nearby light fixture, or a dedicated power supply. Ensure that the power source is located near the camera and can provide the necessary voltage and amperage.
Step 2: Prepare the Wires
Next, prepare the wires for connecting to the power source. Strip approximately half an inch of insulation from the ends of the wires to expose the copper conductors. This will allow for a secure and reliable connection.
Note: It’s important to use wires that are specifically designed for outdoor use to ensure their durability and protection against the elements.
Step 3: Connect the Wires
Now it’s time to connect the wires to the power source. If you are using an existing electrical outlet or light fixture, you may need to remove the cover plate to access the electrical wiring. Consult a licensed electrician if you are unsure about working with electrical connections.
Match the colors of the wires – black to black, red to red, and so on – and twist them together using wire connectors. Ensure that the connection is secure and that there are no exposed wires.
Step 4: Test the Connection
After connecting the wires, it’s recommended to test the connection before mounting the outdoor security camera. This will ensure that the camera receives power and functions properly.
Caution: Always follow the manufacturer’s instructions and guidelines when installing and connecting your outdoor security camera. If you are not comfortable working with electrical connections, it’s best to hire a professional to assist you.
By following these steps, you can successfully connect the wires from your outdoor security camera to the power source. This will enable your camera to operate efficiently, providing you with the peace of mind and security you desire for your outdoor space.
Testing the Camera and Wires
Once you have successfully installed the outdoor security camera and run the wires, it is important to test the camera and ensure that everything is working properly.
Step 1: Power On the Camera
First, make sure that the camera is properly connected to a power source. If you have installed a wired camera, check if the power adapter is plugged in and receiving power. If you have installed a wireless camera, ensure that the batteries are charged or that the camera is connected to a power source.
Step 2: Check the Video Feed
Next, check the video feed from the camera to ensure that it is transmitting a clear image. You can do this by accessing the camera’s video feed on a monitor or through a mobile app if it is a wireless camera. Make sure that there are no obstructions blocking the camera’s view and that the image is clear and not distorted.
Step 3: Test the Camera’s Sensors
If your camera has motion detection or other sensor features, test them to ensure that they are working properly. Move in front of the camera and check if it detects your movement and triggers any alarms or notifications. You can also test other sensor features such as sound detection or night vision, depending on the capabilities of your camera.
Step 4: Check the Connection
Lastly, check the connection between the camera and the recording device or the network. If you have wired cameras, ensure that the wires are securely connected to the recording device and that the video feed is being recorded properly. For wireless cameras, check if the camera is connected to the Wi-Fi network and that the live feed can be accessed remotely without any issues.
By following these steps and testing your outdoor security camera and wires, you can ensure that your camera system is functioning effectively and providing the necessary security for your property.
Concealing the Wires
It’s important to properly conceal the wires for your outdoor security cameras to maintain a clean and professional look. Here are some methods you can use:
1. Underground Installation
If you want a completely hidden wiring system, consider burying the wires underground. This method requires digging a trench from your camera location to the power source or recording device. Use a shovel or trenching tool to create a trench at least 6 to 12 inches deep. Once the trench is dug, place the wires in conduit pipes to protect them from damage. Cover the trench with dirt or grass to blend it with the surroundings.
2. Utilize Existing Landscaping
You can also take advantage of existing landscaping features to hide the wires. For example, if you have shrubs or bushes near the camera location, you can run the wires along the ground and hide them underneath the foliage. Be sure to secure the wires properly to prevent them from being exposed.
Another option is to use gutter downspouts or rain gutters to conceal the wires. Attach the wires to the side of the downspout or gutter using cable clips or adhesive tape. Paint the wires to match the color of the downspout or gutter to make them less noticeable.
3. Hide the Wires Along Walls or Fences
If burying the wires or utilizing existing landscaping is not feasible, you can hide the wires along walls or fences. Use wire clips or adhesive tape to secure the wires to the surface, making sure they are hidden behind the wall or fence as much as possible.
| Pros | Cons |
|---|---|
| Provides a clean and professional look | Requires additional time and effort |
| Wires are completely hidden | May require professional help for underground installation |
| Protects the wires from damage | Limitations based on landscape and property layout |
By concealing the wires for your outdoor security cameras, you can ensure a seamless and aesthetically pleasing installation. Choose the method that works best for your specific needs and enjoy the benefits of a well-hidden wiring system.
FAQ,
What is the best way to run wires for outdoor security cameras?
The best way to run wires for outdoor security cameras is to hide them as much as possible. This can be done by running them through walls, ceilings, or underground conduit. It is important to plan the route of the wires beforehand and use weatherproof cables to protect them from the elements.
Can I run outdoor security camera wires along the side of my house?
Yes, you can run outdoor security camera wires along the side of your house. However, it is recommended to conceal the wires by attaching them to the exterior walls or using cable clips. This will help protect the wires from damage and make them less noticeable.
How deep should I bury outdoor security camera wires?
When burying outdoor security camera wires, it is recommended to dig a trench that is at least 18-24 inches deep. This will provide enough depth to protect the wires from accidental damage, animal interference, and the elements. Additionally, it is important to use direct burial-rated cables and conduit for added protection.
Can I run outdoor security camera wires through my attic?
Yes, you can run outdoor security camera wires through your attic. This can be a convenient way to hide the wires and protect them from the elements. However, it is important to ensure that the attic is well insulated and properly ventilated to prevent any potential damage to the wires due to extreme temperatures or moisture.


