
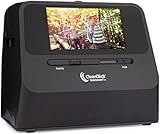
If you have a collection of cherished 8×10 photos and want to digitize them, you don’t necessarily need a traditional scanner. With a digital camera and a few handy tips, you can easily scan these large photos and preserve them in a digital format.
Using a digital camera to scan your 8×10 photos has several advantages. It allows you to capture high-resolution images with vibrant colors and fine details. Additionally, you have more control over the process, enabling you to adjust lighting, angles, and settings for optimal results.
To start, gather the necessary equipment. You will need a digital camera with a high-resolution sensor, a stable tripod, and a well-lit area. Set up your camera on the tripod, ensuring it’s level and secure.
Next, place your 8×10 photo on a clean, flat surface. Make sure there is no direct light or glare on the photo, as it can affect the quality of the scan. Position the camera directly above the photo, making sure it’s parallel to the surface. Adjust the camera settings to achieve the desired exposure and focus.
Once everything is set up, gently press the shutter button or use a remote trigger to capture the photo. Take multiple shots from different angles and distances to ensure you have options to choose from. Afterward, transfer the images to your computer and use photo editing software to enhance the colors, remove any imperfections, and adjust the brightness and contrast.

By following these steps, you can easily scan your 8×10 photos with a digital camera and preserve them for years to come. Now you can share your memories online, create photo albums, or even print them in different sizes without losing any of the original quality.
Why scan an 8×10 photo with a digital camera?
Scanning an 8×10 photo with a digital camera has become a popular and convenient method for capturing and preserving precious memories. Here are several reasons why you should consider using this approach:
1. Preserve photo quality
By using a digital camera to scan an 8×10 photo, you can ensure that the photo’s original quality is preserved. Traditional scanners may have limited resolution and can degrade the image quality over time. In contrast, digital cameras offer higher resolutions and produce sharp and detailed images.
2. Convenience and flexibility
Using a digital camera to scan photos allows you to do it at your own convenience and in any location. You can easily take photos of your 8×10 prints at home or even outdoors, avoiding the need to carry bulky and expensive scanning equipment.
3. Cost-effective approach
Scanning photos with a digital camera is a cost-effective solution compared to purchasing a dedicated photo scanner. As most people already own a digital camera or a smartphone with a decent camera, this method allows you to utilize existing resources without additional expenses.

4. Preserve delicate originals
For delicate or fragile 8×10 photos, using a digital camera eliminates the need for physical handling. This minimizes the risk of causing damage to the original print during the scanning process.
5. Share and edit easily
Once you have scanned your 8×10 photos with a digital camera, you can easily share them with loved ones by sending digital files. You can also edit the digital images using various software to enhance their quality, adjust colors, or remove any imperfections.
Overall, scanning an 8×10 photo with a digital camera provides a convenient, cost-effective, and high-quality method for preserving your cherished memories. It allows you to easily share, edit, and safeguard your photos for years to come.
Essential equipment for scanning an 8×10 photo
1. Digital camera: To scan an 8×10 photo with a digital camera, you will need a high-quality digital camera with a resolution of at least 12 megapixels. This will ensure that you can capture the details and colors of the photo accurately.
2. Tripod: A sturdy tripod is essential to keep the camera stable during the scanning process. This will help eliminate any blur or camera shake, resulting in sharp and clear scans.

3. Light source: You will need a consistent and diffuse light source to illuminate the photo evenly. Natural light or a softbox can work well for this purpose. Avoid using direct flash, as it can cause glare and reflection on the photo.
4. Background: Choose a plain and neutral-colored background for scanning the photo. A white or gray background can help you concentrate on the details of the photo and make adjustments if needed.
5. Tripod mount or copy stand: A tripod mount or copy stand will allow you to position the photo securely and at the right angle for scanning. This will help you maintain consistency and avoid any distortion in the final scan.
6. Remote shutter release: Using a remote shutter release or self-timer functionality on your camera will further reduce any vibration or movement during the scanning process. This will result in sharper and more accurate scans.
7. Photo scanner software: Make sure you have photo scanner software installed on your computer. This software will allow you to import, edit, and save your scanned images in high resolution.

8. Cleaning materials: Clean the camera lens and the photo surface before scanning to avoid any dust or smudges that can affect the scan quality. Use a microfiber cloth or lens cleaning solution for this purpose.
9. Patience and attention to detail: Scanning an 8×10 photo with a digital camera requires patience and attention to detail. Take your time to position the camera, adjust the settings, and review the scans to ensure you capture the photo accurately.
Remember: Always handle the photo with clean hands and avoid touching the surface to prevent fingerprints or scratches. This will help preserve the photo’s quality and longevity.
Setting up the photo scanning process
Scanning an 8×10 photo with a digital camera requires careful setup to ensure the best quality and accuracy. Follow these steps to set up the photo scanning process:
- Choose a well-lit area: Find a location with plenty of natural light or use artificial lighting to illuminate the photo evenly. Avoid harsh shadows or reflections that could affect the image quality.
- Prepare the photo: Make sure the photo is clean and free of dust or debris. Use a soft, lint-free cloth to gently wipe the surface if needed.
- Position the photo: Place the 8×10 photo on a flat surface, such as a table or a clean whiteboard, to provide a contrasting background. Use small weights or clips to hold the photo in place and prevent it from moving during the scanning process.
- Set up the camera: Mount your digital camera on a tripod or use a stable surface to hold it steady. Adjust the camera settings to capture the highest resolution possible and disable any flash or auto-focus features.
- Frame the photo: Position the camera directly above the photo, ensuring that the entire image is within the frame. Use the camera’s viewfinder or LCD screen to align the edges of the photo with the edges of the frame.
- Check the focus: Use the camera’s manual focus or autofocus feature to ensure the photo is sharp and clear. Take test shots and review them to verify the focus accuracy.
- Capture the photo: Once everything is set up, press the camera’s shutter button to capture the image. Be careful not to move the camera or disturb the photo during the process.
- Review and edit: Transfer the captured photo to a computer and review it for any imperfections or inconsistencies. Use photo-editing software to make necessary adjustments, such as cropping or color correction, to enhance the final image.
By following these steps, you can successfully set up the photo scanning process and ensure high-quality digital copies of your 8×10 photos.

Positioning the photo for scanning
Positioning the photo correctly is crucial for achieving high-quality scans with your digital camera. Follow these steps to ensure that your photo is properly aligned and positioned:
1. Clean the photo:
Before scanning, make sure your photo is free from dust, dirt, or any other debris. Gently clean the surface of the photo using a soft, lint-free cloth or a compressed air canister. This will help prevent any blemishes or imperfections from appearing in the scanned image.
2. Use a stable surface:
Place the photo on a stable, flat surface that won’t move or vibrate during the scanning process. A sturdy table or desk is recommended. This will help prevent blurry or distorted images caused by camera shake.
3. Position the photo properly:
Align the edges of the photo parallel to the edges of your camera’s viewfinder or LCD screen. Make sure the entire photo is visible within the frame and there is no cropping or overlapping. This will ensure that the entire photo is captured during scanning.
Note: If your photo is larger than the size of your camera’s viewfinder or LCD screen, you may need to scan it in multiple sections and stitch the images together later using image editing software.
4. Set up proper lighting:
Avoid harsh direct lighting that can create glare or shadows on the photo. Use diffused lighting or natural light from a window to evenly illuminate the photo. This will help capture the accurate colors and details of the photo.
Follow these guidelines when positioning your photo for scanning with a digital camera to achieve the best results and ensure that your scanned images are of high quality.
Adjusting the camera settings
Before scanning your 8×10 photo with a digital camera, it is important to adjust the camera settings to ensure the best possible image quality. Here are some tips for adjusting the camera settings:
- Resolution: Set the camera to the highest resolution possible to capture the fine details of the photo.
- ISO: Choose a low ISO setting, such as 100 or 200, to minimize noise and grain in the image.
- White Balance: Set the white balance according to the lighting conditions to ensure accurate color reproduction.
- Aperture: Use a narrow aperture, such as f/8 or higher, to increase the depth of field and keep the entire photo in focus.
- Shutter Speed: Select a moderate shutter speed to avoid motion blur and ensure sharpness in the image.
- Image Format: Choose a file format suitable for editing, such as RAW or JPEG, depending on your intended use for the scanned photo.
By adjusting these camera settings, you will be able to capture a high-quality digital version of your 8×10 photo that preserves its original details and colors.
Lighting considerations for scanning a photo
When scanning an 8×10 photo with a digital camera, lighting plays a crucial role in capturing the image without any distortions or unwanted reflections. Here are some important lighting considerations to keep in mind:

Avoid direct sunlight
Direct sunlight can create harsh shadows and introduce overexposure to your photo, resulting in loss of details and color accuracy. It is recommended to avoid scanning photos under direct sunlight as it can also cause glare on the glossy surface of the photo.
Use diffused lighting
For best results, use diffused lighting to minimize harsh shadows and reflections. You can achieve this by placing a translucent material, such as a white sheet or a diffuser, between the light source and the photo. This will help evenly distribute the light and reduce the appearance of unwanted shadows.
Position the lights correctly
Position the lights at an angle to the photo instead of having them directly in front of it. This will help avoid any direct reflections from the photo’s surface. Experiment with different angles to find the best lighting setup that minimizes reflections and reveals the true details of the photo.
Avoid mixed lighting sources
Try to avoid using different types of lighting sources, such as fluorescent and incandescent lights, simultaneously. Mixing different lighting temperatures can result in color casts and inaccurate representation of the photo. Stick to one consistent light source to maintain color accuracy.
By considering these lighting factors when scanning an 8×10 photo with a digital camera, you can ensure that the resulting image is a faithful representation of the original, preserving its details, colors, and overall quality.
Capturing the photo with your digital camera
Scanning an 8×10 photo with a digital camera can produce high-quality, digitized versions of your cherished memories. Here are the steps to capture the photo using your digital camera:
- Clean the photo: Before capturing the photo, make sure it is clean and free from dust or smudges. Use a soft, lint-free cloth to gently wipe the photo if needed.
- Set up a stable surface: Place the photo on a flat surface, such as a table or desk, ensuring it is well-lit with natural or artificial light. Avoid capturing the photo in direct sunlight to prevent harsh reflections or shadows.
- Position the photo: Align the 8×10 photo within the frame of your digital camera. Make sure there is enough space around the edges to capture the entire photo without cropping any details.
- Adjust camera settings: Set your camera to the highest resolution and image quality possible. This will ensure that the scanned photo will be captured with maximum detail and clarity.
- Use a tripod: To prevent camera shake and blur, it is recommended to use a tripod or another stable support for your camera. This will help achieve sharp and clear results.
- Focus: Use the autofocus feature of your digital camera or manually adjust the focus to ensure the photo is sharp and in focus. Pay attention to any areas of the photo that may be difficult to focus on, such as fine details or textured surfaces.
- Capture the photo: Once everything is set up and the photo is properly aligned and focused, press the shutter button to capture the image. Try to minimize any movement or shaking of the camera during the capture process.
- Review and retake if necessary: After capturing the photo, review it on the camera’s LCD screen. If the image is not satisfactory, you can retake it by adjusting the position, focus, or camera settings as needed.
Following these steps will help you successfully capture an 8×10 photo with your digital camera. Once you have the digitized version, you can further enhance it using photo editing software if desired.
Post-processing tips for scanned 8×10 photos
Scanning an 8×10 photo with a digital camera can produce amazing results, but the scanning process doesn’t always result in a perfect image. However, with some post-processing techniques, you can enhance the quality of your scanned photo and make it look even better.
1. Color correction: When scanning an 8×10 photo, the colors can sometimes appear faded or distorted. Use a photo editing software to adjust the color levels, saturation, and white balance to bring back the original hues and make the photo look more vibrant.
2. Dust and scratch removal: Old photos often have dust and scratches that can be distracting. Use the healing brush or clone stamp tool in your photo editing software to remove these imperfections. Be careful not to overdo it and alter the original image too much.
3. Sharpening: Scanning can sometimes result in a slightly soft image. Use the sharpening tool in your photo editing software to add a little extra clarity and sharpen the details. Be cautious not to oversharpen, as it can introduce noise and artifacts.
4. Cropping and straightening: Adjust the composition by cropping the image if necessary. Also, check if the scanned photo is aligned correctly and use the rotate or straighten tools to fix any tilt or perspective issues.
5. Adjusting contrast and brightness: Improve the overall tone of the photo by adjusting the contrast and brightness levels. This can help bring out details in shadowed areas and make the photo more visually appealing.
6. Adding effects: Experiment with various effects, such as sepia or black and white, to give your scanned 8×10 photo a different look. Be creative, but keep in mind the original style and intent of the photo.
Remember, post-processing should enhance the photo, not drastically alter it. Preserve the integrity and authenticity of the image while making necessary improvements to bring out its best qualities.
Question-answer:
What is the best way to scan an 8×10 photo with a digital camera?
The best way to scan an 8×10 photo with a digital camera is to use a tripod to ensure stability and avoid blur. Place the photo on a flat surface with good lighting and make sure there are no reflections. Set your camera to the highest resolution and use the autofocus function. Take multiple shots from different angles to capture the photo accurately. Afterwards, transfer the photos to your computer and edit them if necessary.
Can I scan an 8×10 photo with my smartphone?
Yes, you can scan an 8×10 photo with your smartphone. To do so, follow these steps: find a well-lit area with no glare or reflections, position your photo on a flat surface, and hold your smartphone steady. Use the camera’s built-in scanning feature or a third-party scanning app to take the photo. Make sure your phone is set to the highest resolution and use the auto-focus function. Take multiple shots from different angles for the best results. Finally, transfer the scanned photo to your computer or save it directly to your phone’s gallery.


