
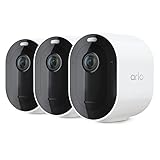
The Arlo Pro camera is a popular choice for home and business security, offering wireless, high-definition video monitoring. However, it’s important to take the necessary steps to ensure that your Arlo Pro camera is secure and protected from unauthorized access.
1. Change the Default Password: One of the first steps you should take to secure your Arlo Pro camera is to change the default password. The default passwords are often easily guessable, making your camera vulnerable to hacking attempts. Choose a strong password that includes a combination of letters, numbers, and special characters.
2. Enable Two-Factor Authentication: Two-factor authentication adds an extra layer of security to your Arlo Pro camera by requiring an additional verification step during login. This typically involves entering a code sent to your mobile device. Enable two-factor authentication to protect your camera from unauthorized access.
3. Keep Your Firmware Updated: Regularly updating your Arlo Pro camera’s firmware is essential to ensure that you have the latest security patches and bug fixes. These updates often include security enhancements that address potential vulnerabilities, so it’s important to stay up-to-date with the latest firmware releases.
4. Secure Your Network: Your Arlo Pro camera relies on your home or business network for connectivity. Make sure that your network is secure by using a strong Wi-Fi password and encrypting your network with WPA2 encryption. Avoid using open or public Wi-Fi networks, as they can put your camera at risk.

5. Disable Remote Access: If you don’t need remote access to your Arlo Pro camera, consider disabling this feature. Remote access allows you to view the camera’s live feed from anywhere, but it also presents a potential security risk. By disabling remote access, you can limit the points of entry for unauthorized users.
By following these security measures, you can ensure that your Arlo Pro camera remains secure and provides reliable video monitoring for your home or business.
Why is security important:
Security is of utmost importance when it comes to protecting your home and loved ones. With the prevalence of technology and connected devices, it has become easier for unauthorized individuals to gain access to private spaces and sensitive information. By taking measures to secure your Arlo Pro camera, you can ensure the safety and privacy of your household.
1. Privacy Protection
One of the main reasons why security is important is to protect your privacy. Arlo Pro cameras are designed to monitor your home and provide you with peace of mind. However, if they are not properly secured, they can become vulnerable to hacking and unauthorized access. By implementing security measures, such as setting strong passwords and regularly updating firmware, you can prevent unauthorized individuals from accessing your camera feed and invading your privacy.
2. Deterrence of Criminal Activity
Having a visible security system, such as an Arlo Pro camera, can act as a deterrent to criminal activity. When potential intruders see that your property is under surveillance, they are more likely to move on to an easier target. By securing your Arlo Pro camera and placing it in strategic locations, you can discourage criminals from attempting to break into your home.

3. Evidence Gathering
In the unfortunate event of a crime occurring on your property, having a properly secured Arlo Pro camera can provide valuable evidence for law enforcement. By capturing high-quality video footage, you can assist in the identification and prosecution of criminals. Ensuring that your camera is securely mounted and functioning properly increases the chances of capturing clear and useful evidence.
Overall, security is important to protect your privacy, deter criminal activity, and provide evidence in case of any unfortunate events. By taking the necessary steps to secure your Arlo Pro camera, you can enjoy the benefits of enhanced protection and peace of mind.
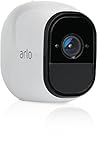
Benefits of using Arlo Pro camera:
The Arlo Pro camera offers a range of benefits that make it a top choice for home security. Here are a few key advantages:
1. Wireless and Weatherproof:
The Arlo Pro camera is completely wireless, allowing you to place it anywhere around your home without the need for complicated wiring. This flexibility makes it easy to install and adjust the camera’s position as needed. Additionally, the camera is weatherproof, meaning it can withstand various weather conditions, providing reliable surveillance year-round.
2. HD Quality and Night Vision:
The Arlo Pro camera captures video in high-definition (HD) quality, ensuring clear and detailed footage. This feature is crucial for identifying potential threats or suspicious activities accurately. Moreover, the camera is equipped with night vision capabilities, enabling it to record crisp and clear footage even in low-light or dark environments, enhancing your home’s security at all times.
3. Two-Way Audio:
The Arlo Pro camera comes with a built-in microphone and speaker, enabling two-way audio communication. This functionality allows you to not only monitor your home visually but also interact with anyone within range of the camera. Whether you’re at home or away, you can use the Arlo app to listen and speak to visitors, delivery personnel, or even ward off potential intruders.
4. Motion Detection and Customizable Alerts:
The Arlo Pro camera features advanced motion detection technology, capable of detecting movement and automatically triggering recording or alert notifications. With customizable alert settings, you can choose to receive instant notifications on your mobile device whenever motion is detected in specific areas of your property. This ensures that you’re always aware of any potential security breaches.
In conclusion, the Arlo Pro camera provides wireless convenience, weatherproof durability, high-definition video quality, night vision, two-way audio communication, and reliable motion detection with customizable alerts. These features make the Arlo Pro camera an excellent choice for securing your home and ensuring your peace of mind.
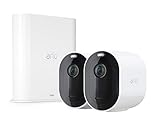
Setting up your Arlo Pro camera:
1. Choose the perfect location for your Arlo Pro camera. Make sure it is within range of your Wi-Fi network and has a clear view of the area you want to monitor.
2. Plug in the Arlo Pro camera and wait for the power LED to turn green.
3. Download the Arlo app from the App Store or Google Play Store and create an Arlo account.
4. Open the Arlo app and follow the on-screen instructions to add your Arlo Pro camera to your account.
5. Press the sync button on the side of the Arlo Pro camera and wait for the sync status LED to blink amber. Then press the sync button on the base station and wait for the sync status LED to blink blue.
6. Once the sync process is complete, you can customize your Arlo Pro camera settings in the app. Set up motion detection, adjust video quality, and customize other preferences according to your needs.
7. Mount the Arlo Pro camera securely using the included mounting accessories or the magnetic mount.

8. Test your Arlo Pro camera to ensure it is working properly by triggering motion events and checking the live stream in the app.
9. If desired, set up Arlo Smart, a subscription service that provides advanced features like person detection and cloud storage for recorded videos.
With these steps, you can easily set up your Arlo Pro camera and enhance the security of your home or business.
Configuring the camera settings:
After setting up your Arlo Pro camera, it is essential to configure the camera settings to ensure its optimal security. Follow the steps below to configure the camera settings:
1. Connect to your Arlo Pro camera:
To configure the camera settings, first, connect the camera to your computer or mobile device. Make sure your device is connected to the same Wi-Fi network as the camera. Use the Arlo app or a web browser to connect to your camera’s live stream.

2. Access the camera settings:
Once you have connected to the camera, access the camera settings menu. In the Arlo app, tap on the Settings icon, which is usually located in the top right corner of the screen. If you are using a web browser, sign in to your Arlo account and navigate to the camera settings page.
3. Set up motion detection:
Enable the motion detection feature to receive alerts and recordings whenever the camera detects any motion. Adjust the motion detection sensitivity according to your preference to avoid unnecessary notifications. You can also define specific motion zones to focus on particular areas.
4. Configure recording options:
Select the desired recording options for your Arlo Pro camera. You can choose to record continuously, set a specific recording schedule, or trigger recordings based on motion detection. Define the video quality and duration of the recordings as per your needs.
5. Enable remote access:
If you want to access your camera remotely, enable remote access in the settings. This will allow you to view the camera’s live stream, receive notifications, and manage settings from anywhere using the Arlo app or a web browser.
Remember to save the changes after configuring the camera settings to apply them effectively. Regularly review and update the settings as needed to ensure the optimum security of your Arlo Pro camera.
Choosing the right location:
When setting up your Arlo Pro camera, it is crucial to choose the right location for optimal security. Here are some factors to consider when selecting the ideal spot:
1. Coverage area:
Determine the specific areas you want to monitor and make sure the camera placement provides coverage for those areas. Consider the field of view and angle of the camera to ensure it covers the desired space.
2. Accessibility:
Ensure that the camera is easily accessible for battery charging, maintenance, and adjustments. It’s important to place it at an appropriate height to avoid tampering or accidental damage.
3. Power source:
Make sure the camera is close to a power source if you plan on using an AC adapter instead of relying solely on the battery. This will ensure uninterrupted power supply and prevent the camera from going offline.
4. Wi-Fi signal strength:
Check the Wi-Fi signal strength in the intended location to ensure a stable connection between the camera and the base station. Weak signal strength can result in poor video quality and frequent disconnections.
5. Environmental factors:
Consider the impact of weather conditions and other environmental factors on the camera’s performance. Ensure the camera is protected from rain, direct sunlight, extreme temperatures, and any potential obstructions that may affect visibility.
6. Mounting options:
Depending on the location, consider the available mounting options such as wall mounts, magnetic mounts, or ceiling mounts. Choose the most suitable mount that provides stability and the desired angle for optimal monitoring.
7. Privacy concerns:
Be mindful of privacy concerns and avoid pointing the camera towards sensitive areas such as bedrooms, bathrooms, or other private spaces. Respect the privacy of others while ensuring maximum security for your property.
By carefully considering these factors, you can select the perfect location for your Arlo Pro camera, ensuring effective surveillance and peace of mind.
Securing the camera against theft:
Securing your Arlo Pro camera is essential to prevent theft and keep your property safe. Here are some measures you can take to ensure the camera is protected:
| 1. Strategic Placement | Place the camera in a location that provides optimal coverage of the area you want to monitor but is also difficult for potential thieves to access. Mount it high on a wall or post where it is less likely to be tampered with. |
| 2. Camera Locking | Consider investing in a camera locking device. These are specially designed mounts that secure the camera and make it difficult to remove without the proper tools. Be sure to follow the manufacturer’s instructions for installation and ensure it is compatible with your Arlo Pro camera model. |
| 3. Concealment | If possible, conceal the camera from view. This can be done by placing it behind a window or using camouflage accessories that blend it with the surroundings. However, ensure that the camera’s view is not obstructed and that the concealment method does not interfere with its performance. |
| 4. Alarm Systems | Consider integrating the camera with an alarm system. This can include motion sensors, sound alarms, or even connecting it to a security company’s monitoring service. In the event of a theft attempt, the alarm system will be triggered, alerting you or the authorities. |
| 5. Password Protection | Ensure that your Arlo Pro camera is password-protected with a strong and unique password. Avoid using easily guessable passwords and do not share your password with unauthorized individuals. Regularly update the password to further enhance the camera’s security. |
| 6. Monitoring and Surveillance | Regularly monitor the camera’s footage and review any suspicious activity. Arlo Pro cameras usually have an accompanying mobile app that allows remote viewing, so you can check in on your property at any time. If you notice any unusual or unauthorized access, report it immediately to the authorities. |
By implementing these security measures, you can greatly reduce the risk of theft and protect your Arlo Pro camera effectively.
Protecting your Arlo Pro camera from weather:
When installing outdoor security cameras like the Arlo Pro, it’s important to take into consideration the weather conditions they will be exposed to. Here are some tips to help you protect your Arlo Pro camera from different weather elements:
1. Rain:
Water can damage the camera’s internal components, so it’s crucial to keep your Arlo Pro camera protected from rain. The camera comes with a weather-resistant casing, but it’s still advised to install it under a roof or an eave to provide additional protection. Alternatively, you can purchase an outdoor housing or a silicone cover designed specifically for your Arlo Pro camera.
2. Extreme Temperatures:
Arlo Pro cameras are designed to operate within a certain temperature range, typically between -20°C to 45°C (-4°F to 113°F). It’s important not to expose the camera to temperatures outside of this range, as it can affect its performance and potentially damage internal components. If you live in an area with extreme temperatures, consider installing the camera in a shaded area or using a weatherproof housing to regulate the temperature.
3. High Winds:
Strong gusts of wind can potentially knock the camera off its mount or cause it to become misaligned. To protect your camera from high winds, make sure it is securely mounted using the provided mounting hardware. Additionally, consider using a camera housing with a sturdy design or choose a location that is less exposed to strong winds.
4. Sun Exposure:
Long-term exposure to direct sunlight can degrade your Arlo Pro camera’s plastic casing and may affect its performance. If possible, try to install the camera in a shaded area or use an outdoor housing with UV protection. Regularly inspect the camera for signs of sun damage and take appropriate action if needed.
5. Snow and Ice:
In cold weather conditions, snow and ice can accumulate on your camera, obstructing the view and potentially causing damage. To protect the camera from snow and ice, consider installing it under a roof or eave to minimize exposure. You can also use a camera housing with a built-in heating element to prevent ice formation.
| Weather Element | Protection Tips |
|---|---|
| Rain | – Install camera under a roof or eave – Use outdoor housing or silicone cover |
| Extreme Temperatures | – Install camera in shaded area – Use weatherproof housing |
| High Winds | – Securely mount the camera – Consider using a sturdy camera housing |
| Sun Exposure | – Install camera in a shaded area – Use outdoor housing with UV protection |
| Snow and Ice | – Install camera under a roof or eave – Use camera housing with heating element |
Updating the firmware:
Regularly updating the firmware on your Arlo Pro camera is crucial for ensuring the security and performance of your device. Firmware updates usually include bug fixes, security patches, and new features that can enhance your camera’s functionality.
To update the firmware on your Arlo Pro camera, follow these steps:
- Launch the Arlo app on your mobile device or log in to your Arlo account on your computer.
- Go to the settings menu and select the camera you want to update.
- Check if there is a firmware update available for your camera by looking for the “Firmware Update” option. If it is available, proceed to the next step.
- Click on the “Firmware Update” option and follow the on-screen instructions to start the update process.
- During the update, make sure your camera is connected to a stable Wi-Fi network and has sufficient battery life.
- Do not disconnect the camera or close the Arlo app until the update is complete.
- Once the update is finished, your Arlo Pro camera will automatically restart to apply the changes.
- After the restart, verify that the firmware has been successfully updated by checking the camera’s settings or the Arlo app.
By regularly updating the firmware on your Arlo Pro camera, you can ensure that your device has the latest security measures and features, providing you with peace of mind when it comes to your home’s security.
Monitoring your Arlo Pro camera remotely:
One of the biggest advantages of the Arlo Pro camera is the ability to monitor it remotely. Whether you’re at work or on vacation, you can keep an eye on your home or office from anywhere in the world. Here are some steps to help you set up remote monitoring for your Arlo Pro camera:
Step 1: Download the Arlo app
To monitor your Arlo Pro camera remotely, you need to download the Arlo app on your smartphone or tablet. The app is available for both iOS and Android devices and can be downloaded from the respective app stores.
Step 2: Create an Arlo account
Once you have downloaded the app, you need to create an Arlo account. Open the app and follow the on-screen instructions to set up your account. Make sure to choose a strong password to ensure the security of your account.
Step 3: Connect your Arlo Pro camera to the app
After creating an account, you need to connect your Arlo Pro camera to the app. Open the app and go to the “Settings” menu. From there, select “Add Device” and follow the instructions to connect your camera. Make sure to enter the correct Wi-Fi credentials to establish a stable connection.
Once your camera is connected, you can access live video feeds, adjust camera settings, and receive notifications directly on your smartphone or tablet.
Note: It is important to keep your Arlo account credentials secure to prevent unauthorized access to your camera.
With the ability to monitor your Arlo Pro camera remotely, you can have peace of mind knowing that you can check on your home or office at any time, from anywhere.
Troubleshooting common issues:
If you are experiencing any issues with your Arlo Pro camera’s security or functionality, here are some troubleshooting steps you can try:
1. Check your internet connection: Make sure your camera is connected to a stable and reliable internet connection. Weak or intermittent internet connectivity can cause issues with the camera’s performance.
2. Restart the camera: Try restarting your camera by unplugging it from the power source and plugging it back in. This can help resolve any minor software glitches that may be causing issues.
3. Check camera placement: Ensure that your camera is placed in an optimal position with a clear line of sight to the area you want to monitor. Obstructions like walls or objects can interfere with the camera’s signal strength.
4. Update camera firmware: Check for any available firmware updates for your Arlo Pro camera. Firmware updates often include bug fixes and improvements that can resolve common issues.
5. Reset camera settings: If you are still experiencing issues, you can try resetting your camera to its default settings. This will delete any customized settings and restore the camera to its original configuration.
6. Contact Arlo support: If none of the above troubleshooting steps resolve your issue, it’s recommended to contact Arlo support for further assistance. They may be able to provide specific solutions or arrange for a replacement if necessary.
By following these troubleshooting steps, you can often resolve common issues with your Arlo Pro camera and ensure its security and functionality.
FAQ,
What are the main features of Arlo Pro camera?
The main features of Arlo Pro camera include wireless connectivity, HD video quality, motion detection, two-way audio, night vision, and weatherproof design.
How do I set up my Arlo Pro camera?
To set up your Arlo Pro camera, first, download the Arlo app on your smartphone or tablet. Then, connect the base station to your Wi-Fi router using an Ethernet cable. Power on the base station and sync it with the Arlo app. Finally, mount the camera on the desired location and sync it with the base station using the sync button.
How can I secure my Arlo Pro camera from unauthorized access?
To secure your Arlo Pro camera from unauthorized access, make sure to use a strong, unique password for your Arlo account. Enable two-factor authentication for an extra layer of security. Additionally, keep the firmware of your camera and base station up to date to protect against potential vulnerabilities. Avoid sharing your camera’s live view with unknown or untrusted individuals.
Can I access my Arlo Pro camera remotely?
Yes, you can access your Arlo Pro camera remotely through the Arlo app on your smartphone or tablet. Simply open the app and select the camera you want to view. You can check live video feed, review recorded clips, and manage camera settings from anywhere with an internet connection.


