If you have installed a Winbook security camera in your home or office, you may be wondering how to monitor it on your iPhone. With the advancement in technology, it is now possible to view the live feed of your Winbook security camera on your iPhone, making it convenient and effortless to keep an eye on your premises.
To begin, you need to ensure that your Winbook security camera is connected to your Wi-Fi network. This can be done by following the instructions provided in the user manual or by contacting the customer support for assistance. Once your camera is connected to the Wi-Fi, you can proceed with the setup process on your iPhone.
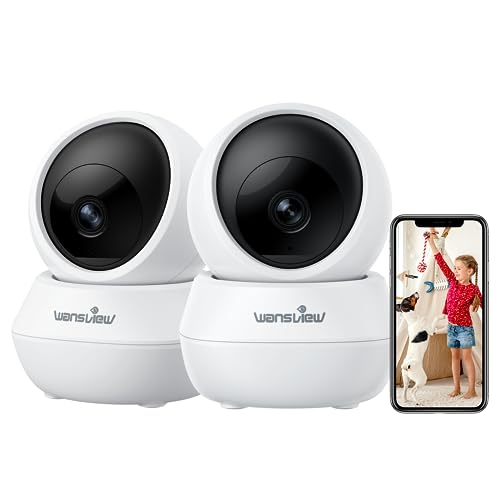
Firstly, you need to download and install the Winbook security camera app from the App Store. This app is specifically designed to provide seamless access to your Winbook security cameras on your iPhone. Once the installation is complete, open the app and follow the on-screen instructions to set up your cameras.
During the setup process, you will be prompted to enter the Wi-Fi credentials of your network. Make sure to enter the correct details to ensure a successful connection. Once the app detects your camera, you will be able to view the live feed on your iPhone.
Now, you can conveniently monitor your Winbook security camera from anywhere using your iPhone. Whether you are at work, on vacation, or simply in another part of your home, you can easily keep an eye on your premises by accessing the app on your iPhone. So, don’t worry about missing any important events or security breaches – keep your iPhone handy and stay connected with your Winbook security camera.
Step 1: Download the Winbook Security Camera app
To connect your Winbook security camera to your iPhone, you need to download the Winbook Security Camera app from the App Store. The app is compatible with most iPhone models and ensures seamless connectivity and functionality with your Winbook security camera.
Here are the steps to download the app:
| 1. | On your iPhone, open the App Store. |
| 2. | Tap on the “Search” tab located at the bottom of the screen. |
| 3. | In the search bar, type “Winbook Security Camera” and tap the search button. |
| 4. | From the search results, select the app with the Winbook Security Camera logo. |
| 5. | Tap the “Get” or “Download” button next to the app. |
| 6. | You may be prompted to enter your Apple ID password or use Touch ID/Face ID for authentication. |
| 7. | Wait for the app to download and install on your iPhone. |
Once the Winbook Security Camera app is successfully downloaded and installed on your iPhone, you can proceed to the next step to set up your security camera and start viewing the footage on your device.
Step 2: Connect your iPhone to the same network as the camera
To see your WinBook security camera on your iPhone, ensure that both your iPhone and the camera are connected to the same network. Follow these steps to connect your iPhone to the camera:
- Open the Settings app on your iPhone.
- Select “Wi-Fi” settings.
- Ensure that Wi-Fi is enabled on your iPhone.
- Tap on the network name that corresponds to the network your camera is connected to.
- Enter the password for the network if prompted.
- Wait for your iPhone to connect to the network.
- Once connected, go back to the home screen of your iPhone.
Now that your iPhone is connected to the same network as your WinBook security camera, you can proceed to the next step to access the camera on your iPhone.

Step 3: Launch the Winbook Security Camera app
Once you have successfully connected your Winbook security camera to your home network and installed the required app on your iPhone, it’s time to launch the Winbook Security Camera app and start viewing the live feed from your camera.
- Locate the Winbook Security Camera app icon on your iPhone’s home screen and tap on it to launch the app.
- Upon launching the app, you may be prompted to sign in or create an account. If you have already created an account during the initial setup process, simply sign in using your credentials. If not, follow the on-screen instructions to create a new account.
- Once you are signed in, you should see a list of available cameras connected to your network. Tap on the camera you want to view.
- The app will then connect to the selected camera and start streaming the live feed. Depending on your network connection, it may take a few seconds for the feed to load.
- You can now view the live feed from your Winbook security camera on your iPhone. Use the app’s controls to adjust the camera’s angle, zoom in or out, and access other features and settings.
Remember to keep your iPhone and the Winbook Security Camera app up to date for the best performance and to take advantage of any new features or improvements.
Step 4: Add your camera to the app
Once you have downloaded and installed the Winbook Security Camera app on your iPhone, follow these steps to add your camera:
1. Open the app
Tap on the Winbook Security Camera app icon on your iPhone’s home screen to open it.
2. Tap on the “+” button
In the app’s main interface, you will see a “+” button in the top-right corner. Tap on it to begin the camera setup process.

3. Select your camera type
On the “Add Device” screen, you will be prompted to select your camera type. Choose the appropriate option based on the model and type of your Winbook security camera.
4. Provide the camera details
Next, you will need to provide the necessary details about your camera. This may include the camera’s name, location, IP address or QR code. Consult your camera’s user manual or documentation to find this information.
5. Connect to your camera
Tap on the “Connect” button to establish a connection between your iPhone and the camera. Make sure your iPhone is connected to the same Wi-Fi network as your camera for a smooth connection.
6. Follow on-screen instructions
Once the connection is established, follow the on-screen instructions to complete the setup process. This may involve entering a username and password, configuring additional settings, or updating the camera’s firmware.
After completing these steps, you should be able to see your Winbook security camera on your iPhone within the app. You can then access live video feed, adjust camera settings, and perform other actions using the app’s interface.

Step 5: Access your camera on your iPhone
Accessing your Winbook security camera on your iPhone is easy with the dedicated mobile app. Follow these simple steps to view your camera feed on your iPhone:
- Open the App Store on your iPhone and search for the Winbook Camera app.
- Download and install the app on your iPhone.
- Once the app is installed, launch it.
- Sign in to your Winbook Camera account using your credentials. If you haven’t created an account yet, you will need to do so before proceeding.
- After signing in, you will be presented with a list of your registered cameras.
- Select the camera you want to view from the list.
- The app will connect to your camera and start streaming live video to your iPhone.
- You can now use your iPhone to view the camera feed, control camera settings, and even take snapshots or record videos.
With the Winbook Camera app on your iPhone, you can conveniently monitor your security camera from anywhere, providing you with peace of mind and enhanced security.
Step 6: Customize camera settings
Once you have successfully connected your Winbook security camera to your iPhone, you may want to customize the camera settings to suit your preferences. Here are some options you can explore:
- Video quality: Adjust the video quality of your camera to optimize the clarity and resolution of the footage.
- Audio settings: Enable or disable audio recording to capture sound along with the video feed.
- Motion detection: Enable motion detection to receive alerts whenever movement is detected in the camera’s field of view.
- Recording schedule: Set up a schedule for when the camera should automatically start or stop recording.
- Live view options: Customize the layout and arrangement of camera feeds when viewing multiple cameras simultaneously.
- Notifications: Configure notification settings to receive alerts on your iPhone when certain events occur, such as motion detection or camera tampering.
By exploring and customizing these settings, you can tailor the Winbook security camera experience to meet your specific needs and preferences.
Step 7: Troubleshooting
If you are experiencing any issues connecting your Winbook security camera to your iPhone, here are some troubleshooting steps you can try:

Check your internet connection
Ensure that your iPhone is connected to a stable Wi-Fi or cellular data network. Poor internet connection can cause problems when accessing your security camera’s feed.
Restart your iPhone and Wi-Fi router
Sometimes, a simple restart can resolve connectivity issues. Try restarting both your iPhone and Wi-Fi router to see if that helps establish a successful connection.
Update the camera’s firmware
Check if there are any available firmware updates for your Winbook security camera. Outdated firmware can sometimes cause compatibility issues with newer devices. Visit the manufacturer’s website or consult the camera’s user manual for instructions on how to update the firmware.
Double-check the camera settings
Ensure that you have correctly configured the camera settings to allow remote access and viewing on your iPhone. Check the camera’s user manual for detailed instructions on how to set up remote access.
Contact technical support
If you have tried all the troubleshooting steps above and are still unable to connect your Winbook security camera to your iPhone, it may be helpful to reach out to the manufacturer’s technical support for further assistance. They will be able to provide specialized support and help troubleshoot any specific issues you may be facing.


