
Setting up a DSLR camera on a tripod is an essential skill for any photographer looking to capture sharp and steady images. Whether you’re shooting landscapes, portraits, or anything in between, a tripod provides stability and minimizes camera shake, resulting in clearer and more professional-looking photographs.
In this article, we will guide you through the process of setting up your DSLR camera on a tripod, step by step.
Step 1: Choose the right tripod
The first step in setting up your DSLR camera on a tripod is to select a tripod that suits your needs. Consider factors such as height, weight, stability, and portability. Ensure that the tripod you choose can support your camera’s weight and provide a stable base for your photography.
Step 2: Attach the camera to the tripod

Once you have chosen a tripod, it’s time to attach your DSLR camera. Start by locating the tripod mount on the bottom of your camera. It is usually located near the center or slightly off-center. Align the tripod mount with the quick release plate on the top of the tripod and securely attach it.
Some tripods may require you to twist or lock the quick release plate for added security.
Step 3: Adjust the tripod height and position
After attaching your camera to the tripod, you need to adjust the tripod’s height and position to suit your shooting needs. Extend or retract the tripod legs to achieve the desired height. For low-angle shots, you can also spread the legs wide and adjust them accordingly.
When positioning the tripod, consider factors such as stability, the subject you are shooting, and the composition of your photograph.
Step 4: Level the tripod and camera
Ensuring that your tripod and camera are level is crucial for producing straight, balanced images. Most tripods come with a built-in bubble level or a ball head with a leveling indicator. Adjust the tripod head or legs until the indicator shows that the camera and tripod are level.
A level camera makes it easier to compose your shots and prevents distortion.
Step 5: Secure the tripod and camera
Once you have set up your DSLR camera on the tripod, it is essential to secure everything to avoid any accidental movement. Check that all the knobs and locks on the tripod legs, center column, and tripod head are tightened properly. This ensures that your camera remains stable during the entire photoshoot.

Remember to use a remote shutter release or the camera’s timer function to further reduce the risk of camera shake.
By following these step-by-step instructions, you can successfully set up your DSLR camera on a tripod and capture stunning photographs with stability and clarity.
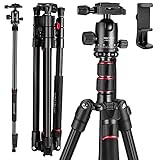
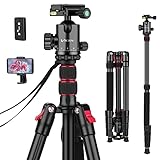
Choosing the Right Tripod for Your DSLR Camera
When it comes to setting up a DSLR camera on a tripod, one of the most important factors to consider is choosing the right tripod. The tripod you select will play a significant role in the stability and quality of your photographs, so it’s crucial to make an informed decision. Here are a few factors to keep in mind when choosing a tripod for your DSLR camera:
1. Weight and Stability
The weight and stability of a tripod are essential considerations. A sturdy tripod will provide stability, preventing camera shake and ensuring sharp images. Determine the weight of your DSLR camera and lens setup, and choose a tripod with a maximum load capacity well above that weight. This way, you can be confident that your camera is secure and will not tip over.
2. Height and Size
The height and size of a tripod are also crucial factors to consider. Ensure that the tripod is tall enough to bring your camera to eye level comfortably. Additionally, check the folded length of the tripod to ensure it’s convenient for transportation and storage. If you plan on using the tripod for outdoor photography, consider a lightweight and compact option.

3. Material
Tripods are typically constructed from aluminum or carbon fiber. Aluminum tripods are generally more affordable and suitable for most photography needs. However, if you are looking for a lightweight option, carbon fiber tripods are worth considering. They are typically more expensive but offer excellent stability and durability.
4. Head Type
Consider the type of tripod head you prefer for your DSLR camera. The most common options are ball heads and pan-tilt heads. Ball heads provide flexibility and are quick to adjust, making them popular for most photographers. Pan-tilt heads offer more precise control but are slightly slower to adjust. Choose a tripod head that suits your shooting style and needs.
5. Budget
Last but not least, consider your budget when choosing a tripod. Like most photography gear, tripods are available at various price points. While more expensive tripods often offer better stability and durability, there are also affordable options that can still meet your needs. Set a budget and prioritize the features that are most important to you.
By considering these factors when choosing a tripod for your DSLR camera, you can ensure that you select the right one to support your photography needs. Remember to compare different models and read reviews to make an informed decision. A high-quality tripod will provide stability and allow you to capture stunning images with your DSLR camera.
Understanding Tripod Specifications
When setting up a DSLR camera on a tripod, it is important to understand the specifications of the tripod to ensure stability and proper support for your camera. Here are some key tripod specifications to consider:
Maximum Load Capacity
The maximum load capacity refers to the maximum weight that the tripod can support. It is crucial to choose a tripod that can support the weight of your DSLR camera and any additional accessories, such as a heavy lens or external flash. Exceeding the maximum load capacity can result in instability and potential damage to your equipment.
Minimum and Maximum Height
The minimum and maximum height of a tripod determine its versatility in different shooting situations. The minimum height is the lowest point at which the tripod can be set up, while the maximum height is the tallest point it can extend to. Consider your shooting style and needs when selecting a tripod with the appropriate height range to ensure comfortable and convenient use.
Leg Sections
The number of leg sections determines the tripod’s compactness and adjustability. Generally, tripods with more leg sections offer better portability as they can fold into a smaller size. However, tripods with fewer leg sections tend to be more stable and sturdy. Choose a tripod with the desired balance between portability and stability based on your shooting requirements.
Tripod Head Type
The tripod head is the part that attaches to your camera and allows for movement and adjustment. There are different types of tripod heads, including ball heads, pan-tilt heads, and three-way heads. Each type offers different levels of flexibility and control. Consider the type of photography you will be doing and your preferred style of shooting to choose a tripod head that suits your needs.
Material
The material used to construct the tripod affects its weight, durability, and stability. Common tripod materials include aluminum, carbon fiber, and magnesium alloy. Aluminum tripods are affordable and sturdy, while carbon fiber tripods are lightweight and resistant to vibration. Magnesium alloy tripods offer a balance between weight and stability. Select a tripod material that aligns with your shooting requirements and budget.

By understanding and considering these tripod specifications, you can choose the right tripod for your DSLR camera setup. Remember to assess your specific needs, such as weight requirements and shooting style, to ensure optimal performance and stability.
Setting Up Your Tripod Correctly
Setting up your tripod correctly is crucial for getting stable and high-quality shots with your DSLR camera. Follow these steps to ensure you set up your tripod properly:
Step 1: Choose a Stable Surface
Before setting up your tripod, it’s important to choose a stable surface. Avoid placing your tripod on uneven ground or surfaces that can easily vibrate, such as wooden floors. Look for a flat and sturdy surface to ensure maximum stability for your camera.
Step 2: Extend the Legs
Once you have found a suitable surface, extend the legs of your tripod by releasing the leg locks. Gradually extend the legs to the desired height, ensuring that the tripod remains stable at each leg extension. Avoid overextending the legs as this can compromise stability.
Step 3: Adjust the Center Column
If your tripod has a center column, adjust it to the desired height. The center column can provide extra height and flexibility for your camera setup. However, keep in mind that extending the center column too much can affect the stability of your tripod. Find the right balance between height and stability.

Step 4: Attach Your DSLR Camera
Attach your DSLR camera to the tripod’s quick release plate. Ensure that the camera is securely mounted and tightened onto the plate. This will prevent any accidental movement or slips during your shoot.
Step 5: Level Your Tripod
Make sure your tripod is level by using the built-in bubble level or a separate leveling tool. Adjust the legs as necessary to achieve a perfectly level position. This will help prevent your camera from tilting or producing crooked shots.
Step 6: Secure the Tripod
Once your tripod is properly set up and leveled, secure it by tightening the leg locks and any other locking mechanisms in place. This will ensure that your tripod remains stable throughout your shoot, even in windy conditions.
Step 7: Test Stability
Before starting your shoot, give your tripod a gentle shake to check its stability. If there is any wobbling or movement, readjust the legs, center column, or camera mounting to improve stability.
| Tip |
|---|
| Using a tripod with a remote shutter release or a timer can further minimize camera shake and improve image sharpness. |
By following these steps and taking the time to properly set up your tripod, you can ensure that your DSLR camera remains steady and your shots turn out crisp and clear.
Attaching Your DSLR Camera to the Tripod
Setting up your DSLR camera on a tripod is an essential step to capture steady and high-quality photos. Here’s a step-by-step guide on how to attach your DSLR camera to a tripod:
1. Position the Tripod
Choose a stable and level surface to set up your tripod. Extend the legs and adjust the height to your desired level. Make sure the tripod is securely locked in place.
2. Locate the Mounting Plate
Find the mounting plate on your tripod. It is typically a small rectangular or circular piece made of plastic or metal. This plate will allow you to attach your camera securely to the tripod.
3. Remove the Camera’s Battery Cover or Access Panel
Before attaching the camera, remove the battery cover or access panel to access the camera’s mounting socket. This socket is located on the bottom of the camera.
4. Align the Mounting Plate with the Camera
Take the mounting plate and align it with the camera’s mounting socket. Ensure that it is securely locked in place and flush against the camera’s bottom.
5. Screw the Mounting Plate into the Camera
Using the provided screw or lever on the mounting plate, attach it to the camera by turning it clockwise. Make sure it is fastened tightly to prevent any movement or instability during use.
6. Attach the Camera to the Tripod
Once the mounting plate is securely attached to the camera, place the camera on top of the tripod. Align the mounting plate with the tripod’s quick-release mechanism or screw hole.
7. Secure the Camera to the Tripod
Depending on the type of tripod, lock the camera in place by either sliding the quick-release mechanism or tightening the screw located near the tripod’s mounting area. Ensure the camera is tightly secured to prevent any wobbling or movement.
With your DSLR camera securely attached to the tripod, you’re ready to take steady and blur-free photos. Remember to check the stability of the tripod and adjust its height if needed before capturing your shot.
| Tips: |
| – Always double-check the tightness of the mounting plate to avoid accidents or camera falls. |
| – Use a remote shutter release or self-timer function to prevent camera shake when taking photos. |
| – Experiment with different tripod positions and heights to capture unique perspectives and angles. |
Adjusting the Height and Leveling Your Camera
Before you begin setting up your DSLR camera on a tripod, it is important to adjust the height and level the camera to ensure stability and optimal positioning. Follow these steps to achieve the correct height and level:
- Extend the tripod legs to your desired height. Make sure the legs are secure by tightening the leg locks.
- If available, use a built-in bubble level on the tripod head to check if the tripod is level. Adjust the legs accordingly if needed.
- Attach the camera mounting plate or quick-release plate to the bottom of your DSLR camera.
- Mount the camera securely onto the tripod head, ensuring it is locked in place.
- Use the tripod’s height adjustment knob to fine-tune the camera’s positioning. Raise or lower the height until your subject is centered in the frame and at the desired level.
- If your tripod has a center column, you can adjust its height to further refine the camera’s positioning.
- Once the camera is at the desired height, use the tripod’s pan and tilt adjustments to level the camera. Look through the viewfinder or use the camera display to check the horizon line or other straight lines in your composition. Make any necessary adjustments to level the camera.
- Double-check the stability of the tripod and make any additional tweaks to the height or level as needed.
By properly adjusting the height and leveling your DSLR camera on a tripod, you can ensure stability and achieve well-composed photographs or videos with ease.
Using the Tripod for Stable Shots
When it comes to capturing professional-quality photos or videos, a tripod is an essential tool. By utilizing a tripod, you can stabilize your DSLR camera to avoid blurry shots and achieve crisp, clear images. Here are some tips on using a tripod effectively:
Choosing the Right Tripod
Before setting up your DSLR camera on a tripod, ensure that you have a sturdy, reliable tripod. Look for one that is made of durable materials and has a weight capacity that can support your camera and lens. Additionally, check for adjustable leg lengths and a quick-release plate for easy camera attachment.
Tip: If you plan to use your tripod both indoors and outdoors, consider purchasing a tripod with spikes on the feet that can be used on uneven terrain.
Setting up the Tripod
Start by finding a level, stable surface to place your tripod on. Extend the legs of the tripod to your desired height, ensuring they are securely locked in place. Next, attach the quick-release plate to the bottom of your DSLR camera, then place the camera onto the tripod head and lock it in place.
Note: To prevent any accidental camera movement, use the camera’s self-timer or a remote shutter release to take your shots.
Adjusting the Tripod
Once your DSLR camera is mounted on the tripod, check the composition of your shot through the camera’s viewfinder or LCD screen. Adjust the height, angle, and position of the tripod accordingly to achieve the desired framing and perspective.
Tip: To ensure maximum stability, avoid extending the camera’s center column fully and keep it as short as possible.
Additionally, if you’re shooting on a windy day, hang a bag or add extra weight to the tripod’s center hook to provide extra stability against any gusts of wind.
Now that you understand how to set up and use a tripod effectively, you can confidently capture steady, professional-looking shots with your DSLR camera.
Practicing Proper Tripod Maintenance
Proper tripod maintenance is essential to ensure the longevity and functionality of your DSLR camera setup. By following a few simple steps, you can keep your tripod in excellent condition and avoid any potential issues during your photography sessions.
1. Regularly Inspect and Clean
Start by inspecting your tripod for any signs of wear or damage. Look for loose screws, worn-out leg locks, or bent components. If you notice any issues, consider repairing or replacing the affected parts.
Additionally, it’s important to clean your tripod regularly, especially if you often shoot in dusty or sandy environments. Wipe down the tripod legs and joints with a soft cloth, and use a small brush to remove any debris that may have accumulated in the crevices.
2. Lubricate Moving Parts
To ensure smooth operation, lubricate the moving parts of your tripod regularly. Apply a small amount of silicone-based lubricant or graphite powder to the leg joints and other adjustable components. Be sure to follow the manufacturer’s instructions and avoid using excessive amounts of lubricant, as this can attract dirt and debris.
3. Store Properly
When not in use, store your tripod in a cool and dry place to prevent damage from moisture or extreme temperatures. Avoid leaving it exposed to direct sunlight for extended periods as this can cause materials to deteriorate over time.
Consider investing in a tripod bag or case to protect your equipment during transport. This will help prevent scratches or other accidental damage that can occur when moving your tripod from one location to another.
4. Handle with Care
When setting up or dismantling your tripod, handle it with care to avoid any unnecessary stress on the components. Avoid dropping or banging the tripod against hard surfaces, as this can damage the legs or other parts.
5. Adjust and Secure Properly
Before mounting your DSLR camera, make sure to adjust the tripod legs and the center column to the desired height. Ensure that the leg locks and other adjustable mechanisms are securely tightened to prevent any accidental slipping or collapsing.
Once your DSLR camera is mounted, double-check the stability of the tripod by gently nudging it. If it wobbles or feels unstable, readjust and tighten the necessary parts until it is securely in place.
Conclusion
By practicing proper tripod maintenance, you can maximize the lifespan of your DSLR camera setup and achieve more stable and professional-looking shots. Regular inspection, cleaning, lubrication, and careful handling are key factors in keeping your tripod in top condition for years to come.
Question-answer:
What is a DSLR camera?
A DSLR camera, or a digital single-lens reflex camera, is a type of camera that uses a mirror mechanism to direct light from the lens to the optical viewfinder. It allows photographers to view the exact image that will be captured by the camera’s sensor.
Why would I need to set up a DSLR camera on a tripod?
Setting up a DSLR camera on a tripod can be beneficial in several ways. Firstly, it provides stability and helps eliminate camera shake, resulting in sharper and more focused images. Secondly, using a tripod allows you to frame your shot more precisely and gives you the ability to experiment with different compositions. Additionally, a tripod is essential when shooting in low light conditions or when using longer exposure times.


