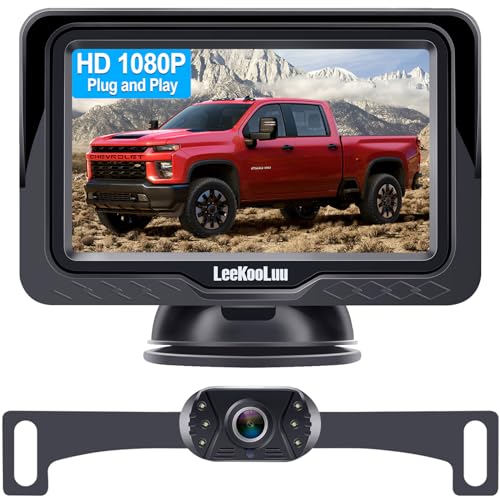
Having a backup camera in your vehicle can greatly enhance your driving experience, especially when parking or maneuvering in tight spaces. The Peak Digital Backup Camera is a popular choice for many drivers due to its affordability and ease of installation. In this article, we will guide you through the process of setting up a Peak Digital Backup Camera in your car.
Step 1: Determine the Placement
The first step in setting up a Peak Digital Backup Camera is to determine the ideal placement for the camera. You will want to choose a location that provides a clear view of the rear of your vehicle, without any obstructions. This is typically the middle of the license plate area. Make sure to take into account the camera’s viewing angle to ensure maximum visibility.
Step 2: Install the Camera
Once you have determined the placement, it’s time to install the Peak Digital Backup Camera. Start by removing the license plate from your vehicle. Then, attach the camera to the license plate area using the provided screws. Make sure to securely fasten the camera to prevent any vibrations or movement while driving.
Step 3: Connect the Wiring
After the camera is securely installed, you will need to connect the wiring. The Peak Digital Backup Camera comes with a long cable that needs to be routed from the camera to the front of your vehicle. You can tuck the wiring underneath the vehicle or use wire clips to secure it along the frame. Once you reach the front of your vehicle, connect the cable to the display unit.
Step 4: Mount the Display Unit
The final step is to mount the display unit in your vehicle. Choose a location that is easily visible to you while driving. This is often the dashboard or the rearview mirror. Use the provided adhesive or a suction cup mount to securely attach the display unit to your chosen location.
With these easy steps, you can set up a Peak Digital Backup Camera in your vehicle and enjoy the added safety and convenience that it provides. Remember to consult the user manual for any specific instructions or troubleshooting tips. Safe driving!

Choosing the Right Backup Camera
When it comes to setting up a peak digital backup camera, selecting the right camera is crucial. Here are a few things to consider when choosing the right backup camera:
Resolution: Look for a backup camera with a high resolution to ensure a clear and detailed view. Higher resolution cameras will provide a sharper image, making it easier to see what’s behind your vehicle.
Field of View: Consider the field of view of the camera. A wider field of view allows you to see more of your surroundings, which can be particularly helpful when parking or maneuvering in tight spaces.
Night Vision: If you often drive during the night or in low-light conditions, look for a backup camera that offers night vision capabilities. This feature uses infrared technology to provide clear images even in complete darkness.
Waterproof: Ensure that the backup camera is waterproof, especially if you live in an area with heavy rainfall or frequently encounter wet conditions. A waterproof camera will be able to withstand moisture and provide reliable performance in any weather.

Installation: Consider the installation process of the backup camera. Some cameras require professional installation, while others can be easily set up yourself. Make sure to choose a camera that is compatible with your vehicle and fits your skill level for installation.
Wireless vs Wired: Decide whether you prefer a wireless or wired backup camera. Wireless cameras are generally easier to install and offer more flexibility, but may be subject to interference. Wired cameras tend to provide a more stable connection, but installation can be more complex.
By taking these factors into consideration, you can choose the right backup camera for your needs and ensure a seamless installation process.
Factors to Consider When Purchasing a Backup Camera
When it comes to selecting a backup camera for your vehicle, there are several important factors to consider. Making the right choice can greatly improve your safety and peace of mind while driving in reverse. Below are some key considerations when purchasing a backup camera:
1. Quality and Resolution
The quality and resolution of the backup camera should be one of your top priorities. Look for a camera with a high-resolution display, preferably with at least 720p or higher. A higher resolution will provide you with a clearer and more detailed view of what is behind your vehicle.

2. Field of View
The field of view is another crucial aspect to consider. A wider field of view allows you to see a larger area behind your vehicle, reducing the risk of blind spots. Aim for a backup camera with a field of view of at least 120 degrees.
Additionally, consider if you need a backup camera with a wide-angle lens. Wide-angle lenses can provide an even wider field of view, allowing you to see more of your surroundings.
3. Night Vision
Driving in reverse at night can be challenging, which is why night vision capabilities are essential for a backup camera. Look for a camera that has infrared or low-light sensors to enhance visibility in low-light or nighttime conditions. This feature will allow you to park or reverse with confidence, regardless of the lighting conditions.
4. Mounting Options
Consider the mounting options available for the backup camera. Some cameras can be installed directly onto the license plate, while others may require drilling or mounting on the rear bumper or other parts of the vehicle. Choose a mounting option that suits your vehicle and preferences.
5. Wireless or Wired
Backup cameras can be either wired or wireless. Wired cameras require routing cables from the camera to the display unit, which may be more difficult to install but provide a more stable and reliable connection. Wireless cameras, on the other hand, are easier to install but may be subject to interference or signal loss.

Lastly, don’t forget to consider your budget and research customer reviews to ensure you are purchasing a backup camera that meets your needs and provides reliable performance.
Gathering the Necessary Tools
Before setting up a peak digital backup camera, it’s important to gather all the necessary tools and equipment that you will need for the installation process. Here are the essential tools you will need:
1. Screwdrivers
Make sure to have both a Phillips-head screwdriver and a flat-head screwdriver on hand. These screwdrivers will be used to remove any screws that may be holding the old camera in place and to attach the new backup camera.
2. Drill and Drill Bits
A drill will come in handy if you need to create holes to mount the camera or route wires. Additionally, having a variety of drill bits will allow you to match the size of the holes needed for installation.
3. Wire Stripper
A wire stripper will be needed to remove the insulation from the wire ends so they can be connected properly.

4. Electrical Tape
Electrical tape will be used to secure and insulate the connections made during installation, ensuring a secure and reliable connection.
5. Multimeter
A multimeter is a useful tool for testing voltage and continuity, which may be necessary when troubleshooting any wiring issues.
6. Mounting Hardware
Depending on the specific installation requirements, you may need various mounting hardware such as brackets, screws, and zip ties to securely attach the camera to your vehicle.
By gathering these essential tools, you will be well-prepared to install your peak digital backup camera and ensure a successful setup process.
Essential Tools for Installing a Backup Camera
Installing a backup camera in your vehicle can greatly increase your safety and peace of mind while reversing or parking. To properly install a backup camera, there are a few essential tools that you will need:

- Power drill and drill bits
- Screwdriver set
- Adjustable wrench
- Wire strippers
- Electrical tape
- Wire connectors
- Heat shrink tubing
- Mounting brackets or adhesive pads
- Camera wiring harness
- Vehicle-specific installation kit (if required)
- Trim removal tools (if necessary)
Before starting the installation process, it is important to ensure that you have all the required tools on hand. These tools will help you properly mount the camera, connect the wiring, and integrate the backup camera system into your vehicle.
Additionally, it is recommended to have a basic understanding of your vehicle’s electrical system and wiring diagrams, as well as access to the vehicle’s battery and fuse box. If you are not comfortable working with electrical components, it may be best to consult a professional installer to ensure a safe and reliable installation.
Remember, proper installation of a backup camera requires careful attention to detail and following the manufacturer’s instructions. With the right tools and a little patience, you can enjoy the added safety and convenience of a backup camera system in your vehicle.
Locating the Ideal Mounting Position
When installing a peak digital backup camera, it is crucial to find the ideal mounting position for optimal visibility and performance. Here are some steps to help you locate the perfect spot:
1. Assess the Rearward Visibility
Start by evaluating your vehicle’s rearward visibility from the driver’s seat. Look for any obstructions or blind spots that might hinder your view. This will help you determine where the camera should be mounted to eliminate any limitations.

2. Consider the Camera’s Field of View
Next, consider the camera’s field of view. The camera should be positioned in a way that provides the widest possible coverage of the area behind your vehicle. Look for a mounting spot that allows the camera to capture the necessary details without any obstacles obstructing the view.
Keep in mind that the camera’s angle can also affect its field of view. You may need to adjust the angle to capture the desired area effectively.
3. Find a Secure Mounting Surface
Choose a mounting surface that is sturdy and secure. The camera should be attached to a part of the vehicle that can withstand various weather conditions and vibrations. Avoid mounting it on plastic or other fragile components that may break or loosen over time.
Additionally, ensure that the mounting surface is level and stable. This will prevent the camera from moving or shaking while driving, ensuring a clear and steady image.
Consider using the provided mounting brackets or adapters to ensure a proper and secure installation.
By following these steps and carefully considering your vehicle’s specific needs, you can find the ideal mounting position for your peak digital backup camera. Remember to test the camera’s functionality before finalizing the installation to ensure you have achieved the best possible visibility.
Factors to Consider When Choosing a Mounting Position
Choosing the right mounting position for your peak digital backup camera is crucial to ensure optimal visibility and functionality. There are several factors to consider when making this decision:
- Line of sight: Make sure that the camera provides an unobstructed view of the area behind your vehicle. Check for any potential blind spots or obstacles that could obstruct the camera’s line of sight.
- Angle of view: Determine the desired angle of view based on your specific needs. Consider factors such as the size and shape of your vehicle, parking requirements, and the level of detail you want to capture.
- Vehicle dimensions: Take into account the dimensions of your vehicle, including its length, height, and width. This will help you determine the best location to mount the camera and ensure that it fits properly.
- Camera compatibility: Consider the specific requirements of your peak digital backup camera. Some cameras may have specific mounting guidelines or limitations that you need to be aware of.
- Wiring considerations: Think about the wiring requirements and the distance between the camera and the display unit. Ensure that you have a suitable route for the cables and that they can reach the necessary connections without any issues.
- Environmental conditions: Evaluate the potential impact of environmental conditions on the camera’s performance. Consider factors such as exposure to harsh weather, extreme temperatures, and potential damage from debris or impact.
- Personal preference: Ultimately, your personal preference and comfort level should also be considered. Choose a mounting position that feels intuitive and convenient for you, ensuring easy access to the camera’s display and controls.
By carefully considering these factors, you can select the most suitable mounting position for your peak digital backup camera, ensuring optimal performance and enhancing your overall driving experience.
Wiring the Vehicle for the Backup Camera
Installing a peak digital backup camera in your vehicle requires proper wiring to ensure a seamless operation. Follow these steps to wire your vehicle for the backup camera:
- Start by locating the power source for the camera. This usually involves tapping into the vehicle’s reverse light wiring. You can find the reverse light wiring by referring to the vehicle’s wiring diagram or using a voltage meter.
- Once you have located the power source, use a wire stripper to strip the ends of the wires. This will allow for proper connection later on.
- Next, connect the power wire from the camera to the power source wire by twisting them together. Use electrical tape or heat shrink tubing to secure the connection and protect it from moisture and other elements.
- Now, locate a suitable ground point near the camera. This can be any bare metal surface in the vehicle’s frame. Use a wire brush or sandpaper to clean off the surface and ensure a good connection.
- Strip the end of the ground wire from the camera and connect it to the ground point using a screw or bolt. Again, use electrical tape or heat shrink tubing to secure the connection.
- If your backup camera has additional features such as audio or video display, you will need to connect them to your vehicle’s entertainment system. Refer to the camera’s user manual for specific instructions on how to do this.
- Finally, test the backup camera to ensure it is working properly. Start your vehicle and put it in reverse. If the camera’s display turns on and shows a clear image of what’s behind you, then you have successfully wired the camera.
Remember to follow all safety precautions and consult a professional if you are unsure about any step in the wiring process. Proper wiring is essential for the reliable operation of your peak digital backup camera.

Steps for Properly Wiring the Backup Camera
Proper wiring is essential for the successful installation of a peak digital backup camera. Follow these steps to ensure that the camera is wired correctly:
Step 1: Gather the necessary tools
Before starting the wiring process, gather the necessary tools such as wire strippers, electrical tape, crimping tool, and a multimeter. Having these tools ready will make the installation process much easier.
Step 2: Locate the power source
Locate a suitable power source for the backup camera. It is recommended to use the vehicle’s reverse lights as they automatically turn on when the car is put into reverse.
Step 3: Connect the power wire
Strip the power wire on the backup camera and connect it to the power source. Use the wire strippers to carefully remove the insulation from the wire, then use the crimping tool to securely connect the wire to the power source.
Step 4: Connect the ground wire
Locate a suitable grounding point for the backup camera, such as a metal surface near the rear of the vehicle. Strip the ground wire on the backup camera and connect it to the grounding point using the wire strippers and crimping tool.
Step 5: Connect the video wire
Locate the video input on the display unit or monitor that will be used with the backup camera. Strip the video wire on the backup camera and connect it to the video input using the wire strippers and crimping tool.
Step 6: Test the camera
Before finalizing the installation, it is important to test the backup camera to ensure that it is working properly. Put the vehicle into reverse and check if the camera displays a clear image on the monitor or display unit.
By following these steps, you can properly wire a peak digital backup camera and ensure that it functions correctly, providing you with a clear view of your surroundings when reversing your vehicle.
Installing the Backup Camera
Installing a peak digital backup camera in your vehicle is a relatively simple process that can greatly enhance your safety on the road. Here are the steps to follow to install the backup camera:
Step 1: Start by choosing the ideal location for your backup camera. It should be positioned at the back of your vehicle, preferably near the license plate. Ensure that it is centered and has a clear view of the area behind your vehicle.
Step 2: Once you have chosen the location, use a drill to create a hole for the camera’s wiring. Make sure to use the appropriate size drill bit and be careful not to damage any existing wiring or vehicle components.
Step 3: After creating the hole, feed the camera’s wiring through it and secure the camera in place using the provided mounting bracket. Make sure the camera is tightly secured to prevent any movement or vibration while driving.
Step 4: Next, locate the reverse light wire of your vehicle. This wire is responsible for turning on the camera when you shift into reverse. Use a wire cutter or stripper to expose a small section of the reverse light wire.
Step 5: Connect the positive wire from the camera to the exposed section of the reverse light wire using a wire splice connector. This will allow the camera to receive power when you engage reverse gear.
Step 6: Finally, connect the camera’s ground wire to a suitable grounding point on your vehicle, such as a metal frame or chassis. Ensure that the ground connection is secure to prevent any electrical issues.
It is important to note that the specific installation process may vary depending on the model of your peak digital backup camera. Always refer to the manufacturer’s instructions for detailed installation guidelines.
Once you have completed the installation, test the backup camera by shifting into reverse and checking the display. Adjust the camera if necessary to ensure a clear and accurate view of the area behind your vehicle.
With the backup camera properly installed, you can now enjoy the added safety and convenience it provides. Always remember to use the camera as an aid and continue to check your surroundings while reversing.
Question-answer:
What is a peak digital backup camera and why do I need it?
A Peak Digital Backup Camera is a device that helps you see what’s behind your vehicle when backing up. It can be especially helpful for larger vehicles or those with blind spots. It provides an additional layer of safety and can prevent accidents or damage to your vehicle.
How do I install a peak digital backup camera?
The installation process for a Peak Digital Backup Camera may vary depending on the specific model you have. However, in general, the camera is typically mounted on the rear of the vehicle, and the wiring is connected to the vehicle’s power supply and display unit. It is recommended to refer to the instruction manual for step-by-step instructions specific to your camera model.
Can I install a peak digital backup camera myself, or do I need professional help?
Installing a Peak Digital Backup Camera yourself is possible, especially if you have experience with car installations. However, if you are not confident in your abilities or prefer to have a professional handle the installation, it is recommended to seek professional help. This will ensure that the camera is installed correctly and functions properly.


