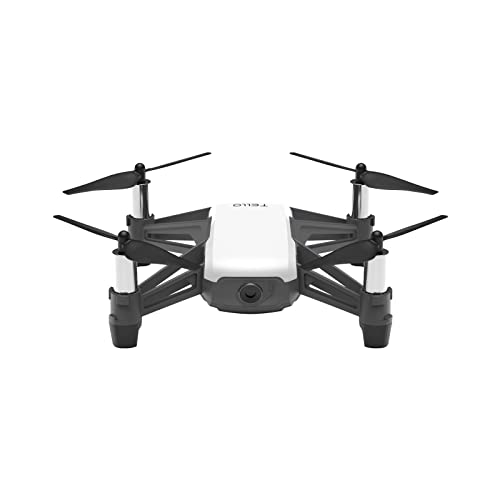
Welcome to the world of Tello drones! Whether you are a beginner or an experienced pilot, setting up a Tello drone is an essential first step for an amazing FPV (First Person View) experience. This guide will walk you through the process of setting up your Tello drone, from unboxing to connecting it to your smartphone or tablet.
Step 1: Unboxing
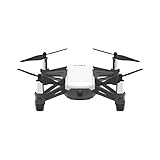
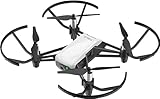
Start by unboxing your Tello drone and ensuring that all the components are present. Inside the box, you will find the Tello drone itself, the battery, propellers, a propeller removal tool, and a USB charging cable. Make sure everything is in good condition and free from any damage.
Step 2: Charging
Next, you need to charge the battery of your Tello drone. Connect the USB charging cable to the battery and plug it into a power source. The LED lights on the battery will indicate the charging status. Once the battery is fully charged, it’s time to move on to the next step.
Step 3: Downloading the App
To control your Tello drone, you will need to download the Tello app on your smartphone or tablet. The app is available for both iOS and Android devices. Simply search for “Tello” in your device’s app store, download, and install it. Once the app is installed, you’re ready to move on.
Step 4: Connecting the Drone
Now that you have the app installed, it’s time to connect your Tello drone. Power on the drone by pressing the main button until the LED lights turn green. Go to your device’s Wi-Fi settings and connect to the Wi-Fi network named “Tello-XXXXXX” (where “XXXXXX” represents the last six digits of the drone’s serial number).
Step 5: Launch the App
Open the Tello app on your device, and you should be greeted with a live video feed from the drone’s camera. Congratulations! You have successfully set up your Tello drone. Now, you can start exploring all the exciting features and capabilities of your new drone.
Please note that it’s important to read and follow the user manual provided by the manufacturer for a complete understanding of safety guidelines and proper operation of your Tello drone.
Now that you know how to set up your Tello drone, it’s time to take to the skies and capture breathtaking aerial footage. Enjoy the thrill of piloting your drone and let your imagination soar!
How to Set Up a Tello Drone
Setting up a Tello drone is a simple process that can be accomplished in just a few steps. Follow the instructions below to get your Tello drone up and running:

1. Unbox your Tello drone and remove all the components from the packaging.
2. Insert the battery into the Tello drone and make sure it is fully charged.
3. Install the Tello app on your mobile device. You can find the app on the App Store or Google Play Store.
4. Turn on the Tello drone by pressing the power button located on the top of the drone.
5. Connect your mobile device to the Tello drone’s Wi-Fi network. You can find the network name and password on the Tello drone’s packaging.
6. Open the Tello app on your mobile device and wait for it to connect to the Tello drone.
7. Once connected, you can use the Tello app to control the drone and access various features such as the camera and video recording.
8. Familiarize yourself with the Tello drone’s controls and practice flying it in a safe and open area.
With these simple steps, you can easily set up your Tello drone and start enjoying its features and capabilities. Have a great time exploring the world from above!
Drone Unboxing and Inspection
When you first receive your Tello drone, it’s important to carefully unbox and inspect it to ensure everything is in proper working order. This step-by-step guide will walk you through the process.
Step 1: Unboxing
Begin by removing the Tello drone package from the shipping box. Carefully cut through any tape or seals holding the package together.
Step 2: Contents Check
Once the package is open, check the contents to make sure everything is included as listed in the instruction manual. This typically includes the Tello drone, a battery, propellers, and a USB charger.
Step 3: Drone Inspection
Inspect the Tello drone for any visible damage or defects. Look for cracks, dents, or other signs of wear and tear. Check the propellers to ensure they are undamaged and securely attached.
Step 4: Battery Check
Check the battery to make sure it is fully charged and not damaged. Ensure the battery connections are clean and free of debris. If the battery appears to be damaged or not holding a charge, contact the manufacturer for assistance.
Step 5: Additional Components
Inspect any additional components that came with your Tello drone, such as propeller guards or spare parts. Verify that they are all present and undamaged.

Step 6: Documentation
Review the instruction manual and any other documentation provided with the Tello drone. Familiarize yourself with the controls, safety guidelines, and any additional features or accessories.
By following these steps, you can ensure that your Tello drone is in proper working order and ready for your first flight. If you notice any issues during the unboxing and inspection process, it’s important to contact the manufacturer or retailer for assistance.
Charging the Battery
Before you can take your Tello drone for a flight, you need to make sure that its battery is fully charged. Here are the steps to charge the battery:
| Step | Description |
| 1 | Locate the battery compartment on the Tello drone. |
| 2 | Open the battery compartment by sliding the latch or removing the cover. |
| 3 | Take the battery out of the drone. |
| 4 | Connect the battery to the included USB charger. |
| 5 | Plug the charger into a power source, such as a wall outlet or a USB port on your computer. |
| 6 | Wait for the battery to fully charge. This usually takes about 60-90 minutes. |
| 7 | Once the battery is fully charged, unplug the charger from the power source. |
| 8 | Reinsert the battery into the drone, making sure it is securely connected. |
| 9 | Close the battery compartment by sliding the latch or replacing the cover. |
Now that your Tello drone’s battery is fully charged, you are ready to start flying! Remember to always follow the safety guidelines and regulations when operating your drone.
Downloading the Tello App
In order to set up and control your Tello drone, you will need to download the Tello app onto your mobile device. The Tello app is available for both iOS and Android devices and can be downloaded from the respective app stores.

Follow the steps below to download the Tello app:
- Open the App Store on your iOS device or the Google Play Store on your Android device.
- Search for “Tello” in the search bar.
- Locate the Tello app in the search results and tap on it.
- Tap the “Download” or “Get” button to start the download and installation process.
- Once the app is downloaded, you can find it on your device’s home screen or in the app drawer.
Alternatively, you can also scan the QR code provided on the Tello drone packaging or in the user manual to directly access the app download link.
Make sure to grant the necessary permissions to the Tello app when prompted, such as access to your device’s camera and microphone, to ensure that all features and functionality of the app can be utilized.
Connecting the Tello to Your Phone
To fly your Tello drone, you will need to connect it to your smartphone. Follow these steps to establish a connection between your Tello and your phone:
Step 1: Power on your Tello

Make sure your Tello is fully charged and power it on by pressing the power button located on the side of the drone.
Step 2: Enable Wi-Fi on your phone
Go to the settings of your smartphone and ensure that Wi-Fi is turned on. Make sure your phone is not connected to any other Wi-Fi networks.
Step 3: Connect to Tello Wi-Fi network
Open the Wi-Fi settings on your phone and look for the Tello Wi-Fi network in the list of available networks. Tap on the Tello network to connect to it.
Step 4: Open the Tello app
If you haven’t already done so, download and install the Tello app from the App Store or Google Play Store. Open the app once installed.
Step 5: Connect your phone to the Tello
Launch the Tello app and wait for it to detect and connect to your Tello drone. Once connected, you will see a live video feed from the drone’s camera on your phone’s screen.
Step 6: You’re ready to fly!
Now that your phone is connected to the Tello, you can start flying your drone using the controls on the app. Enjoy your Tello flying experience!
Note: It is important to ensure that your Tello is within the Wi-Fi range of your phone for a stable connection.
Calibrating the Tello
Calibrating your Tello drone is an important step to ensure accurate and stable flight. It helps the drone understand its orientation in relation to the ground and maintain stability during flight. Here’s how you can calibrate your Tello:
1. Prepare your Tello drone
Make sure your Tello drone is fully charged and turned on. Place it on a flat and level surface, free from any obstacles or interference.
2. Connect your mobile device
Connect your mobile device to the Tello drone using the Tello app or any other compatible app. Follow the instructions provided by the app to establish a stable connection.
3. Access the calibration menu
In the app, locate the calibration menu or settings. This could be found under a “Tools” or “Settings” section. Access the calibration options.
4. Perform the calibration
Follow the on-screen instructions to calibrate your Tello drone. This usually involves rotating or moving the drone in specific directions. Make sure to follow the instructions carefully and complete all the required actions.
During the calibration process, the Tello drone may flash or emit beeping sounds. This is normal and indicates that the calibration is in progress. Avoid any disturbances or movements during the calibration process to ensure accurate results.
Once the calibration is complete, the Tello drone should be ready for flight. It is recommended to recalibrate the drone periodically or whenever you notice any flight instability or erratic behavior.
Calibrating your Tello drone is a simple process that can enhance your flight experience and improve the overall performance of your drone. Take the time to properly calibrate your Tello before taking it out for a flight.
Tello Flight Modes and Settings
The Tello drone offers various flight modes and settings that allow you to customize your flying experience. Whether you are a beginner or an advanced pilot, understanding these modes and settings can enhance your flight skills and capture amazing aerial footage.
Flight Modes
Tello offers three flight modes:
- Normal Mode: This is the default mode and is suitable for beginners. In this mode, the Tello drone is easy to control, and it will automatically stabilize itself in the air.
- Throw & Go Mode: In this mode, you can simply throw the Tello drone into the air, and it will automatically take off and stabilize itself. This mode is great for capturing dynamic shots and initiating quick flights.
- 8D Flips Mode: This mode allows you to perform 360-degree flips in the air. By activating this mode, you can add a fun and interactive element to your flights.
Settings
Tello also provides the following settings that you can adjust:
| Setting | Description |
|---|---|
| Flight Speed | You can adjust the flight speed of the Tello drone to suit your flying style. It offers three speed settings: slow, medium, and fast. |
| Altitude Limit | This setting allows you to set a maximum altitude limit for the Tello drone. It can be useful when flying indoors or in areas with height restrictions. |
| Auto Takeoff/Landing | With this setting enabled, the Tello drone will automatically take off and land with a single tap on the control interface, making it convenient and user-friendly. |
By exploring and familiarizing yourself with the flight modes and settings of the Tello drone, you can make the most out of your flying experience and unlock its full potential.
Tello Safety Guidelines
When flying a Tello drone, it is important to follow these safety guidelines to ensure a safe and enjoyable experience:
1. Choose a Suitable Flying Location
Find an open space that is free from obstacles such as trees, buildings, or power lines. Avoid flying near crowded areas to reduce the risk of accidents and injuries.
2. Check Local Drone Regulations
Before taking off, familiarize yourself with the local regulations regarding drone flights in your area. Be aware of any restricted zones or no-fly areas to avoid any legal complications.
3. Inspect Your Drone
Prior to each flight, thoroughly inspect your Tello drone for any signs of damage or wear. Check the propellers, battery, and connections to ensure everything is in working order.
4. Calibrate the Compass
For accurate flight control, it is important to calibrate the compass before each flight. Follow the manufacturer’s instructions to properly calibrate the drone.
5. Be Mindful of the Battery Life
Monitor the battery level during flight and ensure that you have enough power to safely return the drone to the ground. Avoid draining the battery completely to prevent a sudden loss of control.
6. Keep Line of Sight
Always keep the drone within your line of sight while flying. This will help you maintain control and avoid collisions with objects or other aircraft.
7. Fly in Good Weather Conditions
Avoid flying the Tello drone in adverse weather conditions such as strong winds, rain, or snow. These conditions can affect the stability and control of the drone.
8. Respect the Privacy of Others
When flying your drone, respect the privacy of others. Avoid recording or flying over private property without permission.
By following these safety guidelines, you can ensure a safe and enjoyable flight experience with your Tello drone.
Advanced Tips and Tricks
1. Update the Firmware
To ensure optimal performance and access to the latest features, it’s essential to keep your Tello drone’s firmware up to date. You can check for updates and install them using the Tello app.
2. Use the Tello SDK
The Tello SDK allows you to program your drone and provides more advanced control and automation options. You can use programming languages like Python, Scratch, or Swift to create custom flight paths, automate tasks, and explore new possibilities with your Tello drone.
3. Extend the Wi-Fi Range
If you want to fly your Tello drone over longer distances, you can use a Wi-Fi range extender or external antennas to improve the signal strength and extend the range of the drone’s Wi-Fi connection. This can help you explore new areas and capture stunning aerial footage.
4. Experiment with Flight Modes
The Tello drone offers various flight modes that can make flying more enjoyable and allow you to capture unique shots. Experiment with flight modes like Throw and Go, 8D Flips, Circle, and Bounce to add creativity to your aerial photography or create stunning videos.
5. Customize Controls and Set Limits
The Tello app allows you to customize the control settings to suit your preferences. You can change the control sensitivity, adjust the joystick modes, and set flight limits to ensure safe flying. Personalize your Tello drone’s controls to enhance your piloting experience.
6. Explore Third-Party Accessories
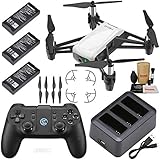
There are various third-party accessories available for the Tello drone that can enhance its capabilities. Consider investing in accessories like propeller guards, spare batteries, carrying cases, or filters to protect your drone and improve its performance in different scenarios.
7. Practice and Fly Responsibly
Lastly, it’s essential to practice flying your Tello drone and follow responsible drone piloting practices. Familiarize yourself with the local drone regulations and fly in open areas away from people, buildings, and restricted airspace. Always prioritize safety and enjoy your Tello drone responsibly.
Question-answer:
What is a Tello drone?
A Tello drone is a small and lightweight drone that is designed for beginners and casual users. It is affordable and easy to fly, making it a popular choice among drone enthusiasts.
How do I set up a Tello drone?
To set up a Tello drone, first download the Tello app on your smartphone or tablet. Then, connect your device to the Tello drone’s Wi-Fi network. Once connected, open the Tello app and follow the on-screen instructions to complete the setup process.
What are the basic controls for flying a Tello drone?
The basic controls for flying a Tello drone include using the virtual joysticks on the Tello app to control the drone’s movement. You can make the drone go up or down, fly forward or backward, and turn left or right using these controls.
Can I use a controller to fly a Tello drone?
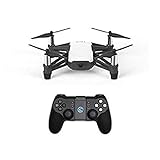
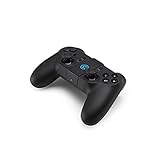
Yes, you can use a controller to fly a Tello drone. Tello is compatible with the GameSir T1d controller, which provides a more traditional and precise control experience. To use the controller, simply connect it to your smartphone or tablet and follow the instructions in the Tello app.
What are some safety tips for flying a Tello drone?
When flying a Tello drone, it’s important to follow these safety tips: fly in an open area away from people and buildings, avoid flying in windy or rainy conditions, keep your drone within your line of sight, and always fly responsibly and considerately. Additionally, make sure to check your local regulations regarding drone flying before taking off.