If you’re looking for a reliable and easy-to-use security camera system, the Arlo Pro 2 is a great choice. With its wireless design, weatherproof construction, and high-quality video recording capabilities, this camera system provides peace of mind for homeowners and business owners alike.
To get started with your Arlo Pro 2 security cameras, follow these simple steps:
Step 1: Set up the base station
Before you can start using your Arlo Pro 2 cameras, you need to set up the base station. This hub acts as the central control unit for all your cameras. Simply connect the base station to your router using the included Ethernet cable, and plug it into a power outlet. Once the base station is powered on, you can move on to the next step.
Step 2: Install the Arlo app

To monitor and control your Arlo Pro 2 cameras, you’ll need to install the Arlo app on your smartphone or tablet. Simply search for “Arlo” in the App Store or Google Play Store, and download and install the app. Once the app is installed, open it and create an Arlo account if you don’t have one already.
Step 3: Add your cameras
Once you have the app set up and your account created, you can start adding your Arlo Pro 2 cameras to the system. To do this, simply press the sync button on the base station and then press the sync button on each camera within one minute. The cameras should connect to the base station and appear in the app.
Step 4: Position your cameras
Now that your cameras are connected to the system, it’s time to position them in the desired locations. The Arlo Pro 2 cameras are wire-free, so you can easily mount them outdoors or indoors without worrying about wiring. Be sure to place your cameras in strategic locations to maximize coverage and capture any potential threats.
Step 5: Customize your settings
Once your cameras are set up, you can customize various settings in the Arlo app to suit your preferences. You can adjust the motion sensitivity, set up activity zones, and even create schedules for when the cameras should record or be on standby. Take the time to explore all the features and settings available to make the most out of your Arlo Pro 2 security camera system.
By following these simple steps, you’ll have your Arlo Pro 2 security cameras up and running in no time. Enjoy the peace of mind that comes with a reliable and advanced security camera system, and feel confident in the safety and security of your home or business.
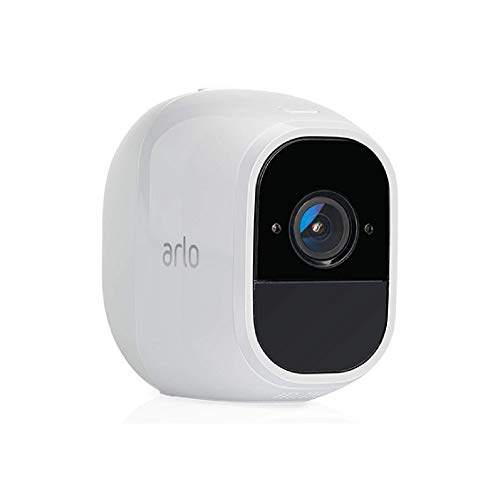
Arlo Pro 2 Security Cameras Overview
The Arlo Pro 2 security cameras are a versatile and easy-to-use solution for securing your home or business. These cameras offer high-quality video surveillance and a host of convenient features that give you peace of mind.
With the Arlo Pro 2, you can set up your cameras both indoors and outdoors, thanks to their weatherproof design. This means you can monitor your home or office from anywhere, whether it’s day or night. The cameras have night vision capabilities, allowing you to see up to 25 feet in the dark.

One of the standout features of the Arlo Pro 2 cameras is their rechargeable batteries. With long-lasting batteries, you won’t have to worry about constantly changing them. These cameras also come with a solar panel option, allowing you to charge them with the power of the sun.
The Arlo Pro 2 cameras offer motion detection and customizable motion zones. You can choose specific areas to monitor and receive alerts whenever motion is detected. This feature helps you keep an eye on what matters most to you.
Another great feature of the Arlo Pro 2 cameras is their two-way audio functionality. This allows you to listen and speak through the cameras using your smartphone or tablet. You can communicate with whoever is near the camera, making it a convenient way to communicate with family members or scare off intruders.
The Arlo Pro 2 cameras are also compatible with other smart home devices. You can integrate them with Amazon Alexa, Google Assistant, and other smart home platforms. This allows you to control your cameras using voice commands or automate them as part of your smart home system.
Setting up the Arlo Pro 2 security cameras is a breeze. The cameras are wire-free, which means you don’t have to deal with complicated wiring installations. Simply mount the cameras where you need them and connect them to your Wi-Fi network. The Arlo mobile app guides you through the setup process, making it easy for anyone to get started.
Overall, the Arlo Pro 2 security cameras offer a reliable and user-friendly solution for securing your property. With their high-quality video, robust features, and easy setup, they are a popular choice among homeowners and businesses alike.
Features, Benefits, and Specifications
The Arlo Pro 2 security cameras come with a range of excellent features, providing numerous benefits for enhanced security and peace of mind.
Features:
- 1080p HD Video: Capture clear and detailed footage with high-definition video recording.
- Weather-Resistant Design: The cameras are designed to withstand harsh weather conditions, ensuring reliable performance in any climate.
- Wire-Free Installation: Easily install the cameras without the need for complicated wiring, making setup a breeze.
- Rechargeable Battery: The included rechargeable battery ensures uninterrupted operation and provides long-lasting power.
- Smart Siren: The built-in smart siren can be triggered remotely to scare off intruders and alert nearby individuals.
- Two-Way Audio: Communicate with visitors or deter potential intruders using the two-way audio feature.
- Night Vision: Enjoy round-the-clock surveillance with the cameras’ infrared night vision capabilities.
- Motion and Sound Detection: Receive instant alerts on your smartphone or email when motion or sound is detected.
Benefits:
- Peace of Mind: Keep an eye on your property and loved ones from anywhere at any time, providing peace of mind.
- Flexible Placement: The wireless design allows you to place the cameras anywhere indoors or outdoors for optimal coverage.
- Customizable Settings: Adjust various settings to suit your preferences, including motion sensitivity and detection zones.
- Cloud Storage: Optional cloud storage plans offer convenient access to recorded footage and added security.
Specifications:
- Resolution: 1080p Full HD
- Field of View: 130 degrees
- IP65 Weather Resistance Rating
- Battery Life: Up to 6 months
- Connectivity: Wi-Fi, Ethernet
- Operating Temperature: -4°F to 113°F (-20°C to 45°C)
With its impressive features, benefits, and specifications, the Arlo Pro 2 security camera system is an excellent choice for comprehensive home or business security.
Choosing the Right Location for Your Arlo Pro 2 Camera
When setting up your Arlo Pro 2 security cameras, it is essential to choose the right location to ensure optimal performance. Here are some key factors to consider:
1. Coverage Area
Determine the area you want to monitor and ensure that the camera’s field of view covers it adequately. Arlo Pro 2 cameras feature a wide-angle lens, so you can capture a larger area without compromising on image quality.
2. Mounting Height
The height at which you mount your Arlo Pro 2 camera can significantly impact its effectiveness. Mount the camera at a height that provides a clear view of the area while keeping it out of reach from potential tampering or vandalism.
3. Power Source
Consider the proximity to a power source when choosing the location for your Arlo Pro 2 camera. If you opt for a wired connection, ensure that the camera’s power cable can reach a nearby outlet. Alternatively, you can use the camera’s rechargeable battery, which offers flexibility in terms of placement.

4. Protection from Elements
Protect your Arlo Pro 2 camera from rain, snow, and extreme temperatures by placing it under an eave or using a weatherproof housing. This will help prolong the camera’s lifespan and ensure reliable performance.
5. Wi-Fi Signal Strength
Check the Wi-Fi signal strength in the proposed location. Weak or fluctuating Wi-Fi signals can affect the camera’s connectivity and video streaming capabilities. Consider using a Wi-Fi range extender if the signal is weak.
Note: Arlo Pro 2 cameras can be used both indoors and outdoors, so you have the flexibility to monitor various areas of your property.
By carefully choosing the right location for your Arlo Pro 2 camera, you can maximize its effectiveness and ensure that your property is well-protected.
Tips for Optimal Placement
Proper placement of your Arlo Pro 2 security cameras is crucial for maximizing their effectiveness. Here are some tips to help you ensure optimal placement:

Consider the Field of View
Before installing your cameras, take some time to consider the field of view that you want to capture. This will depend on the specific areas you want to monitor. Make sure to position the cameras in a way that covers the desired areas.
Place Cameras at Eye Level
For the best monitoring results, it is recommended to place the cameras at eye level. This ensures that the cameras capture the most accurate images and videos of any potential intruders or suspicious activities.
| Camera Placement Do’s | Camera Placement Don’ts |
|---|---|
|
|
By following these placement tips, you can ensure that your Arlo Pro 2 security cameras provide optimal coverage and monitoring of your property.
Installing the Arlo Pro 2 Security Camera
Setting up the Arlo Pro 2 security camera is a simple process that can be done in a few easy steps. Follow the instructions below to get started:
Before You Begin
Before installing the Arlo Pro 2 security camera, make sure you have the following:
- An active Arlo account
- Stable internet connection
- Mobile device with the Arlo app installed
- Arlo base station connected to your network
- Power adapter and cable for the camera
- A suitable location for mounting the camera
Installation Steps
- Open the Arlo app on your mobile device and log in to your Arlo account.
- Select the “Add Device” option in the app and then choose “Arlo Pro 2” from the list of available devices.
- Follow the on-screen instructions to connect the Arlo Pro 2 camera to your Arlo account and your home network. This usually involves scanning the QR code on the camera using your mobile device’s camera.
- Choose a suitable location for mounting the camera. Ensure that it is within range of your Arlo base station and has a clear view of the area you want to monitor.
- Securely mount the camera using the provided mounting bracket and screws. Make sure the camera is positioned at the desired angle for optimal coverage.
- Connect the power adapter to the camera and plug it into a nearby power outlet. Ensure that the cable is securely connected to both the camera and the outlet.
- Wait for the camera to power on and connect to your Arlo base station. This may take a few minutes.
- Once the camera is connected, you can customize its settings and preferences through the Arlo app. This includes adjusting motion detection sensitivity, setting up activity zones, and enabling cloud storage for recorded footage.
- Your Arlo Pro 2 security camera is now installed and ready to use.
It is important to regularly check the camera’s battery level and ensure that it has a stable Wi-Fi connection for optimal performance. If you encounter any issues during the installation process, refer to the Arlo Pro 2 user manual or contact Arlo customer support for further assistance.
Arlo Pro 2 Specifications
| Resolution | 1080p HD |
|---|---|
| Field of View | 130 degrees |
| Night Vision | Up to 25 feet |
| Weather-Resistant | Yes |
| Battery Life | Up to 6 months |
These specifications may vary depending on the model of the Arlo Pro 2 camera.
Step-by-Step Guide:
Setting up the Arlo Pro 2 security cameras is a straightforward process. Follow these steps to get your cameras up and running:
Step 1: Unboxing and Charging
Start by unboxing your Arlo Pro 2 cameras and charging the batteries. Plug the included power adapter into the camera’s charging port and connect it to an electrical outlet. Allow the batteries to charge fully before proceeding to the next step.
Step 2: Syncing the Base Station
Next, you’ll need to sync your cameras with the base station. Connect the base station to your router using the included Ethernet cable and plug it into a power outlet. Wait for the base station to power on.
Open the Arlo app on your smartphone and follow the prompts to create an Arlo account. Once you have an account, click on the “+” icon in the app to add a new device. Select “Base Station” and follow the instructions to sync the base station with your account.
Step 3: Mounting the Cameras
Decide on the ideal location for your cameras and mount them accordingly. Use the provided mounting hardware to attach the cameras to walls or other surfaces. Ensure that the cameras have a clear view of the area you wish to monitor.
Step 4: Adjusting Camera Settings
Launch the Arlo app and navigate to the device settings for each camera. From here, you can customize various camera settings such as motion detection sensitivity, video quality, and recording modes. Adjust these settings according to your preferences.
Step 5: Testing and Troubleshooting
Finally, test your cameras to ensure they are working correctly. Check the live feed from each camera in the Arlo app and verify that the motion detection is functioning as expected. If you encounter any issues, consult the Arlo support documentation or contact their customer support for assistance.
That’s it! You have successfully set up your Arlo Pro 2 security cameras and they are now ready to provide you with peace of mind and enhanced home security.
Connecting Arlo Pro 2 Cameras to Your Wi-Fi Network
Setting up your Arlo Pro 2 security cameras to connect to your Wi-Fi network is a simple process. Follow these steps to ensure a successful connection:
Step 1: Power on your Arlo Pro 2 cameras
First, ensure that your Arlo Pro 2 cameras are powered on by connecting them to a power source. Make sure the batteries are correctly installed.
Step 2: Download and launch the Arlo app
Search for the Arlo app in the App Store or Google Play Store and download it onto your mobile device. Once downloaded, launch the app.
Step 3: Create an Arlo account or sign in
If you are a new user, create an Arlo account by following the instructions in the app. If you already have an account, sign in using your credentials.
Step 4: Set up the base station
Follow the instructions provided in the app to set up the base station for your Arlo Pro 2 cameras. Connect the base station to your Wi-Fi router using an Ethernet cable.
Step 5: Add your Arlo Pro 2 cameras
In the Arlo app, go to the Devices tab and select “Add Device”. Follow the prompts to add your Arlo Pro 2 cameras to the base station. Make sure they are within range of the base station.
Step 6: Connect to your Wi-Fi network
Once the cameras are added, go to the Settings tab and select “Wi-Fi” from the menu. Follow the on-screen instructions to connect your Arlo Pro 2 cameras to your Wi-Fi network. Make sure you enter the correct network credentials.
Step 7: Test the connection
After connecting, check the Arlo app to ensure that all your Arlo Pro 2 cameras are online and functioning properly. If any issues arise, refer to the troubleshooting section of the Arlo app or consult the user manual.
Once you have successfully connected your Arlo Pro 2 cameras to your Wi-Fi network, you can now enjoy the benefits of wireless security monitoring and surveillance.
Easy Wi-Fi Setup Instructions
Setting up your Arlo Pro 2 security cameras is a breeze with the easy Wi-Fi setup feature. Just follow these step-by-step instructions to get your cameras up and running in no time:
- Start by placing your Arlo Pro 2 cameras in the desired location. Make sure they are within range of your Wi-Fi network.
- Power on your Arlo Pro 2 cameras by inserting the batteries or connecting them to a power source.
- Launch the Arlo app on your smartphone or tablet.
- Select the “Add Device” option in the app.
- Choose “Arlo Pro 2” from the list of available devices.
- Follow the on-screen instructions to connect your Arlo Pro 2 cameras to your Wi-Fi network.
- Make sure you have the correct Wi-Fi network name (SSID) and password for your home network.
- Wait for the app to detect and connect to your Arlo Pro 2 cameras.
- Once your cameras are connected, you can customize settings, such as motion detection sensitivity and recording duration, through the Arlo app.
- Place your Arlo Pro 2 cameras in strategic locations to monitor your home or property.
With these simple Wi-Fi setup instructions, you can easily install and set up your Arlo Pro 2 security cameras for effective home surveillance.
FAQ,
What is Arlo Pro 2 security camera?
Arlo Pro 2 is a wireless security camera system that allows you to monitor your home or business from anywhere using your smartphone. It offers HD video quality, two-way audio, and advanced motion detection features.
Can I install Arlo Pro 2 cameras outdoors?
Yes, Arlo Pro 2 cameras are designed for both indoor and outdoor use. They are weatherproof and can withstand harsh weather conditions. However, it is recommended to place the cameras in a location that provides optimal coverage while protecting them from direct sunlight and other elements.


