
Arlo security cameras provide a reliable and convenient way to protect your home or business. These wireless cameras can be easily set up without the need for complicated wiring or professional installation. In this guide, we will walk you through the step-by-step process of setting up Arlo security cameras wirelessly, ensuring that you have a secure and efficient surveillance system in no time.
Step 1: Choose the Right Location
Before setting up your Arlo security cameras, it’s important to choose the right location for maximum coverage and effectiveness. Identify the areas that you want to monitor and make sure the cameras have a clear line of sight. It’s recommended to place the cameras at entrances, such as doors and windows, as well as around the perimeter of your property.
Remember: The placement of your Arlo security cameras greatly affects their performance, so take your time to find the optimal positions.
Step 2: Install the Arlo Mobile App

To set up your Arlo security cameras, you’ll need to download and install the Arlo mobile app on your smartphone or tablet. The app is available for both iOS and Android devices and can be found in the respective app stores. Once installed, create an Arlo account or log in to your existing account.
Top tip: Make sure your smartphone or tablet is connected to the same Wi-Fi network that you plan to connect your Arlo security cameras to.
Step 3: Connect the Base Station
The next step is to connect the Arlo base station. Plug one end of the Ethernet cable into the base station and the other end into your router. Power on the base station using the included power adapter. Wait for the LED lights on the base station to turn green, indicating a successful connection.
Note: The base station serves as the central hub for your Arlo security cameras, allowing them to communicate with the app and store recorded footage.

Step 4: Sync the Cameras
After connecting the base station, it’s time to sync your Arlo security cameras. Press the sync button on the base station and wait for the LED lights to blink. Then, press the sync button on each camera one at a time. The LED lights on the base station and cameras will turn solid once the synchronization is complete.
Remember: It’s important to sync each camera individually to ensure a proper connection with the base station.
By following these four simple steps, you can set up your Arlo security cameras wirelessly and enjoy the peace of mind that comes with knowing your property is protected. Whether you’re away from home or tucked in for the night, the Arlo system will keep a watchful eye on your surroundings, providing you with real-time alerts and recorded footage whenever any suspicious activity is detected.
How to Set Up Arlo Security Cameras Wireless
Arlo security cameras are a great way to keep your home or business safe, and setting them up wirelessly is a convenient option. Follow these steps to ensure a successful wireless setup:

1. Choose the Right Location
Before setting up your Arlo security cameras, it’s crucial to choose the right location for each camera. Look for areas with a clear view of the surroundings you want to monitor, such as entry points or high-traffic areas. Make sure the cameras are out of reach and protected from harsh weather conditions.
2. Install the Arlo Base Station
The Arlo Base Station acts as the hub for your wireless security camera system. Start by connecting the base station to your router using the provided Ethernet cable. Plug the base station into a power outlet and wait for the LED lights to turn green.
3. Sync the Cameras
Next, sync your Arlo cameras with the base station. Press the sync button on the base station, and within seconds, press the sync button on the camera itself. The LED lights on the camera should blink blue, indicating that the sync process was successful.
4. Position the Cameras
Once your Arlo cameras are synced, it’s time to position them. Mount the cameras using the provided magnetic mounts or adhesive mounts. Make sure they are securely attached and have a clear view of the desired area. Adjust the angle and position as needed.
5. Connect to the Arlo App
Download the Arlo app on your smartphone or tablet. Create an Arlo account or sign in if you already have one. Follow the on-screen instructions to add your cameras to the app. Make sure your mobile device is connected to the same Wi-Fi network as the Arlo Base Station.

6. Test and Adjust
Once your cameras are connected to the app, test them to ensure they are capturing the desired footage. Use the live view feature in the app to monitor the camera feeds in real-time. Adjust the camera settings, such as motion sensitivity and alarm notifications, to suit your needs.
Congratulations! You have successfully set up your Arlo security cameras wirelessly. Enjoy the peace of mind that comes with knowing your property is protected.
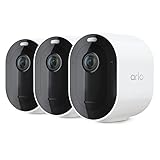
Unboxing the Arlo Security Camera
When you first open the package of your Arlo Security Camera, you’ll find everything you need to get started with your wireless home security system. The sleek and compact design of the camera is sure to blend seamlessly into your home environment.
What’s Included in the Box
- Arlo Security Camera
- Mounting hardware
- Batteries
- Power adapter
- Quick start guide
As you carefully unpack the contents, you’ll notice the Arlo Security Camera, which boasts a contemporary and unobtrusive design. The camera is weatherproof, making it suitable for both indoor and outdoor use. You’ll also find the mounting hardware, allowing you to easily attach the camera to any desired location.
The included batteries ensure that your camera is ready to be set up and used right away. This eliminates the need for any additional purchases or waiting for the camera to charge before use. Additionally, the power adapter can be used as an alternative power source if you prefer a wired setup over the wireless option.

To assist you in the setup process, the quick start guide provides clear and concise instructions. It will guide you through each step, from connecting the camera to your smartphone or tablet to configuring the settings to meet your specific security needs.
Conclusion
Unboxing the Arlo Security Camera is an exciting moment, as you begin your journey towards a more secure home. With all the necessary components included and a user-friendly guide, setting up your wireless camera system has never been easier. Feel confident knowing that the Arlo Security Camera is designed to provide you with peace of mind and reliable surveillance, whether you’re at home or away.
Installing the Arlo Base Station
Before you can start setting up your Arlo security cameras, you need to install the Arlo base station. This base station acts as the central hub for your Arlo system, allowing you to connect and manage your cameras.
Follow these steps to install the Arlo base station:
- Find a suitable location for the base station. It should be placed near your wireless router and connected to a power outlet.
- Connect the provided Ethernet cable from the base station to your router.
- Plug the power adapter into the base station and connect it to a power outlet.
- Wait for the power LED on the front of the base station to turn solid green.
- Download and install the Arlo app on your smartphone or tablet.
- Launch the Arlo app and create a new Arlo account or sign in to your existing account.
- Follow the on-screen instructions to add the base station to your Arlo account. This usually involves scanning a QR code on the base station or entering its serial number manually.
- Once the base station is added, the app will guide you through the process of connecting and syncing your Arlo cameras to the base station.
- Position your cameras in the desired locations and adjust their angles for optimal coverage.
With the Arlo base station installed and your cameras set up, you can now enjoy the peace of mind that comes with a wireless security system. Remember to regularly check the Arlo app for notifications and updates from your cameras.

Connecting the Base Station to the Internet
To set up your Arlo security cameras for wireless use, you will need to connect the base station to the internet. Follow these steps to ensure a successful connection:
- Find a suitable location for your base station. It should be placed near the router for a reliable internet connection.
- Use the provided Ethernet cable to connect the base station to an available LAN port on your router.
- Plug the power adapter into the base station and connect it to a power outlet.
- Make sure you have a stable internet connection and wait for the power LED on the base station to turn solid green.
- Now, open a web browser on your computer or mobile device and visit arlo.netgear.com.
- Create an Arlo account if you don’t have one already. If you do, log in to your account.
- Follow the on-screen instructions to add the base station to your Arlo account.
- Once the base station has been successfully added, you can proceed to add your Arlo cameras to the system.
By following these steps, you will be able to connect your Arlo base station to the internet, allowing you to monitor your property wirelessly and enhance the security of your home or business.
Downloading the Arlo App
To set up your Arlo security cameras wirelessly, you will need to download the Arlo app on your mobile device. The Arlo app is available for both iOS and Android devices and can be downloaded for free from the respective app stores.
Follow these steps to download the Arlo app:
| Step 1: | Open the App Store on your iOS device or the Google Play Store on your Android device. |
| Step 2: | Search for “Arlo” in the search bar at the top of the app store. |
| Step 3: | Tap on the Arlo app icon when it appears in the search results. |
| Step 4: | Tap on the “Install” or “Get” button to start the download and installation process. |
| Step 5: | Wait for the app to download and install on your device. |
| Step 6: | Once the app is installed, tap on the Arlo app icon to open it. |
By following these steps, you will successfully download the Arlo app on your mobile device, which will allow you to set up and manage your Arlo security cameras wirelessly.
Adding the Arlo Camera to the App
After setting up your Arlo security cameras wirelessly, the next step is to add them to the Arlo app. Here’s how you can do it:
Step 1: Download and Install the Arlo App
First, you need to download and install the Arlo app on your smartphone or tablet. You can find it in the App Store (for iOS devices) or the Google Play Store (for Android devices).
Step 2: Create an Arlo Account
Once you have the app installed, open it and create a new Arlo account. Follow the on-screen instructions to provide the necessary information and create a strong password. Make sure to remember these details as you will need them to log in to the app later on.
Step 3: Log in to the Arlo App
After creating your account, log in to the Arlo app using your credentials. Enter your email address and password, and tap the “Log In” button.
Step 4: Add a New Device
Once you are logged in, you can add your Arlo camera to the app. Tap the “Add Device” icon or button, usually located in the top right corner of the screen. Follow the on-screen instructions to complete the setup.
Please note that during the setup process, you may need to connect your smartphone or tablet to the Arlo camera’s WiFi network. This is necessary to establish a connection between the camera and the app.
Once the setup is complete, you should see the live feed from your Arlo camera on the app’s home screen. From there, you can access various features and settings to customize your camera’s behavior and enhance your security setup.
Remember to repeat these steps for each Arlo camera you have in your setup.
Note: The process may vary slightly depending on the specific Arlo camera model and the version of the Arlo app you are using. Make sure to refer to the user manual or manufacturer’s website for detailed instructions specific to your device.
Configuring the Arlo Camera Settings
Once your Arlo security cameras are wirelessly connected, you will need to configure the camera settings to ensure optimal performance and functionality. Here are the steps to follow:
Step 1: Accessing the Arlo Camera Settings
To access the camera settings, open the Arlo app on your mobile device or visit the Arlo website on your computer. Log in to your Arlo account using your username and password.
Step 2: Selecting the Camera
If you have multiple Arlo cameras, select the camera you want to configure from the list of available cameras.
Step 3: Adjusting the Camera Position
Ensure that the camera is positioned correctly for optimal coverage. Make any necessary adjustments to the camera’s angle or positioning.
Step 4: Setting the Video Quality
You can choose the video quality based on your preferences and network capabilities. Higher video quality may require more bandwidth. Select the desired video quality from the settings menu.
Step 5: Enabling Motion Detection
Arlo cameras are equipped with motion detection capabilities. Enable motion detection to receive notifications whenever motion is detected in the camera’s field of view. Adjust the sensitivity and detection zones settings for more accurate motion detection.
Step 6: Configuring Recording Options
Choose the recording options that suit your needs. You can select continuous video recording or configure the camera to record only when motion is detected. Additionally, you can set the length of the recorded clips and choose whether to include audio in the recordings.
Step 7: Setting Up Alerts
Configure the alerts settings to receive notifications when motion is detected or when there are other important events, such as low battery or internet connection issues. Choose your preferred notification method, such as push notifications or email alerts.
Step 8: Configuring Additional Settings
Explore the various additional settings available for your Arlo camera, such as night vision options, power management settings, scheduling recording times, and more. Adjust these settings according to your preferences and requirements.
Once you have configured the Arlo camera settings to your liking, you can start using your security camera system with peace of mind, knowing that it is set up optimally for your home or business.
Placing the Arlo Camera
When setting up your Arlo security cameras wirelessly, it is important to consider the placement of the camera for maximum effectiveness and coverage. Here are some tips to help you make the right choices:
1. Determine the areas to monitor:
Identify the specific areas you want the Arlo camera to cover. This may include entrances, windows, driveways, or any other vulnerable spots around your property.
2. Consider the camera’s field of view:
Understand the field of view of your Arlo camera to ensure it covers the desired area. Some cameras have a wide-angle lens, allowing them to capture a larger area, while others have a narrower focus.
3. Mount the camera at an appropriate height:
Place the Arlo camera at a height that provides a clear view of the area you want to monitor. This could be eye level or higher, depending on the location and purpose of the camera.
4. Position the camera out of reach:
Mount the camera in a location that is out of reach of potential intruders or tampering. This will help ensure the camera remains functional and captures accurate footage in case of any security incidents.
5. Consider weather conditions:
Take into account the weather conditions in your area when positioning the Arlo camera. Ensure that it is protected from rain, direct sunlight, or any extreme weather conditions that may affect its performance.
Note: It is recommended to consult the Arlo user manual for specific instructions on how to mount and position your Arlo camera.
Testing the Arlo Security Camera
Once you have successfully set up your Arlo Security Camera, it is essential to test its functionality to ensure that it is working correctly. Testing your camera will allow you to identify any issues or gaps in its coverage and make necessary adjustments. Here are some steps to follow when testing your Arlo Security Camera:
1. Positioning: Before testing your camera, make sure it is correctly positioned to cover the desired area. Ensure that it has a clear line of sight and is not obstructed by any objects that may interfere with its performance.
2. Power: Verify that your camera is receiving power and is properly connected to the Arlo Base Station or SmartHub. Check the LED indicators on the camera to ensure it is powered on and connected to the network.
3. Camera Connectivity: Using the Arlo mobile app or web portal, check the camera’s connectivity status. Ensure that the camera is online and connected to the Arlo server.
4. Motion Detection: Test the motion detection feature of your Arlo camera by walking in the camera’s field of view. Confirm that the camera is detecting motion and recording video clips or capturing images as expected. Adjust the sensitivity settings if needed.
5. Night Vision: Test the night vision capability of your Arlo camera by checking its performance in low-light or dark conditions. Verify that the camera is capturing clear and detailed footage even in low-light environments. Adjust the camera’s position or add additional lighting if necessary.
6. Audio and Two-Way Communication: Test the audio capabilities of your Arlo camera by playing a sound near the camera and checking if the audio is captured clearly. If your camera supports two-way communication, try speaking through the camera and listen for the audio quality. Adjust the microphone and speaker volume settings if needed.
7. Remote Viewing: Check if you can remotely access your Arlo camera’s live video feed through the Arlo mobile app or web portal. Ensure that you can view the footage in real-time and that there is no significant delay in transmission.
Note: It is recommended to perform these tests periodically to ensure that your Arlo Security Camera is functioning correctly and to address any potential issues promptly.
FAQ,
Can I set up Arlo security cameras wirelessly?
Yes, Arlo security cameras can be set up wirelessly. They connect to your home Wi-Fi network, allowing you to view live footage and receive alerts on your mobile device.
Can I access the Arlo security cameras remotely?
Yes, you can access the Arlo security cameras remotely through the Arlo app. As long as you have an internet connection, you can view live footage, adjust camera settings, and receive alerts on your mobile device from anywhere in the world.


