Protecting your home and loved ones is a top priority, and having a reliable home security camera system is essential. The Blink XT Home Security Camera System offers a versatile and easy-to-use solution that allows you to monitor your property both indoors and outdoors. Whether you want to keep an eye on your front porch, backyard, or any room in your house, this guide will walk you through the step-by-step process of setting up your Blink XT Home Security Camera System.
Step 1: Unboxing and Gathering the Necessary Equipment
Before you begin setting up your Blink XT Home Security Camera System, make sure you have all the necessary equipment. Inside the box, you should find the Blink XT cameras, sync module, USB cables, power adapters, mounting kits, and batteries. Take a moment to gather all these items and set them aside for easy access.
Step 2: Installing the Blink Home Security App
In order to set up and control your Blink XT Home Security Camera System, you will need to download and install the Blink Home Security App. This app is available for free on both iOS and Android devices. Open the App Store or Google Play Store on your smartphone or tablet, search for “Blink Home Security,” and follow the prompts to download and install the app.

Step 3: Creating an Account
Once you have installed the Blink Home Security App, open it and create a new account. The app will guide you through the account creation process, which typically involves providing your email address and setting a password. Make sure to choose a strong password that is easy for you to remember but difficult for others to guess.
Step 4: Setting Up the Sync Module
Now it’s time to set up the sync module, which acts as the central hub for your Blink XT Home Security Camera System. Plug the sync module into a power outlet and connect it to your Wi-Fi network using the USB cable provided. Follow the in-app instructions to complete the sync module setup process.
Step 5: Adding and Placing Blink XT Cameras

With the sync module set up, you can now start adding and placing your Blink XT cameras. Open the app and select “Add a System” from the main menu. Follow the on-screen instructions to scan the QR codes on the cameras and add them to your system. Once added, you can choose the locations where you want to place your cameras and use the included mounting kits to secure them in the desired positions.
By following these simple steps, you can easily set up your Blink XT Home Security Camera System and enjoy the peace of mind that comes with knowing your home is protected. Whether you’re at work, on vacation, or simply in another room, you can monitor your property and receive instant alerts on your smartphone whenever the cameras detect motion. Stay safe and secure with Blink XT!
Unboxing the Blink XT Home Security Camera System
When you receive your Blink XT Home Security Camera System, it’s an exciting moment as you’re one step closer to ensuring the safety of your home. Let’s go through the unboxing process to give you an idea of what to expect.
Inside the package, you will find the following items:
- One Blink XT Camera
- One Sync Module
- Mounting Kit
- AA Lithium Batteries (required for the camera)
- USB Cable (for the Sync Module)
- Power Adapter (for the Sync Module)
- Quick Start Guide
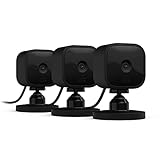
Begin by carefully opening the box and removing all the items. You’ll notice that the Blink XT Camera is compact and lightweight, making it easy to install in various locations around your home.

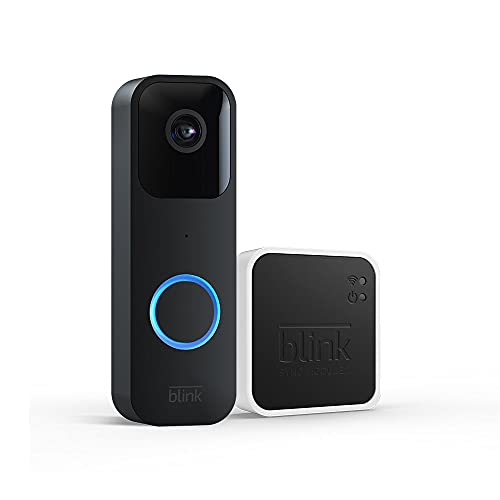
The Sync Module is an essential component of the Blink XT Home Security Camera System. It acts as the central hub that connects your camera to the Blink cloud servers. Make sure to keep it in a safe and easily accessible place.
The Mounting Kit contains everything you need to securely attach the Blink XT Camera to either a wall or a flat surface. It includes screws and anchors for easy installation.
Next, insert the AA Lithium Batteries into the Blink XT Camera. These batteries are specifically designed to provide long-lasting power and reliability for outdoor use.
Connect the Sync Module to your existing Wi-Fi network using the USB Cable (included) and power it up with the provided Power Adapter. This will allow your Blink XT Camera to communicate with both the Sync Module and the Blink app on your smartphone.
Finally, consult the Quick Start Guide for step-by-step instructions on how to set up your Blink XT Home Security Camera System using the Blink app. The app will guide you through the process of adding your camera, creating a Blink account, and setting up motion detection and alerts.
Once you’ve completed the unboxing and setup process, you’re ready to enjoy the peace of mind that comes with having a reliable and user-friendly home security camera system like the Blink XT. With its wireless design and advanced features, the Blink XT is sure to keep your home protected day and night.
Mounting the Cameras
Mounting the cameras is a crucial step in setting up your Blink XT home security camera system. It is important to ensure proper positioning and angling to maximize the camera’s field of view and effectiveness. Here is a step-by-step guide on how to mount the cameras:
- Start by selecting the optimal location for each camera. Consider factors such as visibility, coverage area, and accessibility.
- Once you have determined the ideal spot, use the included mounting bracket to attach it securely. Make sure to tighten the screws firmly to prevent any movement or instability.
- Position the camera in the desired angle to capture the necessary footage. You can adjust the camera’s tilt and rotation to achieve the best view.
- If you plan to mount the camera outdoors, make sure it is protected from elements such as rain, direct sunlight, and harsh weather conditions. Consider using a weatherproof casing or housing if needed.
- Once the camera is mounted and positioned correctly, connect it to the Blink XT Sync Module. Follow the manufacturer’s instructions for proper connection and setup.
- Test the camera’s functionality by viewing the live feed on your smartphone or computer. Make any necessary adjustments to the camera’s position or settings to ensure optimal performance.
- Repeat the above steps for each camera in your Blink XT system. Remember to test and adjust the positioning of each camera to cover all desired areas effectively.
By following these steps, you can successfully mount your Blink XT home security cameras and enhance the overall security of your property.
Connecting the Sync Module to Wi-Fi
To start using your Blink XT home security camera system, you need to connect the Sync Module to your Wi-Fi network. Here are the steps to follow:
1. Plug in the Sync Module to a power outlet using the provided power adapter.
2. Wait for the Sync Module to power on. The LED light on the front of the module will start blinking blue.
3. Download and open the Blink app on your smartphone or tablet.
4. Tap the “+” button on the home screen to add a new device.
5. Select “Blink XT” from the list of available devices.
6. Follow the on-screen prompts to enter your Blink account information and complete the setup process.

7. When prompted, select “Sync Module” from the list of devices you want to add.
8. Press and hold the button on the top of the Sync Module until the LED light starts blinking blue.
9. Follow the on-screen prompts to connect the Sync Module to your Wi-Fi network. Make sure you enter the correct Wi-Fi password.
10. Wait for the Sync Module to establish a connection with your Wi-Fi network. The LED light will turn solid blue when the connection is successful.
11. Once the Sync Module is connected, you can proceed to add your Blink XT cameras to the system and customize your settings.

By following these steps, you will be able to connect the Sync Module to your Wi-Fi network and start using your Blink XT home security camera system. It’s important to ensure that your Wi-Fi network has a strong and reliable signal in the area where you plan to install your cameras for optimal performance.
Installing the Blink Home Monitor App
Once you have set up your Blink XT home security camera system, the next step is to install the Blink Home Monitor app. This app allows you to remotely monitor your cameras, receive alerts, and customize your camera settings. Here’s how to install the app:
Step 1: Download the App
To begin, open the app store on your smartphone or tablet. Search for “Blink Home Monitor” and select the app from the search results. Tap on the “Install” button to start the download. If you are using an iPhone or iPad, you may need to enter your Apple ID password or use Touch ID to authenticate the installation.
Step 2: Create an Account
After the app has finished downloading, tap on the icon to open it. If you already have a Blink account, enter your login details and tap “Sign In”. If you are new to Blink, tap on “Create Account” to register for a new account. Follow the on-screen instructions to provide your email address, create a password, and complete the account registration process.
Step 3: Connect Your Camera System
Once you have logged in or created a new account, the app will guide you through the process of connecting your Blink XT camera system. Make sure your camera system is powered on and within range of your Wi-Fi network. Follow the in-app instructions to scan the QR code on the back of each camera or enter the serial number manually. The app will then connect your cameras to your Blink account.
During the setup process, you will also be prompted to give your camera system a name and customize your camera settings. You can choose options such as motion detection sensitivity, video quality, and the length of video clips captured by the cameras.
Step 4: Access Your Camera Feeds
Once your cameras are connected and configured, you will be able to access their live feeds through the Blink Home Monitor app. Simply tap on the camera you want to view, and the app will display the live video stream. You can also access your camera feeds from multiple devices by logging in with the same Blink account.
With the Blink Home Monitor app installed and configured, you can now enjoy the peace of mind of having a reliable and convenient home security camera system. Whether you are at home or away, you can monitor your property and receive instant alerts if any motion is detected. Stay connected and keep your home secure with the Blink XT and the Blink Home Monitor app!
Adding the Cameras to the Blink XT System
After setting up the Blink XT home security camera system hub, the next step is to add the cameras to the system. To do this, follow the steps below:
Step 1: Connect the Camera to Power
Make sure the camera is placed near a power source and connect the included power cord to the camera and the power source. Once connected, the camera will boot up and initialize.
Step 2: Open the Blink App
Launch the Blink app on your smartphone or tablet. If you don’t have the app installed, download and install it from the App Store or Google Play Store.
Step 3: Tap the Plus Icon to Add a Device
In the Blink app, tap on the plus icon (+) located at the top right corner of the screen. This will start the process of adding a new device to your system.
Step 4: Select “Add Camera”
From the list of available devices, select “Add Camera”. This will prompt the app to search for the camera nearby.
Step 5: Press the Sync Button on the Camera
On the camera, press the sync button located on the side (or bottom) of the camera. The LED light on the camera will start to flash blue, indicating that it is now in sync mode.
Step 6: Wait for Camera to Connect
In the Blink app, wait for the camera to connect to the system. This process may take a few seconds. Once connected, the camera will appear on the app’s device list, ready for use.
Repeat these steps for each additional camera you want to add to the Blink XT system. Each camera will need to be placed near a power source and synced individually following the same steps outlined above.
Adjusting Camera Settings
Once you have successfully set up your Blink XT home security camera system, you may want to adjust the camera settings to optimize its performance and meet your specific needs. Here are some key settings to consider:
Motion Detection: The Blink XT camera can be set to detect motion, and you can adjust the sensitivity level. This allows you to customize how the camera responds to movement, ensuring that it captures the footage you need without false alarms. To adjust the motion detection settings, access the camera settings menu in the Blink app.
Video Quality: You can choose the video quality of the footage captured by your Blink XT camera. Higher quality may consume more storage space, so it’s important to find the right balance between video quality and storage capacity. Go to camera settings in the Blink app to adjust the video quality.
Clip Length: By default, the Blink XT camera records clips that are up to 60 seconds long when motion is detected. If you prefer shorter or longer clips, you can adjust the clip length in the camera settings menu.
Arming Schedule: The Blink XT camera system allows you to set an arming schedule, which determines when the camera will be active and monitoring for motion. This is useful if you have specific periods of time when you want the camera to be active, such as during nighttime or when you are away from home. You can set the arming schedule in the Blink app under camera settings.
Alerts and Notifications: You can customize the alerts and notifications you receive from your Blink XT camera system. This includes choosing which events trigger alerts, such as motion detection, and deciding how you want to receive these alerts, such as via push notifications on your smartphone. Access the camera settings in the Blink app to adjust the alert and notification settings.
Remember to experiment with the settings until you find the configuration that works best for your specific needs. Regularly checking and adjusting the camera settings will ensure that your Blink XT home security camera system is optimized for optimal performance and peace of mind.
Setting Up Motion Detection
One of the essential features of the Blink XT home security camera system is motion detection. In this section, we will guide you through the process of setting up motion detection on your cameras.
Step 1: Accessing the Blink XT App
To begin, open the Blink XT app on your smartphone or tablet. If you haven’t installed the app yet, you can download it from the App Store or Google Play Store.
Step 2: Selecting the Camera
In the app’s home screen, you will see a list of your Blink XT cameras. Tap on the camera that you want to set up motion detection for.
Step 3: Navigating to Motion Settings
Once you have selected the camera, you will be taken to its live view screen. In the top-right corner of the screen, tap on the gear icon to access the camera’s settings.
In the settings menu, you will find various options. Scroll down and tap on “Motion Settings” to proceed.
Step 4: Adjusting Motion Detection Settings
In the motion settings screen, you will see several options related to motion detection. Here, you can adjust the sensitivity level, clip length, and re-trigger time for motion detection.
By default, the sensitivity level is set to a medium value. If you want to receive more motion alerts, you can increase the sensitivity. Conversely, if you want fewer notifications, you can decrease the sensitivity.
The clip length determines how long the camera records a clip when motion is detected. The default value is set to 5 seconds, but you can adjust it to your preference.
The re-trigger time specifies the delay between consecutive motion detection events. By default, the re-trigger time is set to 10 seconds, but feel free to change it based on your needs.
Step 5: Testing Motion Detection
Once you have adjusted the motion detection settings, you can test if the camera is correctly detecting motion. Simply walk in front of the camera’s field of view, and you should receive a push notification on your device if motion is detected.
If the camera is not detecting motion, double-check the placement and angle of the camera to ensure optimal coverage.
Please note that you can adjust the motion detection settings for each camera in your Blink XT system individually.
| Setting | Description |
|---|---|
| Sensitivity | Adjust the sensitivity level for motion detection. |
| Clip Length | Determine the duration of the recorded clip when motion is detected. |
| Re-trigger Time | Set the delay between consecutive motion detection events. |
Congratulations! You have successfully set up motion detection on your Blink XT home security camera system. Now you can enjoy the peace of mind that comes with knowing your property is protected.
Enabling Notifications
To ensure that you receive important alerts and notifications from your Blink XT home security camera system, you will need to enable notifications on your mobile device.
Follow these steps to enable notifications:
- On your mobile device, open the Blink app.
- Tap the menu icon, usually located in the top left corner of the screen.
- Select “Settings” from the menu.
- In the settings menu, tap “Notifications.”
- Toggle the switch to enable notifications for the Blink app.
- You can customize the types of notifications you receive by selecting “Notification Preferences” and choosing the specific events you want to be notified about.
- Make sure that the sound and vibration settings are also enabled if you want to receive audio and vibration alerts along with the notifications.
- Once you have configured your notification preferences, exit the settings menu.
With notifications enabled, you will receive real-time alerts whenever your Blink XT cameras detect motion or when other predefined events are triggered. This will help you stay informed of any potential security threats and take appropriate action.
Remember to regularly check and test your notification settings to ensure they are working correctly. You can also adjust the notification preferences at any time to better suit your needs and preferences.
Note: Enabling notifications may require granting the Blink app access to certain permissions on your mobile device. Make sure to follow the prompts and grant the necessary permissions for the app to function properly.
Reviewing Footage and Managing Storage
Once your Blink XT home security camera system is set up and running, it’s important to know how to review the footage and manage storage effectively. Here are some tips and tricks:
1. Accessing recorded videos
To review the recorded footage, open the Blink app on your smartphone or tablet. Navigate to the Camera section, where you can see a list of all the cameras in your system. Select the camera you want to review the footage for, and you’ll find a timeline of recorded events.
2. Playing back recorded videos
Tap on an event in the timeline to play back the recorded video. You can also scrub through the footage by dragging your finger horizontally on the screen. This allows you to quickly find the specific moment you want to review.
3. Saving and sharing videos
If you come across a video that you want to save or share, tap on the arrow icon located at the bottom of the video playback screen. From there, you’ll have the option to save the video to your smartphone’s gallery or share it with others through various messaging or social media apps.
4. Customizing video capture length
By default, Blink XT cameras capture video clips that are 5 seconds in length. However, you can customize this duration in the camera settings. Longer clip durations may use more storage space, so consider your storage capacity before making any changes.
5. Managing storage space
Each Blink XT camera requires a Sync Module, which acts as the central hub for your system. The Sync Module stores the recorded footage on a USB drive or in the cloud, depending on your setup. To manage storage space, periodically check the available storage capacity in the Blink app. If the storage gets full, consider deleting old footage or upgrading your storage options.
By following these tips, you’ll be able to effectively review footage from your Blink XT home security camera system and manage your storage space efficiently.
Troubleshooting Common Issues
Setting up a Blink XT home security camera system can sometimes come with its share of challenges. Here are some common issues that users encounter and troubleshooting steps you can take to resolve them:
Camera Not Powering On
If your camera is not turning on after you’ve connected it to a power source, there are a few things you can check:
- Ensure that the power source is working properly by plugging in another device.
- Make sure that the power cable is securely connected to both the camera and the power source.
- If using batteries, ensure that they are properly inserted and have sufficient charge.
Poor Video Quality
If the video quality from your Blink XT cameras is not satisfactory, you can try the following troubleshooting steps:
- Check the camera positioning to make sure it has a clear view of the area you want to monitor.
- Ensure that there are no obstructions in the camera’s field of view.
- Check your internet connection speed. A slow connection can affect the video quality. Consider upgrading your internet plan if necessary.
- If the issue persists, try resetting the camera to its factory settings and set it up again.
Camera Not Detecting Motion
If your Blink XT camera is not detecting motion as expected, you can troubleshoot the issue with these steps:
- Make sure that the camera is properly positioned to capture the desired area. Check for any obstructions or changes in the environment.
- Adjust the motion sensitivity settings in the Blink app. Sometimes, a higher sensitivity might be needed to detect smaller movements.
- Ensure that the camera lens is clean and free from any dirt or debris that might interfere with motion detection.
- If necessary, consider adding an additional camera or adjusting the positioning of existing cameras to cover the desired area more effectively.
Connection Issues
If you are experiencing connection issues with your Blink XT system, try the following troubleshooting steps:
- Check your Wi-Fi network and make sure it is working properly. Restart your router if necessary.
- Ensure that your Blink XT cameras are within range of the Wi-Fi signal. Consider moving the base station or adding a Wi-Fi extender if needed.
- Check for any firmware updates for your Blink XT system and install them if available.
- If all else fails, try removing the cameras from your system and re-adding them.
If you are still encountering issues with your Blink XT home security camera system after trying these troubleshooting steps, it may be helpful to consult the Blink support documentation or reach out to their customer support for further assistance.
FAQ,
What are the main features of the Blink XT home security camera system?
The Blink XT home security camera system has several main features, including motion detection, HD video recording, two-way audio, weatherproof design, and cloud storage.
How easy is it to set up the Blink XT home security camera system?
The Blink XT home security camera system is very easy to set up. All you need to do is download the Blink app, connect the Blink XT cameras to your home Wi-Fi network, and follow the on-screen instructions to complete the setup process.
Can I access the live feed from my Blink XT cameras on my smartphone?
Yes, you can access the live feed from your Blink XT cameras on your smartphone. The Blink app allows you to view the live feed, as well as control and manage your camera settings remotely.
Does the Blink XT home security camera system require a subscription?
No, the Blink XT home security camera system does not require a subscription. However, if you want to access cloud storage for your video recordings, you will need to subscribe to a Blink cloud storage plan.


