When it comes to capturing stunning wildlife photos, the Cuddeback digital camera is a top choice for many outdoor enthusiasts. Whether you’re a professional photographer or just an avid nature lover, setting up this camera is essential to ensure you get the best shots possible.
One of the first steps in setting up your Cuddeback digital camera is selecting the perfect location. It’s important to choose an area with plenty of wildlife activity, such as a game trail or feeding area. Once you’ve found the ideal spot, make sure to clear away any obstructions that could obstruct your camera’s view.
Next, securely mount your Cuddeback digital camera to a sturdy tree or post using the included straps or mounting bracket. It’s crucial to ensure that the camera is level and properly aligned with your desired area of focus. This will help maximize the camera’s field of view and increase your chances of capturing those breathtaking wildlife shots.
After mounting the camera, insert fresh batteries and a memory card into your Cuddeback digital camera. The memory card will allow you to store all the incredible photos you capture, while the batteries will provide the necessary power to keep your camera running for an extended period of time. Remember to check the battery and memory card levels regularly to prevent any disruptions during your wildlife photography sessions.
Finally, configure the settings on your Cuddeback digital camera to meet your specific photography needs. This includes adjusting the resolution, setting the delay time, and choosing the desired trigger type. Additionally, it’s crucial to set your camera to the correct date and time to ensure accurate photo timestamps.
With these simple steps, you’ll be well on your way to setting up your Cuddeback digital camera and capturing stunning wildlife photos like a pro. So get out there, explore nature, and let your camera do the magic!
Step-by-step guide to setting up a Cuddeback digital camera
Step 1: Unpack the camera
Begin by carefully unpacking the camera from its packaging materials. Make sure to remove all protective covers and packaging materials from the camera.
Step 2: Insert batteries
Open the battery compartment on the camera and insert the required number of batteries. Ensure that the batteries are inserted correctly, following the polarity indicators inside the battery compartment.

Step 3: Insert memory card
Locate the memory card slot on the camera and insert a compatible memory card. Make sure that the card is inserted in the correct orientation and fully inserted into the slot.
Step 4: Power on the camera
Press and hold the power button on the camera to turn it on. Wait for the camera to initialize and the screen to display the start-up sequence.
Step 5: Set up date and time
Follow the on-screen prompts to set the date and time on the camera. Use the navigation buttons to move between the options and the select button to confirm your choices.
Step 6: Select camera mode
Using the menu button, navigate to the camera mode option and select the desired mode for your photography needs. The camera may offer various modes such as photo, video, time-lapse, or hybrid modes.
Step 7: Adjust camera settings
Explore the menu options to adjust additional camera settings such as image resolution, image quality, and trigger speed. Customize these settings according to your preference and intended use.

Step 8: Mount the camera
Choose a suitable location for mounting the camera. Ensure that it is securely mounted and positioned for optimal image capture. Consider factors such as height, angle, and proximity to the subject.
Step 9: Test the camera
Perform some test shots or recordings to ensure that the camera is functioning properly and capturing the desired images or videos. Make any necessary adjustments to the camera settings or positioning if needed.
Step 10: Regularly check the camera

Regularly check the camera to ensure that it is operating correctly and that the batteries and memory card have sufficient capacity. Replace or recharge batteries as needed, and download captured media to a computer for safekeeping if desired.
By following this step-by-step guide, you can successfully set up your Cuddeback digital camera and start capturing amazing wildlife moments.
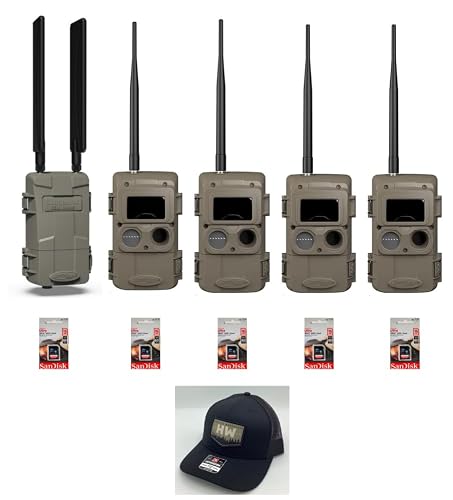
Unboxing the camera
When you receive your cuddeback digital camera, the first thing you need to do is unbox it. The camera comes in a well-packaged box to ensure its safety during transit. Take a moment to appreciate the sleek design and quality of the packaging.
Inside the box, you will find the following items:
| 1 x cuddeback digital camera |
| 1 x Mounting strap |
| 1 x Instruction manual |
| 1 x Warranty card |
| 1 x USB cable |
| 1 x SD memory card |
Make sure to carefully remove each item from the box and inspect them for any physical damage. It’s a good idea to read through the instruction manual to familiarize yourself with the camera’s features and functions.

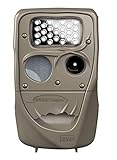
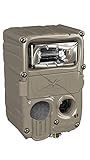
Camera
The cuddeback digital camera is compact and lightweight, making it easy to carry and mount in various locations. It features a robust construction that can withstand harsh outdoor conditions.
Mounting Strap
The included mounting strap allows you to securely attach the camera to a tree or any other desired location. It ensures the camera stays in place and captures the perfect shots.
With the camera unboxed and all the accessories accounted for, you are now ready to set up your cuddeback digital camera and start capturing amazing wildlife images.
Checking the camera components
Before setting up your Cuddeback digital camera, it is important to check that all the components are present and in good working condition. This will ensure that your camera functions properly and captures the desired footage.
Here is a checklist of the essential camera components to verify:

- Camera body: Ensure that the camera body is intact and without any visible damage.
- Lens: Inspect the lens for any scratches or smudges, as these can affect the image quality.
- Battery compartment: Open the battery compartment and check for any corrosion or loose connections. Make sure the battery contacts are clean.
- Memory card slot: Locate the memory card slot and ensure it is free from any debris or obstructions. This is where you will insert the memory card to store your captured images.
- Control panel: Check that the control panel buttons and settings are responsive and in good working order.
- Mounting bracket: Open the mounting bracket and ensure that it is secure and sturdy. This will be used to attach the camera to a desired location.
- Strap or mounting accessories: Check for the presence of a strap or any additional mounting accessories that may have come with your camera. These can be used to secure the camera in different locations.
- Remote control: If your Cuddeback digital camera comes with a remote control, ensure that it is included and functioning properly.
Once you have verified the presence and condition of all these camera components, you can proceed with the setup process. It is important to follow the manufacturer’s instructions for proper installation and configuration of your Cuddeback digital camera.
Installing the batteries
To set up your Cuddeback digital camera, the first step is to install the batteries. Follow these instructions to ensure proper installation:
- Locate the battery compartment: Open the battery compartment door, usually located on the front or bottom of the camera.
- Insert the batteries: Insert the required number of batteries into the compartment. Make sure to place them in the correct orientation as indicated by the polarity symbols (+ and -).
- Close the battery compartment door: Once the batteries are correctly inserted, close the compartment door securely.
- Replace the battery compartment cover: If your camera comes with a separate battery compartment cover, slide it back into place.
It is recommended to use high-quality alkaline batteries or rechargeable batteries for optimal performance. Check the camera’s user manual for the specific battery requirements.
Note: If the camera has not been used for an extended period of time, it is advisable to replace the batteries with fresh ones to ensure reliable operation.
Mounting the camera
Properly mounting your Cuddeback digital camera is essential to getting the best results. Here are the steps to follow:
1. Choose a suitable location
Select a location that offers a clear view of the area you want to monitor. Make sure the area has adequate lighting conditions and is free from obstructions that could block the camera’s field of view.
2. Use a sturdy mount
It is important to use a sturdy mount to ensure that the camera remains stable and secure. A tree mount or a post mount are commonly used options. Ensure that the mount is compatible with your specific Cuddeback camera model.
3. Position the camera correctly
Position the camera at the desired height and angle. It is recommended to place the camera at about waist height for optimal results. Make sure the camera is facing the area you want to monitor, and adjust the angle as needed.
4. Secure the camera
Securely attach the camera to the mount using the provided mounting straps or screws. Ensure that the camera is tightly secured to prevent any movement or vibrations that could affect the image quality.
5. Test the camera
Before leaving the camera unattended, test it to make sure it is capturing images correctly. Walk within the camera’s detection range to trigger a test photo. Review the photo to ensure the camera is capturing images as expected.
Following these steps will help you properly mount your Cuddeback digital camera and ensure that it functions optimally for capturing wildlife or monitoring any other desired area.
Adjusting the camera settings
Once you have completed the initial set up of your Cuddeback digital camera, you can begin adjusting the camera settings to optimize its performance and meet your specific needs. The camera settings allow you to control various parameters such as image quality, trigger speed, detection range, and more.
1. Image Quality
Choosing the right image quality setting is essential to capture clear and high-resolution photos. You can adjust the image quality by accessing the camera’s settings menu. Select the desired image resolution from the available options, such as 2MP, 4MP, 8MP, or higher. Keep in mind that higher resolutions may result in larger file sizes.
2. Trigger Speed and Detection Range
The trigger speed determines how quickly the camera captures an image after detecting motion. A faster trigger speed is ideal for capturing fast-moving subjects, such as wildlife. Access the camera settings menu to adjust the trigger speed to your preference.
The detection range determines the distance at which the camera can detect motion. You can adjust the detection range depending on your specific monitoring needs. A larger detection range will cover a wider area, while a smaller range will focus on a more specific area.
It is recommended to experiment with different trigger speed and detection range settings to find the optimal combination for your desired outcomes.
3. Time-Lapse Mode
Cuddeback digital cameras also offer a time-lapse mode that allows you to capture images at predefined intervals. This mode is useful for monitoring slow-moving subjects or capturing activities that occur over an extended period. Access the camera settings menu and enable the time-lapse mode to start capturing images at regular intervals.
Make sure to review the camera’s user manual for detailed instructions on adjusting specific settings as the process may vary slightly depending on the camera model.
| Setting | Description |
|---|---|
| Image Quality | Select the desired resolution for captured images. |
| Trigger Speed | Adjust the speed at which the camera captures images after motion detection. |
| Detection Range | Control the distance at which the camera can detect motion. |
| Time-Lapse Mode | Capture images at predefined intervals. |
Inserting the SD card
Before setting up your Cuddeback digital camera, you need to insert the SD card. The SD card is where your camera will store all the captured photos and videos. Follow these steps to properly insert the SD card:
- Locate the SD card slot on your Cuddeback digital camera. It is usually located on the side or the bottom of the camera.
- Gently push the SD card into the slot until it clicks into place. Make sure to insert it in the correct orientation, aligning the notched edge of the card with the notched edge of the slot.
- Ensure that the SD card is securely inserted but be careful not to force it, as it may cause damage.
- Once the SD card is inserted, you can close the card slot if applicable. Some cameras may have a small door or cover to protect the SD card.
With the SD card properly inserted, your Cuddeback digital camera is now ready to be set up and capture high-quality photos and videos.
Testing the Camera
Once you have set up your Cuddeback digital camera, it is important to test it before leaving it unattended in the field.
Here are the steps to properly test your camera:
- Ensure that the batteries are fully charged and properly inserted into the camera.
- Turn the camera on and wait for it to initialize. You should see a green light indicating that the camera is ready.
- Set up the camera in the desired location, making sure it is securely mounted to a tree or post.
- Walk in front of the camera to trigger a test photo. You should see a red flash indicating that the photo was taken.
- Wait for the camera to save the photo. You can check this by seeing a blinking green light on the camera.
- Remove the SD card from the camera and insert it into a computer or SD card reader.
- View the test photo on your computer to ensure that it is clear and properly captured.
- If everything looks good, you can proceed to leave your Cuddeback digital camera in the field for monitoring wildlife activity.
By following these steps, you can ensure that your Cuddeback digital camera is properly set up and ready to capture high-quality photos in the field.
Positioning the camera for optimal results
Setting up your cuddeback digital camera in the right position is crucial to capture high-quality images and achieve optimal results. Here are some tips to help you position your camera effectively:
- Choose a strategic location: Find an area where wildlife activity is frequent, such as game trails, watering holes, or feeding areas. This will increase the chances of capturing animals on camera.
- Mount the camera securely: Ensure the camera is firmly attached to a tree, post, or other stable object using the provided strap or mounting bracket. This will prevent any unintended movement that could result in blurry or distorted images.
- Position at the right height: Aim to mount the camera at a height that aligns with the target area. Generally, a height of around 3 to 4 feet above the ground works well for most wildlife photography, but this can vary depending on the specific animal species you’re targeting.
- Camera angle: Adjust the camera angle slightly downward to capture the animal’s entire body and minimize the risk of missed shots. This is especially important for smaller animals like rabbits or raccoons, as they are closer to the ground.
- Consider lighting conditions: Take into account the direction of sunlight when positioning your camera. Placing it facing north or south helps avoid direct sunlight, which can result in overexposed or washed-out images.
- Test for motion detection: Take a few test shots to ensure the camera’s motion detection is working effectively. Walk through the camera’s field of view to confirm that the camera triggers and captures images as desired.
By following these guidelines, you’ll place your cuddeback digital camera in an optimal position, increasing your chances of capturing stunning wildlife images.
Monitoring the camera remotely
One of the great features of the cuddeback digital camera is the ability to monitor it remotely. Here’s how you can set it up:
Step 1: Install the Cuddeback Remote App
First, you’ll need to download and install the Cuddeback Remote App on your smartphone or tablet. The app is available for both iOS and Android devices and can be found in the respective app stores.
Step 2: Connect your camera to the app
Once you have the app installed, you’ll need to connect your camera to it. Ensure that your camera is turned on and has a stable internet connection. Open the app and follow the on-screen instructions to connect your camera to the app. This typically involves entering the camera’s unique identification code and password.
Step 3: Access the camera remotely
Once your camera is connected to the app, you’ll be able to access it remotely from your smartphone or tablet. The app provides a live feed from the camera, allowing you to see exactly what it’s capturing in real-time. You can also adjust camera settings, such as photo quality and capture intervals, through the app.
In addition to the live feed, the app also provides notifications when the camera detects motion or captures an image. This allows you to stay updated on any activity in the camera’s vicinity, even when you’re not physically present.
It’s important to note that remote monitoring requires a stable internet connection for both the camera and your smartphone or tablet. Make sure you have a reliable internet connection to ensure uninterrupted access to the camera feed.
By following these simple steps, you can easily set up and monitor your cuddeback digital camera remotely. This feature allows you to keep an eye on your camera’s surroundings and capture any interesting wildlife or security footage, even when you’re not there physically.
Question-answer:
How do I set up the Cuddeback digital camera?
Setting up the Cuddeback digital camera is a straightforward process. First, insert batteries into the camera and ensure they are properly installed. Then, insert an SD card into the camera for storage. Next, adjust the settings according to your preferences, such as image quality and capture delay. Finally, mount the camera in a desired location using the provided straps or mounting bracket.
What type of batteries does the Cuddeback digital camera require?
The Cuddeback digital camera requires 8 AA batteries for operation. Ensure to use high-quality batteries to prolong the battery life and optimize camera performance.
Can I change the capture settings on the Cuddeback digital camera?
Yes, you have the ability to change various capture settings on the Cuddeback digital camera. This includes adjusting image resolution, selecting different capture modes (e.g., time-lapse or motion), setting capture delays, and configuring the camera’s sensitivity to motion. These settings can be adjusted through the camera’s menu system.
Where is the best place to mount the Cuddeback digital camera for optimal wildlife photography?
The best place to mount the Cuddeback digital camera for wildlife photography depends on the specific wildlife you want to capture and the location you are monitoring. However, some general tips for optimal placement include mounting the camera at a height of around 3-4 feet off the ground, positioning it to face an area with high wildlife activity (e.g., near feeding areas or game trails), and ensuring it is well-concealed to avoid scaring off animals.


