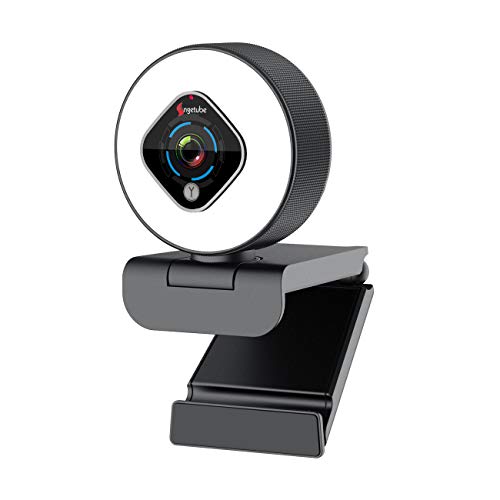
In today’s digital age, capturing precious moments has become easier than ever. With the advancements in technology, digital cameras have become a popular choice for capturing high-quality images and videos. One of the key advantages of digital cameras is the ability to record videos directly onto your personal computer. This feature allows you to not only save space on your camera’s memory card but also gives you the convenience of editing and sharing your videos effortlessly.
Setting up your digital camera to record on your PC requires a few simple steps. Firstly, you will need to ensure that your camera has the capability to connect to a computer. Most digital cameras come with a USB cable that allows them to connect directly to your PC. Once you have confirmed that your camera supports this feature, you can proceed to connect it to your computer using the USB cable.
Once your camera is connected to your PC, you will need to set it up as a recording device. To do this, open your computer’s “Control Panel” and navigate to the “Hardware and Sound” section. Select “Devices and Printers” and look for your connected digital camera. Right-click on it and choose the “Set as default device” option.
After setting up your digital camera as the default recording device, you can now open the video recording software of your choice. Many computers come with pre-installed software such as Windows Movie Maker or QuickTime Player. If you do not have any pre-installed software, you can easily download and install a video recording software that suits your needs. Once you have opened the software, select your camera as the video source. You are now ready to start recording directly onto your PC!
Connecting a Digital Camera to Your PC
If you want to transfer and record photos or videos from your digital camera onto your PC, you’ll need to establish a connection between the two devices. Here’s how you can do it:

USB Cable Connection
One of the most common methods to connect your digital camera to a PC is through a USB cable. This method is usually straightforward and requires minimal setup:
- Switch off your digital camera.
- Locate the USB port on your camera. It is typically a small rectangular port labeled “USB”.
- Connect one end of the USB cable to the USB port on your camera.
- Locate an available USB port on your PC.
- Connect the other end of the USB cable to the USB port on your PC.
- Switch on your digital camera.
- Your PC should recognize the camera and install any necessary drivers or software. Follow any on-screen instructions if prompted.
- Once the connection is established, you can access the files on your camera by opening the appropriate software or file explorer on your PC.
Card Reader Connection
If your digital camera uses a memory card, another option is to use a card reader to transfer the files to your PC:
- Remove the memory card from your digital camera.
- Locate the memory card slot on your PC or card reader.
- Insert the memory card into the appropriate slot.
- Depending on your PC or card reader, you may need to use an adapter to ensure compatibility.
- Your PC should recognize the memory card and open a window with its contents.
- If the window does not automatically open, you can access the memory card by opening the appropriate software or file explorer on your PC.
Once you have successfully connected your digital camera to your PC, you can easily transfer and record your photos and videos, allowing you to conveniently store and edit your media files on your computer.
Choosing the Right Cable
When setting up a digital camera to record on your PC, selecting the right cable is crucial for a successful connection and transfer of data. There are various types of cables available, each with its own features and compatibility that you need to consider. Here are a few factors to keep in mind when choosing the right cable for your digital camera:
1. USB Cable
USB cables are the most common type of cable used to connect digital cameras to computers. They are versatile and widely supported by both cameras and PCs. USB cables typically come with a Type-A connector on one end (usually the PC end) and a Type-B connector on the other end (usually the camera end). Make sure the cable is compatible with your camera’s specific model and has the appropriate USB version (USB 2.0 or USB 3.0) for optimal data transfer speed.
2. HDMI Cable
If your digital camera supports HDMI output, using an HDMI cable is an excellent option for recording on your PC. HDMI cables provide high-quality audio and video transmissions, allowing you to capture footage in high-definition directly on your computer. However, not all cameras have an HDMI output, so check your camera’s specifications before purchasing an HDMI cable.
Remember to verify the compatibility of the HDMI port on your computer and the HDMI version on the camera to ensure a successful connection.
Pro Tip: Some cameras may require an additional mini or micro HDMI adapter to connect to a standard HDMI cable. Double-check your camera’s documentation to determine if you need any extra adapters.
3. Firewire Cable
Firewire cables, also known as IEEE 1394 or iLink cables, are another option to consider if your camera supports this interface. Firewire connections offer a high-speed data transfer rate, making them ideal for professional videographers or those recording large, high-quality videos. However, Firewire ports are not as common on modern PCs, so ensure that your computer has a Firewire port or consider purchasing a Firewire card if necessary.
When choosing a Firewire cable, make sure it matches your camera’s specific Firewire version, such as Firewire 400 or Firewire 800, for compatibility.

Final Thoughts
When setting up your digital camera to record on your PC, remember to choose the right cable based on your camera’s compatibility and your computer’s available ports. USB, HDMI, and Firewire cables all offer different advantages, so consider your specific needs and requirements before making a decision. With the right cable, you can easily transfer and record high-quality footage from your camera directly to your computer!
Checking Ports and Connections
Before setting up your digital camera to record on your PC, it is important to check the ports and connections on both your camera and computer. This will ensure that they are compatible and can communicate with each other effectively.
USB ports
Most digital cameras use USB connections to transfer data to a computer. Check if your camera has a USB port and if it matches the USB port on your computer. The USB port on your computer can be a USB-A, USB-B, USB-C, or micro-USB port.
Video output
In some cases, digital cameras may have a video output port. This port allows you to connect your camera directly to a monitor or TV screen. If your camera has this port, make sure it matches the available ports on your computer or monitor.

You may need additional cables or adapters to connect your camera’s video output to your computer or monitor.
Memory card
Another option for transferring files from your camera to your computer is using a memory card. Many digital cameras have a slot for a memory card, such as an SD card or microSD card. Check if your camera has a memory card slot and make sure the type of memory card is compatible with your computer.
| Memory Card Type | Computer Compatibility |
|---|---|
| SD Card | Most computers have an SD card slot or require an SD card reader |
| MicroSD Card | May require an SD card adapter or a USB card reader |
| CompactFlash Card | May require a CompactFlash card reader |
Make sure your camera’s memory card is properly inserted into the slot and that it is not write-protected, as you won’t be able to transfer files if it’s write-protected.
By checking the ports and connections on your camera and computer, you can ensure that they are compatible and ready for recording on your PC. If you encounter any compatibility issues, refer to the user manual of your camera or consult the manufacturer for further assistance.
Installing the Camera Software
Before you can start recording your digital camera footage on your PC, you will need to install the camera software on your computer. The camera software is essential as it allows your computer to detect and communicate with your camera.
To install the camera software, follow these simple steps:
- Check the camera manufacturer’s website: Visit the official website of the camera manufacturer and search for the latest software drivers and updates for your specific camera model. Download the software package to your computer.
- Run the camera software installer: Locate the downloaded software package on your computer and double-click on it to run the installer. Follow the on-screen prompts to install the camera software.
- Connect your camera to your computer: Connect your digital camera to your computer using the USB cable that came with your camera. Make sure your camera is powered on.
- Open the camera software: Once the camera is connected, open the camera software on your computer. The software should automatically detect your camera and display its status.
- Configure the camera software settings: Depending on the camera software, you may need to configure certain settings such as the video format, resolution, and recording quality. Refer to the camera software user manual or help documentation for further instructions.
- Start recording: Once the camera software is properly installed and configured, you can start recording your digital camera footage on your PC. Use the software controls to start, stop, and pause the recording as needed.
Note: It’s important to keep your camera software up-to-date to ensure compatibility with your computer’s operating system and to take advantage of the latest features and improvements.
Downloading the Latest Software
If you want to set up your digital camera to record on your PC, one of the first things you should do is download the latest software provided by the camera manufacturer. This software is essential for establishing a connection between your camera and computer, as well as enabling the recording and transfer of videos and photos.
To download the latest software, follow these simple steps:
- Visit the official website of your camera manufacturer.
- Navigate to the support or downloads section of the website.
- Look for the software or drivers specifically designed for your camera model.
- Click on the download link and save the file to your computer.
- Once the download is complete, locate the file on your computer and double-click on it to start the installation process.
- Follow the on-screen instructions to install the software.
- Restart your computer after the installation is complete.
Benefits of Downloading the Latest Software
Downloading and installing the latest software for your digital camera offers several benefits:

- Improved Functionality: The latest software often includes new features and updates that enhance the functionality of your camera, allowing you to make the most of your recording experience.
- Bug Fixes: Software updates can address any known bugs or issues that may be present in the previous version, ensuring a smoother and more reliable performance.
- Compatibility: Using the most up-to-date software ensures compatibility with the latest operating systems and devices, preventing any potential compatibility issues.
Regular Software Updates
It’s important to note that digital camera manufacturers often release regular software updates to improve their products. Therefore, it’s a good practice to periodically check the manufacturer’s website for any new software releases or updates for your camera model.
By downloading and installing the latest software for your digital camera, you can ensure a seamless experience, optimal performance, and compatibility with your PC, enabling you to effortlessly record and transfer your photos and videos.
Installing the Software on Your PC
Step 1: Start by connecting your digital camera to your PC using a USB cable. Make sure your camera is turned on and set to the correct mode for transferring files.
Step 2: Once you’ve connected your camera, your PC should automatically recognize it and install the necessary drivers. If prompted, follow the on-screen instructions to complete the driver installation.
Step 3: With the drivers installed, insert the software CD that came with your camera into your PC’s CD drive. If your camera did not come with a CD, you can usually find the software online by visiting your camera manufacturer’s website and navigating to the support or downloads section.

Step 4: Open the software installation wizard that appears on your screen. You may need to double-click on the CD icon or navigate to the downloaded software file to launch the installation wizard.
Step 5: Follow the prompts on the installation wizard to install the camera software on your PC. Make sure to read and accept any terms and conditions if prompted.
Step 6: Once the installation is complete, restart your PC to ensure that all changes take effect.
Step 7: After your PC has restarted, open the camera software. It should automatically detect your connected camera and provide you with options to manage and configure your camera settings.
Step 8: You can now begin recording or transferring files from your camera to your PC using the camera software. Consult your camera’s user manual for detailed instructions on how to use the software and access its features.
By following these steps, you should be able to successfully install the necessary software for your digital camera on your PC. Enjoy capturing and managing your photos and videos with ease!
Setting Up the Camera Settings
Before you start recording with your digital camera on your PC, it’s important to ensure that the camera settings are properly configured. Follow these steps to set up the camera settings correctly:
1. Connect your camera to your PC: Use a USB cable to connect your digital camera to your computer. Make sure the camera is turned on.
2. Access the camera settings: Once your camera is connected, you may need to access the camera settings on the device itself. Look for a menu button or a settings icon on your camera, and press it to navigate to the settings menu.
3. Select the recording mode: In the camera settings menu, look for the recording mode option. This may be called “Mode” or “Function” depending on your camera model. Select the recording mode that allows you to record videos directly to your PC.
4. Adjust the video resolution: Next, navigate to the video settings within the camera settings menu. Adjust the video resolution to a desired setting that is compatible with your PC. Higher resolutions may result in larger file sizes, so consider your storage capacity.
5. Set the frame rate: In the video settings, you may find an option to adjust the frame rate of your videos. Set the frame rate based on your preferences and the capabilities of your PC. Higher frame rates often result in smoother video playback.
6. Enable audio recording: If you want to record audio along with your videos, make sure the audio recording is enabled in the camera settings. Look for an option like “Audio” or “Sound” and ensure it is turned on.
7. Save the settings: Once you have adjusted all the necessary camera settings, save the changes. This might involve pressing a “Save” or “Apply” button or simply navigating away from the settings menu.
8. Test the recording: To ensure that the camera is set up properly, test the recording functionality. Open your preferred recording software on your PC and start a new recording. Check the video and audio quality to ensure everything is working as expected.
By following these steps and properly configuring your camera settings, you’ll be ready to capture high-quality videos directly onto your PC using your digital camera.
Adjusting Video Recording Mode
When setting up your digital camera to record on a PC, it is important to adjust the video recording mode to ensure optimal video quality. The video recording mode determines the resolution, frame rate, and other settings that can greatly affect the clarity and smoothness of the recorded video.
Selecting the Video Recording Mode
Most digital cameras offer different video recording modes, such as standard mode, high-definition mode, or slow-motion mode. To select the appropriate mode for your recording needs:
- Access the camera’s settings menu by pressing the menu button or navigating through the camera’s touchscreen.
- Look for the “Video Settings” or “Video Mode” option within the menu.
- Select the desired video recording mode from the available options.
It is important to consider the purpose of your video recording when selecting the mode. If you plan to upload the recorded video online or watch it on a high-definition display, choosing a high-definition mode with a higher resolution is recommended. On the other hand, if you want to capture slow-motion footage, selecting the slow-motion mode can help create dramatic effects.
Adjusting Video Settings
In addition to selecting the appropriate mode, adjusting certain video settings can further enhance your recording experience:
- Resolution: Higher resolutions result in a clearer and more detailed video, but they may also require more storage space. Choose a resolution based on your preferences and available storage capacity.
- Frame Rate: The frame rate determines how many frames are captured per second. Higher frame rates result in smoother motion, but can require more processing power and storage space. Select a frame rate based on the level of motion in your video.
- Exposure: Adjusting the exposure settings can help to compensate for different lighting conditions. If the video appears too bright or too dark, try adjusting the exposure accordingly.
It is recommended to experiment with different settings and modes to find the combination that best suits your recording needs. Keep in mind that the optimal settings can vary depending on factors such as the lighting conditions, the subject of the video, and the desired output.
Once you have adjusted the video recording mode and settings, you can connect your digital camera to your PC and start recording videos with enhanced quality.
Question-answer:
Can I set up my digital camera to record directly onto the PC without using a USB cable?
No, most digital cameras require a USB connection to transfer files to a PC. However, some cameras may have built-in Wi-Fi functionality or support wireless file transfer, allowing you to transfer files to a PC without a USB cable. Check your camera’s user manual or specifications to see if it has this capability.
What software do I need to install on my PC to set up a digital camera for recording?
Typically, you do not need to install any special software to set up a digital camera for recording on a PC. Most modern PCs have built-in drivers that recognize and support digital cameras. When you connect your camera to the PC via USB, it should automatically detect the camera and allow you to access its files. However, if you encounter any issues, you can check the camera manufacturer’s website for any available software or drivers specifically designed for your camera model.
Is it possible to record videos directly onto the PC’s hard drive instead of the camera’s memory card?
It depends on the camera model and its capabilities. Some cameras have the option to record directly onto the PC’s hard drive by establishing a direct connection between the camera and the PC. However, this feature is not available in all cameras. You can check your camera’s user manual or the manufacturer’s website for information on whether your camera supports this functionality.


