
Every day, technology becomes more advanced and accessible, making it easier than ever to ensure the safety and security of your home or business. One popular way to enhance security is by setting up a live security camera. These cameras allow you to monitor your property in real-time, providing you with peace of mind and the ability to act quickly in case of any suspicious activity.
Setting up a live security camera may seem like a daunting task, but with the right equipment and knowledge, it can be a straightforward process. In this guide, we will take you through the step-by-step process of setting up your own live security camera system, so you can start protecting your property and loved ones right away.
Step 1: Choose the Right Camera
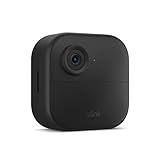
The first step in setting up a live security camera is to choose the right camera for your specific needs. There are various types of security cameras available, including wired and wireless options, indoor and outdoor cameras, and cameras with different features such as night vision or motion detection. Consider factors such as the area you want to monitor, the level of security you require, and your budget when selecting a camera.
Step 2: Determine Camera Placement
Once you have chosen a camera, the next step is to determine where to place it. Think about the areas of your property that you want to monitor and choose strategic locations that provide optimal coverage. Common placement areas include the front and back entrances, driveways, and windows. Keep in mind that the camera should be installed at a height and angle that allows for clear and unobstructed footage.
Follow these steps, and soon you’ll be able to enjoy the benefits of having a live security camera system in place, knowing that you have taken an important step towards enhancing the safety and security of your property.
Benefits of Live Security Camera
A live security camera offers numerous advantages for ensuring the safety and security of your property. Here are some key benefits:
1. Real-time Monitoring
Live security cameras provide a real-time view of your premises, allowing you to monitor activities as they happen. This enables you to respond promptly to any suspicious or unauthorized behavior, allowing for a quicker resolution and potentially preventing any criminal activity.
2. Deterrent Effect
The presence of a live security camera acts as a powerful deterrent against potential criminals. Most criminals are less likely to target properties that have visible security cameras, as the risk of being caught on camera increases their chances of being apprehended by law enforcement.

3. Remote Access
A live security camera system can be accessed remotely from anywhere using a smartphone, tablet, or computer. This allows you to keep an eye on your property even when you are away, providing peace of mind and the ability to respond to any emergencies or suspicious activities immediately.
4. Evidence Collection
In the unfortunate event of a crime or incident, live security camera footage can serve as valuable evidence for investigations and legal proceedings. The recorded video can be provided to law enforcement authorities to help identify perpetrators, validate claims, and provide a detailed account of the events that occurred.
5. Insurance Benefits
Having a live security camera system installed can potentially lead to lower insurance premiums. Insurance companies often offer discounted rates for properties equipped with security cameras, as they are seen as a proactive measure to reduce the risk of criminal activity and property damage.
In conclusion, investing in a live security camera system provides real-time monitoring, acts as a deterrent, offers remote access, aids in evidence collection, and may even lead to insurance benefits. These advantages make live security cameras an essential tool for protecting your property and ensuring the safety of your loved ones.
Choosing the Right Camera
When it comes to setting up a live security camera, choosing the right camera is crucial. The camera you select will determine the quality of the footage and the overall effectiveness of your security system. Here are some factors to consider when choosing the right camera for your needs:

1. Camera Resolution
One of the most important factors to consider is the camera’s resolution. Higher resolution cameras produce clearer and more detailed images, making it easier to identify people or objects captured on video. Look for cameras with at least 1080p resolution for optimal image quality.
2. Camera Type
There are various types of security cameras available in the market, including dome cameras, bullet cameras, and PTZ (pan-tilt-zoom) cameras. Each type has its own advantages and is suitable for different situations. Dome cameras are discreet and can be easily mounted on ceilings, while bullet cameras are more visible and suitable for outdoor use. PTZ cameras offer the flexibility to remotely control the camera’s movement.
3. Day/Night Functionality
Consider whether you need a camera that can capture clear images in low-light conditions or at night. Cameras with day/night functionality have infrared LEDs that allow them to capture footage even in complete darkness. This feature is particularly important if you are monitoring outdoor areas or need 24/7 surveillance.
4. Field of View
Determine the area you want to cover with your security camera and choose a camera with an appropriate field of view. Cameras with wider angles cover more area but may sacrifice on image detail. It is important to strike a balance between coverage and image clarity based on your specific needs.
5. Connectivity
Consider how you will connect your camera to your recording or monitoring device. Wired cameras require physical cables for data and power transmission, while wireless cameras rely on Wi-Fi or network connections. Wired cameras can provide a more stable connection and uninterrupted power supply, while wireless cameras offer more flexibility in terms of placement.

By considering these factors and assessing your specific security needs, you can choose the right camera that will help you set up an effective live security camera system.
Installing the Camera
Before setting up your live security camera, you need to install it in the desired location. Here are the steps to help you install your camera:
1. Choose the Location
Find the ideal spot to install the camera. Make sure it provides a clear view of the area you want to monitor. Consider factors such as lighting conditions, potential obstacles, and the camera’s range.
2. Mount the Camera
Once you’ve chosen the location, securely mount the camera. You can use screws or brackets provided with the camera. Ensure that the camera is stable and positioned correctly for optimal coverage.
3. Connect the Power
Plug the camera into a power source. Ensure that the power supply matches the camera’s requirements. Use proper electrical connections and make sure the camera is receiving power to function properly.

4. Connect to Wi-Fi
If your camera is wireless, access its Wi-Fi settings. Connect it to your Wi-Fi network by following the manufacturer’s instructions provided with the camera. Make sure the signal strength is sufficient for a stable connection.
5. Set Up the Camera
Download and install the camera’s software or app on your smartphone or computer. Follow the instructions to connect the camera to your device. Set up the camera’s settings according to your preferences, including motion detection, recording options, and remote access.
By following these steps, you will successfully install your live security camera and be ready to monitor your desired area.
Positioning the Camera
When setting up a live security camera, it’s crucial to consider the positioning of the camera. The camera’s position will determine its field of view and the effectiveness of its surveillance capabilities. Here are some key factors to consider when positioning your camera:
1. Coverage Area
The first step is to determine the specific area you want to monitor. Assess the vulnerable points of your property that need surveillance, such as entrances, windows, or parking lots. This will help you identify the optimal locations for camera placement.

2. Line of Sight
Ensure that the camera has an unobstructed line of sight to the target area. Avoid placing the camera behind any obstacles that may block its view, such as trees or walls. Additionally, consider the camera’s mounting height to maximize its field of view.
TIP: For outdoor cameras, choose weatherproof models that can withstand various weather conditions.
3. Lighting Conditions
Proper lighting is crucial for clear video footage. Take into account the lighting conditions in the area where the camera will be placed. If the area is poorly lit, consider installing additional lighting fixtures to ensure optimal visibility.
NOTE: Avoid positioning the camera directly facing bright light sources, as this may cause overexposed or washed-out video quality.
By carefully considering these factors, you can position your live security camera in a way that maximizes its effectiveness and ensures comprehensive surveillance of your property.

Connecting the Camera to Power
Before you can start setting up your live security camera, you need to make sure it is properly connected to a power source. Here are the steps to follow:
- Locate the power adapter that came with your camera.
- Find a nearby electrical outlet where you want to install your camera.
- Plug one end of the power adapter into the camera’s power input port.
- Connect the other end of the power adapter to the electrical outlet.
- Make sure the power outlet is turned on.
- Check the camera to ensure that the power LED indicator lights up, indicating that the camera is receiving power.
It is important to note that some security cameras may have different power requirements, so it is always a good idea to consult the camera’s user manual for specific instructions on how to connect it to a power source.
Once the camera is properly connected to power, you can proceed with the next steps to set up the camera and configure its settings.
Setting up the Camera’s Network
When setting up a live security camera, one of the most important steps is configuring the camera’s network settings. This ensures that the camera can connect to your network and transmit the video feed to your desired location.
Step 1: Connecting the Camera
First, connect the camera to your network using an Ethernet cable. Plug one end of the cable into the camera’s network port and the other end into an available port on your router or network switch.
Note: Some cameras also support Wi-Fi connectivity, in which case, you can skip the Ethernet connection and connect the camera to your Wi-Fi network following the manufacturer’s instructions.
Step 2: Accessing the Camera’s Configuration
Once the camera is connected to your network, you need to access its configuration settings. To do this, open a web browser on a computer or mobile device that is connected to the same network.
Enter the camera’s IP address in the address bar of the web browser. The IP address can usually be found in the camera’s user manual or on a sticker attached to the camera itself.
For example, if the camera’s IP address is 192.168.1.100, enter “http://192.168.1.100” in the address bar.
Step 3: Configuring the Network Settings
Once you have accessed the camera’s configuration interface, navigate to the network settings section. Here, you can set the camera’s IP address, subnet mask, gateway, and DNS server.
IP Address: Assign a unique IP address to the camera that is within the same subnet as your network. This ensures that the camera can communicate with other devices on the network.
Subnet Mask: Set the subnet mask to match the subnet mask of your network. This defines the range of IP addresses that the camera can communicate with.
Gateway: Enter the IP address of your router or default gateway. This allows the camera to send and receive data to and from the internet.
DNS Server: Specify the IP address of your DNS server. The DNS server translates domain names into IP addresses, allowing the camera to access websites by name.
After configuring the network settings, save the changes and restart the camera if required by the manufacturer’s instructions.
Note: It is important to keep a record of the camera’s network settings for future reference.
By following these steps, you can successfully set up the camera’s network and ensure seamless video transmission for your live security camera system.
Configuring Live Viewing Options
Once your security camera system is properly set up, you can configure the live viewing options to suit your needs. Below are the steps to help you get started:
Step 1: Access the Camera’s Settings
To configure the live viewing options, you will need to access the camera’s settings. Open the camera’s web interface by entering its IP address into a web browser. Login to the camera using the provided username and password.
Step 2: Navigate to Live Viewing Settings
Once in the camera’s settings, locate the live viewing options. This may be under a tab labeled “Live View” or “Display Settings”. Click on this tab to access the live viewing settings.
Step 3: Adjust the Display Format
Choose the desired display format for the live view. You may have options such as single camera view, quad view, or multi-grid view. Select the format that best suits your needs.
Step 4: Enable Pan/Tilt/Zoom Controls
If your security camera supports pan, tilt, and zoom functions, you can enable these controls in the live viewing options. This will allow you to remotely control the camera’s movement and zoom level.
Step 5: Set Recording Options
In the live viewing settings, you may also find options for setting recording preferences. Choose whether you want to record continuously or only when motion is detected. Adjust the recording quality and resolution as per your requirements.
Step 6: Configure Privacy Masking
Privacy masking allows you to block certain areas of the camera’s view to protect privacy. If you need to hide sensitive areas or windows, enable privacy masking in the live viewing options and define the areas that should be blocked out.
Step 7: Save and Apply the Changes
Once you have made the desired changes to the live viewing options, click on the “Save” or “Apply” button to save the settings. The camera will then apply the changes and your live viewing preferences will be configured accordingly.
By following these steps, you can easily configure the live viewing options for your security camera system. This will allow you to customize the live feed to your preferences and enhance the overall security of your property.
Remote Access and Monitoring
Once you have set up your live security camera system, it’s essential to have remote access and monitoring capabilities. This will allow you to keep an eye on your premises from anywhere at any time. Here are some steps to set up remote access and monitoring:
| 1. Internet connection: | Ensure that you have a stable and reliable internet connection at the location where your security camera system is installed. |
| 2. Router configuration: | Access your router’s settings and configure port forwarding to allow access to your security camera system from outside your local network. |
| 3. Dynamic DNS: | Set up a dynamic DNS service to assign a hostname to your network, as your router may have a dynamic IP address. |
| 4. Network security: | Enable strong encryption, such as WPA2, for your Wi-Fi network to prevent unauthorized access to your camera feeds. |
| 5. Software setup: | Install the manufacturer’s software or mobile app on your smartphone, tablet, or computer to access your security camera system remotely. |
| 6. Account creation: | Create an account with the manufacturer’s software or app to securely log in and access your live camera feeds remotely. |
| 7. Testing: | Test your remote access setup by logging in to the software or app and ensuring that you can view the camera feeds without any issues. |
By following these steps, you will be able to remotely access and monitor your live security camera system, providing peace of mind knowing that you can keep an eye on your premises at all times.
FAQ,
What is a live security camera?
A live security camera is a device that captures and streams video footage in real-time. It allows users to monitor their surroundings remotely and provides an extra layer of security for homes or businesses.
What equipment do I need to set up a live security camera?
To set up a live security camera, you will need a camera (wired or wireless), a power source for the camera, a stable internet connection, and a device (such as a computer or smartphone) to view the live video feed.
How do I install a live security camera?
The installation process may vary depending on the type of camera you have, but generally, you will need to mount the camera in a suitable location, connect it to a power source, and configure it to connect to your internet network. You may also need to install additional software or apps on your viewing device.
What are the benefits of using a live security camera?
Using a live security camera offers several benefits, including real-time monitoring of your property, the ability to remotely access the camera feed from anywhere using an internet connection, deterrence of potential intruders, and the ability to provide evidence in case of criminal activities or accidents.


