
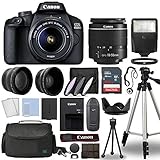
Setting up a manual camera DSLR can seem daunting at first, especially if you’re new to photography. However, with a bit of practice and understanding, you’ll be able to take your photography skills to the next level. The manual mode allows you to have complete control over the settings of your DSLR camera, giving you the flexibility to capture the perfect shot in any lighting condition.
Firstly, familiarize yourself with the different components of your DSLR camera. Your camera should have a mode dial that includes various shooting modes such as manual (M), aperture priority (A/Av), shutter priority (S/Tv), and program (P). To set up your camera in manual mode, rotate the mode dial to “M”. This will give you full control over the camera settings.
Next, learn about the three key settings in manual mode: aperture, shutter speed, and ISO. Aperture controls the amount of light that enters the camera, and it also determines the depth of field in your image. Shutter speed controls the length of time the camera’s shutter stays open, which affects motion blur. ISO measures the camera’s sensitivity to light. Experiment with these settings to achieve the desired effect in your photos.
Once you have a basic understanding of these settings, start by setting your ISO. In bright conditions, choose a lower ISO value, such as 100 or 200. In low-light situations, increase the ISO to a higher value, such as 800 or 1600. Remember that higher ISO values may introduce more noise in your images, so find a balance that works for your specific situation.
Now, adjust your aperture. A lower aperture number like f/1.8 or f/2.8 will give you a shallow depth of field, where the subject is in sharp focus and the background is blurred. A higher aperture number like f/8 or f/11 will give you a deeper depth of field, where both the subject and background are in focus. Experiment with different aperture settings to achieve the desired effect.

Lastly, set your shutter speed. A higher shutter speed like 1/500th of a second will freeze motion, while a lower shutter speed like 1/30th of a second will create motion blur. Adjust your shutter speed based on the desired effect you want to achieve in your photos.
With these steps, you’re well on your way to setting up your manual camera DSLR. Remember, practice is key, so take your camera out and experiment with different settings in various lighting conditions. As you become more familiar with your camera and its manual mode, you’ll gain the confidence to capture stunning shots in any situation.
What is a manual camera DSLR?
A manual camera DSLR, also known as a digital single-lens reflex camera, is a type of camera that offers full control over various settings to the photographer. It allows photographers to manually adjust settings such as aperture, shutter speed, ISO, and focus, giving them complete control over the final image. These cameras are widely used by professional photographers and enthusiasts who desire more creative freedom and control over their photographs.
Unlike point-and-shoot or automatic cameras, manual camera DSLRs provide the flexibility to set the camera’s parameters according to the photographer’s preferences. This means that users can decide the amount of light that enters the camera by adjusting the aperture, control the duration of the exposure by setting the shutter speed, and adjust the sensitivity to light by changing the ISO. These settings can greatly influence the way an image looks and allow photographers to achieve the desired artistic effects.
Advantages of using a manual camera DSLR:
- Control: Manual camera DSLRs provide full control over settings, allowing photographers to capture the image exactly as they envision it.
- Creative freedom: These cameras enable photographers to experiment with different settings and techniques to achieve unique and artistic results.
- High image quality: Manual camera DSLRs often have larger image sensors, which generally result in higher image quality with better detail and less noise.
- Interchangeable lenses: DSLRs allow users to change lenses, giving them greater flexibility to adapt to different situations and capture a wide range of subjects.
- Compatibility with accessories: Manual camera DSLRs are compatible with a wide variety of external accessories such as flashes, filters, and remote triggers, offering additional creative possibilities.
Conclusion:
A manual camera DSLR is a powerful tool for photographers who want full control over their images. By allowing users to adjust various settings manually, these cameras offer creative freedom and the ability to produce high-quality photographs. Whether you are a professional photographer or an enthusiast, a manual camera DSLR can help you take your photography skills to the next level.

Why use a manual camera DSLR?
There are several reasons why using a manual camera DSLR can be beneficial for photographers:
1. Control over settings
A manual camera DSLR allows you to have complete control over every aspect of your photography, including exposure, shutter speed, aperture, ISO, and focus. This level of control gives you the freedom to experiment and achieve the exact results you want.
2. Greater image quality
A manual camera DSLR typically has a larger image sensor compared to a point-and-shoot camera or a smartphone. This larger sensor size allows for better light gathering capability, resulting in higher image quality, improved dynamic range, and reduced noise in low-light situations.
Additionally, the ability to use interchangeable lenses with a DSLR allows you to choose lenses specifically designed for different types of photography, such as wide-angle lenses for landscapes or telephoto lenses for wildlife photography. This flexibility in lens selection further enhances the overall image quality and creative possibilities.
3. Advanced creative options
A manual camera DSLR offers advanced features and creative options that are not typically found in other types of cameras. These features include the ability to shoot in RAW format, which retains more image data for post-processing, and the option to use different shooting modes such as manual, aperture priority, or shutter priority.

Furthermore, a manual camera DSLR provides greater control over depth of field, allowing you to achieve a shallow depth of field for stunning bokeh effects or a deep depth of field for capturing intricate details in a landscape. The ability to control these creative elements adds depth and interest to your photographs.
In conclusion, using a manual camera DSLR provides photographers with unparalleled control over their images, improved image quality, and advanced creative options. Whether you are a professional photographer or an enthusiast, a manual camera DSLR can take your photography to the next level.
Setting up a manual camera DSLR
Shooting with a manual camera DSLR allows you to have complete control over your photographs. It allows for more creativity and gives you the flexibility to adjust your settings based on the conditions and desired outcome. Here are some steps to help you get started with setting up your manual camera DSLR:
1. Familiarize yourself with the camera controls
Before you start shooting, it’s important to understand the various controls and buttons on your camera. Take the time to read the camera manual and familiarize yourself with the functions of each button and dial. This will allow you to make quick adjustments when needed.
2. Set your camera to manual mode
In order to have full control over your settings, switch your camera mode to manual (M). This will allow you to manually adjust the aperture, shutter speed, and ISO.
Note: Some cameras have additional manual modes like aperture priority (A or Av) or shutter priority (S or Tv). These modes can be useful in certain situations, but for complete control, stick to manual mode.
3. Adjust the aperture
The aperture determines the depth of field in your photograph. A wider aperture (smaller f-number) will give you a shallow depth of field, whereas a smaller aperture (larger f-number) will give you a larger depth of field. Adjust the aperture based on how much of your subject you want in focus.
4. Adjust the shutter speed
The shutter speed determines how long the shutter remains open, affecting the amount of light that enters the camera. A faster shutter speed will freeze motion, while a slower shutter speed will create motion blur. Adjust the shutter speed based on the desired effect and the available light in the scene.
5. Set the ISO
The ISO determines the camera’s sensitivity to light. A higher ISO allows you to shoot in low-light conditions, but it may introduce more noise into the image. Adjust the ISO based on the available light, keeping in mind the balance between image quality and noise.
Note: It’s best to start with the lowest ISO setting and increase it if needed.

By understanding and taking control of these key settings, you’ll be able to capture stunning photographs with your manual camera DSLR. Remember to experiment, practice, and have fun with your newfound creative freedom!
Choose the right lens
When setting up your DSLR camera for manual shooting, one of the most important factors to consider is the lens you use. The choice of lens can greatly influence your photos and the overall quality of your images.
1. Prime Lens vs. Zoom Lens
There are two main types of lenses: prime lenses and zoom lenses. Prime lenses have a fixed focal length, which means they cannot zoom in or out. They often provide better image quality and are ideal for capturing sharp and detailed photos. On the other hand, zoom lenses have a variable focal length, allowing you to zoom in and out to adjust the composition of your shots. They offer more flexibility in terms of framing your subject.
2. Focal Length
Focal length refers to the distance between the lens and the image sensor. It determines the field of view and magnification of your photos. In general, shorter focal lengths (wide-angle lenses) are great for landscape and architectural photography, as they allow you to capture a wider scene. Longer focal lengths (telephoto lenses) are ideal for capturing subjects from a distance, such as wildlife or sports photography. Standard focal lengths (around 50mm) are suitable for everyday photography.
3. Aperture
The aperture of a lens determines how much light it can let in. It is expressed as an f-number, such as f/2.8 or f/4. A smaller f-number indicates a larger aperture, which allows more light to enter the camera. A larger aperture is beneficial in low-light situations, as it enables you to use faster shutter speeds and capture well-exposed images. Additionally, a wider aperture creates a shallow depth of field, resulting in a blurred background and a more prominent subject.

By considering the type of lens, its focal length, and the aperture, you can make an informed decision and choose the right lens for your DSLR camera setup. Experimenting with different lenses will also help you discover various creative possibilities and enhance your photography skills.
Adjust settings for manual mode
When using a DSLR camera in manual mode, it is important to adjust several settings to achieve the desired results. Here are the key settings you need to consider:
- ISO: This setting determines the sensitivity of your camera’s sensor to light. A lower ISO setting (e.g., 100) is ideal for well-lit environments, while a higher ISO (e.g., 1600) is suitable for low-light conditions. Keep in mind that higher ISO settings may introduce noise into your images.
- Aperture: The aperture controls the amount of light entering the camera through the lens. It also affects the depth of field, or the area of the image that appears in focus. A smaller aperture (e.g., f/16) produces a greater depth of field, while a larger aperture (e.g., f/2.8) creates a shallower depth of field.
- Shutter speed: The shutter speed determines how long the camera’s shutter remains open. It directly affects the exposure and motion blur in your photos. A faster shutter speed (e.g., 1/1000 second) freezes motion, while a slower speed (e.g., 1/30 second) can create motion blur.
- White balance: White balance adjusts the color temperature of your images to ensure accurate and natural-looking colors. You can choose from presets such as daylight, cloudy, or tungsten, or set a custom white balance by using a gray card or a neutral-colored object in the scene.
- Focus mode: Depending on your subject and shooting conditions, you can choose between autofocus and manual focus. Autofocus is a convenient option for most situations, but manual focus gives you full control and can be more precise, especially in challenging lighting or when shooting moving subjects.
Adjusting these settings in manual mode allows you to have creative control over your DSLR camera and capture the perfect shot in various lighting conditions and situations. Experiment with different settings to find the combination that works best for your desired outcome.
Focus and compose your shot
One of the most important aspects of manual DSLR photography is focusing and composing your shot. By manually adjusting the focus and composition, you have complete control over how your image will look.
Manual Focus
Most DSLR cameras offer both autofocus and manual focus options. When shooting in manual mode, using manual focus allows you to pinpoint exactly where you want the sharpest focus to be.

To manually focus your DSLR camera, start by switching your lens to manual focus mode. Then, look through the viewfinder or use Live View (if available) to see your subject. Turn the focus ring on your lens until your subject appears sharp and in focus.
It’s important to note that different lenses have different focus rings, so be sure to consult your camera’s manual for specific instructions.
Composition
Composition refers to how you arrange the elements within your frame. This includes the placement of your subject, the use of lines and shapes, and the overall balance of the image.
When composing your shot, keep in mind the rule of thirds. This rule suggests dividing your frame into a 3×3 grid and placing your subject along one of the grid lines or at an intersection point. This creates a more balanced and visually pleasing image.
Additionally, consider the background and foreground elements when composing your shot. Look for leading lines, interesting textures, or contrasting colors that can enhance the overall composition.
Experiment with different angles and perspectives to add depth and interest to your photos. Don’t be afraid to break the rules and try new compositions. Remember, the goal is to create visually compelling images that tell a story or evoke emotions.
Exposure settings and metering
When setting up a manual DSLR camera, understanding exposure settings and metering is crucial. These settings determine how light or dark your photos will be, and mastering them will allow you to achieve the desired exposure.
Exposure settings
There are three key exposure settings you need to adjust on your DSLR camera:
| Setting | Description |
|---|---|
| Aperture | Determines the amount of light that enters the camera through the lens. It is represented by an f-number, where a smaller number means a larger aperture (more light) and a larger number means a smaller aperture (less light). |
| Shutter speed | Controls the duration of time the camera’s shutter remains open. It is measured in fractions of a second, such as 1/1000s. Faster shutter speeds allow less light to enter the sensor, whereas slower shutter speeds allow more light to enter. |
| ISO | Determines the sensitivity of the camera’s image sensor to light. A higher ISO setting increases the sensor’s sensitivity, making it easier to shoot in low-light conditions. However, higher ISO settings can introduce noise into the image. |
Metering
Metering refers to how the camera measures the light in a scene to determine the correct exposure. DSLR cameras often offer various metering modes, such as:
- Evaluative metering: The camera evaluates the entire scene to determine the best exposure.
- Center-weighted metering: The camera gives more weight to the center of the frame when determining exposure.
- Spot metering: The camera meters only a small area in the frame, often the spot where the focus point is located.
Choosing the appropriate metering mode depends on the lighting conditions and the desired outcome. It’s essential to experiment with different modes to understand how they affect exposure.
Practice and experiment
Once you have familiarized yourself with the basic settings and functions of your DSLR camera, it’s time to practice and experiment with different shooting scenarios. The key to becoming a skilled manual photographer is to continuously practice and refine your skills.
1. Outdoor Photography
One of the best ways to practice using your DSLR camera in manual mode is by taking photos outdoors. Take your camera out on a sunny day and experiment with different settings to capture vibrant landscapes or close-up shots of nature. Try adjusting the aperture to control the depth of field or the shutter speed to capture motion. Don’t be afraid to take multiple shots with different settings to compare the results.
| Tips for Outdoor Photography: |
|---|
| • Use a tripod to keep your camera steady for sharp images. |
| • Experiment with different angles and compositions to add interest to your photos. |
| • Pay attention to the lighting conditions and adjust the ISO accordingly to avoid overexposure or underexposure. |
2. Portrait Photography
Another great way to practice manual camera settings is by taking portraits of people. Whether it’s your family, friends, or even strangers, capturing their essence requires understanding the camera’s settings. Use a wide aperture (low f-stop number) to blur the background and make your subject stand out, or try a smaller aperture to capture more details in the surroundings. Experiment with different lighting setups, such as natural light or studio lighting, and adjust the white balance accordingly for accurate skin tones.
| Tips for Portrait Photography: |
|---|
| • Communicate with your subject and make them comfortable to capture their natural expressions. |
| • Experiment with different focal lengths to achieve different perspectives. |
| • Pay attention to details, such as clothing choices and background, which can greatly impact the overall look and feel of the portrait. |
By practicing and experimenting with your DSLR camera in manual mode, you will gradually gain confidence and improve your photography skills. Remember to review your photos and analyze the settings used to understand what worked and what didn’t. Photography is an art form, and with practice, dedication, and creativity, you can capture stunning images.
Question-answer:
What is a DSLR camera?
A DSLR (Digital Single-Lens Reflex) camera is a type of camera that uses a mirror and prism system to allow photographers to see directly through the lens. It offers manual control over various settings and interchangeable lenses, making it a popular choice for professional and enthusiast photographers.
What are some basic settings to consider when setting up a manual DSLR camera?
When setting up a manual DSLR camera, there are several basic settings to consider. These include the ISO (sensitivity of the camera sensor to light), aperture (the opening of the lens that controls how much light enters the camera), shutter speed (the length of time the camera’s sensor is exposed to light), and white balance (adjusting the camera’s settings to accurately represent colours). These settings can be adjusted based on the specific shooting conditions and desired outcome.
How can I adjust the ISO settings on my DSLR camera?
To adjust the ISO settings on your DSLR camera, locate the ISO button or menu option. Pressing the ISO button or accessing the ISO menu will allow you to choose from a range of ISO values, such as 100, 200, 400, etc. Selecting a higher ISO value will increase the sensitivity of the camera sensor to light, which can be useful in low-light situations. However, higher ISO values may introduce more noise into the image, so it’s important to find the right balance based on your shooting conditions.
How can I achieve a shallow depth of field with my DSLR camera?
To achieve a shallow depth of field with your DSLR camera, you can adjust the aperture settings to a lower f-stop value. A lower f-stop value (such as f/1.8 or f/2.8) will result in a larger aperture and narrower depth of field, meaning that only a small portion of the image will be in sharp focus while the rest will be blurred. You can also achieve a shallow depth of field by using a lens with a longer focal length and getting closer to your subject.


