
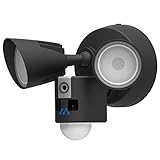
Setting up a security camera is an essential step in ensuring the safety and protection of your home or office. Momentum security cameras are known for their high-quality video, easy installation process, and advanced features. Whether you’re a beginner or an experienced user, this guide will walk you through the step-by-step process of setting up your Momentum security camera.
Step 1: Choose the Right Location
Before beginning the installation process, it’s important to choose the right location for your security camera. Consider areas that need surveillance, such as entrances, driveways, or high-traffic areas. The ideal location should provide a clear view and minimize potential obstructions.
Pro tip: Mount your camera at a height that is out of reach but still captures the desired field of view.
Step 2: Connect the Camera
The next step is to connect your Momentum security camera. Start by plugging the power adapter into a power outlet and connect the other end to your camera. If your camera supports a wired internet connection, use an ethernet cable to connect it to your router. If your camera is wireless, proceed to the next step.
Pro tip: Use a surge protector to protect your camera from power surges.
Step 3: Download the Momentum App
To control and monitor your security camera, you’ll need to download the Momentum app on your smartphone or tablet. The app is available for iOS and Android devices and can be easily found in the respective app stores. Install the app and create a Momentum account if you don’t have one already.
Pro tip: Ensure your smartphone or tablet is connected to a stable Wi-Fi network for a seamless setup process.

Now that you have followed these three initial steps, you are ready to proceed with the rest of the setup process. By carefully following the manufacturer’s instructions and using the Momentum app, you can customize your camera’s settings, including motion detection, alerts, and video storage options. Remember, a well-set up Momentum security camera will provide you with peace of mind and an extra layer of protection for your property.
What is a momentum security camera?
A momentum security camera is a type of surveillance camera that is designed to provide advanced security features and monitoring capabilities. These cameras are commonly used for home security purposes and are connected to a network, allowing users to monitor their property remotely through a smartphone or computer.
One of the key features of a momentum security camera is its ability to capture high-definition video footage. This ensures that users can easily identify any suspicious activity or intruders on their property. These cameras are equipped with motion sensors that can detect movement and trigger a recording, alerting the user to any potential security threats.
In addition to video recording, momentum security cameras often include other advanced functions such as two-way audio communication. This allows users to not only monitor their property visually but also to communicate with anyone in the vicinity of the camera. This feature can be particularly useful for interacting with delivery personnel, guests, or even deterring potential intruders.
Smartphone Integration
Momentum security cameras are designed to seamlessly integrate with smartphones or tablets through dedicated mobile applications. These apps provide users with real-time access to the camera feed and allow them to control various settings and features remotely.

Cloud Storage and Data Encryption
Many momentum security cameras offer cloud storage options, allowing users to store their recorded video footage remotely. This ensures that even if the camera is tampered with or stolen, the footage will still be accessible. Additionally, these cameras often utilize encryption technology to protect the user’s data, ensuring that it cannot be intercepted or compromised by unauthorized individuals.
Overall, momentum security cameras provide an effective and convenient solution for enhancing home security. With their advanced features and ease of use, they offer peace of mind and the ability to monitor and protect your property from anywhere at any time.
Step 1: Choose the right location
Setting up your Momentum security camera starts with choosing the right location for installation. This step is crucial as it will determine the camera’s effectiveness in capturing and monitoring the desired areas.
Consider the following factors when selecting the location:
- Visibility: Ensure that the camera has a clear line of sight to the intended area. Avoid obstructions such as walls, trees, or objects that may block the view.
- Height: Mount the camera at an optimal height to capture the desired field of view. Typically, a height of 10 to 12 feet (3 to 3.6 meters) provides a good balance between visibility and accessibility.
- Power source: Choose a location near a power outlet to ensure continuous power supply for the camera. If the area does not have a nearby power source, consider using an extension cord or installing a dedicated outdoor power outlet.
- Weather resistance: If installing the camera outdoors, make sure it is weather-proof and can withstand various weather conditions. Look for cameras with an IP65 or higher rating for optimal outdoor durability.
- Wi-Fi coverage: Ensure that the chosen location has a strong Wi-Fi signal strength to ensure a stable connection between the camera and your home network. Consider using a Wi-Fi extender if the signal is weak in the area.
By considering these factors, you can ensure that your Momentum security camera is placed in an ideal location for optimal performance and monitoring capabilities.

Considerations for placement
When setting up your Momentum security camera, there are several important considerations to keep in mind for optimal performance and coverage:
1. Location: Choose an area for your security camera that provides the best vantage point for monitoring the desired area. Consider factors such as the line of sight, proximity to potential threats, and overall visibility.
2. Height: Mount the camera at an appropriate height to capture clear and unobstructed footage. Generally, a height of 7 to 9 feet is recommended for outdoor cameras to prevent vandalism and tampering.
3. Lighting: Make sure you consider lighting conditions when placing your security camera. Position the camera in an area that has adequate lighting during both day and night to ensure clear and usable footage.
4. Power source: Ensure that the camera is located near a power source or consider using a camera with a rechargeable battery option if you need more flexibility in placement.

5. Wi-Fi signal strength: Check the Wi-Fi signal strength in the area where you plan to place the camera. A strong and stable Wi-Fi network is essential for a reliable connection and smooth video streaming.
6. Weatherproofing: If you are installing an outdoor security camera, make sure it is weatherproof and designed to withstand harsh weather conditions such as rain, snow, or extreme temperatures.
By carefully considering these factors, you can ensure that your Momentum security camera is strategically placed for maximum effectiveness and protection.
Step 2: Mounting the camera
Once you have identified the ideal location for your Momentum security camera, you can proceed with mounting it. Follow these steps:
1. Gather the necessary tools: Before you begin, make sure you have all the tools required for mounting the camera. This typically includes a drill, screws, a screwdriver, and a level.

2. Prepare the mounting surface: Clean and dry the surface where you plan to mount the camera. Make sure it is free from any dust or debris for a secure attachment.
3. Mark the mounting holes: Hold the camera in the desired position, and use a pencil to mark the spots where the mounting holes should go. Double-check the alignment and ensure the camera is level before proceeding.
4. Drill the holes: Use a drill to create holes in the marked spots. The size of the holes should match the size of the screws that came with your camera.
5. Attach the camera: Align the mounting holes of the camera with the drilled holes and carefully attach the camera using the provided screws. Ensure it is firmly secured in place.
6. Adjust the camera angle: Once the camera is mounted, adjust the angle to capture the desired view. Use the level to ensure it is perfectly aligned.

7. Test the camera: Before finalizing the installation, test the camera to ensure it is functioning properly. Connect it to a power source and check the live feed on your smartphone or computer.
By following these steps, you can successfully mount your Momentum security camera and move on to the next steps in the setup process.
Types of mounts
In order to set up your Momentum security camera, it is important to consider the type of mount that best suits your needs. Different mounts offer various advantages depending on the location and purpose of your camera.
Wall Mount
A wall mount is the most common and versatile option. It allows you to securely attach your camera to a wall, providing a wide range of viewing angles. Wall mounts are ideal for indoor and outdoor installations and can be adjusted to achieve the desired camera position.
Ceiling Mount
A ceiling mount is a great option when you want to install your camera on the ceiling. It provides a discreet and unobtrusive placement, making it suitable for areas where aesthetics matter. Ceiling mounts offer a clear view of the surroundings and can be tilted or rotated for optimal coverage.
Pole Mount
If you plan to install your camera outdoors or in large open spaces, a pole mount is a recommended choice. It allows you to securely attach your camera to a pole or post, providing a panoramic view and coverage of a wider area. Pole mounts often come with adjustable brackets for easy positioning.
When selecting a mount for your Momentum security camera, ensure that it is compatible with the specific model and offers the necessary features for your desired camera placement. Consider factors like stability, adjustability, and durability to ensure a secure and reliable installation.
Step 3: Connecting the camera
Now that you have positioned your Momentum security camera in the desired location, it’s time to connect it to your home network. Follow the steps below to ensure a successful connection:
Step 1: Powering the camera
Start by plugging the camera into a power source using the provided power adapter. Ensure that the camera is receiving power by checking the LED indicator light on the camera. It should turn on and stay solid to indicate that the camera is properly powered.
Step 2: Connecting to Wi-Fi
Next, you need to connect the camera to your home Wi-Fi network. To do this, open the Momentum app on your smartphone or tablet and tap on the camera that you want to connect. Select the “Wi-Fi Settings” option and follow the on-screen instructions to connect the camera to your Wi-Fi network. Make sure you enter the correct Wi-Fi network name and password when prompted.
Once you have entered the correct Wi-Fi network details, the camera will attempt to connect to the network. This may take a few minutes, so be patient. During this process, it’s important to keep your smartphone or tablet close to the camera to ensure a strong and stable Wi-Fi signal.
If the camera is successfully connected to your Wi-Fi network, you will see a confirmation message on your smartphone or tablet screen. The LED indicator light on the camera should also turn solid or blink slowly, indicating that the camera is now connected to your home network.
It’s important to note that if the camera fails to connect to your Wi-Fi network, you may need to troubleshoot the issue. Check your network settings, ensure that your Wi-Fi password is correct, and try moving the camera closer to the Wi-Fi router to improve the signal strength.
Once the camera is successfully connected to your Wi-Fi network, you are ready to move on to the next step in the setup process.
Wired vs. wireless options
When setting up a Momentum security camera, one of the decisions you’ll need to make is whether to go with a wired or wireless option. Both options have their own advantages and considerations, so it’s important to understand the differences before making a choice.
Wired Security Cameras
Wired security cameras require a physical connection to your home’s power supply and your Wi-Fi router. They typically offer a more stable and reliable connection compared to wireless cameras. With a wired setup, you don’t have to worry about battery life or any potential interference that may come from other devices.
However, installing wired cameras can be more time-consuming and may require professional assistance. You also need to consider the placement of the camera and the visibility of the wires running from it, which may not be aesthetically desirable.
Wireless Security Cameras
Wireless security cameras, on the other hand, offer more flexibility in terms of installation. They connect to your Wi-Fi network, eliminating the need for cables and enabling easy relocation if needed. This makes them a great option for renters or those who want a more convenient setup.
Although wireless cameras are generally easier to install, they may be more susceptible to interference from other devices or a weak Wi-Fi signal. They also require regular charging or battery replacement, which could be a hassle if you forget to do it or if the camera is positioned in a hard-to-reach spot.
Choosing the Right Option
When deciding between wired and wireless security cameras, consider factors such as your specific needs, installation requirements, and potential limitations. If you value stability and reliability, a wired camera may be the better choice. On the other hand, if flexibility and ease-of-installation are more important to you, wireless cameras may be the way to go.
Ultimately, the decision depends on your preferences and the unique circumstances of your home or business.
Step 4: Configuring the camera
After successfully connecting the Momentum security camera to your home Wi-Fi network, it is important to configure the camera settings to ensure it operates according to your preferences and requirements. Follow the steps below to configure the camera:
1. Download the Momentum app
To configure and control your Momentum security camera, you will need to download the Momentum app on your smartphone or tablet. The app is available for both Android and iOS devices. Simply visit the Google Play Store or Apple App Store and search for “Momentum” to find and install the app.
2. Create a Momentum account
Once you have downloaded the app, create a new Momentum account or sign in with your existing account if you already have one. Creating an account allows you to access the camera remotely and receive motion detection alerts on your mobile device.
3. Add the camera to your account
After signing in to your Momentum account, follow the instructions in the app to add the security camera to your account. This typically involves scanning a QR code or entering the camera’s unique identification number. Make sure the camera is powered on and connected to the same Wi-Fi network as your mobile device for successful synchronization.
4. Configure camera settings
Once the camera is successfully added to your account, you can start configuring its settings. The Momentum app allows you to adjust various camera settings such as video quality, motion detection sensitivity, and notification preferences. Customizing these settings will help optimize the camera’s performance and tailor it to your specific needs.
Note: It is recommended to set up password protection and enable encryption on your camera to enhance security and prevent unauthorized access to your camera feed.
5. Test the camera and adjust if needed
After configuring the camera settings, it is important to test the camera to ensure that it is functioning properly. Check the live feed from the camera in the Momentum app and verify that the motion detection feature is activated correctly. If needed, you can make further adjustments to the settings and test again until you are satisfied with the camera’s performance.
By following these steps, you will be able to successfully configure your Momentum security camera and customize its settings according to your preferences.
Setting up the camera settings
Once you have successfully connected your Momentum security camera to your Wi-Fi network, it’s time to set up the camera settings. Here are the steps to follow:
1. Launch the Momentum app on your mobile device and select the camera you want to set up.
2. Tap on the camera settings icon located at the bottom right corner of the screen.
3. In the camera settings menu, you can adjust various settings such as video quality, motion detection sensitivity, audio settings, and more.
4. To change the video quality, tap on the “Video Quality” option and select the desired resolution.
5. If you want to enable motion detection, tap on the “Motion Detection” option and toggle the switch to the on position.
6. You can also adjust the sensitivity of the motion detection by selecting the “Motion Sensitivity” option and choosing a level from low to high.
7. To enable audio, tap on the “Audio” option and toggle the switch to the on position. This will allow you to listen to the camera’s audio feed.
8. Once you have customized the camera settings to your preference, tap on the “Save” button to save the changes.
9. You can now start using your Momentum security camera with the updated settings.
By properly setting up the camera settings, you can ensure optimal performance and customize your camera’s functionality according to your needs.
Step 5: Testing the Camera
After completing the previous steps, it’s time to test your Momentum security camera to make sure everything is working properly. Follow these instructions to test the camera:
1. Power on the Camera
Connect the camera to a power source and ensure it is turned on. Wait a few seconds for the camera to initialize.
2. Check the Camera’s Indicator Lights
Look at the camera’s indicator lights to see if they are lit up. Typically, a solid green light indicates that the camera is connected to the network and functioning correctly. If the lights are not on or if there is a different color, consult the camera’s user manual for troubleshooting steps.
3. Confirm the Camera’s Connection to the Network
Open the Momentum app on your smartphone or tablet and navigate to the camera’s settings. Check the camera’s status to ensure it is connected to the Wi-Fi network. If it is not connected, follow the app’s instructions to connect the camera to your network.
If you have successfully connected the camera to the network, try accessing the live video feed through the app. Verify that you can see a clear image and that the camera’s motion detection feature is working properly.
Additionally, you can test other camera features such as the two-way audio, night vision, and recording functionalities to ensure they are functioning as expected.
By following these steps, you can ensure that your Momentum security camera is set up correctly and that it is capturing high-quality video footage for your safety and security needs.
Ensuring proper functionality
After setting up your Momentum security camera, it is essential to ensure that it is functioning correctly. Here are some steps you can follow to ensure proper functionality:
1. Test the camera
Before installing the camera in its final location, it is a good idea to test it to make sure all the features are working properly. Connect the camera to a power source and follow the manufacturer’s instructions to set it up. Once it is connected, test the live video feed, motion detection capabilities, and audio functionality (if applicable).
2. Check the network connection
Ensure that your camera is connected to a stable and reliable network. This can be done by checking the Wi-Fi signal strength near the camera’s location. If the signal is weak, consider moving the camera closer to the router or installing a Wi-Fi extender. Additionally, you can check the network stability by verifying if the camera can maintain a consistent live video feed without any interruptions.
3. Adjust camera settings
Take the time to adjust the camera settings according to your preferences and needs. This includes adjusting the video quality, motion detection sensitivity, and other features specific to your camera model. Refer to the manufacturer’s instructions or user manual for guidance on how to access and customize these settings.
4. Periodic maintenance
Regularly check the camera’s lens for any smudges, dirt, or obstructions that may affect the quality of the captured footage. Clean the lens using a soft cloth and avoid using any harsh chemicals. Additionally, ensure that the camera remains powered and connected to the network uninterrupted to prevent any disruptions in the monitoring or recording process.
5. Review camera footage
Occasionally review the camera footage to ensure that it is capturing the desired areas effectively and without any issues. Check for any blind spots, glare, or image distortion that may need adjustment or rectification. It is also recommended to save important footage on a compatible storage device or cloud service for future reference.
| Issue | Possible Solution |
|---|---|
| No video/audio feed | – Check the camera power and network connection – Make sure the camera is set up correctly and the settings are configured properly |
| Poor video/audio quality | – Adjust the camera settings for better quality – Ensure there are no obstructions near the camera lens – Check the network connection for stability |
| Motion detection not working | – Verify that the motion detection feature is enabled – Adjust the sensitivity settings if necessary – Check for any obstructions in the camera’s view that may affect motion detection |
By following these steps and addressing any issues that may arise, you can ensure that your Momentum security camera functions properly and provides you with the desired level of security and peace of mind.
FAQ,
What is a momentum security camera?
A momentum security camera is a type of home security camera that allows you to monitor your property remotely. It is designed to provide surveillance and peace of mind, allowing you to keep an eye on your home, family, and belongings.
Can I access my momentum security camera remotely?
Yes, you can access your momentum security camera remotely. The Momentum app allows you to view live video feeds from your camera wherever you are. As long as you have an internet connection, you can use the app to monitor your property from your smartphone or tablet.


