
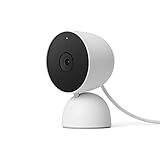
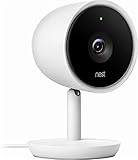
If you are concerned about the safety and security of your home, then investing in a security camera is a great idea. One of the most popular options on the market is the Nest Cam Indoor Security Camera. This compact and easy-to-use camera allows you to monitor your home from anywhere using your smartphone or tablet. In this article, we will guide you through the process of setting up your Nest Cam Indoor Security Camera, so you can start protecting your home right away.
Step 1: Unboxing the Camera
Start by unboxing your Nest Cam Indoor Security Camera. Inside the box, you will find the camera, a power adapter, a power cable, a wall mounting plate, and some screws. Take a moment to familiarize yourself with the different components.
Tip: Before you start the setup process, make sure you have a strong Wi-Fi signal in the area where you plan to install the camera.
Step 2: Download the Nest App
To set up your Nest Cam Indoor Security Camera, you will need to download the Nest app on your smartphone or tablet. The Nest app is available for both iOS and Android devices and can be downloaded for free from the App Store or Google Play.
Tip: Make sure your device is connected to the internet before downloading the Nest app.
Step 3: Create a Nest Account
Once you have downloaded the Nest app, open it and create a new Nest account. You will need to provide some basic information, such as your name, email address, and a password. Make sure to choose a strong and unique password to protect your account.
Tip: If you already have a Nest account, you can simply log in using your existing credentials.
Step 4: Add the Camera to your Nest Account
After creating your Nest account, the app will prompt you to add a camera. Tap on the “Add” button and follow the on-screen instructions to connect your Nest Cam Indoor Security Camera to your account. You will need to scan the QR code on the bottom of the camera using your device’s camera.
Tip: Make sure you have the camera and your device close to each other during this step.
Step 5: Connect the Camera to Wi-Fi
Once the camera is successfully added to your Nest account, the app will guide you through the process of connecting it to your Wi-Fi network. Select your Wi-Fi network from the list of available networks and enter your Wi-Fi password when prompted. The app will then attempt to connect the camera to your Wi-Fi network.

Tip: If the camera fails to connect to your Wi-Fi network, make sure you are entering the correct password and that your Wi-Fi signal is strong enough.
Congratulations! You have successfully set up your Nest Cam Indoor Security Camera. You can now use the Nest app to view a live stream from your camera, receive notifications when motion or sound is detected, and even talk and listen through the camera using the app’s two-way audio feature. Enjoy the peace of mind that comes with knowing you can keep an eye on your home at all times.
Benefits of Nest Cam Indoor Security Camera
The Nest Cam Indoor Security Camera offers several benefits for users looking to enhance their home security. Whether you want to keep an eye on your property while you’re away or ensure the safety of your loved ones, this smart camera provides reliable surveillance and peace of mind.
1. 24/7 Live Surveillance
With the Nest Cam Indoor Security Camera, you can access live video footage of your home anytime, anywhere. This allows you to stay connected and monitor your property in real-time, even when you’re not there. Whether you’re at work, on vacation, or running errands, you can keep an eye on your home with just a few taps on your smartphone.
2. Clear HD Video and Audio
This security camera captures crisp and clear high-definition video, ensuring that you can see every detail. Whether it’s a suspicious person lurking around your property or a package being delivered, you won’t miss a thing. The built-in microphone and speaker also enable two-way audio, allowing you to communicate with family members, pets, or delivery personnel.
3. Intelligent Alerts
The Nest Cam Indoor Security Camera is equipped with intelligent motion detection technology. It can differentiate between people and objects, reducing false alarms caused by pets or moving shadows. When something is detected, you’ll receive instant notifications on your smartphone, allowing you to respond promptly and take appropriate action.
4. Night Vision
With its advanced night vision capabilities, the Nest Cam Indoor Security Camera provides clear footage even in low-light conditions. Whether it’s late at night or during a power outage, you can trust that this camera will still capture high-quality images, ensuring round-the-clock security.
5. Secure Cloud Storage
All recorded footage from the Nest Cam Indoor Security Camera is automatically stored in the cloud. This eliminates the need for additional storage devices and ensures that your video footage is safe and easily accessible. You can review and download the footage at any time, giving you the evidence you need in case of any incidents.
In conclusion, the Nest Cam Indoor Security Camera offers a wide range of benefits for those looking to enhance their home security. With its live surveillance, clear HD video and audio, intelligent alerts, night vision, and secure cloud storage, you can have peace of mind knowing that your home is protected.
Choosing the Right Location for Your Nest Cam Indoor
When it comes to setting up your Nest Cam Indoor, choosing the right location is crucial to ensure optimal security coverage. Here are some important factors to consider when selecting the perfect spot:

1. Coverage area:
Determine the areas you want to monitor with your Nest Cam Indoor. Consider locations that have a good line of sight to the area, allowing the camera to capture clear and comprehensive footage.
2. Power source:
Ensure that the selected location is near a power outlet so that you can easily plug in your Nest Cam Indoor. This will eliminate the need for long extension cords or complicated wiring.
3. Wi-Fi signal:

Position your camera in an area where it can receive a strong Wi-Fi signal. A weak or unstable signal may result in delayed notifications or interrupted live feeds.
4. Height and angle:
Mount your Nest Cam Indoor at a suitable height and angle to achieve the best coverage. Aim for a height that captures the desired viewing area without easily being tampered with or obstructed. Also, consider the tilt of the camera to capture a clear view without distortions.
5. Privacy concerns:
Be mindful of privacy considerations when placing your Nest Cam Indoor. Avoid pointing the camera directly into private areas such as bedrooms, bathrooms, or other sensitive spaces.

6. Accessibility:
Ensure that the camera is easily accessible for maintenance and adjustments. This will allow you to quickly troubleshoot any issues or make adjustments as needed.
By considering these factors and taking the time to plan the ideal location for your Nest Cam Indoor, you can maximize its effectiveness and enhance the security of your indoor space.
Nest Cam Indoor Setup Requirements
Before setting up your Nest Cam Indoor security camera, make sure you have the following requirements:
- A compatible smartphone or tablet device with the Nest app installed
- A stable internet connection with a minimum upload speed of 2 Mbps
- A nearby power outlet to connect and power the camera
- A Wi-Fi network with a 2.4 GHz or 5 GHz frequency
- A Nest account. If you don’t have one, you can create it through the Nest app
Ensure that you have all the necessary requirements ready before starting the setup process for your Nest Cam Indoor security camera.
Connecting Your Nest Cam Indoor to Wi-Fi
To connect your Nest Cam Indoor to Wi-Fi, follow these simple steps:
Step 1: Download the Nest app
Before you can connect your Nest Cam Indoor to Wi-Fi, you’ll need to download the Nest app on your smartphone or tablet. The app is available for both Android and iOS devices, so make sure to download the appropriate version for your device.
Step 2: Set up your Nest account
If you don’t already have a Nest account, you’ll need to create one before you can connect your Nest Cam Indoor to Wi-Fi. Open the Nest app and follow the on-screen prompts to set up your account.
Step 3: Add your Nest Cam Indoor to the app
Once you have a Nest account, open the Nest app and tap on the “+” button to add a new device. Select “Nest Cam Indoor” from the list of available devices and follow the on-screen prompts to add your camera to the app.
Step 4: Connect your Nest Cam Indoor to Wi-Fi
Next, you’ll need to connect your Nest Cam Indoor to your Wi-Fi network. Make sure your camera is plugged in and powered on, then follow the on-screen prompts in the Nest app to connect your camera to Wi-Fi. You’ll need to enter your Wi-Fi network name and password to complete the setup process.
Step 5: Test the connection
Once your Nest Cam Indoor is connected to Wi-Fi, the app will perform a quick test to ensure a stable connection. This may take a few moments, so be patient. If the test is successful, you’re all set!
Remember, a stable Wi-Fi connection is essential for optimal performance and video quality. Make sure your camera is within range of your Wi-Fi router and that there are no major obstructions between the two.
Installing the Nest App on Your Device
If you want to set up your Nest Cam Indoor security camera, the first step is to install the Nest app on your device. The Nest app is available for both iOS and Android devices and allows you to control and manage your Nest Cam Indoor camera from anywhere.
Here’s how you can install the Nest app:
- Open the App Store or Google Play Store on your device.
- Search for the Nest app using the search bar.
- Tap on the Nest app when it appears in the search results.
- Tap on the “Install” or “Get” button to download and install the app on your device.
- Once the installation is complete, tap on the app icon to open it.
Alternatively, you can visit the Nest website on your device and click on the download links provided there. This will redirect you to the respective app store where you can download and install the app.
After installing the app, you will need to create a Nest account or sign in to an existing account. This account will be used to connect your Nest Cam Indoor camera to the app and enable you to access its features and settings.
Once you have installed the Nest app and set up your Nest account, you can proceed to the next step of the setup process, which is connecting your Nest Cam Indoor camera to your Wi-Fi network. This will allow you to live stream video, receive notifications, and control your camera remotely.
Setting Up Your Nest Cam Indoor Account
Before you can start using your Nest Cam Indoor security camera, you need to set up an account. The account will give you access to your camera’s livestream, event history, and personalized notifications.
To begin the setup process, follow these steps:
- Download and open the Nest app on your mobile device.
- Create a new account or sign in to your existing Nest account.
- Tap on the “+” button to add a new device.
- Select “Cameras” from the list of available devices.
- Choose “Nest Cam Indoor” as the type of camera you want to set up.
- Follow the on-screen instructions to connect your camera to your Wi-Fi network and power source.
- Once the camera is connected, scan the QR code on the bottom of the camera to add it to your account.
- Give your camera a name and choose a location for it in your home.
- Review and customize your camera’s settings, such as video quality and activity detection.
Once you’ve completed these steps, your Nest Cam Indoor account will be set up and ready to use. You can now access your camera’s livestream and receive alerts on your mobile device whenever there is activity detected in your home. Enjoy the peace of mind that comes with knowing your home is protected by Nest Cam Indoor.
Mounting Your Nest Cam Indoor
Once you have set up your Nest Cam Indoor security camera, the next step is to mount it in your desired location. Before you begin, make sure you have the necessary tools and equipment:
- A power outlet within reach of the camera
- A flat surface or wall where you want to mount the camera
- A power adapter and cable
- Screws and a mounting bracket
Choosing the Right Location
When selecting a location to mount your Nest Cam Indoor, consider the following:
- Make sure the camera has a clear view of the area you want to monitor
- Place the camera at a height that gives you the best angle
- Consider the distance from the power outlet to ensure the cable reaches without strain
- Avoid mounting the camera in direct sunlight or areas with extreme temperature
Mounting Steps
- Decide whether you want to mount the camera on a wall or place it on a flat surface.
- If you choose to mount it on a wall, use the mounting bracket and screws provided.
- Hold the mounting bracket against the wall and mark the spots where you will screw it in.
- Use a drill to make holes in the marked spots and insert the screws, leaving them slightly loose for adjustment.
- Attach the camera to the mounting bracket by aligning the slots on the camera’s back with the tabs on the bracket.
- Slide the camera down until it clicks into place.
- If you choose to place the camera on a flat surface, simply position it where you want and plug it into a power outlet.
Note: It’s important to connect the power adapter and cable before mounting the camera to avoid any inconvenience.
By following these steps, you will be able to successfully mount your Nest Cam Indoor and start monitoring your home or office with ease.
Adjusting and Testing Your Nest Cam Indoor
Once you have set up your Nest Cam Indoor security camera, you may want to adjust the camera’s position and test its functionality. Follow the step-by-step instructions below to ensure that your camera is properly set up and working correctly:
Adjusting the Camera Position
1. Place the Nest Cam Indoor on a flat surface or mount it securely to a wall using the provided wall-mounting plate.
2. Adjust the camera’s angle by gently rotating it left or right. The camera has a 130° wide-angle lens, allowing you to capture a large view of the room.
3. Tilt the camera up or down to get the desired view. The camera can be manually tilted up to 90°.
4. Use the Nest app on your smartphone or tablet to view the camera’s live feed and make any necessary adjustments.
Testing the Camera’s Functionality
1. Open the Nest app and select your Nest Cam Indoor from the list of available devices.
2. Tap on the live view to start streaming the camera’s video feed.
3. Check the video quality and ensure that the camera is capturing a clear and well-lit image.
4. Test the camera’s audio by speaking into the app’s microphone. You should be able to hear your voice through the camera’s speaker.
5. Enable and test the camera’s motion detection feature. Walk in front of the camera to trigger a motion event and ensure that you receive a notification on your smartphone or tablet.
6. If you have set up Nest Aware, check if the camera is properly recording and storing video footage based on the selected settings.
Conclusion
By adjusting the camera’s position and thoroughly testing its functionality, you can ensure that your Nest Cam Indoor is set up correctly and providing reliable security surveillance for your home or office.
Using the Nest Cam Indoor Features
The Nest Cam Indoor security camera offers a range of features to help keep your home safe and secure. Here are some key features and how to use them:
Live view: With the Nest app, you can access your camera’s live feed at any time. Simply open the app and select your camera to view a live stream of what’s happening in your home. This allows you to check in on your house, pets, or loved ones from anywhere.
24/7 recording: If you subscribe to Nest Aware, your Nest Cam Indoor can record 24/7, so you can review footage at any time. This is especially useful if you need to check on an event that occurred when you weren’t actively monitoring the camera.
Motion and sound alerts: The Nest Cam Indoor can send you notifications when it detects motion or sound in your home. You can customize the sensitivity of these alerts and choose whether you want to receive them as push notifications or emails. This feature is great for keeping an eye on unexpected activities or potential intruders.
Activity zones: With Nest Aware, you can set specific activity zones to monitor within the camera’s view. This allows you to focus on important areas, such as entrances or high-traffic areas, and filter out less significant movements, like pets or passing cars.
Two-way audio: The Nest Cam Indoor has a built-in microphone and speaker, which allows you to communicate with anyone in your home through the camera. This can be useful for checking in on family members, giving instructions to pets, or even scaring away potential intruders.
Family and guest access: You can grant access to your camera’s live stream and recordings to trusted family members or guests through the Nest app. This feature is particularly handy if you want to share camera access with a house sitter or neighbor while you’re away.
Integrations: The Nest Cam Indoor can be integrated with other smart home devices, such as smart speakers or displays. This allows you to control your camera with voice commands, view the live feed on a smart display, or easily access camera recordings through other smart home systems.
By familiarizing yourself with these Nest Cam Indoor features, you can maximize the security and convenience they provide in keeping your home safe and secure.
Troubleshooting Common Issues
If you are experiencing any issues with setting up your Nest Cam Indoor security camera, here are some common problems and their possible solutions:
1. Unable to Connect to Wi-Fi Network
If you are unable to connect your Nest Cam to your Wi-Fi network, try the following troubleshooting steps:
- Ensure that you are entering the correct Wi-Fi network name and password.
- Make sure that your Wi-Fi router is turned on and broadcasting its signal.
- Move your Nest Cam closer to your Wi-Fi router or try using a Wi-Fi range extender to improve the signal strength.
- Reset your Wi-Fi router and try connecting your Nest Cam again.
- Check if your Wi-Fi network has any restrictions or filters that may be blocking the connection.
2. Poor Video Quality
If you are experiencing poor video quality from your Nest Cam, try the following troubleshooting steps:
- Check the placement of your camera to ensure it has a clear line of sight and is not obstructed by any objects.
- Make sure the lens of your camera is clean and free from any dust or smudges.
- Check your internet connection speed as a slow connection may affect video quality.
- Reboot your Nest Cam and see if the video quality improves.
- Contact Nest support for further assistance if the issue persists.
3. Camera Not Detecting Motion
If your Nest Cam is not detecting motion as expected, try the following troubleshooting steps:
- Adjust the motion sensitivity settings in the Nest app to ensure they are not set too high or too low.
- Ensure that your camera has a clear view of the area you want to monitor for motion.
- Check if there are any objects or obstacles blocking the camera’s view.
- Make sure that the software of your camera is up to date.
- Reset your camera to default settings and see if it starts detecting motion.
If none of the above solutions work, it is recommended to contact Nest support for further assistance.
FAQ,
What is Nest Cam Indoor security camera?
Nest Cam Indoor is a security camera designed to monitor the interior of your home. It can be used to keep an eye on your house, pets, children, and belongings.
How do I set up Nest Cam Indoor security camera?
To set up Nest Cam Indoor, you first need to download the Nest app on your smartphone or tablet. Then, open the app and sign in with your Nest account. Follow the on-screen instructions to scan the QR code on the back of your camera and connect it to your Wi-Fi network. Once connected, you can customize your camera settings and start using it.
Can I use Nest Cam Indoor without a subscription?
Yes, you can use Nest Cam Indoor without a subscription. However, a Nest Aware subscription is recommended as it provides additional features such as continuous video recording, intelligent alerts, and the ability to create activity zones. Without a subscription, you will still be able to view live video, receive basic motion and sound alerts, and access the last three hours of recorded video.
Can I access Nest Cam Indoor remotely?
Yes, you can access Nest Cam Indoor remotely through the Nest app. As long as you have an internet connection, you can view the live video feed, receive alerts, and control your camera settings from anywhere in the world.
What are the privacy features of the Nest Cam Indoor?
The Nest Cam Indoor prioritizes privacy and security. It uses bank-level encryption to protect your video data, and you have full control over who can access your camera feed. You can set up two-factor authentication for added security, and the camera has a physical indicator that shows when it’s recording. You can also customize your camera settings to turn off video and audio recording when you’re at home.


