
Night Owl Security Cameras provide a reliable and efficient solution for monitoring your home or business. Whether you want to protect your property from theft or keep an eye on your loved ones, setting up these cameras is a crucial step in ensuring your safety and peace of mind.
Installing Night Owl Security Cameras may seem like a daunting task, but with the right guidance, it can be a straightforward process. In this article, we will guide you through the necessary steps to set up your Night Owl Security Cameras and maximize their functionality.
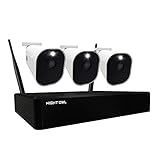
Before you begin, make sure you have all the necessary components: Night Owl Security Cameras, cables, a power source, and a monitor or smartphone to view the camera feed.
Step 1: Plan and Position
Start by identifying the areas you want to monitor and determine the ideal locations for your cameras. Consider factors such as the angle of view, lighting conditions, and potential obstructions. Once you have your plan in place, position the cameras accordingly, making sure they are securely mounted and facing the desired direction.

Step 2: Connect and Power
Next, connect the cables from the cameras to the NVR (Network Video Recorder). Ensure that each cable is securely attached and properly labeled. Then, connect the NVR to a power source using the provided power adapter. Make sure all connections are secure to avoid any disruptions in the camera feed.
Step 3: Configure and Access
Once your cameras are in place and powered on, it’s time to configure and access them. Connect your monitor or smartphone to the NVR to access the camera feed. Follow the instructions provided by Night Owl to set up your device and establish a connection. This may involve downloading the Night Owl app or accessing the NVR interface through a web browser.
Congratulations! You have now successfully set up your Night Owl Security Cameras. Test each camera to ensure they are functioning correctly and adjust any settings as needed. Remember to periodically check your camera system for updates and maintenance to keep it running smoothly.
In conclusion, setting up Night Owl Security Cameras is an essential step in enhancing the security of your property. By following these steps and ensuring proper installation and configuration, you can fully utilize the features of your Night Owl cameras and enjoy peace of mind knowing that you have a reliable surveillance system in place.
Understanding Night Owl Security Cameras
Night Owl security cameras are innovative surveillance devices designed to provide high-quality video footage, day and night. By understanding the key features and capabilities of Night Owl security cameras, you can make informed decisions when setting up and using them to enhance the security of your property.
1. High Definition Resolution
One of the standout features of Night Owl security cameras is their high definition resolution. This means that the cameras can capture clear and detailed footage, allowing you to easily identify people or objects in the recorded videos. Whether you need to monitor your home, office, or any other location, the high definition resolution of Night Owl cameras gives you peace of mind.
2. Night Vision Technology
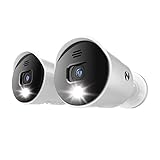
Night Owl security cameras are equipped with advanced night vision technology. This technology enables the cameras to capture clear images even in low-light or complete darkness. By using infrared LEDs, Night Owl cameras can illuminate the surroundings and produce high-quality night vision footage. This is essential for ensuring the security of your property at all times, regardless of the lighting conditions.
Additionally, Night Owl cameras have a smart motion detection feature that can be activated during night vision mode. This helps alert you of any suspicious activity in real-time, allowing you to respond promptly and effectively.
If you want to install Night Owl security cameras to a specific area, make sure to consider the total darkness distance specified by the camera. This will ensure that the camera can effectively capture detailed footage in complete darkness.
Conclusion
Understanding the features and capabilities of Night Owl security cameras is essential to ensure you get the most out of these devices. Their high definition resolution and night vision technology provide you with clear and detailed footage, both during the day and night. By setting up these cameras strategically and considering their specific features, you can enhance the security of your property and have peace of mind knowing that your premises are well protected.
Selecting the Right Location
When setting up your Night Owl security cameras, selecting the right location is crucial for maximizing their effectiveness. Here are a few factors to consider:
Visibility
Ensure that the selected location provides clear visibility of the area you want to monitor. Look for any potential obstructions such as trees, bushes, or other structures that may hinder the camera’s line of sight. It’s important to place the camera where it can capture the entire desired coverage area without any blind spots.
Lighting Conditions
Take into account the lighting conditions of the area at different times of the day. If the location is poorly lit or experiences regular changes in lighting, consider using Night Owl cameras with enhanced night vision capabilities. These cameras are equipped with infrared technology, allowing them to capture clear footage even in low light or complete darkness.

Weatherproofing
Ensure that the selected location is suitable for the camera’s weatherproofing capabilities. Night Owl security cameras are designed to withstand various weather conditions, including rain, snow, and extreme temperatures. However, placing the camera in an exposed area, directly under heavy rainfall or extreme heat, may affect its performance and lifespan. Consider placing the camera under an eave or using a weatherproof housing for added protection.
Power and Connectivity
When choosing a location, ensure that it is close enough to a power source and has a stable internet connection if applicable. Night Owl cameras typically require a power outlet nearby to provide continuous power. If you are using wireless cameras, make sure they are within range of your Wi-Fi network to ensure a reliable connection.
| Factors to Consider: | Suggested Location: |
|---|---|
| Visible coverage area without obstructions | High vantage point or unobstructed wall |
| Appropriate lighting conditions | Near a light source or with night vision capabilities |
| Weatherproofing considerations | Under an eave or with a weatherproof housing |
| Proximity to power source and internet | Near a power outlet and within Wi-Fi range |
By carefully considering these factors and selecting the right location, you can ensure optimal performance and coverage from your Night Owl security cameras.
Installing Night Owl Security Cameras
Installing Night Owl security cameras can help enhance the security of your home or business. These cameras provide you with the peace of mind by giving you a clear view of what’s happening in and around your property.
1. Determine the camera placement
Start by assessing the areas where you want to install the Night Owl security cameras. Consider the points of entry, vulnerable areas, and any blind spots. This will help you determine the number and type of cameras you need.

2. Gather the necessary tools and equipment
Before starting the installation process, make sure you have all the required tools and equipment. This may include a power drill, screws, a ladder, and a cable running kit. Ensure that you have the correct cables for the specific camera model you are installing.
3. Install the mounting brackets
Using the power drill and screws, attach the mounting brackets to the designated areas. Make sure the brackets are securely fastened and levelled.
4. Connect the cables
Depending on the camera model, you may need to connect the cables directly to a power source or to a central recording system. Follow the manufacturer’s instructions for proper cable connections.
5. Adjust the camera angle
Once the camera is securely mounted and connected, adjust the camera angle to ensure optimal coverage. Consider the field of view and any potential obstructions that may block the camera’s view.
6. Test the cameras
After installation, test the cameras to ensure they are functioning properly. Check the video feed on your connected device or recording system to verify the camera’s view and quality.

By following these steps, you can successfully install Night Owl security cameras and enhance the security of your property. Remember to consult the specific user manual for your camera model for any additional installation instructions or troubleshooting tips.
Connecting Night Owl Security Cameras to a DVR
Once you have your Night Owl security cameras and DVR system ready to go, it’s time to connect them together to ensure a seamless surveillance experience. Follow the steps below to connect your cameras to the DVR:
- Start by identifying the ports on the back of the DVR. You should see several labeled camera inputs, typically labeled “CAM1,” “CAM2,” and so on.
- Locate the cables that came with your Night Owl security cameras. These cables typically have a BNC connector on one end, which is used to connect the camera to the DVR.
- Take one of the camera cables and connect the BNC connector to the corresponding camera input port on the back of the DVR. Make sure to match the cable to the correct input label.
- Next, take the other end of the camera cable, which should have a power adapter attached to it. Plug the power adapter into a power outlet or power strip.
- Repeat the above steps for each camera you want to connect to the DVR. Each camera will have its own cable and corresponding input on the DVR.
- Once all the cameras are connected, power on the DVR and the cameras. You should see the camera feed appear on the monitor connected to the DVR.
- If you need to adjust the camera view or make any other changes, consult the Night Owl DVR manual for instructions on how to access the settings menu.
By following these simple steps, you can easily connect your Night Owl security cameras to the DVR and start monitoring your property in no time.
Configuring Night Owl Security Cameras
After setting up your Night Owl security cameras, the next step is configuring them to ensure they are properly working and providing the desired level of security. The configuration process involves several important steps that need to be followed:
1. Connecting to the Network
First, you should connect your Night Owl security cameras to your home or office network. This can typically be done using an Ethernet cable or by connecting to a Wi-Fi network. The specific instructions for connecting to the network will vary depending on the model of your Night Owl security cameras, so it is recommended to refer to the user manual or online resources provided by Night Owl.

2. Setting Up Motion Detection
Most Night Owl security cameras come with motion detection capabilities, allowing you to receive alerts and notifications when motion is detected in specific areas. To configure motion detection, you will need to access the camera settings either through a mobile app or a web interface. From there, you can set up specific motion detection zones, adjust sensitivity levels, and customize how you receive notifications.
It is important to fine-tune your motion detection settings to avoid false alarms caused by things like tree branches moving or passing cars. Experiment with different sensitivity levels and motion detection zone sizes to find the best configuration for your specific needs.
3. Enabling Remote Viewing
Night Owl security cameras are designed to allow remote viewing, which means you can access the camera feeds from anywhere using your smartphone, tablet, or computer. To enable remote viewing, you will need to set up an account with Night Owl and pair your cameras with the account. This is typically done through the Night Owl mobile app or web interface.
Once your cameras are paired with your account, you can use the Night Owl app or website to access the camera feeds, receive alerts, and manage your camera settings remotely. This feature is especially useful for keeping an eye on your property while you are away or for monitoring multiple locations simultaneously.
In conclusion, configuring your Night Owl security cameras involves connecting them to your network, setting up motion detection, and enabling remote viewing. By following these steps, you can ensure that your cameras are optimized for your specific security needs and provide reliable surveillance to protect your property.
Testing and Troubleshooting
Once you have set up your Night Owl security cameras, it is important to test and troubleshoot to ensure they are functioning properly. Here are some steps you can take:
1. Check the camera connections: Ensure that all cables are securely connected to the cameras and the surveillance system. If any cables are loose or disconnected, reattach them properly.
2. Verify power supply: Make sure that the cameras are receiving power. Check the power cables and ensure that they are properly connected and plugged into a working power outlet.
3. Check camera settings: Ensure that the camera settings are configured correctly. Check the camera’s user manual for instructions on how to access and adjust the settings.
4. Monitor the footage: Use your surveillance system to monitor the camera footage. Check if the cameras are capturing clear video and if the angles and positions are suitable for your intended surveillance purposes.
5. Test the motion detection: Set up a test scenario to see if the cameras properly detect and record motion. Walk through the camera’s field of view to ensure that it captures motion and triggers any desired alerts or recordings.
6. Connect to remote viewing: If you want to access the camera footage remotely, make sure to test the remote viewing capabilities. Install any necessary software or apps, and try connecting to the cameras from a different device outside of your network.
7. Contact customer support: If you encounter any issues that you cannot resolve on your own, don’t hesitate to contact Night Owl’s customer support. They can provide further assistance and guidance in troubleshooting any problems you may be experiencing with your security cameras.
Remember: It is crucial to regularly test and troubleshoot your security cameras to ensure they are functioning optimally. By doing so, you can have peace of mind knowing that your property is consistently monitored and protected.
FAQ,
What are night owl security cameras?
Night owl security cameras are a type of surveillance cameras that are specifically designed to capture high-quality video footage in low-light or no-light conditions. They are equipped with infrared technology, which allows them to see in the dark.
How do I set up night owl security cameras?
Setting up night owl security cameras is a straightforward process. First, you need to determine the best locations for your cameras to maximize the coverage area. Then, mount the cameras using the provided brackets and screws. Next, connect the cameras to the DVR (digital video recorder) using the included cables. Finally, plug in the power adapters and turn on the system. You may need to follow the specific instructions provided with your night owl security camera system for additional setup steps.


