
Setting up a professional Swann security camera system with a Network Video Recorder (NVR) is a great way to enhance the security of your property. Whether you are a business owner looking to protect your office or a homeowner wanting to secure your home, these cameras offer top-notch surveillance capabilities.
Swann security cameras are known for their high-quality images, advanced features, and user-friendly interface. With the help of an NVR, you can easily set up a professional security system that allows you to monitor your premises in real-time and access recorded footage whenever needed.
Before you start the installation process, it is crucial to plan where you want to mount your cameras. Consider the areas that require the most coverage, such as entry points, parking lots, or storage areas. By strategically placing the cameras, you can maximize the surveillance coverage and ensure that no blind spots are present.
To set up the Swann security cameras, you will need to connect them to the NVR using Ethernet cables. These cables provide both power and data connections, eliminating the need for additional power sources. Simply plug one end of the cable into the camera and the other end into the NVR’s PoE (Power over Ethernet) ports.
Once you have connected the cameras to the NVR, you can access the system’s interface through a monitor or a computer. The user-friendly interface allows you to configure various settings, such as motion detection, recording schedules, and remote access. You can also set up notifications to receive alerts on your smartphone or email whenever the cameras detect any suspicious activity.

With professional Swann security cameras and NVR, you can have peace of mind knowing that your property is under constant surveillance. Whether you are at the office, away on vacation, or sleeping soundly at home, you can always keep an eye on what matters most to you. Follow the steps outlined in this guide, and you’ll be able to set up a reliable and efficient security system in no time.
Choosing the right security camera system for your needs
When it comes to setting up a professional NVR Swann Security Cameras, it’s important to choose the right security camera system for your specific needs. With so many options available on the market, it can be overwhelming to decide which system is the best fit for you. Here are some factors to consider when choosing the right security camera system:
1. Camera Resolution
One of the most important factors to consider when choosing a security camera system is the camera resolution. The resolution determines the level of detail that the camera can capture. Higher resolution cameras provide clearer and more detailed images, which can be crucial when identifying people or objects in the footage. HD (High Definition) cameras are a popular choice as they offer excellent video quality.
2. Coverage Area
Consider the coverage area you need the security cameras to monitor. Determine how many cameras you will need and the specific areas you want them to cover. This will help you decide on the number of cameras and their placement to ensure comprehensive surveillance of your property.
3. Night Vision
If you require surveillance during nighttime or low-light conditions, it is important to choose a security camera system that has good night vision capabilities. Look for cameras with infrared LEDs or other night vision technologies that can provide clear images even in complete darkness.

4. Wireless or Wired
Decide whether you want a wireless or wired security camera system. Wireless systems are easier to install and offer more flexibility in terms of camera placement. However, they may be susceptible to signal interference and can require more maintenance. Wired systems, on the other hand, provide a more stable and reliable connection but require running cables for each camera.
5. Remote Viewing
If you want the ability to view your security camera footage remotely, consider choosing a system that offers remote viewing capabilities. This allows you to monitor your property from anywhere using a smartphone, tablet, or computer.
Overall, it is important to choose a security camera system that meets your specific requirements and provides the level of surveillance you need. Consider the factors mentioned above to make an informed decision and ensure the security of your property.
Understanding the role of NVR in security camera setup
The NVR (Network Video Recorder) plays a crucial role in a professional security camera setup. It has become a popular choice for many individuals and businesses due to its advanced features and functionalities.
What is an NVR?
An NVR is a specialized device that is used to record, store, and manage video data captured by security cameras. Unlike traditional analog video recorders (DVR), NVRs are designed to work with IP cameras, which transmit video data over an Ethernet network.

By connecting IP cameras to an NVR, users can enjoy numerous benefits, such as high-definition video quality, remote access, and easy scalability. NVRs also offer advanced features like motion detection, email alerts, and video analytics.
Key features of an NVR
1. Video recording: NVRs have built-in storage capabilities where the recorded video data is stored. Depending on the model and configuration, an NVR can support multiple hard drives to provide ample storage space for video footage.
2. Video management: NVRs come with software that allows users to manage and organize their video recordings efficiently. Users can easily search, playback, and export the recorded video data using the NVR’s user-friendly interface.
3. Remote access: One of the key advantages of using an NVR is the ability to access live and recorded video footage remotely. With the help of a mobile app or web interface, users can view their security cameras from anywhere in the world, as long as they have an internet connection.
4. Power over Ethernet (PoE) support: Many NVRs support PoE, which eliminates the need for separate power cables for individual cameras. This feature simplifies the installation process and provides a clean and organized setup.

5. Integration with other security systems: NVRs can be integrated with other security systems, such as alarms and access control systems. This integration enables a more comprehensive security solution and allows for centralized management.
6. Scalability: NVRs offer scalability, allowing users to expand their security camera system as their needs grow. With the NVR’s capacity to support multiple cameras, users can easily add or remove cameras as required without any significant infrastructure changes.
7. Video analytics: Some advanced NVRs come with built-in video analytics capabilities. These analytics can detect and analyze specific events or objects, such as motion detection, facial recognition, and object tracking. This feature enhances the overall security and provides valuable insights.
Conclusion
Understanding the role of an NVR in a security camera setup is crucial for a successful installation. NVRs offer a range of features and advantages that make them an ideal choice for professional security camera systems. With their advanced functionalities, users can ensure high-quality video recording, efficient management, remote access, and easy scalability.
Step-by-step installation guide
Setting up a professional NVR Swann security camera system may seem intimidating, but with this step-by-step guide, you’ll have your system up and running in no time.

1. Plan your camera placement
Before you begin the installation, take some time to plan where you want each camera to be placed. Consider the areas you want to monitor and make sure the cameras have a clear line of sight. Take note of any obstacles that may affect the camera’s view. Planning ahead will ensure optimal surveillance coverage.
2. Mount the cameras
Once you have decided on the camera placement, it’s time to mount them. Use the included brackets and screws to securely attach the cameras to the desired locations. Make sure the cameras are facing the right direction and are securely fastened to avoid any movement or tampering.
3. Connect the cameras
After mounting the cameras, locate the appropriate cables and connect them to each camera. Run the cables through walls or ceilings to conceal them for a cleaner installation. Make sure to connect the camera cables to the corresponding ports of the NVR (Network Video Recorder).
4. Connect the NVR to a monitor
To set up the NVR, you’ll need to connect it to a monitor or TV. Use an HDMI or VGA cable to establish the connection. Once connected, power on the NVR and the monitor and make sure they are working properly.
5. Power on the system
Now it’s time to power on the entire system. Plug in the power cables for the cameras and the NVR. Ensure that all the devices are receiving power and turning on. You should see the cameras appearing on the monitor connected to the NVR.

6. Configure the system
Once the system is powered on, you’ll need to configure some settings. Use the on-screen menu of the NVR to set up the date, time, and network settings. You may also need to create user accounts and set up recording options.
7. Test the system
After configuring the settings, it’s important to test the system. Make sure all the cameras are showing a clear and steady video feed on the monitor. Check if the motion detection or recording features are working as expected. Additionally, test the remote access functionality if applicable.
With these step-by-step instructions, you should be able to install and set up your professional NVR Swann security camera system successfully. If you encounter any issues, refer to the user manual or contact Swann’s technical support for further assistance.
Unboxing the Swann Security Camera System
When you receive your Swann security camera system, the first step is to unbox all the components and familiarize yourself with each item. This will ensure that you have everything you need to set up your professional NVR Swann security cameras.
What’s included in the box?
The Swann security camera system typically comes with the following components:
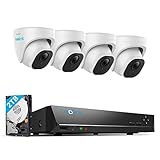
- NVR (Network Video Recorder) box: This is the central hub of your security camera system. It records and manages the video feed from your cameras.
- Swann security cameras: The number of cameras included in the box may vary depending on the specific package you purchased. These cameras are designed to provide high-quality surveillance footage.
- Power adapters: Each camera and the NVR requires a power source. The power adapters are included to ensure that all components receive electricity.
- Ethernet cables: These cables are used to connect the cameras to the NVR. They transmit both power and data signals.
- Mounting brackets and screws: These accessories are provided to help you securely install the cameras in the desired locations.
- Mouse and HDMI cable: The mouse is used to navigate the NVR’s user interface, while the HDMI cable is used to connect the NVR to a monitor or TV for live viewing.
Things to check
As you unbox the Swann security camera system, make sure to check the following:
- Ensure that all the components are included and accounted for, based on the package you purchased.
- Inspect each component for any signs of damage. If you notice any issues, contact Swann’s customer support for assistance.
- Read the user manual and installation guide provided to familiarize yourself with the setup process.
Once you have completed unboxing and checking all the components, you are ready to proceed with setting up your Swann security camera system.
Mounting the security cameras in strategic locations
When setting up your Swann security cameras, it is crucial to consider the strategic locations for mounting them. Proper camera placement is essential for maximizing coverage and capturing clear footage. Here are some important factors to consider:
1. Coverage area
Start by assessing the areas you want to monitor and ensuring that the selected camera locations provide optimal coverage. Identify areas with high foot traffic, points of entry, blind spots, and any potential vulnerabilities.
2. Height and angle
The height and angle of the camera play a significant role in capturing clear images. Mount the cameras at least 9 feet above the ground to prevent tampering and vandalism while maintaining a wide field of view. Adjust the angle to ensure the camera captures the desired area without obstructions.
Keep in mind that placing the camera too high or at an extreme angle may hinder capturing crucial details, so finding the right balance is crucial.
3. Lighting conditions
Consider the lighting conditions in the areas you are monitoring. Cameras placed in poorly lit areas may struggle to capture clear footage. In low-light conditions, consider cameras with infrared capabilities or install additional lighting sources to improve visibility.
On the other hand, avoid placing cameras directly facing strong light sources or areas with excessive glare, as it can cause washed-out images and diminish the effectiveness of the camera.
It is essential to regularly check and adjust the cameras’ positioning, especially if lighting conditions change over time.
By strategically mounting your Swann security cameras in the right locations, you can enhance the security of your property and ensure comprehensive coverage. Remember to consider the coverage area, height and angle, and lighting conditions to achieve optimal results.
Running the necessary cables for camera connectivity
To set up your professional Swann security cameras, it is essential to properly run the necessary cables for camera connectivity. Follow these steps to ensure effective camera installation:
1. Plan the cable routes:
Before running the cables, carefully plan the routes they will take from the cameras to the NVR. Consider the length of the cables and ensure they are long enough to reach the desired positions. Avoid any potential obstructions or hazards along the way.
2. Use appropriate cables:
Ensure that you are using high-quality cables that are specifically designed for security camera installations. Swann offers a range of cables, including BNC cables for video transmission and Ethernet cables for data and power transmission.
3. Connect the cameras to the NVR:
Connect one end of the BNC cable to the camera’s video output and the other end to the corresponding video input on the NVR. For power transmission, use an Ethernet cable to connect the camera’s power adapter to a power outlet or use a Power over Ethernet (PoE) switch if your cameras support it.
4. Conceal the cables:
To maintain a professional and tidy installation, consider concealing the cables within walls, ceilings, or cable ducts. This will help protect the cables from damage and prevent them from becoming an eyesore.
5. Test the connectivity:
Once all the cables are properly connected, turn on the NVR and check if the cameras are successfully connected and transmitting video. Ensure that the camera feeds are clear and stable.
6. Secure the cables:
After confirming the connectivity, secure the cables using clips, cable ties, or cable management systems to prevent them from being accidentally unplugged or damaged. This will also help in organizing the cables for easier future maintenance.
By following these steps and running the necessary cables for camera connectivity, you can ensure a reliable and professional setup for your Swann security cameras.
Connecting the security cameras to the NVR
Once you have set up your NVR (Network Video Recorder) from Swann and have installed the necessary software and apps, the next step is to connect your security cameras to the NVR. Follow these steps to ensure a successful connection:
Step 1: Power on the NVR
Make sure the NVR is connected to a power source and turned on. Check that the power indicator light on the NVR is lit.
Step 2: Connect the cameras
Connect each security camera to the NVR using the provided Ethernet cables. Plug one end of the cable into the camera’s Ethernet port and the other end into one of the available ports on the back of the NVR.
Step 3: Configure camera settings
Access the NVR’s software or app and navigate to the camera settings. Select the option to add or detect cameras. The NVR should automatically detect the connected cameras. If not, manually add each camera by entering its unique IP address and other relevant details.
Step 4: Assign camera channels
Once the cameras are detected or added, assign each camera to a specific channel on the NVR. This will allow you to view and manage each camera individually.
Step 5: Test the connection
After assigning the camera channels, test the connection by viewing the camera feeds on the NVR’s monitor or through the software or app. Make sure each camera is functioning correctly and positioned as desired.
By following these steps, you can easily connect your security cameras to the NVR and have professional surveillance up and running in no time.
Configuring the NVR for optimal performance
Configuring your Network Video Recorder (NVR) properly is crucial to ensure the optimal performance of your Swann security cameras. Here are some important steps to follow:
- Connect the NVR to your network: Start by connecting your NVR to your router or switch using an Ethernet cable. This will allow the NVR to communicate with your security cameras and other devices on your network.
- Set up the NVR settings: Access the NVR’s interface through a web browser using the provided IP address or domain name. Follow the on-screen instructions to set up the basic settings such as time zone, date format, and network configuration.
- Create user accounts: It is important to create individual user accounts with appropriate access levels to maintain security. Assign passwords that are strong and unique to each user account to prevent unauthorized access to the NVR’s settings and footage.
- Configure recording settings: Adjust the recording settings to fit your specific needs. Choose the desired resolution, frame rate, and recording mode (continuous, motion detection, or schedule) for each camera. Consider the available storage space and the frequency of activity in the camera’s field of view when configuring the recording settings.
- Enable remote access: If you want to access the NVR and view the camera feeds remotely, enable remote access on the NVR and configure port forwarding on your router. This will allow you to access the NVR over the internet using a mobile app or a web browser.
- Set up alerts and notifications: Configure alerts and notifications to receive notifications when motion is detected or certain events occur. This can be done through the NVR’s settings, and you can choose to receive email notifications or push notifications to your mobile device.
- Regularly update firmware: Check for firmware updates for your NVR and install them regularly. Firmware updates often include bug fixes, performance improvements, and new features that can enhance the functionality and security of your NVR.
By following these steps and configuring your NVR properly, you can ensure that your Swann security cameras deliver optimal performance and provide reliable surveillance for your property.
Setting up remote access to view camera feeds
Setting up remote access to view your Swann security camera feeds allows you to monitor your property even when you are not physically present. Here are the steps to set up remote access:
1. Ensure Your NVR is Connected to the Internet
The first step is to make sure that your Network Video Recorder (NVR) is connected to the internet. Connect your NVR to your router using an Ethernet cable or establish a Wi-Fi connection if your NVR supports wireless connectivity.
2. Set up Port Forwarding on Your Router
To access your camera feeds remotely, you will need to set up port forwarding on your router. Port forwarding allows external devices to connect to your NVR over the internet. Log in to your router’s configuration page, usually accessed through a web browser, and find the port forwarding settings. Set up forwarding for the specific port used by your NVR. Consult your router’s user manual or the manufacturer’s website for detailed instructions on setting up port forwarding.
3. Create a SwannView Link Account
Go to the Swann website and create a SwannView Link account. This account will allow you to access your camera feeds remotely. Follow the instructions provided to set up your account and verify your email address.
4. Configure Remote Access on Your NVR
Open the SwannView Link app on your smartphone or access the SwannView Link software on your computer. Follow the on-screen instructions to add your NVR to your SwannView Link account. You will need to provide the required information, such as your NVR’s serial number and the username/password combination used to access your NVR locally.
5. Access Your Camera Feeds Remotely
Once you have completed the previous steps, you can now access your camera feeds remotely. Open the SwannView Link app on your smartphone or use the SwannView Link software on your computer. Log in using your SwannView Link credentials and select your NVR from the available list. You should now be able to view your camera feeds in real-time, no matter where you are.
By following these steps, you can easily set up remote access to view your Swann security camera feeds. This will provide you with peace of mind and the ability to monitor your property anytime, anywhere.
Testing the Swann Security Camera System
Once you have set up your Swann security camera system, it is important to thoroughly test it to ensure that everything is working correctly. Here are some steps to follow when testing your system:
1. Check the Camera Connections: Ensure that all the cameras are properly connected to the NVR (Network Video Recorder). Verify that the cables are securely plugged in and that there are no loose connections.
2. Power on the System: Make sure that the NVR and all the cameras are powered on. Check the power indicators on the NVR and individual cameras to confirm that they are receiving power.
3. Review Camera Feeds: Access the NVR’s control interface to view the live feeds from each camera. Check if the camera views are clear and sharp. Pay attention to any abnormalities or black spots that may indicate camera malfunctions or image quality issues.
4. Test Camera Settings: Experiment with different camera settings to ensure that you can adjust the field of view, zoom, and focus as needed. Test different lighting conditions to see if the cameras can adapt and produce quality images in various environments.
5. Check Recording Functionality: Verify that the cameras are recording properly. Start recording and playback a few minutes of footage to confirm that the system saves and stores data correctly. Ensure that you can access and view recorded footage without any issues.
6. Test Remote Access: If your system supports remote access, try accessing the camera feeds and recordings from a different location using a computer or mobile device. Make sure that you can view the live feeds and recorded footage remotely without any difficulties.
7. Evaluate Motion Detection: Set up motion detection alerts and verify that they are working correctly. Walk in front of each camera to trigger the motion detection and ensure that you receive notifications as expected.
8. Testing Alarm Notifications: If your system is equipped with alarm features, test them to ensure they work properly. Set off the alarm manually and check if you receive the notifications or if any configured actions are triggered.
9. Perform Regular Maintenance: After the initial testing is complete, it is essential to regularly maintain your Swann security camera system. Clean the camera lenses, check for loose connections, and update the firmware regularly to keep the system running optimally.
Following these steps will help you identify any issues or deficiencies with your Swann security camera system and ensure that it is functioning as expected. Regular testing and maintenance will help you keep your property secure and provide peace of mind.
Tips and best practices for effective security camera setup
- Choose the right locations for your security cameras: It’s important to strategically place your cameras in areas where they can capture the most important angles and cover the widest area possible. Consider factors such as the entrance points, high traffic areas, and blind spots.
- Ensure proper lighting: Adequate lighting is essential for clear video footage. Make sure your cameras are installed in well-lit areas or consider using cameras with low-light capabilities for dark areas. Proper lighting helps in facial recognition and improves overall image quality.
- Securely mount your cameras: Proper installation and mounting are crucial to the effectiveness of your security cameras. Ensure that your cameras are securely mounted to prevent tampering or vandalism. Use appropriate mounting brackets or housings for outdoor installations.
- Position cameras at eye level: Mount your cameras at eye level to capture clear images of people’s faces. This will help in identification and provide better evidence in case of any incidents. Avoid mounting cameras too high or too low, as it may impact their effectiveness.
- Regularly clean and maintain your cameras: Keep your cameras clean and free from debris, dirt, or spider webs that may obstruct the view. Regularly check for any loose connections or damage to cables and replace any faulty components promptly.
- Set up motion detection and alerts: Configure your security cameras to send alerts when motion is detected. This can help you stay informed of any unusual activities and quickly respond to potential threats.
- Use high-quality cameras: Invest in high-quality cameras that provide clear video footage and have features like night vision, wide-angle lenses, and weatherproofing. Higher resolution cameras capture more details and can make a significant difference in the effectiveness of your security system.
- Secure your camera system: Change the default login credentials of your NVR system to prevent unauthorized access. Enable encryption and use strong passwords to protect your camera feeds. Regularly update firmware to ensure the latest security patches.
- Consider remote access: Opt for a NVR system that allows remote access, so you can monitor your cameras and footage from anywhere using a smartphone or computer. This provides added convenience and flexibility in managing your security system.
- Test your camera setup: After installation, thoroughly test your camera system to ensure proper functioning. Check the video quality, motion detection, and remote access features. Make any necessary adjustments or troubleshooting as needed.
By following these tips and best practices, you can set up your professional NVR Swann security cameras effectively and maximize their performance in securing your property.
FAQ,
What is NVR and why do I need it for my Swann security cameras?
NVR stands for Network Video Recorder. It is a device that allows you to record and store video footage from your Swann security cameras. NVRs are specifically designed for IP cameras and provide a centralized and advanced solution for managing and monitoring your surveillance system.
Can I set up a professional NVR system with Swann security cameras on my own?
Yes, you can set up a professional NVR system with Swann security cameras on your own. Swann provides detailed instructions and user-friendly interfaces that make the setup process relatively easy. However, it is recommended to have some technical knowledge and understanding of networking concepts for a smooth installation and configuration.
What are the key features of Swann NVRs for professional security camera setup?
Swann NVRs offer various key features for professional security camera setups. Some of the notable features include high-definition video recording, motion detection, remote access and viewing, advanced playback options, email and push notifications, integration with smart devices, and cloud storage options. These features ensure enhanced security and convenience in managing your surveillance system.


