
With the rise of smart technology, monitoring your home or office has never been easier. Security cameras offer a sense of peace and protection, but did you know that you can also access them remotely? If you want to keep an eye on your property even when you’re not there, setting up remote access for your security cameras is essential.
Remote access allows you to view live footage from your security cameras through your smartphone, tablet, or computer, no matter where you are. Whether you want to check on your kids, monitor your pets, or keep an eye on your home while you’re on vacation, remote access offers convenience and enhanced security.
Setting up security camera remote access may seem daunting, but it doesn’t have to be. In this article, we will guide you through the process step by step, so you can have peace of mind knowing that you have complete control over your security cameras.
Choosing the Right Security Camera System
When it comes to ensuring the safety and security of your home or business, investing in a security camera system is a wise decision. With so many options available in the market, choosing the right one can be a daunting task. Here are some factors to consider while selecting a security camera system:
1. Purpose
Determine the main purpose of installing security cameras. Are you looking to monitor the exterior of your property or the interior? Do you need a system for surveillance or just for deterrence?

2. Types of Cameras
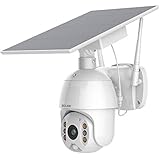
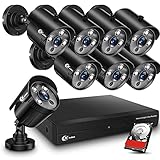
There are different types of security cameras available, including dome cameras, bullet cameras, and PTZ cameras. Dome cameras are discreet and provide a wide-angle view, while bullet cameras are more visible and easier to install. PTZ cameras, on the other hand, can pan, tilt, and zoom for greater coverage.
3. Resolution
The resolution of the camera determines the clarity and quality of the video. Higher resolution cameras capture more details and are recommended for areas that require high-level surveillance, such as entrances or high-traffic areas.
4. Night Vision
If you need surveillance during nighttime, consider cameras with infrared night vision capabilities. These cameras are equipped with IR LEDs that provide clear images even in complete darkness.
5. Connectivity
Decide whether you want a wired or wireless security camera system. Wired systems are more reliable but require professional installation. Wireless systems offer flexibility and ease of installation but may be prone to signal interference.
6. Storage
Determine how long you want to store the recorded footage. Choose a system with sufficient storage capacity, either through on-site storage or cloud-based storage options.

7. Remote Access
If you want to access your security camera system remotely, ensure that it has remote viewing capabilities. This allows you to monitor the live feed and playback recordings from anywhere through a smartphone or computer.
By considering these factors, you can choose the right security camera system that meets your specific needs and provides peace of mind knowing that your property is protected. Take the time to research and compare different options before making a final decision.
Installing and Positioning the Security Cameras
Proper installation and positioning of security cameras is crucial for effective coverage and surveillance. Here are some important steps to follow:
1. Determine the Strategic Locations
Identify the areas that require surveillance coverage. These can include entrances, parking lots, hallways, or any other areas that are vulnerable to security threats. Make sure to prioritize areas with higher risks.
2. Mount the Cameras
Select the appropriate mounting options for your security cameras. Common mounting methods include ceiling or wall mounts. Ensure that the camera is securely fixed to prevent any movement or shaking that may affect the image quality.
3. Adjust the Camera Angles
Position the cameras in angles that provide the best view of the targeted areas. Adjust the tilt and pan functions to capture the desired field of view. Test the angles to check for blind spots or obstructions that may hinder the camera’s effectiveness.
4. Consider Lighting Conditions
Take into account the lighting conditions of the surveillance areas. Install cameras in areas with adequate lighting or consider using cameras equipped with night vision capabilities for low-light environments.
5. Ensure Proper Wiring
Connect the security cameras to the appropriate power source and ensure that the wiring is concealed or protected against tampering. Avoid loose or exposed wires that may pose safety hazards or be easily interrupted.
6. Test the Cameras
Once the cameras are installed, perform a test to ensure that they are functioning correctly. Check the image quality, coverage range, and remote access capabilities to troubleshoot any potential issues.
By following these steps, you can install and position your security cameras effectively, enhancing the security and remote access capabilities of your surveillance system.

Setting up a Network for Remote Access
When it comes to setting up a network for remote access to your security camera, there are a few key steps you need to follow. By taking the time to properly set up your network, you can ensure that you have a secure and reliable connection for accessing your security cameras from anywhere.
Step 1: Choose a Reliable Internet Service Provider (ISP)
Before setting up a network for remote access, it’s important to have a reliable internet service provider (ISP) that can provide you with a stable and fast internet connection. Contact different ISPs in your area and choose one that offers a high-quality service that meets your needs.
Step 2: Secure your Network
Prioritize the security of your network by setting up a strong password and enabling encryption. This will prevent unauthorized access to your security cameras and protect your data. Additionally, consider enabling a firewall to add an extra layer of security to your network.
Step 3: Set up Port Forwarding
In order to access your security cameras remotely, you’ll need to set up port forwarding on your router. This will allow you to redirect traffic from the internet to your security camera’s IP address. Consult the user manual for your specific router model or contact your ISP for assistance.
Step 4: Use Dynamic DNS
Dynamic DNS (DDNS) is a service that assigns a domain name to your IP address, even if it changes. By using DDNS, you can easily access your security cameras using a domain name instead of constantly having to remember your IP address. Research and choose a reliable DDNS provider and follow their instructions to set up the service.
Step 5: Configure Remote Access Software

Depending on the type of security camera system you have, you may need to install and configure remote access software on your computer or smartphone. Follow the instructions provided by your security camera manufacturer to set up the software and establish remote access.
By following these steps, you can create a secure and reliable network for remote access to your security cameras. Remember to regularly update your passwords and software to ensure the ongoing security and functionality of your network.
Configuring Port Forwarding on Your Router
Port forwarding is an essential step in setting up remote access to your security cameras. It allows incoming connections from external devices to reach your camera’s IP address, enabling you to access the live video feed from anywhere in the world.
Step 1: Find Your Router’s IP Address
To configure port forwarding, you need to access your router’s web-based configuration page. Start by finding your router’s IP address. Typically, it can be found on the back or bottom of your router, or you can check your router’s manual for instructions.
Step 2: Access Your Router’s Web-Based Configuration
Type your router’s IP address into a web browser and press Enter. This will take you to your router’s web-based configuration page. You may be prompted to enter a username and password. If you don’t know this information, refer to your router’s manual or contact your Internet Service Provider (ISP).
Note: It’s always a good idea to change the default password for your router to enhance security.
Step 3: Locate the Port Forwarding Settings
Once you’re logged into your router’s configuration page, look for the port forwarding settings. The location may vary depending on your router model and firmware.
Typically, you’ll find the port forwarding settings under a “Port Forwarding” or “Virtual Server” section. Consult your router’s manual for specific instructions on locating these settings.
Step 4: Create a New Port Forwarding Rule
Now it’s time to create a new port forwarding rule. Click on the “Add” or “Create” button to begin the process.
In the port forwarding settings, you’ll need to specify the following information:
- Service Name: Choose a name for the port forwarding rule (e.g., “Camera Remote Access”).
- Internal IP Address: Enter the IP address of your security camera. This will typically be in the form of 192.168.x.x.
- Protocol: Select the protocol used by your security camera (usually TCP or TCP/UDP).
- External Port Start: Enter the starting port number for the external connections. This is the port you’ll use to access your camera remotely.
- External Port End: If your security camera uses a range of ports, enter the ending port number here. Otherwise, leave it the same as the external port start.
- Internal Port: Enter the port number used by your security camera for incoming connections. This is usually the same as the external port number.
- Enable: Make sure this option is checked to enable the port forwarding rule.
Step 5: Save and Apply the Settings
After entering the required information for the port forwarding rule, click on the “Apply” or “Save” button to save the settings. Your router will then apply the changes and enable port forwarding for your security camera.
It’s important to note that port forwarding can expose your network to potential security risks. Therefore, it’s advisable to enable strong passwords, keep your router firmware up to date, and regularly monitor your network for any suspicious activity.
Enabling Remote Access on the Security Camera
Remote access allows you to view the live feed from your security camera and access its settings from any location. To enable remote access on your security camera, follow the steps below:
- Ensure that your security camera is properly connected to your local network.
- Access the camera’s settings page by typing its IP address into a web browser on a computer or mobile device connected to the same network.
- Login to the camera’s interface using the provided credentials.
- Navigate to the remote access settings section.
- Enable the remote access feature.
- Choose a strong password for remote access to ensure the security of your camera.
- Set up port forwarding on your router. This step may require assistance from your internet service provider or network administrator.
Once remote access is enabled, you can access your security camera from anywhere using a computer or mobile device connected to the internet. Simply open a web browser and enter the IP address of your camera in the address bar. Login with the chosen credentials and start viewing the live feed or adjusting the camera’s settings remotely.
Remember to regularly update your camera’s firmware to ensure the highest level of security and to protect against any potential vulnerabilities.
Creating a Secure Password for Remote Access
Setting up a strong and secure password is crucial for ensuring the safety and privacy of your security camera remote access. Here are some tips to help you create a password that can effectively protect your system:
Use a combination of uppercase and lowercase letters
Incorporating a mix of uppercase and lowercase letters in your password can make it harder for hackers to guess. Avoid using common patterns or predictable combinations.
Include numbers and special characters
Adding numbers and special characters, such as punctuation marks or symbols, increases the complexity of your password. Avoid using obvious choices like “123456” or “password”.
It is recommended to use a combination of letters, numbers, and special characters throughout your password to enhance its strength. For example, “P@ssw0rd!” is a stronger option than “password123”.
Avoid using personal information
Refrain from using any personal information that can be easily linked to you, such as your name, birthdate, or address. Hackers can easily guess such details, making your password vulnerable.
Instead, consider creating a passphrase by combining random words, making it easier for you to remember while remaining difficult for others to decipher. For example, “CoffeeLionMoon84” is a strong passphrase that does not relate to any personally identifiable information.
Remember, choosing a strong and secure password is just one part of ensuring remote access security. It is equally important to keep your password confidential, regularly update it, and implement additional measures like two-factor authentication for enhanced protection.
Installing a Mobile App for Remote Viewing
To access your security camera remotely, you will need to install a mobile app on your smartphone or tablet. Follow the steps below to install the app:
- Open the App Store or Google Play Store on your mobile device.
- Search for the app using the search bar.
- Once you find the app, tap on it to open the app page.
- Tap the “Install” or “Get” button to download and install the app.
- Wait for the app to finish installing on your device.
- Once the installation is complete, find the app on your device’s home screen and tap on it to open.
- Follow the app’s instructions to set up an account and connect your security camera.
- Provide the necessary information, such as the camera’s IP address and login credentials.
- Once the setup process is complete, you will be able to remotely access your security camera through the mobile app.
Make sure to keep your mobile app up to date to ensure the latest features and security updates are installed on your device.
Testing the Remote Access Connection
Once you have set up your security camera remote access, it is important to test the connection to ensure everything is working properly. Follow the steps below to test the connection:
- Make sure your security camera and remote device are connected to the internet.
- Launch the remote access application or software on your device.
- Enter your login credentials, such as username and password, to log in to your security camera system.
- Once logged in, navigate to the live view or cameras section to access the live feed from your security cameras.
- Check if the live feed is displayed properly, without any lag or errors.
- Try accessing recorded footage from previous days to ensure the remote access allows you to browse and playback recordings.
- Test any additional features or settings, such as motion detection alerts or pan-tilt-zoom functionality, to ensure they are working correctly.
- If you encounter any issues during the testing process, double-check your network settings, remote access configurations, and ensure that your security cameras are properly connected to the internet.
| Tip: | It is recommended to perform regular tests of your remote access connection to ensure reliability and to identify any potential issues before they become critical. |
By following the steps above and conducting regular tests, you can ensure that your security camera remote access is functioning properly and that you can access your camera feeds and recordings from anywhere, anytime.
Monitoring and Managing Remote Access
Once you have set up remote access for your security cameras, it is important to regularly monitor and manage this access to ensure the safety and security of your system. The following tips will help you effectively monitor and manage your remote access:
1. Regularly Monitor Access Logs
It is essential to review the access logs of your security camera system on a regular basis. These logs will provide you with valuable information about who has accessed your cameras and when. By reviewing these logs, you can quickly identify any unauthorized access attempts and take appropriate action to secure your system.
2. Set Up User Accounts and Permissions
When granting remote access to your security cameras, it is crucial to set up user accounts with appropriate permissions. Limit access to only those who require it and assign them specific privileges based on their role. This will help minimize the risk of unauthorized access and ensure that only authorized individuals can view and manage the security camera system remotely.
Note: Regularly review and update user accounts and permissions as needed, especially when personnel changes occur.
3. Implement Two-Factor Authentication
In addition to setting up user accounts and passwords, consider implementing two-factor authentication to add an extra layer of security to your remote access. Two-factor authentication requires users to provide not only a password but also a second form of verification, such as a unique code sent to their mobile device. This helps prevent unauthorized access even if someone manages to obtain the user’s password.
Note: Enable two-factor authentication for all user accounts with remote access privileges.
4. Keep Software and Firmware Up to Date
Regularly check for software and firmware updates for your security camera system. These updates often include security patches and bug fixes that help protect against vulnerabilities. Keeping your system up to date is an essential part of maintaining the security and functionality of your remote access.
5. Regularly Change Passwords and Encryption Keys
Periodically change the passwords and encryption keys used for remote access to your security cameras. This helps prevent any potential security breaches resulting from compromised credentials. Ensure that strong passwords and encryption keys are used and avoid reusing them across different systems.
By following these tips, you can effectively monitor and manage the remote access to your security camera system, ensuring the safety and security of your premises.
Troubleshooting Remote Access Issues
While setting up remote access for your security cameras, you may encounter some issues that prevent you from accessing them from a different location. Here are some common troubleshooting steps that can help you overcome these problems:
1. Check Your Internet Connection
The first thing you should do is check your internet connection. Make sure you are connected to the internet and that your network is stable. If you are unable to connect to the internet, you will not be able to access your security cameras remotely.
2. Verify Port Forwarding Settings
If you have set up port forwarding to access your security cameras, double-check your port forwarding settings. Ensure that the correct port numbers are used and that the settings match the configuration of your network. Incorrect port forwarding settings can block remote access to your cameras.
3. Confirm Firewall and Router Settings
Your firewall and router settings could be preventing remote access to your security cameras. Check if any firewall rules or router settings are blocking incoming connections. Make sure to configure your firewall and router to allow access to the ports used by your security cameras.
4. Verify Dynamic DNS Configuration
If you are using a dynamic DNS service to access your cameras, verify that your dynamic DNS configuration is correctly set up. Ensure that the DNS address is correctly mapped to your network’s public IP address. An incorrect DNS configuration can prevent remote access to your security cameras.
5. Check Camera Configuration
Double-check the configuration settings of your security cameras. Ensure that the IP address, port numbers, and access credentials are correctly entered in your camera’s settings. Incorrect camera configuration can prevent remote access to your cameras.
By following these troubleshooting steps, you should be able to resolve most remote access issues for your security cameras. If you still encounter problems, consult your camera’s user manual or contact the manufacturer’s support team for further assistance.
FAQ,
What is remote access for security cameras?
Remote access for security cameras refers to the ability to view and control your security cameras from a remote location using a computer, smartphone, or other internet-connected device. It allows you to monitor your property and keep an eye on things even when you are not physically present.
What are the benefits of setting up remote access for security cameras?
Setting up remote access for security cameras has several benefits. Firstly, it allows you to monitor your property from anywhere in the world, providing you with peace of mind. Second, it enables you to quickly respond to any suspicious activity or emergencies by accessing the live feed of your security cameras. Additionally, remote access allows you to save and review recordings, making it easier to identify and report any incidents that may occur. Overall, remote access enhances the effectiveness and convenience of your security camera system.


