Security cameras are essential in protecting your home or business from burglaries and other illegal activities. However, not everyone has access to a reliable wifi connection to connect their cameras to the internet. But don’t worry, there are still options available to set up security cameras without wifi.
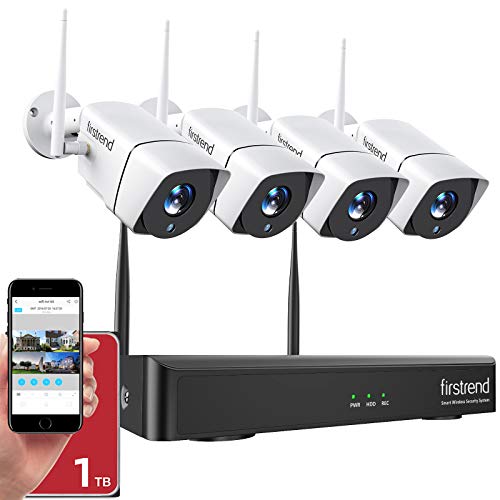
One option is to use cameras that have built-in cellular connectivity. These cameras use a SIM card to connect to the cellular network, allowing you to access the camera feed remotely. This is a great solution for areas with poor or no wifi coverage.
If you don’t want to invest in a new camera with cellular connectivity, you can also use a wireless bridge. A wireless bridge acts as a bridge between your security camera and your router, allowing you to connect the camera to the internet without wifi. This can be done by connecting the camera to the wireless bridge with an ethernet cable.
Another option is to use a local storage solution. Many security cameras come with a slot for an SD card or a hard drive where you can store the camera footage. With this setup, you can access the footage by physically removing the SD card or hard drive from the camera and viewing it on a computer.
Setting up security cameras without wifi may require additional equipment or configurations, but it is definitely possible. Whether you choose a camera with cellular connectivity, a wireless bridge, or a local storage solution, you can still keep your property safe and secure.

Why Set Up Security Cameras Without Wifi?
Setting up security cameras without wifi may seem unconventional in a world that heavily relies on wireless connectivity, but there are several reasons why someone might choose this option:
- Remote location: If your security needs extend to a remote location where wifi coverage is limited or nonexistent, setting up cameras without wifi can provide the necessary surveillance.
- Privacy concerns: Some people are wary of the potential security risks associated with wifi-enabled devices. By opting for cameras without wifi, you can ensure that your security system remains isolated from potential online threats.
- Cost considerations: Wifi-enabled security cameras often come with higher upfront costs and ongoing subscription fees. By choosing cameras without wifi, you can potentially lower your security system expenses.
- Simple installation: Setting up a security camera system without wifi can be simpler and less technical compared to configuring a wireless network. This can be advantageous for individuals who are not adept at technology or want a hassle-free setup process.
- Minimal interference: Wifi signals can sometimes be unreliable or easily disrupted, resulting in intermittent video feeds or system malfunctions. With non-wifi cameras, you can eliminate the potential interruptions and enjoy consistent surveillance coverage.
In Conclusion
While wifi-enabled security cameras offer convenience and advanced features, there are compelling reasons to set up cameras without wifi. Whether it’s for a remote location, privacy concerns, cost considerations, ease of installation, or minimal interference, non-wifi cameras provide an alternative solution for effective surveillance.
Factors to Consider
When setting up security cameras without wifi, there are several factors to consider:
1. Power Source: Security cameras require a power source to operate. Make sure to choose a location where you can easily access a power outlet or use a battery-powered camera.
2. Storage Options: Determine how you will store the footage captured by your security cameras. Consider using a dedicated digital video recorder (DVR) or a network video recorder (NVR) for storing and managing the recordings.

3. Camera Placement: Think carefully about where you will place your cameras to get the best coverage of your property. Consider the field of view, the angles, and any potential obstacles that could block the camera’s view.
4. Connectivity: While you won’t be using wifi, you should consider other connectivity options such as Ethernet cables or cellular networks for remote access to your cameras and viewing the live feed on your smartphone or computer.
5. Maintenance and Accessibility: Keep in mind that you may need to access your cameras for maintenance or troubleshooting purposes. Ensure that the cameras are installed in a location that is easily accessible.
By considering these factors, you can set up security cameras without wifi effectively and ensure the safety and security of your property.
Choosing the Right Security Camera System
When setting up security cameras without Wi-Fi, it is crucial to select the right system that meets your specific requirements. Here are a few factors to consider when choosing a security camera system:

1. Wired vs. Wireless
Decide whether you want to opt for a wired or wireless security camera system. Wired systems require the cameras to be connected via cables, while wireless systems use Wi-Fi or other wireless technologies. Wired systems tend to be more reliable but may require professional installation. Wireless systems offer flexibility and ease of installation.
2. Camera Resolution
The resolution of the security cameras significantly impacts the clarity of the footage. Higher resolution cameras provide better image quality, allowing you to capture details more effectively. Consider your requirements and choose a camera system with an appropriate resolution, such as 720p or 1080p.
3. Night Vision
If you are planning to monitor your premises during nighttime or in low-light conditions, ensure that the security camera system has night vision capabilities. Look for cameras with infrared LEDs for improved visibility in the dark. Some cameras may offer colored night vision, which can provide more accurate color representation.
4. Field of View
The field of view refers to the area that the security camera can capture. Consider the size of the area you want to monitor and choose cameras with an appropriate field of view. Wide-angle lenses can cover larger areas, while cameras with adjustable lenses offer flexibility to focus on specific spots.
5. Storage Options
Determine how you want to store the recorded footage from the security cameras. Some systems offer built-in storage, such as a hard drive or SD card, while others rely on cloud storage. Consider the storage capacity and ensure that it is sufficient for your needs. Keep in mind that cloud storage may incur additional fees.

6. Remote Viewing
If you want the ability to monitor your security cameras remotely, choose a system with remote viewing capabilities. This allows you to access the camera footage using a smartphone, tablet, or computer from anywhere with an internet connection. Check if the system offers a dedicated mobile app or web portal for easy remote access.
Taking these factors into account will help you make an informed decision when choosing a security camera system that suits your needs, even without Wi-Fi connectivity.
| Pros | Cons |
|---|---|
| Wired systems tend to be more reliable | Wired systems may require professional installation |
| Wireless systems offer flexibility and ease of installation | Wireless systems may be prone to interference |
| Higher resolution cameras provide better image quality | Higher resolution cameras may require more storage space |
| Night vision capabilities enable monitoring during nighttime | Cameras with night vision may have limited range |
| Wide-angle lenses can cover larger areas | Fixed lenses may not be suitable for all setups |
Power Options for Wireless Security Cameras
When it comes to setting up security cameras without WiFi, one of the crucial factors to consider is the power source. Since these cameras are not connected to a network, they need a reliable power supply to function properly. Here are some power options to consider for wireless security cameras:
1. Battery-Powered Cameras:
Battery-powered cameras are a convenient option as they don’t require any wiring or an external power source. These cameras are typically equipped with rechargeable batteries that can last for several months or even a year, depending on usage. However, keep in mind that you will need to regularly check and recharge the batteries to ensure uninterrupted surveillance.

2. Solar-Powered Cameras:
If you want a truly wireless setup without worrying about battery replacements, solar-powered cameras are an excellent choice. These cameras are equipped with solar panels that harness sunlight to recharge their batteries. This eco-friendly option is ideal for outdoor surveillance and can provide continuous power as long as there is sufficient sunlight.
3. Wired Power Supply:
If you have access to a power outlet near the camera’s location, you can opt for a wired power supply. This option eliminates the need for battery replacements or recharging but requires running power cables from the outlet to the camera. It’s essential to ensure that the cables are properly concealed and protected to prevent tampering or damage.
4. Power over Ethernet (PoE):

If you have a PoE-enabled network video recorder (NVR), you can power the wireless security cameras using an Ethernet cable. PoE allows both data transmission and power supply through a single cable, simplifying the setup process. This option is suitable for situations where you have a pre-existing PoE infrastructure in place.
5. Battery Packs or Power Banks:
In situations where you cannot access a power outlet or need temporary power for your wireless security cameras, you can use battery packs or power banks. These portable power sources can keep your cameras running for a limited time without the need for a wired or permanent power supply. Bear in mind that the capacity of the battery packs or power banks will determine the duration of surveillance.
Consider your specific requirements, installation location, and available power sources to determine the most suitable power option for your wireless security cameras. Remember to regularly check and maintain the power supply to ensure uninterrupted surveillance.
Installing Your Security Cameras
Setting up security cameras without WiFi requires careful planning and installation. Here are the steps you can follow:

- Choose the right location: Consider the areas you want your security cameras to cover. Look for high-risk areas like entrances, windows, and blind spots, and make sure to place your cameras in such a way that they can capture clear footage.
- Mount the cameras: Use mounting brackets or screws to securely attach the cameras to walls, ceilings, or other surfaces. Ensure that they are positioned at the desired angles for optimal coverage.
- Run the cables: Connect your security cameras to power sources using the provided cables. If you have multiple cameras, consider using a power distribution box to simplify the cable management.
- Connect to a recording device: If you want to store the footage, connect your cameras to a digital video recorder (DVR) or network video recorder (NVR) using coaxial or Ethernet cables.
- Configure the settings: Follow the manufacturer’s instructions to adjust the camera settings, such as motion detection sensitivity, recording duration, and video quality.
- Test the system: After completing the installation, test your security cameras to ensure they are working properly. Adjust any settings if needed and make sure the footage is clear and reliable.
- Set up remote viewing: If your security camera system supports remote viewing, you can access the live feed or recorded footage using a mobile app or computer software. Follow the instructions provided to set up remote access securely.
Remember to consult the user manuals for your specific security camera system. Proper installation and setup are critical to ensure reliable security surveillance without WiFi.
Connecting and Monitoring Your Cameras
Once you have set up your security cameras without wifi, it’s time to connect and monitor them. Here are the steps to follow:
1. Connect the cameras to a power source: Plug in the power adapters of your cameras to an electrical outlet. Make sure the cameras receive a stable power supply for uninterrupted monitoring.
2. Set up a local network: To connect and monitor your cameras, you need to set up a local network. This can be done using an Ethernet switch or a network video recorder (NVR). Connect the cameras to the switch/NVR using Ethernet cables.
3. Configure the IP addresses: Each camera in your system needs to have a unique IP address to function properly. Access the camera’s settings through a web browser on a computer connected to the same network. Configure the IP address of each camera following the manufacturer’s instructions.
4. Install camera software: To monitor your cameras, you will need to install camera software on your computer or mobile device. The software can be obtained from the manufacturer’s website or through an app store. Follow the instructions provided to install and set up the software.
5. Access the cameras: Once the software is installed, open it and add your cameras to the system. This usually involves entering the camera’s IP address and login credentials. Once added, you should be able to view live feeds from your cameras and access their settings.
Note: Without wifi, you will only be able to access the cameras when connected to the same local network.
6. Monitor remotely (optional): If you want to monitor your cameras remotely, you can set up port forwarding on your router. This will allow you to access the cameras from outside your local network. Consult your router’s manual or contact your internet service provider for guidance on how to set up port forwarding.
Remember to always secure your cameras and network by setting strong passwords and regularly updating the firmware.
By following these steps, you can successfully connect and monitor your security cameras without wifi. Enjoy peace of mind knowing that your property is under surveillance!
Storage and Backup Options
When setting up security cameras without wifi, it is important to consider storage and backup options for your footage. Without a wifi connection, you won’t be able to rely on cloud storage or remote access to your video recordings. However, there are still a few options available to securely store and back up your footage.
One option is to use a local network video recorder (NVR). An NVR is a standalone device that can be connected to your security cameras via a wired connection. It is equipped with a large hard drive where your video footage can be stored. The NVR acts as a central hub for your cameras and provides a user-friendly interface for viewing and managing your recordings. Some NVRs also offer additional features, such as motion detection and remote access via a mobile app.
Another option is to use a digital video recorder (DVR). Similar to an NVR, a DVR can be connected to your security cameras via a wired connection. It also has a built-in hard drive for storing your footage. However, unlike an NVR, a DVR is typically used with analog cameras instead of IP cameras. It is important to note that if you are using IP cameras, you will need to convert the digital signal to analog before connecting them to a DVR.
If you prefer a more portable option, you can consider using a microSD card for storage. Many security cameras have a slot for inserting a microSD card, which allows you to directly record and store your video footage on the card. This option is convenient if you want to quickly access and transfer your recordings to another device, such as a computer or smartphone.
Lastly, you can also consider using an external hard drive for storage and backup. By connecting an external hard drive to your security camera system, you can store and backup your footage directly onto the drive. This option provides a higher storage capacity compared to microSD cards and allows you to easily access and transfer your recordings to other devices.
| Storage Option | Pros | Cons |
|---|---|---|
| Local Network Video Recorder (NVR) | Large storage capacity User-friendly interface Potential for remote access |
Requires a wired connection Higher upfront cost |
| Digital Video Recorder (DVR) | Built-in storage capacity Compatible with analog cameras |
May require signal conversion for IP cameras Not as user-friendly as an NVR |
| MicroSD Card | Portable storage option Easy access and transfer of footage |
Limited storage capacity Risk of card failure or loss |
| External Hard Drive | High storage capacity Easily accessible and transferable footage |
Requires additional equipment Potential for drive failure or loss |
Tips for Maximizing Security
When setting up security cameras without WiFi, it is important to take certain precautions in order to maximize the security of your system. Follow these tips to ensure that your cameras are operating efficiently and securely:
- Choose high-quality cameras: Invest in security cameras that provide clear image quality and a wide coverage area. This will help in capturing detailed footage of any suspicious activity.
- Select the right locations: Strategically place your cameras in areas with high foot traffic or areas vulnerable to break-ins. Ensure that your cameras have an unobstructed view and cover all entrances and exits.
- Install cameras at the right angles: Position your cameras at an angle that captures the facial features of individuals entering and exiting the premises. Avoid placing cameras too high as it may make it difficult to identify people accurately.
- Secure camera placement: Mount your cameras in secure locations where they cannot be easily tampered with. Consider installing them at higher points to prevent unauthorized access.
- Use adequate lighting: Proper lighting around your cameras and property can deter potential intruders and improve the quality of recorded footage during the night.
- Regularly check on camera functionality: Test your cameras periodically to ensure they are working properly. Clean the lenses, check the connections, and make any necessary adjustments or repairs.
- Utilize motion detection: Enable and configure motion detection on your cameras. This feature can reduce the amount of footage you need to review and alert you to any suspicious activity.
- Secure the recording device: Make sure that the device storing the camera footage is well-protected. Choose a secure location and consider using encryption to prevent unauthorized access to the recorded data.
- Monitor and review footage: Regularly review the captured footage to identify any security gaps or suspicious incidents. This can help you make necessary adjustments to enhance your security measures.
- Consider a backup power source: Having a backup power source for your cameras can ensure that they continue recording even during power outages.
By following these tips, you can maximize the security of your surveillance system and ensure that your property and belongings are well-protected.
FAQ,
Can I set up security cameras without WiFi?
Yes, you can set up security cameras without WiFi by using a wired connection or a cellular network.
What are the advantages of setting up security cameras without WiFi?
The advantages of setting up security cameras without WiFi are that you don’t need to rely on an internet connection, which can be more secure and reliable.
How do I set up security cameras without WiFi using a wired connection?
To set up security cameras without WiFi using a wired connection, you will need to connect the cameras to a DVR or NVR using Ethernet cables. The DVR or NVR will then record and store the footage from the cameras.
What are some disadvantages of setting up security cameras without WiFi?
Some disadvantages of setting up security cameras without WiFi are that you may need to run long cables to connect the cameras to the recording device, and you won’t be able to access the footage remotely.