
Setting up a home security camera system is crucial for ensuring the safety and security of your property. While Xfinity offers an excellent home security camera service, there may be instances where you want to use a different security camera system without relying on Xfinity. Fortunately, setting up a home security camera without Xfinity is a straightforward process that can be accomplished with a few simple steps.
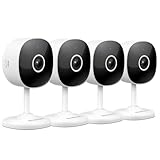
Firstly, you need to select a reliable home security camera system that is compatible with your existing devices. Look for a security camera that offers easy integration with your smartphone or computer, allowing you to monitor your property remotely. Additionally, make sure the camera provides high-resolution video quality, night vision capabilities, and motion detection.
Once you have purchased the security camera, follow the manufacturer’s instructions for installation. Begin by selecting an appropriate location for the camera. This could be near entrances, in the backyard, or in any area where you want to monitor activity. Make sure the camera is securely mounted and positioned in a way that provides optimal coverage.
Next, connect the camera to your home’s Wi-Fi network. Most security cameras have a Wi-Fi setup option that allows you to connect to your network easily. Follow the on-screen instructions to connect the camera to your Wi-Fi, ensuring that you enter the correct network credentials. Once connected, you can test the camera to ensure it is functioning properly.
After setting up the camera, you’ll need to download the corresponding mobile app or software onto your smartphone or computer. This app or software will serve as your interface for accessing the camera’s live feed and managing its settings. Follow the instructions provided by the manufacturer to install the app or software and ensure that it is connected to your security camera.

Once the app or software is installed and connected, you can access your camera’s live video feed from anywhere with an internet connection. This will allow you to monitor your property in real-time and receive alerts for any detected motion or security breaches. You can also customize the camera’s settings, such as adjusting the detection sensitivity or scheduling recording times.
Setting up a security camera system without relying on Xfinity is a simple process that can provide you with peace of mind and enhanced security for your property. By selecting a compatible camera, following the installation instructions, and connecting to your network, you can easily set up and manage a home security camera system without the need for Xfinity’s services.
Getting Started
Setting up your Xfinity Home Security camera without Xfinity is a straightforward process that can be easily accomplished with a few simple steps. Follow the instructions below to get started:
- Ensure that you have all the necessary equipment for setting up the camera, including the camera itself, power adapter, and an Ethernet cable.
- Connect the camera to a power source using the provided power adapter.
- Using the Ethernet cable, connect the camera to your Wi-Fi router or directly to your computer. Make sure that the connection is secure.
- Once the camera is connected, wait for it to power on and go through the initialization process. This may take a few moments.
- Access the camera’s settings by opening a web browser and entering the camera’s IP address. The default IP address should be provided in the camera’s user manual or on the manufacturer’s website.
- Once you have accessed the camera’s settings interface, follow the on-screen instructions to configure the camera’s Wi-Fi connection and other settings according to your preferences.
- After you have finished configuring the camera, save the settings and exit the settings interface.
- To access the camera’s live feed, open a web browser and enter the camera’s IP address. You should now be able to view the camera’s live feed without needing an Xfinity subscription or service.
By following these steps, you should be able to successfully set up your Xfinity Home Security camera without Xfinity and start monitoring your home or property.
Requirements for Setting Up the Camera
Before you can set up your Xfinity home security camera without Xfinity, there are a few key requirements that need to be in place.

- A compatible camera: Ensure that you have a compatible camera that is compatible with the Xfinity home security system. Check with the manufacturer or Xfinity customer support for a list of supported cameras.
- Power supply: Make sure you have a power source nearby to power the camera. This can be an electrical outlet or a Power over Ethernet (PoE) connection if supported by your camera.
- Network connection: You will need a stable and reliable network connection for the camera to connect and communicate with the Xfinity home security system. This can be a wired Ethernet connection or a wireless connection, depending on the capabilities of your camera.
- Wi-Fi network: If you plan on using a wireless connection, make sure you have a Wi-Fi network available with a strong signal in the area where the camera will be installed. Ensure that the Wi-Fi network is encrypted and password-protected for security purposes.
- Mobile device or computer: You will need a mobile device or computer with internet access to set up and configure the camera. This will be used to download the necessary apps or software, create an account, and perform the initial setup.
- Xfinity home security app or software: Depending on the camera and your specific setup, you may need to download and install the Xfinity home security app or software on your mobile device or computer. This app or software will be used to connect the camera to your Xfinity home security system and configure the settings.
- Username and password: Make sure you have a valid Xfinity home security system username and password. This will be used to log in to the app or software and authenticate your camera with the system.
By ensuring that you have these requirements in place, you will be well-prepared to set up your Xfinity home security camera without the need for Xfinity services.
Choosing the Right Location
When setting up your Xfinity home security camera without Xfinity, it’s important to choose the right location for optimal coverage and effectiveness. Consider the following factors:
1. Visibility:
Place the camera where it has a clear line of sight to the area you want to monitor. Avoid obstructions such as walls, plants, or other objects that may block the camera’s view.
2. Height:
Position the camera at a height that provides a good vantage point. Mount it high enough to capture a wide field of view, but not so high that it’s difficult to access for maintenance or adjustments.
3. Lighting:
Ensure that the camera is installed in an area with adequate lighting. Consider the time of day when the area might be dimly lit or dark, and choose a location with proper lighting for optimal video quality.

4. Power Source:
Place the camera near a power source, such as an electrical outlet, to ensure a continuous power supply. This will prevent interruptions in monitoring due to drained batteries or power outages.
5. Wi-Fi Signal:
Choose a location that receives a strong Wi-Fi signal to ensure reliable connectivity. Weak Wi-Fi signal can result in video streaming issues or loss of connection, compromising the effectiveness of the camera.
By considering these factors and choosing the right location for your Xfinity home security camera, you can ensure optimal coverage and performance for your home surveillance needs.
Setting Up the Camera
Setting up your Xfinity home security camera without Xfinity is a straightforward process. Follow the steps below to get started:
Step 1: Gathering the necessary equipment
Before you begin, make sure you have all the required equipment. This includes the Xfinity home security camera, a power adapter, an Ethernet cable, and a mobile device or computer with internet access.
Step 2: Connecting the camera
Connect one end of the Ethernet cable to the camera and the other end to your router or modem. Make sure the camera is powered on by plugging the power adapter into an electrical outlet.
Step 3: Downloading the app
Visit the app store on your mobile device or computer and search for the Xfinity Home Security app. Download and install the app on your device.
Step 4: Creating an account
Open the Xfinity Home Security app and create a new account. Follow the on-screen instructions to provide the required information and set up your account.
Step 5: Adding the camera
In the app, navigate to the camera setup section and follow the prompts to add a new camera. Make sure you select the option for “setting up without Xfinity.”
At this point, the camera should be detected by the app, and you can proceed with the setup process, including configuring Wi-Fi settings and customizing camera preferences.

Note: Depending on the camera model and app version, the specific steps may vary slightly. It is recommended to refer to the camera’s user manual and the app’s documentation for detailed instructions.
By following these steps, you can easily set up your Xfinity home security camera without Xfinity and enjoy the benefits of a secure home monitoring system.
Connecting the Camera to Power
Before setting up your Xfinity home security camera, you will need to connect it to a power source. Follow these steps to ensure proper installation:
Step 1: Check the Camera’s Power Requirements
Check the documentation provided with the camera to find out its specific power requirements. This will include information about the type of power adapter and the voltage required.
Step 2: Find a Suitable Power Outlet
Locate a power outlet near the desired location for your camera. Make sure the outlet is easily accessible and can provide a continuous power supply.

Step 3: Connect the Camera to Power
- Insert the power adapter’s plug into the camera’s power input port.
- Plug the other end of the power adapter into the power outlet.
- Ensure that the connection is secure and that the camera’s power indicator light turns on.
- Wait for the camera to initialize and connect to the power source.
Once you have connected the camera to power, you can proceed with the remaining setup steps according to the manufacturer’s instructions. It is important to follow all instructions carefully to ensure proper functionality of your Xfinity home security camera.
Connecting the Camera to Wi-Fi
Once you have your Xfinity home security camera set up and ready to go, the next step is to connect it to your Wi-Fi network. Follow the steps below to ensure a successful connection:
Step 1: Power on the Camera
Plug in your camera to a power source using the provided power adapter. Make sure it is properly connected and powered on before moving on to the next step.
Step 2: Download the Xfinity Home App
If you haven’t already, download the Xfinity Home app on your smartphone or tablet from the App Store or Google Play Store. This app will be used to connect and control your camera.
Step 3: Open the Xfinity Home App
Open the Xfinity Home app on your device and sign in with your Xfinity account information. If you don’t have an Xfinity account, you will need to create one before proceeding.

Step 4: Add the Camera to the App
Once you’re signed in, navigate to the settings or devices section of the app and select the option to add a new device. Follow the on-screen instructions to select your camera model and place it in setup mode.
Step 5: Connect to Wi-Fi
The app will prompt you to connect your camera to Wi-Fi. Make sure your smartphone or tablet is connected to the same Wi-Fi network you want to use for your camera. Follow the instructions on the app to enter your Wi-Fi network name and password, and wait for the camera to establish a connection.
Note: It’s important to ensure that your Wi-Fi signal is strong and stable in the area where you plan to install the camera. Weak or inconsistent Wi-Fi may result in connection issues or poor video quality.
Step 6: Name Your Camera
Once the camera is connected to Wi-Fi, the app will prompt you to name your camera. Choose a descriptive name that will help you identify the location or purpose of the camera.
Step 7: Test the Connection
After naming your camera, the app will perform a connection test to ensure everything is working properly. Follow any additional instructions provided by the app to complete the setup process.
By following these steps, you will be able to connect your Xfinity home security camera to your Wi-Fi network without using Xfinity service. Enjoy the peace of mind that comes with a connected home security system!
Configuring the Camera
Once you have installed the Xfinity home security camera, you will need to configure it to start monitoring your surroundings. Follow these steps to set up your camera:
1. Power on the Camera: Connect the camera to a power source using the provided power adapter or any compatible USB power source. Ensure that the camera’s power indicator light is turned on.
2. Connect to Wi-Fi: Access the Wi-Fi settings on your smartphone or computer and connect to the network named “xfinity_home_camera.” The camera should automatically connect to this network.
3. Download the Xfinity Home App: Go to your app store (Google Play Store for Android or Apple App Store for iOS) and search for the Xfinity Home app. Download and install the app on your smartphone or tablet.
4. Launch the App: Open the Xfinity Home app on your device. If you don’t already have an Xfinity account, create one by following the on-screen prompts. Otherwise, log in to your existing account.
5. Add a Device: Once you are logged in, tap on the “Add a Device” option in the app’s main menu. Select the “Camera” option from the list of available devices.
6. Configure the Camera: Follow the on-screen instructions to configure the camera. You may need to provide your home Wi-Fi network’s password and other relevant details. Make sure to set a unique name for your camera to easily identify it in the future.
7. Test the Camera: After completing the configuration, the app will connect to the camera. You should now be able to see a live view from the camera on your device’s screen. Test the camera’s functionality by moving around and ensuring that the video feed is smooth and clear.
With these steps, you have successfully configured your Xfinity home security camera without the need for Xfinity services. You can now monitor your home and receive alerts through the Xfinity Home app from anywhere, providing you peace of mind and added security.
Download and Install the Camera App
To set up your Xfinity home security camera without Xfinity, you’ll need to download and install the Xfinity Camera app on your mobile device. The app is available for both Android and iOS devices and can be easily found and downloaded from the respective app stores.
Step 1: Open App Store
On your phone or tablet, locate and open the App Store (for iOS devices) or the Google Play Store (for Android devices). These apps are usually pre-installed on your device, but if not, they can be downloaded from the device manufacturer’s website.
Step 2: Search for “Xfinity Camera”
In the search bar of the app store, type in “Xfinity Camera” and press the search button. The app store will display a list of search results related to your query.
Step 3: Select and Install the App
From the search results, look for the official Xfinity Camera app, which is usually listed first. Tap on the app icon to open the app’s page. On the app’s page, tap the “Install” or “Get” button to start the download and installation process.
The app store may require you to enter your Apple ID or Google account credentials to verify your identity and initiate the download. Follow the on-screen prompts to complete the installation.
Step 4: Launch the App
Once the Xfinity Camera app is successfully installed on your device, locate its icon on your home screen or app drawer and tap on it to launch the app.
Note: If you don’t have an Xfinity account, you may need to create one before using the camera app. Follow the on-screen prompts to create your account, or sign in using your existing Xfinity username and password if you already have an account.
With the Xfinity Camera app installed and launched on your device, you are now ready to set up your Xfinity home security camera without Xfinity. Follow the instructions provided by the app to connect and configure your camera.
Registering the Camera
Once you have set up your Xfinity Home Security Camera without Xfinity, the next step is to register the camera with the Xfinity Home Security system. Follow these steps to complete the registration process:
Step 1: Access the Xfinity Home Security System
Using a web browser on your computer or a mobile device, navigate to the Xfinity Home Security website.
Step 2: Sign in to your Xfinity Account
Enter your Xfinity username and password to log in to your account. If you don’t have an account, you can create one by clicking on the “Create an Account” link and following the prompts.
Step 3: Navigate to the Camera Registration
Once logged in, navigate to the camera registration section of the Xfinity Home Security website. This section may be labeled differently depending on the interface, but look for options related to camera management or camera registration.
Step 4: Enter Camera Information
In the camera registration section, you will be prompted to enter the necessary information to identify and register your camera. This information may include the camera’s serial number, model number, and any other required details. Ensure you have this information readily available when registering the camera.
Step 5: Complete the Registration Process
Follow the on-screen prompts to complete the camera registration process. This may involve confirming the camera’s connectivity to the internet, verifying that it is powered on and functional, and selecting any desired settings or preferences.
Once you have successfully registered the camera, it should be integrated into your Xfinity Home Security system, allowing you to remotely monitor and manage it as part of your overall home security setup.
FAQ,
Can I use Xfinity home security cameras without having Xfinity internet?
Yes, you can use Xfinity home security cameras without having Xfinity internet. Xfinity home security cameras can be connected to any compatible Wi-Fi network for remote viewing and monitoring.
What are the requirements for setting up Xfinity home security cameras without Xfinity?
The requirements for setting up Xfinity home security cameras without Xfinity are a compatible Wi-Fi network, a smartphone or tablet with the Xfinity Home app installed, and a working power outlet to connect the camera.


