
Do you want to keep an eye on your property or monitor your home while you’re away? Setting up a Raspberry Pi security camera live stream is a cost-effective and customizable solution. With just a few simple steps, you can create a reliable surveillance system using this versatile single-board computer.
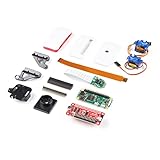
First, you’ll need a Raspberry Pi board, a camera module, and a micro SD card. Make sure to choose a camera module that fits your needs – whether it’s a standard camera module or an infrared camera module for better night vision. The Raspberry Pi supports various operating systems, but we recommend using Raspbian, the official operating system specifically designed for the Raspberry Pi.
Next, you’ll need to install the necessary software. Begin by formatting the micro SD card and flashing the Raspbian operating system onto it using an imaging software like Etcher. Once the operating system is installed, configure it by connecting the Raspberry Pi to a monitor, keyboard, and mouse. Follow the on-screen instructions to set up your Wi-Fi connection and enable the camera module. Make sure to update your system for the latest security patches and software updates.
Choosing the Right Raspberry Pi Model
When setting up a Raspberry Pi security camera live stream, it is important to choose the right Raspberry Pi model for your needs. As there are different models available, each with varying features and capabilities, it is important to consider your requirements before making a decision.
The Raspberry Pi Zero is the smallest and most affordable option. It is perfect for projects with limited space or budget constraints. However, it has limited processing power and lacks certain features, such as built-in Wi-Fi and Ethernet ports.
The Raspberry Pi 3 Model B and Raspberry Pi 4 Model B are higher-end options that offer more processing power and additional features. Both models include built-in Wi-Fi and Ethernet ports, making them suitable for streaming video over a network. The Raspberry Pi 4 Model B offers even more enhancements, such as faster processor, more RAM, and multiple USB ports.
Depending on your specific requirements, you may also consider using the Raspberry Pi Compute Module, which is designed for industrial applications and offers a more flexible form factor. It allows for customization and integration into existing systems.
It is important to choose a Raspberry Pi model that meets your project’s needs in terms of processing power, connectivity, and form factor. Each model has its own strengths and limitations, so carefully evaluate your requirements before making a decision.
Selecting the Camera Module for your Raspberry Pi
When setting up a security camera live stream with your Raspberry Pi, it is essential to choose the right camera module. The camera module plays a crucial role in the quality and functionality of your security camera system. Here are some factors to consider when selecting a camera module:
| Factor | Description |
|---|---|
| Resolution | The resolution of the camera module determines the level of detail in the captured images or videos. Higher-resolution modules produce clearer and sharper footage, but they may also require more processing power. |
| Field of View | The field of view (FOV) refers to the extent of the scene that the camera can capture. A wider FOV allows for a larger area coverage, while a narrower FOV offers more focused and detailed images in a specific area. |
| Low Light Performance | If you plan to use your security camera in low-light conditions, it is important to consider the low light performance of the camera module. Look for modules with good low light sensitivity and enhanced night vision capabilities. |
| Connectivity | Check if the camera module is compatible with your Raspberry Pi model and the required interface (CSI or USB). Ensure that you have the necessary cables or adapters to connect the module to your Raspberry Pi. |
| Additional Features | Consider any additional features that may be important for your specific use case, such as built-in motion detection, audio capabilities, or adjustable focus. |
By carefully evaluating these factors, you can choose a camera module that suits your security camera project needs and maximizes the performance and functionality of your Raspberry Pi setup.

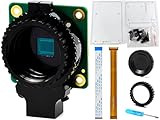
Installing the Camera Module on Raspberry Pi
The first step to set up a security camera live stream on your Raspberry Pi is to install the camera module. The camera module is a small device that allows you to capture images and videos using your Raspberry Pi board.
To install the camera module, follow these steps:
- Make sure your Raspberry Pi is turned off and disconnected from the power source.
- Locate the CSI (Camera Serial Interface) port on the Raspberry Pi board. This port is a small, flat, rectangular connector.
- Gently lift the plastic tab on the CSI port.
- Insert the camera module’s ribbon cable into the CSI port with the metal contacts facing away from the Ethernet port.
- Push the ribbon cable all the way into the CSI port until it is securely attached.
- Push the plastic tab back down to lock the ribbon cable in place.
- Double-check the connection to ensure it is properly secured.
After successfully installing the camera module, you can proceed with setting up the software and configuring the camera settings on your Raspberry Pi to start the live stream.
Configuring the Raspberry Pi Operating System
Before setting up your Raspberry Pi security camera live stream, you need to configure the Raspberry Pi operating system. This involves installing the necessary software and making some basic settings.
1. Start by downloading the latest version of the Raspberry Pi operating system from the official website.

2. Once the download is complete, extract the downloaded file and you will get the Raspberry Pi image file.
3. Insert the SD card into your computer and download and install the SD card formatter software.
4. Launch the SD card formatter software and format the SD card using the default settings.
5. After formatting, use the balenaEtcher software to flash the Raspberry Pi image file onto the SD card.
6. Once the flashing process is complete, eject the SD card from your computer and insert it into the Raspberry Pi.

7. Connect the Raspberry Pi to a monitor, keyboard, and mouse, and power it on.
8. Follow the on-screen instructions to complete the initial setup of the Raspberry Pi operating system.
9. Once the initial setup is complete, open the terminal and run the ‘sudo raspi-config’ command to access the Raspberry Pi configuration menu.
10. In the configuration menu, you can make various settings such as setting the Wi-Fi network, changing the password, expanding the filesystem, and enabling the camera module.
11. Make sure to enable the camera module by selecting the ‘Interfacing Options’ and then ‘Camera’ in the configuration menu.
12. Save the changes and exit the configuration menu.
Now that you have successfully configured the Raspberry Pi operating system, you can proceed with the setup of your security camera live stream.
Setting up a Live Streaming Server
Setting up a live streaming server is an essential step in creating a Raspberry Pi security camera setup. By hosting your own live streaming server, you can access your camera feed remotely from anywhere in the world.
Step 1: Installing the necessary software
The first step is to install the necessary software on your Raspberry Pi. This includes a web server software, such as Apache or Nginx, and a media server software, such as FFmpeg or GStreamer. These software packages allow you to host and stream the video feed from your security camera.
Step 2: Configuring the web server
Once the software is installed, you need to configure the web server to serve the video stream. This involves creating a virtual host, setting up the necessary directories, and configuring the firewall to allow incoming connections to the server. It’s important to secure your server by enabling HTTPS and setting up authentication if you plan on accessing the stream over the internet.

Step 3: Setting up the media server
After configuring the web server, you need to set up the media server software to handle the streaming of the video feed. This involves configuring the media server to encode the video feed from your camera and stream it to the web server. You can customize the settings according to your needs, such as the resolution, frame rate, and compression level.
Step 4: Testing the live stream
Once everything is set up, it’s important to test the live stream to ensure it’s working properly. You can access the live stream by opening a web browser and entering the URL of your server. If everything is configured correctly, you should be able to see the live feed from your security camera.
By following these steps and setting up a live streaming server, you can easily access your Raspberry Pi security camera feed from anywhere in the world. This allows you to keep an eye on your property and ensure its security, even when you’re not physically present.
Securing the Raspberry Pi Security Camera
When setting up a Raspberry Pi security camera live stream, it is important to take steps to secure your device and protect your data. Here are some tips for improving the security of your Raspberry Pi security camera:
1. Change the default credentials: By default, the Raspberry Pi has a default username and password. Change these credentials to something unique to prevent unauthorized access.

2. Update the operating system: Regularly check for updates and install them to ensure that your Raspberry Pi is running the latest security patches.
3. Enable a firewall: Set up a firewall to monitor and control incoming and outgoing network traffic. This can help prevent unauthorized access to your Raspberry Pi.
4. Use strong passwords: Choose a strong password for your Raspberry Pi that includes a combination of letters, numbers, and special characters.
5. Disable unnecessary services: Disable any unnecessary services or features on your Raspberry Pi to minimize potential security vulnerabilities.
6. Enable SSH securely: If you need to remotely access your Raspberry Pi, configure SSH to use key-based authentication instead of passwords.
7. Encrypt your data: Consider encrypting the data stored on your Raspberry Pi to protect it from unauthorized access.
8. Limit physical access: Keep your Raspberry Pi in a secure location and restrict physical access to prevent tampering or unauthorized removal.
9. Regularly backup your data: Make sure to regularly backup your data to an external storage device or cloud storage service to protect against data loss.
By following these security measures, you can ensure that your Raspberry Pi security camera live stream is protected from potential security threats.
Accessing the Live Stream from Any Device
Once you have set up your Raspberry Pi security camera and configured the live stream, you can easily access it from any device connected to the same network. Here’s how you can do it:
1. Find the IP address of your Raspberry Pi:
To access the live stream, you need to know the IP address of your Raspberry Pi. You can find it by logging into your router’s admin interface and looking for the connected devices list. Alternatively, you can use a network scanning tool to discover the IP address of your Raspberry Pi.
2. Open a web browser:
Once you have the IP address, open a web browser on your device. It can be a computer, smartphone, or tablet.
3. Enter the IP address:
In the address bar of your web browser, type in the IP address of your Raspberry Pi. Make sure to include the port number if you have specified one during the setup process.
4. Authenticate if necessary:
If you have set up authentication for accessing the live stream, you will be prompted to enter your username and password. Enter the credentials that you set up during the configuration process.
5. Enjoy the live stream:
Once you have successfully authenticated, you will be able to see the live stream from your Raspberry Pi security camera on the web browser of your device. You can now monitor your premises from anywhere within the network.
Note: If you want to access the live stream from outside your network, you will need to set up port forwarding on your router and use the public IP address of your network. Make sure to follow the security best practices to protect your live stream from unauthorized access.
Troubleshooting Tips
If you are experiencing issues with setting up a Raspberry Pi security camera live stream, here are some troubleshooting tips to help you resolve the problem:
1. Check the camera connection: Ensure that the camera module is properly connected to the Raspberry Pi. Make sure the ribbon cable is securely inserted into both the camera module and the CSI connector on the Raspberry Pi board.
2. Verify camera settings: Double-check the camera settings in the Raspberry Pi configuration. Open the terminal and run the command sudo raspi-config to access the configuration settings. Navigate to “Interfacing Options” and make sure the camera is enabled.
3. Update the software: It is recommended to regularly update the software on your Raspberry Pi to ensure compatibility and stability. Run the following commands in the terminal to update the system:
sudo apt-get update
sudo apt-get upgrade
4. Test the camera: Use the command raspistill -v -o test.jpg to capture an image. If the image is successfully saved, it indicates that the camera is functioning properly.
5. Check the power supply: Insufficient power supply can cause issues with the camera module. Make sure you are using a high-quality power supply with an output of at least 2.5A.
6. Troubleshoot connection issues: If you are unable to access the live stream remotely, check your network configuration and port forwarding settings. Ensure that your router is forwarding the required ports to the Raspberry Pi’s IP address.
If you follow these troubleshooting tips and still encounter issues, it may be helpful to consult the official Raspberry Pi documentation or seek assistance from the Raspberry Pi community forums.
FAQ,
What is a Raspberry Pi?
A Raspberry Pi is a small single-board computer that can be used for various projects. It is popular among hobbyists and DIY enthusiasts.
Can I use a Raspberry Pi as a security camera?
Yes, you can use a Raspberry Pi as a security camera. With the right software and setup, it can capture and stream live video footage.


