
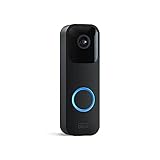
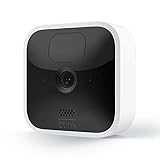
Setting up a home security camera system is an essential step towards protecting your home and ensuring the safety of your loved ones. With the advancement in technology, setting up a security camera has become easier and more accessible than ever before.
If you’re looking for a reliable and affordable home security camera, Blink is a fantastic option to consider. In this article, we will guide you through the step-by-step process of setting up your Blink home security camera system to help you get started quickly and easily.
Step 1: Unboxing and Preparing the Camera
The first step in setting up your Blink home security camera is to unbox and prepare the camera for installation. Inside the box, you will find the Blink camera, batteries, a mounting kit, and any necessary cables. Make sure you have all the components before proceeding.
To ensure proper functionality and longevity, it is essential to insert the batteries correctly. Follow the instructions in the user manual to install the batteries properly.

Why Setup Blink Home Security Camera
Setting up a Blink home security camera system can provide you with peace of mind and added protection for your property and loved ones. Whether you want to keep an eye on your home while you’re away, or monitor your front porch for package deliveries, a Blink camera system can help you stay connected and aware of what’s happening.
1. Easy Installation
Blink cameras are designed for easy installation. With their wireless design, there’s no need to worry about running cables or hiring a professional to set them up. Simply find the right spot, mount the camera using the provided hardware, and sync it with the Blink mobile app. The app will guide you through the process and ensure a seamless setup.
2. Motion Detection and Alerts
One of the standout features of Blink cameras is their motion detection capabilities. When the camera detects motion within its field of view, it will send an alert to your connected smartphone or tablet. This allows you to quickly assess the situation and take appropriate action if needed. Whether it’s an unexpected visitor, a potential intruder, or a delivery person, you’ll be notified in real-time.
You can also customize the sensitivity of the motion detection feature to avoid false alarms. This ensures that you only receive notifications when it truly matters, saving you time and reducing unnecessary interruptions.
Tip: Place the Blink camera strategically to capture important areas, such as entry points or high-traffic areas, for enhanced security and better monitoring.
3. Live View and Two-Way Audio
If you want to get a real-time view of your home or communicate with someone who’s near the camera, the Blink app allows you to access a live video feed and use the two-way audio feature. This way, you can see and hear what’s happening at any given moment, even if you’re not physically present.
Having the ability to see and talk through the camera can be particularly useful for checking in on pets, answering the door remotely, or simply keeping an eye on your property when you’re away.
In conclusion, setting up a Blink home security camera system offers convenience, flexibility, and peace of mind. With easy installation, motion detection and alerts, as well as live view and two-way audio capabilities, Blink cameras empower you to monitor your home and stay connected no matter where you are.
Choosing the Perfect Location for Your Blink Home Security Camera
When setting up your Blink home security camera, choosing the perfect location is crucial to ensure proper monitoring of your property. Here are some key points to consider when deciding where to place your camera:
1. Entry Points: Install your camera near the main entrance points of your home, such as doors and windows. This will allow you to capture any suspicious activity as people approach or try to enter your property.

2. Coverage Area: Assess the area you want to monitor and ensure that the camera’s field of view covers the entire space. Keep in mind the camera’s angle of view and placement to avoid any blind spots.
3. Height: Mount your camera at a height that provides a clear and unobstructed view of the surrounding area. Placing it higher up ensures that it cannot be easily tampered with or obstructed by objects or people passing by.
4. Weatherproofing: If you plan to install your camera outdoors, make sure it is weatherproof and can withstand various weather conditions. Consider the camera’s IP rating to ensure it is suitable for outdoor use.
5. Power Source: Determine the availability of a power source near the desired location. If there is no power outlet nearby, you may need to consider alternative power options, such as battery-powered cameras or installing an outdoor power outlet.
6. Wi-Fi Signal: Check the strength of your Wi-Fi signal in the potential camera placement area. Poor signal strength can result in unreliable video streaming and connectivity issues. If the signal is weak, consider using a Wi-Fi extender or relocating your router.
7. Privacy Considerations: Be mindful of the privacy of your neighbors and avoid pointing the camera directly towards their property. Position the camera in a way that captures your own property without intruding on others’ privacy.
8. Easy Access: Ensure that the camera is easily accessible for regular maintenance and battery replacements (if applicable). Avoid placing it too high or in hard-to-reach locations that could make maintenance difficult.
By considering these factors, you can choose the perfect location for your Blink home security camera and maximize its effectiveness in protecting your property.
Connecting Your Blink Home Security Camera to Wi-Fi
In order to use your Blink home security camera, you need to connect it to your Wi-Fi network. Follow the steps below to ensure a successful connection:
| Step 1: | Open the Blink mobile app on your smartphone or tablet. |
| Step 2: | Tap the “Add a System” button on the main screen. |
| Step 3: | Select “Blink Indoor” or “Blink Outdoor” depending on the type of camera you are setting up. |
| Step 4: | Follow the on-screen instructions to put your camera into setup mode. |
| Step 5: | Tap the “Continue” button once your camera’s LED indicator starts blinking blue. |
| Step 6: | Enter your Wi-Fi network’s name (SSID) and password when prompted. |
| Step 7: | Wait for your Blink camera to connect to your Wi-Fi network. This may take a few minutes. |
| Step 8: | Once the connection is successful, you will be redirected to the camera settings page. |
| Step 9: | You can now customize your camera’s settings and start monitoring your home. |
By following these steps, you will be able to connect your Blink home security camera to your Wi-Fi network and enjoy the peace of mind that comes with a secure and reliable home surveillance system.

Configuring Motion Detection on Your Blink Home Security Camera
One of the key features of your Blink Home Security Camera is the ability to detect and record motion in its viewing area. By configuring the motion detection settings, you can ensure that the camera captures any movement effectively and provides you with the necessary footage for review or security purposes. Here’s how you can set up motion detection on your Blink Home Security Camera:
Step 1: Access the Blink Camera System
Begin by accessing the Blink Camera system on your preferred device. This can be done through the Blink mobile app or the Blink website.
Step 2: Select the Camera
Select the Blink Home Security Camera for which you want to configure motion detection. This step is applicable only if you have multiple cameras connected to your Blink system.
Step 3: Configure Motion Detection Settings
Once you have selected the camera, navigate to the settings menu and locate the motion detection settings. These settings may vary slightly depending on the version of the Blink system you’re using.
Typically, you will have options to adjust the sensitivity of the motion detection, set up detection zones, and control the length of the recorded clips. Take some time to familiarize yourself with these options and customize them based on your specific needs and the environment where your camera is installed.
For optimal motion detection, it’s recommended to set a sensitivity level that captures significant movements while ignoring minor disturbances like trees swaying or passing vehicles. Additionally, configuring detection zones can help minimize false alarms caused by non-essential areas in the camera’s view.
Step 4: Test and Fine-Tune
After configuring the motion detection settings, it’s essential to test and fine-tune them to ensure optimal performance. Activate the camera and observe its behavior during different scenarios, such as regular movement, sudden movements, or low-light conditions. If necessary, make adjustments to the settings to achieve the desired results.
Keep in mind that the effectiveness of motion detection can be affected by factors such as camera placement, lighting conditions, and the presence of obstacles. It may take some trial and error to find the ideal configuration for your specific needs.
Step 5: Regularly Monitor and Review Footage
Once your motion detection settings are configured, it’s crucial to regularly monitor and review the footage captured by your Blink Home Security Camera. This allows you to identify and address any potential issues, such as missed detections or false alarms.
| Common Motion Detection Issues | Possible Solutions |
|---|---|
| The camera fails to detect significant movements. | Adjust the sensitivity settings and ensure there are no obstructions blocking the camera’s view. |
| The camera triggers false alarms due to non-essential movements. | Refine the detection zones to exclude areas with frequent non-essential movement. |
| The camera records excessively long or short clips. | Adjust the clip length settings to align with your recording requirements. |
By regularly monitoring and addressing any issues, you can maintain the effectiveness of your Blink Home Security Camera’s motion detection capabilities and ensure your peace of mind.

Setting up the Blink Home Security App on Your Mobile Device
Setting up the Blink Home Security App on your mobile device is a simple process that ensures you have access to all the features and functions of your Blink home security camera system. Follow the steps below to get started:
1. Download the Blink Home Security App from the App Store or Google Play Store on your mobile device.
2. Once the app is installed, open it and sign up for a Blink account or log in if you already have one.
3. Tap on the “Add a Blink System” button to begin setting up your Blink home security camera.
4. Follow the on-screen instructions to connect your Blink Sync Module to your Wi-Fi network.
5. Once the Sync Module is connected, use the app to scan the QR code located on the back of each Blink camera you want to add to your system. Alternatively, you can manually enter the serial number of the camera if needed.
6. Position your Blink cameras in the desired locations and make sure they are within range of your Wi-Fi network.
7. Once all the cameras are added and positioned, you can customize the settings for each camera, such as motion detection sensitivity and recording duration.
8. Test each camera to ensure they are capturing and recording the desired areas by using the app to view the live feed from each camera.
9. You’re all set! You can now use the Blink Home Security App on your mobile device to monitor your home, receive alerts, and review recorded footage.
Setting up the Blink Home Security App on your mobile device allows you to take full advantage of the features and capabilities of your Blink home security camera system. By following these simple steps, you can have peace of mind knowing that your home is protected and secure.
Creating User Accounts and Permissions for Your Blink Home Security Camera
When setting up your Blink home security camera, it is important to create user accounts and assign appropriate permissions to ensure the security of your camera system. This helps to control access to your camera and prevents unauthorized users from accessing your video feeds.
Creating User Accounts
To begin, you will need to create user accounts for each person who will have access to the Blink home security camera system. Follow these steps:
- Open the Blink app on your smartphone or tablet.
- Tap on the menu icon in the top left corner of the screen.
- Select “Manage Account” from the menu options.
- Tap on “Users” and then on “Add User.”
- Enter the email address of the person you want to add as a user.
Once you have entered the email address, an invitation will be sent to the user’s email. They will need to accept the invitation and set up their own Blink account to gain access to the camera system.
Assigning Permissions
After creating user accounts, you can assign different permissions to each user based on their role and level of access required. Follow these steps:
- Open the Blink app on your smartphone or tablet.
- Tap on the menu icon in the top left corner of the screen.
- Select “Manage Account” from the menu options.
- Tap on “Users” and then select the user whose permissions you want to edit.
From here, you can select the level of access for the user, such as:
| Permission | Description |
|---|---|
| Admin | Full access to camera settings, video feeds, and system controls. |
| Viewer | Access to view video feeds and receive alerts, but no access to camera settings or system controls. |
Choose the appropriate permission level for each user and tap “Save” to apply the changes. You can also remove user access by selecting the user and tapping “Remove”.
By creating user accounts and assigning permissions, you can ensure that only authorized individuals have access to your Blink home security camera system. This helps to protect your privacy and maintain the integrity of your camera feeds.
Optimizing Battery Life on Your Blink Home Security Camera
Blink home security cameras are a great way to keep your home safe, but to ensure they work efficiently, it’s important to optimize their battery life. Here are some tips to help you get the most out of your Blink cameras:
1. Place your cameras strategically: Make sure your cameras are mounted in areas where they have a clear view of the area you want to monitor. Avoid placing them in areas with excessive motion or where there will be a lot of false triggers.
2. Adjust the motion detection sensitivity: By adjusting the motion detection sensitivity, you can ensure that your camera is only triggered by relevant motion. This will help conserve battery life.
3. Set the recording length: Blink cameras allow you to set the length of the recordings when motion is detected. Setting a shorter recording length can help save battery life.
4. Enable scheduling: Take advantage of the scheduling feature to have your cameras only active during specific times of the day or week. This can help conserve battery life when monitoring is not necessary.
5. Keep the firmware up to date: Blink regularly releases firmware updates for their cameras, which can include optimizations for battery life. Make sure to check for and install any available updates.
6. Optimize Wi-Fi signal: Ensure that your cameras have a strong Wi-Fi signal. Weak signals can cause your cameras to work harder, draining the battery more quickly.
7. Limit live view usage: While it’s convenient to check on your cameras through the Blink app, frequent use of the live view feature can drain the battery. Use live view sparingly to extend the battery life.
8. Use the power-saving mode: If you know that you won’t need to monitor your cameras for an extended period, you can enable the power-saving mode. This mode will put the camera into a sleep state, conserving battery life.
By following these tips, you can optimize the battery life of your Blink home security cameras and ensure they continue to keep your home safe without any interruptions.
Accessing and Viewing Live Feeds from Your Blink Home Security Camera
Once you have successfully set up your Blink home security camera system, you can easily access and view live feeds from your cameras. This allows you to monitor your home or office in real-time, providing you with peace of mind and enhanced security.
Step 1: Launch the Blink App
To access and view live feeds from your Blink home security cameras, you need to launch the Blink app on your mobile device. Make sure you have the latest version of the app installed. If you haven’t installed the app yet, you can find it on the App Store (for iOS) or Google Play Store (for Android).
Step 2: Log In to Your Blink Account
Open the Blink app and log in to your Blink account using your registered email address and password. If you don’t have a Blink account yet, you can create one by following the on-screen instructions.
Step 3: Select the Camera
Once you are logged in to your Blink account, you will be presented with a list of all the cameras linked to your account. Select the camera you wish to view the live feed from by tapping on its name or thumbnail image.
Step 4: Start Live View
After selecting the camera, you will be taken to the live view screen. Here, you can see the live feed from the selected camera. Depending on the model of your Blink camera, you may have additional options such as the ability to enable audio or switch between different camera views.
It’s important to note that Blink cameras require an active internet connection to view live feeds. Make sure your mobile device is connected to Wi-Fi or has a stable cellular data connection.
By following these simple steps, you can easily access and view live feeds from your Blink home security cameras, allowing you to monitor your property and keep an eye on what matters most to you.
Integrating Your Blink Home Security Camera with Other Smart Home Devices
If you want to take your home security to the next level, you can integrate your Blink Home Security Camera with other smart home devices. This will allow you to have a more seamless and connected experience with your entire smart home system.
One popular integration option is to connect your Blink camera with a smart home hub, such as Amazon Echo or Google Home. By doing so, you can control your camera using voice commands or through the hub’s mobile app. This means you can easily check in on your home’s security without having to open the Blink app.
Another option is to integrate your Blink camera with other smart home devices, such as smart lights or motion sensors. This allows you to create automation rules that trigger certain actions when your camera detects motion or when specific conditions are met. For example, you can set your smart lights to turn on automatically when your camera detects someone approaching your front door.
To integrate your Blink camera with other smart home devices, follow these steps:
- Ensure that your Blink camera and the smart home device you want to integrate with are both connected to the same Wi-Fi network.
- Open the Blink app and navigate to the camera’s settings.
- Select the “Integrations” or “Integration Options” menu.
- Choose the smart home device or hub you want to integrate with.
- Follow the on-screen instructions to complete the integration process.
Once the integration is complete, you can enjoy the benefits of a more connected and automated smart home system. Whether it’s controlling your camera with voice commands or creating automation rules, integrating your Blink Home Security Camera with other smart home devices can greatly enhance your home security and overall smart home experience.
Troubleshooting Common Issues with Blink Home Security Camera Setup
Setting up your Blink home security camera system can sometimes come with its challenges. If you’re experiencing issues during the setup process, here are some common troubleshooting steps to help you get your Blink cameras up and running:
- Check your Wi-Fi signal: Ensure that your Blink camera is within range of a strong Wi-Fi signal. Weak or unstable Wi-Fi can cause setup issues. Move the camera closer to your router or consider using a Wi-Fi extender.
- Verify internet connectivity: Make sure that your internet connection is working properly. Check if other devices are able to connect to the internet. Restart your router if necessary.
- Reset the camera: If the initial setup fails, try resetting the Blink camera. Locate the small reset button on the back of the camera and hold it down for a few seconds until the camera’s LED light blinks blue. This will restore the camera to its factory settings.
- Update the Blink app: Ensure that you have the latest version of the Blink app installed on your smartphone or tablet. Outdated app versions can cause compatibility issues with the camera setup process.
- Double-check camera batteries: If your Blink camera is not powering on or connecting to the app, check the batteries. Make sure they are properly inserted and replace them if necessary.
- Reposition the Sync Module: The Sync Module that connects your Blink cameras to your Wi-Fi network should be placed in a central location. If you’re having connectivity issues, try moving the Sync Module closer to your cameras.
- Ensure correct Wi-Fi password: Enter the correct Wi-Fi password during the setup process. Incorrect passwords can prevent your Blink cameras from connecting to your network.
- Reach out to customer support: If you have tried all the troubleshooting steps and are still experiencing issues, reach out to Blink customer support for further assistance. They can provide additional guidance and help resolve any lingering setup problems.
By following these troubleshooting steps, you should be able to overcome common issues with setting up your Blink home security camera system and enjoy the added peace of mind that comes with it. Remember, persistence and patience are key when troubleshooting technical difficulties!
Keeping Your Blink Home Security Camera Firmware Up to Date
Regularly updating the firmware of your Blink Home Security Camera is an essential step to ensure that your device is running smoothly and securely. Firmware updates often include bug fixes, performance improvements, and new features that enhance the overall functionality of your camera.
Why Update?
Updating your Blink Home Security Camera firmware offers several benefits:
- Enhanced Security: Firmware updates often include security patches that protect your camera from potential vulnerabilities.
- Improved Performance: Updates can optimize your camera’s performance, providing a better user experience and ensuring reliable functionality.
- Bug Fixes: Firmware updates address known issues, bugs, and glitches that may affect the camera’s performance.
- New Features: Updates may introduce new features and functionalities that expand the capabilities of your camera.
How to Update
Updating your Blink Home Security Camera firmware is a simple process:
- Open the Blink mobile app on your smartphone or tablet.
- Select the camera that you want to update.
- Go to the camera settings.
- Find the firmware update option and tap on it.
- Follow the on-screen instructions to download and install the latest firmware.
- Wait for the update process to complete.
- Once the update is finished, your camera will reboot with the new firmware.
Additional Tips
Here are some additional tips to keep in mind when updating your Blink Home Security Camera firmware:
- Make sure that your camera is connected to a stable Wi-Fi network during the update process.
- Keep your Blink mobile app updated to ensure compatibility with the latest firmware.
- Check for firmware updates regularly to stay up to date with the latest improvements and features.
- If you encounter any issues during the update, contact Blink customer support for assistance.
By following these steps and keeping your Blink Home Security Camera firmware up to date, you can ensure that your camera is always running at its best, providing you with the peace of mind you deserve.
FAQ,
What is a blink home security camera?
A blink home security camera is a wireless security camera that allows you to monitor your home or property remotely through a smartphone or computer.
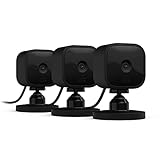
Can I use multiple blink home security cameras together?
Yes, you can use multiple blink home security cameras together. The Blink app supports multi-camera systems, allowing you to monitor different areas of your home or property simultaneously.


