Ensuring the safety of your home is vital in today’s world. One of the most effective ways to achieve this is by installing a home security camera system. These cameras not only act as a deterrent to potential burglars, but also provide you with peace of mind knowing that you can monitor your property at all times.
Setting up a home security camera may seem like a daunting task, but with the right guidance, it can be a straightforward process. In this article, we will walk you through the steps to successfully set up your own home security camera system.
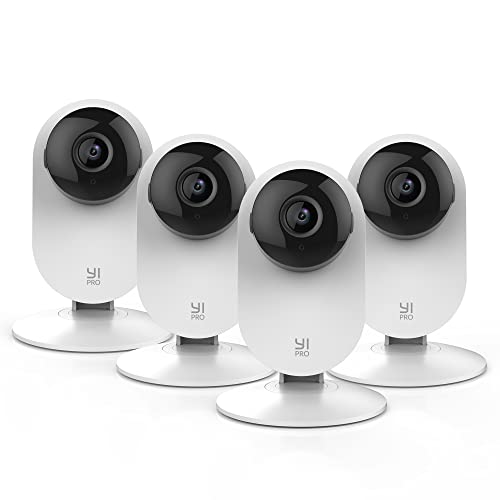
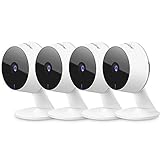
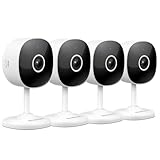
1. Choose the Right Camera: Before you start setting up your home security camera system, it is important to choose the right camera for your needs. Consider factors such as the area you want to monitor, whether you need a wired or wireless camera, and the desired resolution of the footage.
2. Determine Camera Placement: The placement of your cameras is crucial for effective monitoring. Identify the areas of your home that are most vulnerable to break-ins and make sure to position your cameras accordingly. Common locations include entrances, windows, and backyards.
3. Install the Cameras: Once you have chosen the right cameras and determined their placement, it’s time to install them. Follow the manufacturer’s instructions carefully to ensure that the installation is done correctly. This may involve drilling holes to mount the cameras or using adhesive mounts for easier installation.

4. Connect the Cameras to a Recorder or Monitor: To access the footage captured by your home security cameras, you will need to connect them to a recorder or monitor. This can be done using cables or wirelessly, depending on the type of camera you have chosen. Make sure to follow the instructions provided by the manufacturer for this step.
5. Set Up Remote Access: With advancements in technology, you can now access your home security camera footage remotely. To set up remote access, you will typically need to connect your camera system to your home’s Wi-Fi network and download a compatible app on your smartphone or tablet. This will allow you to view live footage and receive notifications on the go.
By following these steps, you can set up your own home security camera system and enhance the safety of your home. Remember to regularly check and maintain your cameras to ensure their effectiveness. With a reliable security camera system in place, you can rest easy knowing that your home is protected.
Step-by-step guide to setting up a home security camera
Keeping your home secure is essential, and one of the most effective ways to protect your property is by installing a home security camera system. Follow these steps to set up your home security camera and ensure peace of mind:
1. Choose the right location
Before you start installing your home security camera, carefully select the right location to maximize its effectiveness. Consider high traffic areas, vulnerable entry points, and blind spots. Make sure the camera is positioned at a height that allows for a wide-angle view.
2. Install the camera
Once you have chosen the ideal location, you can begin installing the camera. Most home security cameras are wireless, making installation much simpler. Follow the manufacturer’s instructions to mount the camera securely. Ensure that it is protected from the elements and has a clear line of sight.
3. Connect to power
Your home security camera will need to be connected to a power source. If you are using a wired camera, make sure to run the cables neatly and discreetly, using cable channels if necessary. If you are using a wireless camera, ensure it is within range of a power outlet or use a battery-powered option.
4. Set up the camera system
Once the camera is installed and connected to power, it’s time to set up the camera system itself. This typically involves downloading the manufacturer’s app or software and following the provided instructions to connect the camera to your home network. Ensure you have a strong WiFi signal for reliable operation.
5. Configure camera settings
Once connected, you can configure the camera’s settings according to your preferences. Common settings include motion detection sensitivity, recording schedules, and email or app notifications. Adjust these settings to suit your needs and maximize the camera’s effectiveness.
6. Test the camera
Before considering the installation complete, it is important to thoroughly test the camera to ensure it is functioning properly. Check the live feed, test motion detection, and verify that notifications are working as expected. This step will give you peace of mind and allow you to make any necessary adjustments.

By following these simple steps, you can successfully set up a home security camera system. Remember to regularly maintain and update your camera system to ensure optimal performance and protection for your home.
Choosing the Right Camera
Choosing the right security camera is a crucial step in setting up your home security system. With so many options available on the market, it can be overwhelming to make the right choice. Here are a few factors to consider when selecting a camera:
1. Indoor vs. Outdoor
First, determine whether you need an indoor or outdoor camera. If you are primarily concerned with monitoring the inside of your home, an indoor camera may be sufficient. However, if you want to cover the exterior areas of your property, such as the front porch, backyard, or driveway, you will need a weatherproof outdoor camera. These cameras are built to withstand harsh weather conditions, including rain, snow, and extreme temperatures.
2. Resolution
The resolution of the camera determines the clarity of the video footage. Higher resolution cameras provide clearer images, allowing you to see more details. It is recommended to choose a camera with at least 1080p resolution for optimal video quality.
Note: Keep in mind that higher resolution cameras may require more storage space as they produce larger video files.

3. Field of View
The field of view (FOV) refers to the area that a camera can capture. Cameras with a wider field of view can monitor larger areas, reducing the number of cameras needed to cover the entire property. Consider the layout of your home and the areas you want to monitor to determine the appropriate FOV for your needs.
Tip: Some cameras offer pan, tilt, and zoom features, allowing you to adjust the camera’s field of view remotely.
4. Night Vision
For 24/7 surveillance, consider a camera with night vision capabilities. Night vision cameras use infrared technology to capture clear footage in low light or complete darkness. This feature is essential if you want to monitor your property during the night or in poorly lit areas.
Important: Check the camera’s night vision range to ensure it covers the desired area without any blind spots.
By considering these factors, you can choose the right security camera to suit your specific requirements and create a reliable home security system.

Selecting a Suitable Location
Setting up a home security camera is a vital step towards ensuring the safety and security of your property. When selecting a suitable location for your camera, there are several factors to consider:
1. Coverage Area
Determine the areas you want your camera to cover. This might include your front yard, driveway, entrances, or any other vulnerable spots. Take note of the blind spots and areas where the camera’s view might be obstructed.
2. Mounting Options
Consider the mounting options available to you. Cameras can be wall-mounted, ceiling-mounted, or freestanding. Choose a location that allows for the optimal placement of your camera to get the desired coverage and angle.
3. Power Supply
Ensure that the selected location is near a power outlet or has easy access to power. You may need to use extension cords or consider alternative power sources if the location is far from a power source.
4. Weatherproofing
If the location you choose is exposed to the elements, make sure the camera is weatherproof or housed in a protective casing. This will ensure that your camera remains operational and protected from rain, snow, or extreme temperatures.

5. Accessibility
Consider the accessibility of the camera for maintenance and adjustments. You may need to access the camera periodically for cleaning, adjusting the angle, or retrieving footage. Choose a location that allows for easy access without compromising the camera’s security.
6. Privacy Concerns
Be mindful of privacy concerns when selecting the location. Avoid pointing the camera towards areas where privacy is expected, such as bedrooms or bathrooms. Ensure that your camera adheres to legal and ethical guidelines regarding privacy.
- Consider all these factors when selecting the location for your home security camera.
- Take your time to find the best spot that provides optimal coverage and minimizes blind spots.
- If you have multiple cameras, plan their placement strategically to cover all critical areas.
- Testing the camera’s view and adjusting the angle before final installation can help ensure its effectiveness.
Installing the camera system
Setting up a home security camera system can be a great way to enhance the safety and security of your property. Here are the steps to install your camera system:
1. Determine the camera locations:
Start by identifying the areas where you want to install the security cameras. Ideally, you should cover the entrances, backyards, and high-risk areas such as the garage or basement.
2. Choose the right cameras:
Consider the type of cameras that best suit your needs. There are various options available, including wired or wireless cameras, indoor or outdoor cameras, and cameras with different features like night vision or motion detection.
3. Mount the cameras:
Once you have the cameras, you need to mount them securely. Follow the manufacturer’s instructions to mount the cameras at the desired locations. Make sure they are positioned correctly to capture the necessary footage.
4. Connect the cameras:
If you have wired cameras, you will need to connect them to the recording device using the provided cables. For wireless cameras, follow the manufacturer’s instructions to connect them to your home’s Wi-Fi network.
5. Set up the recording device:
Choose a suitable recording device such as a digital video recorder (DVR) or a network video recorder (NVR). Follow the manufacturer’s instructions to connect the recording device to the cameras and set up the necessary settings.
6. Configure the camera system:
Access the camera system’s software or app to configure the system settings. This may include adjusting camera angles, setting recording schedules, enabling motion detection, or accessing remote viewing options.
7. Test the system:
Before relying on your camera system for security, test each camera to ensure they are capturing clear footage and functioning correctly. Make any necessary adjustments or troubleshooting if needed.
By following these steps, you can successfully install your home security camera system and enjoy the peace of mind that comes with knowing your property is protected.
Connecting to a power source
Before you begin setting up your home security camera, you will need to connect it to a power source. The power source will provide the necessary electricity to keep your camera functioning properly.
1. Check the power requirements
First, you need to check the power requirements of your security camera. Most cameras require a DC power supply, typically 12V or 24V. Make sure you have a power supply that matches the requirements of your camera. You can find this information in the user manual or on the camera’s packaging.
2. Locate a power outlet
Next, find a suitable power outlet near the location where you plan to install your camera. Make sure the outlet is easily accessible and within reach of the camera’s power cable. It’s important to choose a power outlet that is not easily switched off or unplugged accidentally.
| Important note: |
|---|
| Do not use an extension cord or power strip to connect your security camera. These devices can introduce interference and may not provide a stable power supply. It’s best to directly connect the camera to a power outlet. |
Once you have located a suitable power outlet, you can proceed to connect your camera to the power source.
Configuring the camera settings
After installing your home security camera, it’s important to configure the camera settings to ensure optimal performance and functionality. Here are some steps to help you get started:
- Connect the camera to your home network: Use the provided Ethernet cable or connect the camera to your Wi-Fi network. Follow the manufacturer’s instructions to complete the setup.
- Access the camera’s settings: Open a web browser on a computer or a mobile device that is connected to the same network as the camera. Enter the camera’s IP address in the browser’s address bar.
- Enter login credentials: You may be prompted to enter a username and password to access the camera’s settings. Refer to the camera’s user manual for the default login credentials or the steps to set up a new username and password.
- Adjust the video settings: Once logged in, navigate to the video settings section. Here, you can customize the resolution, frame rate, and other video quality settings according to your preferences.
- Configure motion detection: If your camera supports motion detection, enable it and adjust the sensitivity levels. This feature can help you receive alerts or trigger recordings when motion is detected within the camera’s field of view.
- Set up recording options: Decide how you want to store the camera’s footage. You can choose to save videos locally on a connected storage device or use cloud storage options provided by the camera manufacturer.
- Configure remote access: To access the camera’s live feed remotely, enable the remote access feature. This usually involves creating an account with the camera manufacturer and setting up port forwarding on your router.
- Test the camera: After configuring all the settings, make sure to test the camera’s functionality. Check the live feed, motion detection, and recording features to ensure everything is working as expected.
By following these steps, you can configure your home security camera to meet your specific needs and enhance the security of your home.
Setting up remote access
Remote access allows you to view the live feed from your home security camera system using a smartphone, tablet, or computer from anywhere in the world. Setting up remote access is an important step to ensure that you can monitor your home even when you are not physically there. Follow these steps to set up remote access for your home security camera:
Step 1: Choose a remote access method
There are several methods to set up remote access for your home security camera system. Some cameras offer their own mobile apps or web portals, while others may require you to use a third-party app or software. Research and choose a method that is compatible with your camera model and suits your needs.
Step 2: Configure your router
Remote access requires port forwarding, which allows incoming connections from the internet to reach your home security camera system. Access your router’s settings page and navigate to the port forwarding section. Add a new rule to forward the specific port required by your camera system to the IP address of your camera.
For example, if your camera system requires port 8080 and the IP address of your camera is 192.168.1.100, create a port forwarding rule that forwards port 8080 to 192.168.1.100.
Step 3: Set up a dynamic DNS
If your internet service provider assigns a dynamic IP address to your router, you will need to set up a dynamic DNS (Domain Name System) service. This service assigns a domain name to your home network, which will remain constant even if your IP address changes.
Choose a dynamic DNS provider and follow their instructions to set up an account and link it to your router. Once the dynamic DNS service is set up, you will be able to access your home security camera system using a domain name instead of an IP address.
Remember to update your router’s dynamic DNS settings if you switch to a different provider or if the provided domain name expires.
With remote access set up, you can now view the live feed from your home security camera system using a mobile app or web portal, regardless of your location. Ensure that your device has an internet connection and open the app or portal to access the camera feeds. You may need to enter your login credentials or the assigned domain name to establish the connection.
Enjoy the peace of mind knowing that you can monitor your home anytime, anywhere!
Testing and troubleshooting
Once you have set up your home security camera system, it is essential to test its functionality to ensure that it is working correctly. Here are some tips for testing and troubleshooting your security camera:
1. Check the camera’s power supply: Make sure that the camera is receiving power and that the power adapter is plugged in securely. If the camera is battery-powered, ensure that the batteries are properly inserted and fully charged.
2. Verify the camera’s connection: Ensure that the camera is connected to your network correctly. You can do this by checking the LAN cable or Wi-Fi connection. If you are using Wi-Fi, check the signal strength and consider moving the camera closer to the Wi-Fi router.
3. Test the camera’s video feed: Use the camera’s software or app to view the live video feed. Check if the camera is displaying a clear and crisp image. If the image quality is poor or if there is no video feed at all, adjust the camera’s position or troubleshoot the network connection.
4. Test the camera’s motion detection: If your camera has motion detection capabilities, walk in front of the camera to see if it is properly detecting and recording motion. Adjust the camera’s sensitivity settings if necessary.
5. Check the camera’s night vision: If your camera has night vision capabilities, test it in low-light conditions to ensure that it is capturing clear footage during the night. If the night vision is not working correctly, check if the camera’s infrared (IR) lights are functioning properly.
6. Review the camera’s storage and recording settings: Check if the camera is properly recording and storing footage. Review the camera’s settings and ensure that the storage device, such as an SD card or cloud storage, is functioning correctly.
7. Troubleshoot software or app issues: If you are experiencing difficulties with accessing the camera’s software or app, try reinstalling or updating the software. Ensure that you are using the latest version of the software that is compatible with your camera.
8. Contact technical support: If you have followed all the troubleshooting steps and are still experiencing issues with your home security camera, it may be necessary to contact the manufacturer’s technical support for further assistance.
FAQ,
What is a home security camera?
A home security camera is a device that records video footage to monitor the activities inside and outside of your home.
Why should I install a home security camera?
Installing a home security camera can provide added protection and peace of mind. It can deter potential burglars and provide evidence in case of any criminal activity. It can also help to monitor children, pets, and deliveries.