
Welcome to our comprehensive guide on how to set up your Night Owl security camera system! Whether you’re a home or business owner, installing a security camera system is a great way to enhance the safety and security of your property. The Night Owl brand is known for its high-quality and reliable security solutions, and we’re here to walk you through the setup process step by step.
Why Choose Night Owl Security Camera?
Night Owl has established itself as a leading provider of security camera systems, offering a wide range of products designed to meet the unique needs of residential and commercial customers. With Night Owl, you can expect exceptional image quality, advanced features, and easy installation. Whether you need to monitor your home, office, or any other property, Night Owl security cameras are a trusted choice.
Before You Begin:
Before diving into the setup process, it’s important to take a moment to gather all the necessary equipment. Make sure you have your Night Owl security camera system, cables, power adapter, and any other accessories that may have come with your package. Familiarize yourself with the user manual and ensure that you have the required tools for installation. Once you have everything ready, you can proceed to the next steps.

Choosing the Right Night Owl Security Camera
When it comes to setting up a Night Owl security camera, one of the most important decisions you’ll need to make is choosing the right camera for your needs. With so many options available, it can be overwhelming to know where to start. In this guide, we’ll walk you through the key factors to consider when selecting a Night Owl security camera.
1. Resolution
The resolution of a security camera determines the level of detail you can expect from your footage. Night Owl offers a range of camera resolutions, from 720p to 4K Ultra HD. Higher resolution cameras will generally provide clearer and more detailed images, but they may also require more storage space for the footage.
2. Night Vision
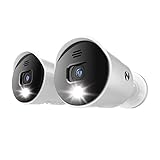
Since Night Owl security cameras are primarily designed for nighttime monitoring, it’s important to consider the night vision capabilities of the camera you choose. Look for cameras with infrared (IR) LEDs, which emit infrared light that allows the camera to capture clear images even in complete darkness.
3. Field of View
The field of view (FOV) refers to the area that the camera can capture. A wider FOV means that the camera can cover a larger area, reducing the number of cameras needed for comprehensive coverage. Consider the size and layout of the area you want to monitor to determine the appropriate FOV for your needs.
4. Connectivity
Consider how you want to connect your Night Owl security camera. Wired cameras offer a reliable and secure connection, but they may require professional installation. On the other hand, wireless cameras are easier to install and provide more flexibility in terms of camera placement, but they may have limitations in terms of range and signal interference.

5. Additional Features
Lastly, consider any additional features that may be important to you. Some Night Owl security cameras offer advanced features such as two-way audio, motion detection, and remote viewing capabilities. Determine which features are essential to your surveillance needs and select a camera that offers them.
By considering these factors, you can choose the right Night Owl security camera that meets your specific requirements. Whether you’re setting up cameras for your home or business, you can have peace of mind knowing that you’ve made an informed decision.
Planning the Installation of Night Owl Security Camera
Before you start setting up your Night Owl security camera, it is important to plan the installation to ensure optimal coverage and functionality. Here are some important factors to consider:
1. Determine the Number of Cameras Needed
Decide how many cameras you will need for your surveillance system. Consider the size of the area you want to cover and any specific areas of concern. This will help you determine the number of cameras required for complete coverage.
2. Identify the Best Camera Positions
Survey the area to identify the best camera positions. Look for areas that provide a clear view of the target areas while minimizing obstructions such as trees or buildings. Consider factors like lighting conditions and any potential blind spots.

3. Plan the Camera Wiring
Determine the best wiring route for your cameras. Consider the distance between each camera and the location of the DVR or NVR. It is recommended to use a dedicated power outlet for each camera to ensure stable power supply.
4. Select the Proper Mounting Equipment
Choose the appropriate mounting equipment for each camera location. There are various mounting options available, including wall mounts, ceiling mounts, and pole mounts. Ensure that the mounting equipment is suitable for the camera model and can withstand the elements.
5. Consider Network Connectivity
If you plan to connect your Night Owl security camera system to a network, ensure that you have the necessary network infrastructure in place. Determine the best method for connecting the cameras to the network, whether it be through Ethernet cables or wireless connections.
6. Check for Local Regulations
Before installing your security cameras, familiarize yourself with any local regulations or laws regarding surveillance systems. This may include obtaining permits or adhering to certain privacy restrictions.
By thoroughly planning the installation of your Night Owl security camera system, you can ensure that it is set up correctly and provides the surveillance coverage you need.

Required Tools and Materials for Night Owl Security Camera Setup
Setting up your Night Owl security camera system requires a few essential tools and materials to ensure a smooth and successful installation process. Before getting started, make sure you have the following items:
1. Night Owl Security Camera System: Purchase a Night Owl security camera system that suits your needs. Depending on the size and coverage area of your property, choose a system that includes the desired number of cameras.
2. Cameras: In addition to the main security camera system, you will need individual cameras for different areas of your property. Make sure that the cameras you purchase are compatible with your Night Owl system.
3. Cables: Various types of cables are required for connecting the cameras to the digital video recorder (DVR). These cables include BNC cables for video transmission and power cables for providing electrical power to the cameras.
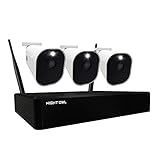
4. DVR (Digital Video Recorder): The DVR is the central component of your Night Owl security camera system. It records and stores the video footage captured by the cameras. Ensure that the DVR you choose is compatible with the cameras and offers the desired storage capacity.
5. Monitor: A monitor is necessary for viewing the live footage from your security cameras. You can connect the monitor to the DVR using an HDMI or VGA cable.
6. Power Supply: The cameras and DVR require a power supply to operate. Make sure you have the necessary power adapters or power supply unit included with your Night Owl system to power all the components.
7. Mounting Hardware: Depending on where you plan to install your cameras, you may need mounting brackets, screws, and other hardware to securely mount the cameras in place.
8. Network Cable (Ethernet Cable): If you want to access your security camera system remotely or connect it to your home network, you will need an Ethernet cable to connect the DVR to your router or modem.
9. Internet Connection: To take advantage of remote viewing and other online features of your Night Owl security camera system, you need a stable internet connection. Ensure that your internet service is up and running before setting up your system.
10. Smartphone or Computer: To access your security camera system remotely, download and install the Night Owl app on your smartphone or utilize the Night Owl Connect software on your computer.
By having these tools and materials ready, you can proceed with the setup of your Night Owl security camera system without any obstacles. Make sure to read the instruction manual provided with your system for detailed installation steps.
Step-by-Step Guide to Installing Night Owl Security Camera
Installing a Night Owl security camera is a straightforward process that can help enhance the security of your home or office. Follow these step-by-step instructions to set up your Night Owl security camera system.
Step 1: Unboxing and Preparation
Start by unboxing your Night Owl security camera system and ensure that you have all the required components, including the camera(s), cables, power adapters, and the DVR/NVR unit. Read through the user manual and familiarize yourself with the system’s features and setup process before proceeding.
Step 2: Camera Placement
Select optimal locations for mounting the cameras both indoors and outdoors. Make sure the chosen locations provide the best view of the area you want to monitor and have easy access to power outlets and cables.

Step 3: Mounting the Cameras
Use the provided screws and mounting brackets to securely attach the cameras to the desired locations. Ensure that the cameras are mounted at the appropriate height and angle to capture the desired field of view.
Step 4: Cable Installation
Connect the included cables to the cameras and route them to the DVR/NVR unit. Use cable clips or conduits to secure and protect the cables from external damages. Make sure to follow the recommended cable lengths and avoid excessive cable bends.
Step 5: DVR/NVR Setup
Connect the DVR/NVR unit to a monitor or TV using the provided HDMI or VGA cable. Plug in the power adapter and turn on the unit. Follow the on-screen instructions to complete the initial setup, including setting up the date, time, and system preferences.
Step 6: Camera Connection
Connect the camera cables to the corresponding ports on the DVR/NVR unit. Ensure that each camera is properly connected and recognized by the system. Use the included software or mobile app to verify the camera feeds and adjust any necessary settings.
Step 7: Network Configuration
If you intend to access your Night Owl security camera system remotely, connect the DVR/NVR unit to your router using an Ethernet cable. Configure the network settings on the unit and enable remote access by following the provided instructions.
Step 8: Power On and Testing
Plug in the power adapters for both the cameras and the DVR/NVR unit. Ensure that all devices power on and that the camera feeds are visible on the connected monitor or TV. Test each camera’s functionality by monitoring the video feeds and adjusting the camera angles if needed.
That’s it! You have now successfully installed your Night Owl security camera system. Familiarize yourself with the user manual to explore the system’s additional features and settings to maximize its effectiveness in securing your property.
Connecting and Configuring Night Owl Security Camera
Once you have unboxed your Night Owl security camera and positioned it in the desired location, it’s time to connect and configure it. Follow the steps below to ensure a successful setup:
Step 1: Power Up the Camera
Connect the camera to a power source using the provided power adapter. Make sure the power source is easily accessible and stable to ensure uninterrupted power supply.
Step 2: Connect the Camera to the DVR
Using the supplied BNC cable, connect the camera to your Night Owl Digital Video Recorder (DVR). The BNC cable is typically color-coded, so match the corresponding colors on both the camera and DVR. Ensure a secure connection by twisting the connectors clockwise.
Step 3: Connect the DVR to a Monitor
Attach a VGA or HDMI cable from the DVR to your monitor or TV. This will allow you to view and configure the camera settings. Make sure to turn on the monitor and select the correct input source.
Step 4: Configure Camera Settings
Access the DVR’s settings menu using the provided remote control or mouse. Navigate to the camera settings and adjust parameters such as resolution, frame rate, and video quality according to your preferences.
Step 5: Set Up Remote Viewing
If you wish to access your security camera remotely, you will need to set up remote viewing. This typically involves configuring the DVR to connect to your network, enabling port forwarding on your router, and installing the relevant app on your mobile device or computer. Follow the instructions provided with your DVR to complete this step.
Once you have completed these steps, your Night Owl security camera should be connected and configured successfully. You can now monitor live footage, record videos, and receive motion alerts depending on the features offered by your specific model.
| Step | Description |
|---|---|
| Step 1 | Power Up the Camera |
| Step 2 | Connect the Camera to the DVR |
| Step 3 | Connect the DVR to a Monitor |
| Step 4 | Configure Camera Settings |
| Step 5 | Set Up Remote Viewing |
Night Owl Security Camera Troubleshooting Tips
1. Check Power Connection:
Make sure your camera is properly connected to a power source. Check all cables and connections to ensure they are secure. If using a battery-powered camera, make sure the batteries are charged or replace them if needed.
2. Verify Network Connection:
Ensure that your camera is connected to your Wi-Fi network. Check the network settings on your camera and verify the network credentials are entered correctly. If your camera has an Ethernet connection, make sure the cable is securely plugged in.
3. Restart Camera:
Try restarting your camera by turning it off and then on again. This can help resolve minor software glitches and connectivity issues.
4. Update Firmware:
Check for any available firmware updates for your camera and install them if needed. Firmware updates often include bug fixes and performance improvements.
5. Adjust Camera Position:
If you’re experiencing issues with image quality or visibility, try adjusting the camera’s position. Ensure that the camera is properly aimed at the desired area and that there are no obstructions blocking the view.
6. Clear Obstructions:
Remove any objects or debris that may be obstructing the camera’s view. Make sure there are no plants, curtains, or other items blocking the camera’s line of sight.
7. Check Camera Settings:
Review the camera settings to ensure they are configured correctly. Check the resolution, motion detection sensitivity, and other settings that may affect the camera’s performance.
8. Test Camera with Different Device:
If possible, try connecting your camera to a different device, such as a smartphone or tablet, to see if the issue persists. This can help determine if the problem is with the camera or the original device.
By following these troubleshooting tips, you should be able to resolve most common issues with your Night Owl security camera. If the problem persists, consult the camera’s user manual or contact Night Owl’s customer support for further assistance.
Night Owl Security Camera Maintenance and Care
Caring for your Night Owl security camera is essential to ensure its reliable performance and longevity. Regular maintenance and proper care will help maximize the effectiveness of your security system.
1. Clean the cameras regularly:
Regularly clean the camera lenses and housing using a soft, lint-free cloth. Avoid using harsh chemicals or abrasive materials that may damage the camera’s surface.
2. Check for obstructions:
Periodically check the cameras for any obstructions or objects blocking the view. Clear any obstacles like leaves, spider webs, or other debris that may affect the camera’s performance.
3. Inspect the cables:
Check the cables that connect the cameras to the recording device for any signs of damage, such as cuts or frayed edges. Replace any faulty cables to ensure proper connectivity.
4. Protect against weather elements:
If your Night Owl security cameras are installed outdoors, ensure they are properly protected from rain, direct sunlight, and extreme temperatures. Consider installing weatherproof housings for added durability.
5. Test the system regularly:
Regularly test your Night Owl security system to ensure all cameras are functioning correctly. This includes checking the video feed, motion detection, and any additional features or settings.
6. Secure mounting:
Ensure that your cameras are securely mounted to minimize the risk of them being tampered with or stolen. Follow the manufacturer’s instructions for proper installation and use appropriate mounting hardware.
7. Update the firmware:
Stay up-to-date with the latest firmware updates provided by Night Owl to ensure your cameras have the latest features, performance enhancements, and security fixes.
Following these maintenance and care tips will help keep your Night Owl security camera system in optimal working condition, providing you with peace of mind and reliable surveillance for your property.
FAQ,
What are the initial steps to set up a Night Owl security camera?
The initial steps to set up a Night Owl security camera include selecting a suitable location for the camera, connecting the camera to a power source, connecting the camera to a monitor or a compatible device, and installing the necessary Night Owl software or app.
What are the factors to consider when selecting a suitable location for a Night Owl security camera?
When selecting a suitable location for a Night Owl security camera, it is important to consider factors such as the camera’s field of view, the lighting conditions in that area, the proximity to a power source, and the accessibility for maintenance and adjustments.
How can I connect my Night Owl security camera to a power source?
You can connect your Night Owl security camera to a power source by plugging the camera’s power adapter into a nearby electrical outlet or by using a compatible power over Ethernet (PoE) injector or switch.
What is the Night Owl software or app and how can I install it?
The Night Owl software or app allows you to remotely access and control your Night Owl security camera system. To install it, you can visit the Night Owl website or the app store on your device, search for the Night Owl app, and follow the instructions for downloading and installing it.
Are there any additional steps or precautions I should take when setting up a Night Owl security camera?
Yes, there are a few additional steps and precautions you can take when setting up a Night Owl security camera. These include securing the camera with proper mounting hardware, configuring any necessary settings or preferences within the Night Owl software or app, and regularly updating the camera’s firmware to ensure optimal performance and security.


