
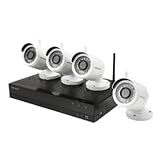
If you want to keep your home or business secure, investing in a security camera system is a wise decision. Samsung is a trusted brand known for its high-quality products, and their security camera DVRs are no exception. Setting up a Samsung security camera DVR may seem like a daunting task, but with the right guidance, you can have it up and running in no time.
Step 1: Plan Your Camera Placement
Before you start setting up your Samsung security camera DVR, take some time to plan where you want to place your cameras. Consider the areas you want to monitor and the angles you need for optimal coverage. It’s important to place the cameras strategically to ensure maximum security and surveillance.
Pro tip: Make sure to choose locations that are not easily accessible or obstructed by objects like trees or walls.
Step 2: Connect the DVR to the Power Source
Once you have determined the ideal placement for your cameras, it’s time to connect the DVR to the power source. Locate a power outlet near the selected area and connect the power adapter to the DVR. Ensure that the power supply is stable and uninterrupted to avoid any issues with the system.
Pro tip: Consider using a surge protector to protect your Samsung security camera DVR from power surges and fluctuations.
Step 3: Connect the Cameras
After connecting the DVR to the power source, you need to connect the cameras to the DVR. Depending on the model, the cameras may connect via Ethernet cables or wireless connections. Follow the manufacturer’s instructions to ensure proper installation. Once connected, you can adjust the cameras’ angles and positions according to your initial plan.
Pro tip: Test each camera’s feed on the DVR to ensure they are all working correctly before finalizing their positions.

Step 4: Configure the DVR
Now that your Samsung security camera DVR is connected and the cameras are in place, you need to configure the DVR settings. Follow the manufacturer’s instructions to access the DVR’s settings menu. Customize the settings according to your preferences, such as recording mode, motion detection, and notifications. Take your time to familiarize yourself with the interface and features to make the most out of your Samsung security camera DVR.
Pro tip: Create a strong password for your system to prevent unauthorized access and ensure the security of your footage.
By following these steps and taking the time to properly set up your Samsung security camera DVR, you can enjoy peace of mind knowing that your home or business is well-protected. Keep in mind that each Samsung DVR model may have specific instructions, so always refer to the user manual for detailed guidance.
Things to consider before setting up Samsung security camera DVR
Setting up a Samsung security camera DVR can help enhance the security of your property and give you peace of mind. However, before you start the installation process, there are a few important factors to consider:

- Location: Determine the best location for your security camera DVR. Consider factors such as the coverage area, visibility, accessibility for maintenance, and protection from weather elements.
- Camera placement: Decide where to position your security cameras. It’s important to cover key areas such as entry points, blind spots, and high-risk areas. Consider the field of view, angle, and height for optimal coverage.
- Power source: Ensure that your security camera DVR has a reliable power source. You may need to install electrical outlets nearby or opt for a battery-powered system if wiring is not possible.
- Internet connectivity: Check if your security camera DVR requires an internet connection for remote viewing and monitoring. Ensure stable and high-speed internet access for seamless functionality.
- Storage: Determine the storage capacity needed for storing video footage. Consider whether to use a local hard drive, a cloud-based service, or a combination of both. Also, take into account the scalability of the storage solution.
- Camera specifications: Carefully select the right type of security cameras based on your specific needs. Consider factors such as resolution, night vision capabilities, motion detection, and weather resistance.
- Wiring options: Plan the wiring setup for your security camera DVR. Decide whether to use wired or wireless cameras and ensure adequate cables or connectivity options are available.
- System compatibility: Ensure that your Samsung security camera DVR is compatible with other security devices or systems you may have in place, such as alarms or access control systems.
- Legal considerations: Familiarize yourself with any local laws or regulations related to the use of security cameras and ensure compliance.
- Professional installation: If you are not confident in your abilities or lack the time, consider hiring a professional to install your Samsung security camera DVR system. A professional can ensure correct installation and provide guidance on optimal setup.
By considering these factors before setting up your Samsung security camera DVR, you can better plan and optimize your surveillance system for enhanced security and peace of mind.
Choosing the right location for your Samsung security camera DVR
Installing a Samsung security camera DVR is an important step in ensuring the safety and security of your home or business. However, choosing the right location for your DVR is equally crucial to make sure it functions optimally and captures all necessary footage. Here are some key factors to consider when selecting the installation site for your Samsung DVR:
1. Accessibility: The location should be easily accessible for maintenance and troubleshooting. Choose a space where you can easily reach the DVR for any necessary repairs or adjustments.
2. Power supply: Make sure there is a nearby power source to connect your Samsung DVR. You don’t want to install it in a place where you’ll need to use long extension cords or deal with complicated wiring.
3. Ventilation: Your Samsung DVR generates heat while in operation, so find a well-ventilated area to prevent overheating. Avoid enclosed spaces or areas that lack proper airflow.

4. Security: Place your DVR in a secure location to prevent theft or tampering. Consider installing it in a locked room or cabinet to ensure the safety of your surveillance system.
5. Central position: Ideally, place your DVR in a central position to maximize the camera coverage area. This will help ensure that all critical areas are captured without any blind spots.
6. Protection from the elements: Avoid installing your Samsung DVR in areas exposed to extreme temperatures or moisture. Extreme weather conditions can damage the DVR and reduce its lifespan.
By carefully considering these factors, you can choose the right location for your Samsung security camera DVR and enhance its performance and longevity.
Steps to connect your Samsung security camera DVR to the internet
If you want to access your Samsung security camera DVR remotely or view the recorded footage over the internet, you need to connect it to your home or office network. Follow the steps below to set up the internet connection:

Step 1: Connect your DVR to the router
First, you need to connect your Samsung security camera DVR to your router using an Ethernet cable. Locate the Ethernet port on the back of your DVR and plug in one end of the cable. Connect the other end of the cable to an available LAN port on your router.
Step 2: Configure the network settings
Once the physical connection is established, it’s time to configure the network settings on your DVR. Turn on your DVR and go to the settings menu. Look for the network or network settings option and select it. Here, you will need to assign a static IP address to your DVR. Make sure the IP address you choose is within the same IP range as your router. Note down the IP address, subnet mask, gateway, and DNS server values for future reference.
Step 3: Port forwarding
To access your Samsung security camera DVR from outside your network, you need to set up port forwarding on your router. Log in to your router’s administration page by entering its IP address in your web browser. Look for the port forwarding or virtual server option and create a new entry. Specify the DVR’s IP address, the required port numbers (default is usually 80 or 8000), and choose both TCP and UDP protocols. Save the settings and restart your router.
Step 4: Test the connection
At this point, your Samsung security camera DVR should be connected to the internet. You can test the connection by accessing it remotely using the IP address and port number specified in the port forwarding settings. Open a web browser on a device outside your network and type in the following URL: http://[YourPublicIPAddress]:[PortNumber]. If everything is set up correctly, you should be able to access your DVR and view the camera feeds or recorded footage.
By following these steps, you can connect your Samsung security camera DVR to the internet and gain remote access to monitor your property or business from anywhere.

Configuring the settings on your Samsung security camera DVR
Setting up and configuring your Samsung security camera DVR is an essential step to ensure the effective and efficient functioning of your surveillance system. This guide will take you through the necessary steps to configure the settings on your Samsung security camera DVR.
Step 1: Accessing the DVR Menu
To begin configuration, you need to access the DVR menu. Connect your DVR to a monitor or TV using an HDMI or VGA cable. Once connected, power on the DVR and use the remote control or front panel buttons to navigate to the main menu.
Step 2: Setting the Date and Time
It is crucial to set the correct date and time on your Samsung security camera DVR to ensure accurate recording and playback. In the DVR menu, locate the “Date/Time” or “System” section and select it. Proceed to enter the current date and time following the on-screen prompts. Save the settings and exit the menu.
Step 3: Configuring Camera Settings
In the DVR menu, navigate to the “Camera” or “Channel” section to configure individual camera settings. You can adjust parameters such as brightness, contrast, resolution, and motion detection for each camera connected to the DVR. Take your time to fine-tune these settings according to your specific surveillance requirements.
Step 4: Network Configuration
If you intend to access your Samsung security camera DVR remotely or want to enable features like email alerts, you need to configure the network settings. In the DVR menu, locate the “Network” or “Network Setup” section. Enter the required information such as IP address, subnet mask, gateway, and DNS server. Consult your network administrator or Internet Service Provider (ISP) for accurate network settings.

Step 5: Recording Settings
In the DVR menu, navigate to the “Recording” or “Storage” section to configure recording settings. Here, you can specify parameters like recording mode (continuous, scheduled, motion), recording resolution, frame rate, and storage allocation for each camera. Adjust these settings based on your desired recording quality and storage capacity.
Step 6: User Management and Password
It is essential to create strong user passwords and manage user access to your Samsung security camera DVR. Locate the “User” or “Account” section in the DVR menu and create individual user accounts with unique passwords. Assign appropriate user permissions to control access levels and ensure the security of your surveillance system.
After completing these steps, your Samsung security camera DVR should be properly configured and ready to use. Regularly review and update the settings as needed to adapt to changing surveillance requirements or system updates.
Understanding the different recording modes on your Samsung security camera DVR
When setting up your Samsung security camera DVR, it is important to understand the different recording modes available. These recording modes determine how the DVR captures, stores, and manages the video footage.
Continuous Recording Mode
Continuous recording mode is the most common and straightforward mode. When enabled, the DVR records video footage continuously, 24/7. This mode ensures that every moment is captured, but it can consume a large amount of storage space. Make sure you have sufficient storage capacity if you decide to use this mode.
Motion Detection Recording Mode
Motion detection recording mode allows the DVR to start recording only when motion is detected in the camera’s field of view. This mode saves storage space as it records only when something is happening. However, it is important to fine-tune the motion detection sensitivity to avoid false triggers, such as moving tree branches or passing cars.
Some Samsung DVRs allow you to define specific areas within the camera’s field of view where motion detection should be active. This feature is useful for focusing on specific areas, such as doorways or windows, while ignoring other parts of the image.
Scheduled Recording Mode
Scheduled recording mode gives you the flexibility to specify when the DVR should start and stop recording. You can set up a weekly or daily schedule to record during specific time periods. This mode is useful if you only need surveillance during certain hours of the day or if you want to conserve storage space during times when surveillance is not required.
It is important to ensure that the DVR’s internal clock is accurate for scheduled recording mode to work correctly. Check the DVR’s settings to make sure the time is correctly set.
By understanding and using the different recording modes available on your Samsung security camera DVR, you can optimize the storage usage and ensure that you capture the footage that is most important to you.
Setting up remote viewing on your Samsung security camera DVR
Remote viewing allows you to access and monitor your Samsung security camera DVR from anywhere using your smartphone, tablet, or computer. By following these steps, you can easily set up remote viewing on your Samsung security camera DVR:
-
Step 1: Ensure DVR is connected to the internet
Make sure your Samsung security camera DVR is connected to the internet. You can do this by connecting the DVR to your router using an Ethernet cable.
-
Step 2: Set up a DDNS account
Register for a DDNS (Dynamic Domain Name System) account. A DDNS account allows you to access and control your DVR remotely using a domain name instead of an IP address.
-
Step 3: Configure DVR network settings
Access the network settings on your Samsung security camera DVR and enter the necessary information to connect it to your internet network. This includes configuring the IP address, gateway, subnet mask, and DNS settings.
-
Step 4: Enable DDNS on your DVR
Enable DDNS on your Samsung security camera DVR by entering the DDNS account information you registered in Step 2. This will allow your DVR to communicate with the DDNS server and obtain a domain name for remote access.
-
Step 5: Set up port forwarding
Configure port forwarding on your router to allow external access to your Samsung security camera DVR. Forward the necessary ports (typically TCP port 80 and TCP port 8000) to the local IP address of your DVR.
-
Step 6: Install the mobile app or software
Download and install the Samsung security camera DVR mobile app or software on your smartphone, tablet, or computer. This app or software will allow you to remotely view and control your DVR.
-
Step 7: Connect and view your DVR remotely
Launch the mobile app or software and sign in to your DDNS account. Enter the domain name of your DVR to connect and view the live stream from your Samsung security camera DVR remotely.
By following these steps, you can easily set up remote viewing on your Samsung security camera DVR and have peace of mind knowing that you can monitor your property from anywhere.
Tips for maintaining and troubleshooting your Samsung security camera DVR
Keeping your Samsung security camera DVR in good condition is essential for maintaining the safety and security of your property. Here are some tips to help you maintain and troubleshoot your Samsung security camera DVR:
Maintenance:
- Regularly clean the cameras and DVR to remove any dust or debris that may affect the quality of the footage.
- Ensure that the DVR is placed in a well-ventilated area to prevent overheating.
- Check the power supply and cables regularly to ensure that they are properly connected and not damaged.
- Keep the firmware of your DVR up to date by regularly checking for and installing any available updates.
Troubleshooting:
- If you are experiencing connection issues, check the network cables and ensure that they are securely connected.
- Restart the DVR and all connected cameras to see if the issue persists.
- Check the power supply and make sure it is connected properly and functioning.
- If you are unable to view the cameras remotely, check your network settings and ensure that remote access is enabled on your DVR.
- If you notice a decrease in image quality, check the camera lenses for any dirt or smudges and clean them if necessary.
- If you are experiencing recording issues, check the hard drive status and make sure it is not full or crashing.
- If you are unable to playback recorded footage, ensure that the correct date and time settings are configured on your DVR.
By following these tips, you can ensure that your Samsung security camera DVR is functioning optimally and providing you with the best possible surveillance and security for your property.
Enhancing the security of your Samsung security camera DVR system
Setting up your Samsung security camera DVR system is an important step towards securing your property. However, there are additional measures you can take to further enhance the security of your system. By implementing these steps, you can maximize the effectiveness of your CCTV surveillance.
Here are some tips to enhance the security of your Samsung security camera DVR system:
- Regularly change default login credentials: When setting up your DVR system, it is crucial to change the default login credentials immediately. This ensures that unauthorized individuals cannot access your system using the default username and password.
- Enable two-factor authentication: Two-factor authentication adds an extra layer of security by requiring a second form of verification, such as a unique code sent to your mobile device, in addition to the username and password. Enable this feature to prevent unauthorized access to your DVR system.
- Keep your firmware up-to-date: Samsung regularly releases firmware updates for their security camera DVR systems. These updates often include security patches and bug fixes. To ensure your system’s security, regularly check for and install firmware updates.
- Create strong passwords: Using strong, unique passwords for your DVR system’s login credentials can prevent unauthorized access. Avoid using common passwords and include a mix of uppercase and lowercase letters, numbers, and special characters.
- Restrict network access: Configure your router’s firewall to restrict network access to your DVR system. This prevents external connections and unauthorized access attempts. Additionally, consider setting up a virtual private network (VPN) to encrypt network traffic and further secure your system.
- Regularly review system logs: Monitoring and reviewing your DVR system’s logs can help you identify any suspicious activity. Keep an eye out for unusual login attempts or any other anomalies that could indicate a security breach.
- Physically secure your DVR: Ensure that your DVR system is physically secure by placing it in a locked and secure location. This prevents unauthorized tampering or theft of the system.
- Train employees or residents: If your DVR system is installed in a business or residential setting, provide training to employees or residents on the proper use of the system. Educate them about the importance of maintaining security and the potential risks of unauthorized access.
By following these measures, you can enhance the security of your Samsung security camera DVR system and protect your property effectively.
FAQ,
What is a Samsung security camera DVR?
A Samsung security camera DVR is a digital video recorder that is used to record and store video footage from Samsung security cameras. It allows users to monitor and playback the recorded footage.
How do I set up a Samsung security camera DVR?
To set up a Samsung security camera DVR, follow these steps:
1. Connect the DVR to a power source and to the monitor using the provided cables.
2. Connect the cameras to the DVR using coaxial cables.
3. Power on the DVR and navigate through the on-screen setup menu to configure settings such as date and time, camera recording modes, and network settings.
4. Install the required software on your computer or mobile device to access the DVR remotely.
5. Ensure the cameras are positioned correctly and test the system to make sure everything is working properly.
What are the benefits of using a Samsung security camera DVR?
Using a Samsung security camera DVR has several benefits:
– It allows for continuous recording of video footage, which can be crucial in monitoring and investigating security incidents.
– DVRs often have larger storage capacities, allowing for longer periods of video retention.
– They offer remote access capabilities, enabling users to view live or recorded footage from anywhere using a computer or mobile device.
– DVRs often have advanced features such as motion detection, email alerts, and the ability to search for specific events in recorded footage.
Can I connect my Samsung security camera DVR to the internet?
Yes, you can connect your Samsung security camera DVR to the internet. Most DVRs have built-in network connectivity options such as Ethernet ports or Wi-Fi, allowing for remote access and control of the system. You can connect the DVR to your home or office network by following the manufacturer’s instructions and configuring the network settings on the DVR.


