Installing a security camera system in your home or office is an essential step towards ensuring the safety and security of your property. One of the most convenient ways to set up a security camera system is by connecting it to your wireless router. This allows you to easily access the camera feed from your smartphone, tablet, or computer, no matter where you are.
Before you begin the setup process, it’s important to choose the right security camera system that meets your specific needs. Consider factors like the number of cameras you require, the resolution quality, indoor or outdoor use, and whether you need night vision capabilities. Once you have decided on the right system, follow these simple steps to set up your security camera on a wireless router.
First, ensure that your wireless router is properly set up and connected to the internet. This involves connecting the router to your modem using an Ethernet cable and configuring the router settings. If you’re unsure about how to do this, refer to the user manual that came with your router or contact your internet service provider for assistance. Once your router is connected to the internet, you can move on to the next step of setting up your security camera system.
How to Setup Security Camera on Wireless Router
If you want to keep an eye on your home or office when you’re not around, setting up a security camera on your wireless router can provide you with peace of mind. With advancements in technology, it is now easier than ever to set up a wireless security camera system. Follow these steps to get started:
Step 1: Choose the Right Camera

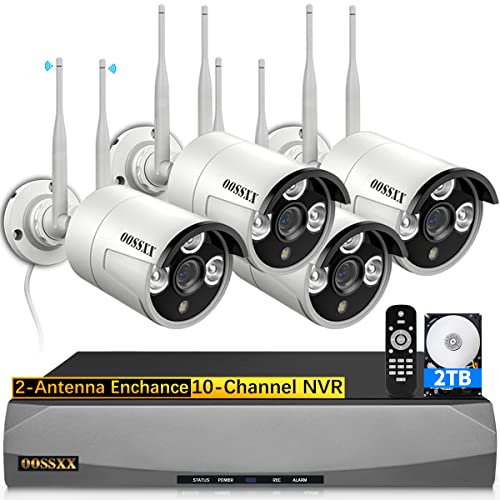
Before setting up your security camera, you need to choose the right camera that suits your needs. Consider factors such as video quality, motion detection, night vision, and remote access. Look for cameras that are compatible with wireless networks.
Step 2: Connect Your Camera to the Power Source
Once you have chosen your camera, connect it to a power source. Most cameras come with an AC adapter that you can plug into a standard power outlet. Make sure to position the camera in a strategic location to get the best view of the area you want to monitor.
Step 3: Connect Your Camera to the Wireless Router
Next, connect your camera to the wireless router. Check the user manual for specific instructions on how to connect your camera to your router. Most cameras can be connected wirelessly using Wi-Fi or through an Ethernet cable.

Step 4: Install the Camera Software/App
After connecting your camera to the router, install the camera software or app on your computer or smartphone. Follow the instructions provided by the manufacturer to download and install the software.
Step 5: Configure Your Camera Settings
Once the software or app is installed, open it and configure the camera settings. This may include setting up your camera’s name, security settings, motion detection sensitivity, email alerts, and remote access settings.
Step 6: Test Your Camera

After configuring the camera settings, test your camera to ensure everything is working properly. Check the live video feed from your camera to verify that you are receiving clear and steady footage.
Step 7: Mount Your Camera
Finally, mount your camera in its permanent location. Most cameras come with mounting brackets or screws that allow you to attach them to walls or ceilings securely. Make sure the camera is positioned at the desired angle and height.
By following these steps, you can easily set up a security camera on your wireless router and enjoy the benefits of having a reliable surveillance system. Remember to regularly check your camera’s video feed and adjust the settings as needed to ensure maximum security.
Choosing the Right Security Camera
When it comes to setting up a security camera on a wireless router, choosing the right camera is essential to ensure the safety and security of your premises. There are several factors to consider when selecting a security camera:

1. Resolution and Image Quality
One of the most important factors to consider is the resolution and image quality of the camera. Higher resolution cameras provide clearer and more detailed images, making it easier to identify people or objects in the recorded footage. Look for cameras with at least 1080p resolution for optimal image quality.
2. Night Vision
If you need surveillance during nighttime or in low-light conditions, it is crucial to choose a camera with excellent night vision capabilities. Look for cameras that use infrared (IR) technology, as it allows the camera to capture clear images even in complete darkness.
3. Field of View
The field of view (FOV) of a security camera determines the area it can cover. Depending on your needs, you may require a camera with a wide-angle lens or a camera with pan, tilt, and zoom (PTZ) capabilities. Consider the size of the area you want to monitor and choose a camera with an appropriate FOV.
4. Connectivity and Compatibility
Make sure that the security camera you choose is compatible with your wireless router and the software or monitoring system you plan to use. Most cameras are designed to work with standard Wi-Fi networks, but it is always worth checking the compatibility to avoid any compatibility issues or configuration problems.
5. Storage Options
Consider how the camera stores the recorded footage. Some cameras have built-in memory, while others require additional storage solutions such as microSD cards or cloud-based storage services. Choose a camera with storage options that meet your needs and budget.

6. Weatherproofing
If you plan to install the security camera outdoors, make sure it is weatherproof and can withstand the elements such as rain, snow, or extreme temperatures. Look for cameras with an IP65 or IP66 rating for reliable outdoor use.
By considering these factors and choosing the right security camera for your wireless router setup, you can create a reliable and effective surveillance system to protect your property and ensure peace of mind.
Checking Router Compatibility
Before setting up a security camera on your wireless router, it is important to check the compatibility between the camera and your router. Not all routers support the same security camera models, so it is crucial to confirm that your router meets the necessary requirements.
The first step is to gather information about your wireless router. Find the make and model of your router, which is usually printed on the device itself or can be found in the router’s settings. Once you have this information, you can start researching the compatibility of your router with the security camera you plan to use.
One way to determine compatibility is to consult the user manual or manufacturer’s website of your security camera. Look for a list of compatible routers or specific router requirements. This information should indicate whether your router is compatible or if any additional steps need to be taken.

Another option is to search online forums or community groups for discussions about your specific security camera and router combination. Other users may have already encountered compatibility issues or can provide advice on the setup process.
If you are unable to find any conclusive information about your router’s compatibility, you can also contact the manufacturer or customer support of your security camera. They should be able to confirm whether your router is compatible or provide guidance on other compatible routers.
By taking the time to verify the compatibility between your security camera and wireless router, you can ensure a smoother setup process and avoid any complications or issues that may arise due to incompatibility.
| Key Points | – |
|---|---|
| Check the make and model of your wireless router | |
| Consult the security camera’s user manual or manufacturer’s website for compatibility information | |
| Search online forums or community groups for discussions about compatibility | |
| Contact the manufacturer or customer support of the security camera for further assistance |
Connecting the Camera to the Router
Once you have ensured that your wireless router is properly set up and running, you can now connect the security camera to the router. Here is a step-by-step guide to help you with the process:
- Locate the Ethernet port on the back of the camera.
- Connect one end of the Ethernet cable to the camera’s Ethernet port.
- Connect the other end of the Ethernet cable to one of the available Ethernet ports on the wireless router.
- Make sure that the camera is powered on.
- Wait for the camera to establish a connection with the router. This process may take a few seconds.
- Check the camera’s user manual or documentation to find the default IP address of the camera.
- Open a web browser on a computer or mobile device connected to the same network as the camera.
- Enter the camera’s IP address in the web browser’s address bar and press Enter.
- You will be prompted to log in to the camera’s web interface. Enter the default username and password provided in the camera’s documentation.
- Once you have successfully logged in, you can configure the camera’s settings, such as resolution, motion detection, and recording options.
By following these steps, you should be able to connect your security camera to the wireless router and access its web interface for further configuration and monitoring.

Configuring Router Settings
Once you have set up your security camera system and connected it to your wireless router, the next step is to configure your router settings to enable access to the camera feed remotely.
Step 1: Accessing the Router’s Admin Panel
In order to configure your router settings, you will need to access the router’s admin panel. Typically, you can do this by entering the router’s IP address into a web browser. Consult your router’s user manual or contact the manufacturer for specific instructions on how to access the admin panel.
Step 2: Port Forwarding
To allow remote access to your security camera system, you will need to set up port forwarding on your router. Port forwarding allows incoming connections from the internet to be forwarded to a specific device on your network – in this case, your security camera.
First, you will need to find the local IP address of your security camera. This can usually be found in the camera’s settings or documentation. Once you have the IP address, you can proceed to set up port forwarding.
Access the router’s admin panel and navigate to the port forwarding section. Add a new port forwarding rule and enter the following details:
- External Port: This is the port number that will be used to access your security camera remotely. Choose a port number that is not commonly used.
- Internal IP Address: Enter the local IP address of your security camera.
- Internal Port: This is the port number that your security camera is using for incoming connections. This information can usually be found in the camera’s settings.
- Protocol: Select the appropriate protocol, usually TCP or UDP.
Save the port forwarding rule and exit the admin panel.
Step 3: Dynamic DNS Setup
If your internet connection has a dynamic IP address (most residential connections do), you will need to set up dynamic DNS (DDNS) to ensure that you can access your security camera even when your IP address changes.
DDNS allows you to associate a domain name with your IP address, so you can use a fixed domain name to access your camera regardless of your changing IP address.
Check if your router supports DDNS and follow the instructions provided by your router manufacturer to set it up. You may need to sign up for a DDNS service and enter the credentials in your router’s settings.
Step 4: Testing Remote Access
Once you have configured the router settings for your security camera system, it’s time to test remote access. On a device connected to a different network, enter the static IP address or domain name associated with your camera into a web browser.
If you have followed the steps correctly, you should be able to view the live feed from your security camera remotely. If you encounter any issues, double-check the router settings and consult the user manual or contact the manufacturer for assistance.
Remember to keep your router’s firmware up to date and ensure that you have strong passwords for both your router and security camera system to maximize the security of your setup.
Setting Up Remote Access
Setting up remote access for your security camera is essential if you want to monitor your property from anywhere in the world. With remote access, you can view the live feed, playback recorded footage, and receive alerts on your smartphone or computer.
Step 1: Configure your router
To enable remote access, you need to configure your wireless router. Start by logging into your router’s web interface using the default gateway provided by the manufacturer. Once logged in, locate the port forwarding or virtual server settings. Create a new rule and enter the IP address of your security camera as the internal IP, and the port number as the external port. Save the changes.
Step 2: Set up a dynamic DNS service
Since most residential internet connections have dynamic IP addresses, you’ll need to set up a dynamic DNS (DDNS) service to make it easier to access your camera remotely. Choose a DDNS provider and sign up for an account. Follow the provider’s instructions to link your router’s IP address with your chosen domain name. Remember to update your router’s DDNS settings with the required information.
Step 3: Configure your security camera
Access your security camera’s web interface by entering its local IP address into a web browser. Navigate to the network or remote access settings and enter the external port and domain name you configured in the previous steps. Enable remote access and save the settings.
Step 4: Test remote access
Now it’s time to test the remote access setup. Disconnect from your local Wi-Fi network and connect to a different network, such as your smartphone’s mobile data. Open the web browser or mobile app provided by your camera manufacturer and enter your DDNS domain name, followed by the port number, to access the live feed remotely. If successful, you should be able to view your camera’s footage.
Securing Your Wireless Network
Securing your wireless network is essential to protect your privacy and prevent unauthorized access to your security camera. Follow these steps to ensure your wireless network is secure:
-
Change the Default Router Login Credentials
One of the first things you should do is change the default login credentials for your router. The default username and password are often easy to guess, so changing them will help prevent unauthorized access to your network.
-
Enable Encryption
Ensure that your wireless network is encrypted using WPA2 or WPA3 encryption. Encryption protects your network by encrypting the data transmitted between your devices and your wireless router, making it difficult for hackers to intercept and read the data.
-
Use a Strong Wi-Fi Password
Choose a strong, complex password for your Wi-Fi network. Avoid using common words or phrases and include a mix of uppercase and lowercase letters, numbers, and special characters. A strong password will make it harder for hackers to guess or crack your password.
-
Disable Remote Management
Disable remote management on your router to prevent unauthorized access from outside your network. Remote management allows you to access and manage your router from a different location, but it also opens up a potential security vulnerability.
-
Disable SSID Broadcast
Disable the broadcasting of your network’s SSID (Service Set Identifier). By disabling SSID broadcast, you hide your network’s name from public view, making it less visible to potential hackers or unauthorized users.
-
Enable MAC Address Filtering
Enable MAC address filtering on your router to create a whitelist of devices that are allowed to connect to your network. Only devices with their MAC addresses listed in the whitelist will be able to connect, providing an additional layer of security.
-
Regularly Update Firmware
Check for and install firmware updates for your router regularly. These updates often include security patches and bug fixes that help protect your network from new threats and vulnerabilities.
-
Disable WPS
Disable Wi-Fi Protected Setup (WPS) if possible. While WPS can make it easier to connect devices to your network, it is vulnerable to brute-force attacks, making your network more susceptible to unauthorized access.
By following these steps, you can significantly improve the security of your wireless network and ensure the protection of your security camera and other connected devices.
Monitoring and Managing the Camera
Once you have successfully set up your security camera on your wireless router, you can now begin monitoring and managing it to ensure the safety and security of your property. Here are some key steps to help you with this process.
Accessing the Camera
To monitor your security camera, you need to access its live feed and settings. Most cameras come with a dedicated mobile app or web interface that allows you to connect and view the camera remotely. Install the app on your smartphone or access the web interface on your computer by entering the camera’s IP address into a web browser.
Viewing the Live Feed
Once connected to the camera, you can view the live feed on your smartphone or computer. This allows you to see what’s happening in real-time and be aware of any potential risks or suspicious activities. It is recommended to check the live feed regularly, especially during periods of increased security concerns or when you are away from your property for an extended period.
Sometimes, you may also have the option to record the live feed for future reference. Depending on your camera’s capabilities, you can set up a recording schedule or enable motion detection to trigger recording when any movement is detected.
Managing Camera Settings
Managing the camera settings is crucial for ensuring optimal performance and security. Use the camera’s app or web interface to configure important settings such as resolution, frame rate, video quality, and storage options. It is advised to choose settings that balance video quality with available bandwidth and storage capacity.
Additionally, you can also set up alerts and notifications to keep you informed about any disturbances or security breaches. This can be done by enabling motion detection notifications, which will send an alert to your smartphone or email whenever motion is detected within the camera’s field of view.
Additional Features
Depending on the model and brand of your security camera, you may have access to additional features and functionalities. These can include pan-tilt-zoom (PTZ) capabilities, two-way audio communication, or integration with other smart home devices. Explore the available options and customize the camera settings according to your specific needs.
Regular Maintenance
Regularly maintaining your security camera is essential for its longevity and performance. Keep the camera lens clean from dust and debris, ensure that the camera is securely mounted, and periodically check for any firmware updates released by the manufacturer. Stay proactive in maintaining and updating your camera to enhance its overall effectiveness and security.
By following these steps and regularly monitoring and managing your security camera, you can enjoy enhanced peace of mind and have better control over the security of your property.
Troubleshooting Tips
If you are experiencing difficulties setting up your security camera on a wireless router, here are some troubleshooting tips to help you resolve common issues:
1. Check your network connection:
Make sure that your wireless router is properly connected to the internet. Check if other devices are able to connect to the internet through the same router.
2. Verify camera settings:
Ensure that the camera is properly configured with the correct network settings, including the SSID (Wireless Network Name) and password. Double-check the settings and re-enter them if necessary.
3. Restart your devices:
Try restarting both your security camera and wireless router. Sometimes, a simple restart can resolve connectivity issues.
4. Move closer to the router:
If you are experiencing weak Wi-Fi signal, try moving your camera closer to the wireless router. This can improve the connection strength and stability.
5. Check for firmware updates:
Visit the manufacturer’s website and check if there are any firmware updates available for your security camera or wireless router. Updating the firmware can fix bugs and enhance performance.
6. Reset factory settings:
If all else fails, you can try resetting your security camera and wireless router to their factory settings. Please note that this will erase all previous settings and configurations.
Remember, if you are still having trouble setting up your security camera on a wireless router, it may be helpful to consult the manufacturer’s support documentation or contact their customer support for further assistance.
FAQ,
What is a wireless router?
A wireless router is a device that allows you to connect multiple devices to the internet wirelessly.
Why would I want to set up a security camera on a wireless router?
Setting up a security camera on a wireless router allows you to monitor your home or office remotely, providing an extra layer of security and peace of mind.
What equipment do I need to set up a security camera on a wireless router?
To set up a security camera on a wireless router, you will need a wireless IP camera, a wireless router, and a smartphone or computer with internet access.


