
Security cameras have become an essential component of modern home and business security systems. They allow us to monitor our properties and keep an eye on our loved ones, even when we are not physically present. One of the key features of security cameras is remote access, which allows you to view live footage from your cameras on your smartphone, tablet, or computer, no matter where you are.
Setting up security camera remote access may seem like a challenging task, but it doesn’t have to be. In this article, we will guide you through the process step by step, so you can enjoy the benefits of remote access and ensure the safety of your property.
Step 1: Choose the Right Security Camera System
The first step in setting up remote access is to choose a security camera system that supports this feature. Not all security cameras have remote access capabilities, so it’s important to do your research and select a system that fits your needs. Look for cameras that offer mobile app support and cloud storage options, as these are usually indicators of remote access functionality.
What is remote access for security cameras?
Remote access for security cameras refers to the ability to access and view the live and recorded footage of your security cameras from a remote location. This means that you can monitor your security cameras from anywhere in the world as long as you have an internet connection.

With remote access, you can use a computer, smartphone, or tablet to log into your security camera system’s app or website and view the video feeds. This has become increasingly popular as it provides convenience and peace of mind to homeowners and business owners alike.
Remote access allows you to:
- Monitor your property: Whether you are at work, on vacation, or simply away from home, remote access enables you to keep an eye on your property in real-time. This gives you the ability to detect any suspicious activities or security breaches.
- Review surveillance footage: In the event of an incident, remote access allows you to review the recorded footage remotely. This can be incredibly valuable for investigating crimes, accidents, or any other events that may have occurred on your property.
- Receive notifications: Many security camera systems offer the option to receive real-time alerts and notifications when motion is detected or when a specific event occurs. With remote access, you can instantly receive these notifications and take appropriate action if necessary.
In summary, remote access for security cameras provides flexibility, convenience, and enhanced security by allowing you to monitor and manage your security camera system from anywhere, at any time.
The importance of remote access
Remote access to security camera systems has become increasingly important in today’s world. With advances in technology and the rise of smart devices, having the ability to monitor and access your security cameras remotely provides numerous benefits and enhances your overall security measures.
Enhanced Surveillance
Remote access allows you to monitor your security cameras from anywhere at any time. Whether you are at work, on vacation, or simply away from your property, you can always keep an eye on your surroundings. This provides peace of mind knowing that you can check in on your home or business no matter where you are.

Furthermore, remote access enables you to respond quickly to potential security threats. If you receive an instant alert or notice suspicious activity, you can view the live feed from your security cameras and take immediate action, such as contacting the authorities or activating additional security measures.
Convenience and Flexibility
By setting up remote access to your security cameras, you can conveniently view live footage and recorded video from your smartphone, tablet, or computer. This eliminates the need to be physically present on-site to review footage, saving you time and effort.
Remote access also offers flexibility in managing your security camera system. You can adjust camera angles, change settings, and perform other administrative tasks remotely. This is especially beneficial for large properties or multiple locations, as it eliminates the need for manual adjustments and streamlines the overall management process.
Moreover, remote access allows you to easily share camera feeds with trusted individuals, such as family members or employees, without them needing physical access to the property. This can be useful for remote collaboration, monitoring specific areas, or ensuring the safety of loved ones or colleagues.
Overall, remote access to security camera systems provides enhanced surveillance capabilities, convenience, flexibility, and peace of mind. It empowers you with real-time monitoring and quick response capabilities, allowing you to effectively protect your property and loved ones regardless of your physical location.

Step 1: Choosing the right security camera system
Choosing the right security camera system is an important first step in setting up remote access for your security cameras. It is crucial to select a system that meets your specific needs and requirements, ensuring optimal performance and effectiveness.
Considerations for choosing a security camera system:
1. Camera type: Determine whether you need a wired or wireless camera system. Wired cameras offer a more stable connection but require professional installation, while wireless cameras are easier to install but may experience signal interference.
2. Camera resolution: Higher resolution cameras provide clearer and more detailed footage, allowing for easier identification of individuals and objects. Consider opting for cameras with at least 1080p resolution.
3. Camera features: Evaluate the necessary features for your surveillance needs, such as night vision, motion detection, PTZ (pan-tilt-zoom), and weather resistance. These features enhance the overall functionality and performance of your security camera system.
4. Number of cameras: Determine the number of cameras required to adequately cover the desired surveillance area. Consider the location, size, and layout of the area to determine the optimal number of cameras needed.

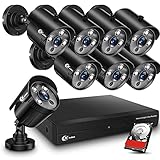
5. DVR or NVR: Decide whether you prefer a Digital Video Recorder (DVR) system or a Network Video Recorder (NVR) system. DVR systems are typically used with analog cameras, while NVR systems are compatible with IP cameras.
6. Storage capacity: Consider the amount of storage required to store your recorded footage. Determine whether you need an on-site storage solution, such as a hard drive, or if cloud storage is a more suitable option.
7. Remote access capabilities: Ensure that the security camera system you choose provides remote access capabilities, allowing you to view live and recorded footage remotely. Check if the system supports mobile apps or web browsers for convenient access from anywhere.
Comparison table for different security camera systems:
| System | Camera Type | Resolution | Features | Number of Cameras | DVR/NVR | Storage Capacity | Remote Access |
|---|---|---|---|---|---|---|---|
| System A | Wired | 1080p | Night Vision, Motion Detection | 4 | DVR | 1TB Hard Drive | Yes |
| System B | Wireless | 4K | Night Vision, Motion Detection, PTZ | 8 | NVR | 2TB Hard Drive | Yes |
| System C | Wired | 720p | Motion Detection, Weather Resistance | 6 | DVR | 500GB Hard Drive | Yes |
By considering these factors and comparing different security camera systems, you can make an informed decision and choose the right system that meets your requirements for remote access to your security cameras.
Factors to consider when selecting a security camera system
When choosing a security camera system for your remote access needs, there are several factors to consider to ensure optimal performance and functionality. Here are some important factors to keep in mind:
1. Resolution: The resolution of the security camera system determines the clarity and detail of the footage. Higher resolutions, such as 4K Ultra HD, offer crisper images and make it easier to identify people or objects in the video.
2. Field of view: Consider the field of view that the security camera system offers. A wider angle allows you to monitor a larger area, reducing the number of cameras needed.
3. Night vision: If you need to monitor your property during the nighttime, choose a security camera system with good night vision capabilities. Look for cameras that have infrared LEDs and can capture clear footage even in low-light conditions.
4. Connectivity: Ensure that the security camera system you select offers remote access capabilities. Look for systems that are compatible with mobile devices and allow you to view the camera feed remotely through a secure app or website.
5. Storage: Consider the storage options offered by the security camera system. Look for systems that offer both local and cloud storage options, allowing you to store footage locally on a hard drive and also have a backup in the cloud to prevent data loss.
6. Scalability: If you plan to expand your security camera system in the future, consider systems that allow for easy scalability. Look for systems that support the addition of more cameras without affecting the performance of the existing setup.
7. Ease of installation: Look for security camera systems that are easy to install and set up. Consider whether you want a wired or wireless system, and choose one that matches your requirements and technical expertise.
8. Budget: Last but not least, consider your budget when selecting a security camera system. Set a budget and look for systems that offer the best features and performance within that price range.
By keeping these factors in mind, you can select a security camera system that best fits your remote access needs and provides you with peace of mind knowing that your property is protected.
Understanding the different types of security cameras
When it comes to setting up security camera remote access, it’s important to understand the different types of security cameras available. Each type of camera has its own features and benefits, allowing you to choose the best option for your specific needs.

1. Dome Cameras
Dome cameras are a popular choice for both indoor and outdoor surveillance. These cameras have a dome-shaped casing that makes them tamper-resistant and difficult to determine the direction they are pointing in. Dome cameras are often used in casinos, retail stores, and offices due to their discreet design.
2. Bullet Cameras
Bullet cameras are long and cylindrical in shape, resembling a bullet. They are typically used for outdoor surveillance and can be easily mounted on walls or ceilings. Bullet cameras have a wide field of view and are designed to withstand harsh weather conditions.
3. PTZ Cameras
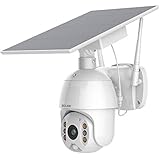
PTZ (Pan-Tilt-Zoom) cameras are versatile and can be controlled remotely. These cameras can pan, tilt, and zoom to capture different angles and zoom in on specific areas of interest. PTZ cameras are widely used in large outdoor spaces such as parking lots and stadiums.
4. Thermal Cameras
Thermal cameras use heat rather than visible light to create images. These cameras are ideal for low-light or no-light environments and can detect heat signatures, making them effective for detecting intruders or monitoring thermal conditions. Thermal cameras are commonly used in industrial settings and by law enforcement.
5. Wireless IP Cameras
Wireless IP cameras are connected to a network and can be accessed remotely through the internet. These cameras are easy to install and offer flexibility in terms of placement, as they do not require additional wiring. Wireless IP cameras are suitable for both indoor and outdoor surveillance.
| Type of Camera | Features | Best Use Case |
|---|---|---|
| Dome Cameras | Tamper-resistant, discreet design | Casinos, retail stores, offices |
| Bullet Cameras | Wide field of view, weather-resistant | Outdoor surveillance |
| PTZ Cameras | Pan, tilt, zoom functionality | Parking lots, stadiums |
| Thermal Cameras | Heat detection, low-light environments | Industrial settings, law enforcement |
| Wireless IP Cameras | Network-connected, remote access | Indoor and outdoor surveillance |
By understanding the different types of security cameras and their features, you can make an informed decision when setting up remote access for your security system.
Step 2: Setting up your security camera system
Before you begin: Ensure that you have all the necessary equipment and tools, such as the security cameras, cables, DVR/NVR, power supply, and a monitor or smartphone for viewing the camera footage.
1. Install the security cameras: Determine the locations where you want to install the cameras. It is recommended to place cameras at the front and back entrances, as well as other areas with high foot traffic. Ensure that the cameras are mounted securely and have a clear view of the desired areas.
2. Connect the cameras to the DVR/NVR: Use the provided cables to connect the cameras to the DVR/NVR. Each camera should have its own cable connected to the corresponding input on the DVR/NVR. Ensure that the connections are secure and tight.
In case of wireless cameras: Follow the manufacturer’s instructions to connect the cameras wirelessly to the DVR/NVR. This may involve connecting the cameras to your Wi-Fi network or using a separate wireless receiver.
3. Connect the DVR/NVR to the monitor: Use an HDMI or VGA cable to connect the DVR/NVR to a monitor or TV. This will allow you to view the camera footage in real-time. Follow the manufacturer’s instructions for the specific setup process.
4. Power up the system: Connect the power supply to the DVR/NVR and plug it into a power outlet. Ensure that all cameras and the monitor are also connected to a power source. Turn on the system and wait for it to initialize.
5. Configure the network settings: Use the menu or settings options on the DVR/NVR to configure the network settings. This may involve assigning a static IP address, setting up port forwarding, or enabling UPnP (Universal Plug and Play) for automatic configuration.
6. Test the remote access: Use a computer or smartphone connected to the same network as the DVR/NVR to test the remote access. Open a web browser or the official mobile app and enter the IP address or domain name provided by your Internet service provider (ISP) or the manufacturer. Follow the on-screen instructions to log in and view the camera footage remotely.
Note: In some cases, you may need to set up an account with the manufacturer or use a VPN (Virtual Private Network) for secure remote access.
7. Additional configurations: Depending on your preferences, you may want to further customize your security camera system. This can include adjusting motion detection settings, scheduling recording times, setting up email notifications for alerts, and integrating with other smart home devices or platforms.
8. Regular maintenance and monitoring: Regularly check your security camera system to ensure that it is functioning properly. Keep an eye on the camera feed, review recordings, and make any necessary adjustments or repairs as needed. This will help maintain the security and effectiveness of your system.
By following these steps, you can successfully set up your security camera system and have remote access to monitor your property from anywhere.
Installing the security cameras
Before you can access your security cameras remotely, you need to install them properly. Follow these steps to get your security cameras up and running:
Step 1: Determine camera placement
Start by deciding where you want to install your security cameras. Consider the areas you want to monitor and ensure that the cameras have a clear view of those areas. It’s important to choose strategic locations that cover all potential entry points and vulnerable areas.
Tip: Make sure the cameras are out of reach and protected from vandalism.
Step 2: Mount the cameras
Once you have determined the ideal locations for your cameras, it’s time to mount them. Use the necessary mounting brackets, screws, and anchors to securely attach the cameras to walls, ceilings, or other surfaces. Ensure that the cameras are properly aligned and positioned for optimal coverage.
Tip: Consult the user manual provided by the manufacturer for specific installation instructions.
Step 3: Connect the cameras
After mounting the cameras, connect them to your surveillance system. This typically involves running cables from the cameras to the recording device or network video recorder (NVR). Use the appropriate cables, such as Ethernet or coaxial cables, and ensure they are properly connected to each camera and the recording device.
Tip: It’s recommended to test the camera’s video feed before proceeding to the next step.
Step 4: Power up the cameras
Supply power to the security cameras by connecting them to a power source. This can be done using power adapters or by connecting the cameras to a compatible power over Ethernet (PoE) switch. Ensure that the cameras receive a stable power supply to avoid any disruptions in the surveillance system.
Tip: Consider using surge protectors to protect the cameras from power surges.
Step 5: Configure the cameras
Once the cameras are powered up, you need to configure them according to your surveillance requirements. This involves accessing the camera’s settings through a web browser or dedicated software provided by the manufacturer. Set up necessary parameters such as video quality, motion detection, and network settings.
Tip: Create strong passwords for your cameras to enhance security.
By following these installation steps, your security cameras will be ready for remote access, allowing you to monitor your property and ensure its safety from anywhere in the world.
Connecting the security cameras to a network
Before accessing your security cameras remotely, you need to connect them to a local network. Here are the steps to follow:
1. Check your camera’s documentation: Consult the user manual or online documentation provided with your security cameras to find information about connecting them to a network. Each camera model may have slightly different instructions.
2. Connect the camera to your router: Most cameras require a wired connection to your router using an Ethernet cable. Locate the Ethernet port on the camera and connect one end of the cable to it, and the other end to an available Ethernet port on your router.
3. Power on the camera: Plug the camera into a power outlet and ensure that it is powered on.
4. Configure camera settings: Use the camera’s configuration utility or a web browser to access the camera’s settings. This step allows you to set up important parameters such as the camera’s IP address and port number.
5. Assign a unique IP address: In most cases, you will want to assign a static IP address to your camera to prevent it from receiving a new IP address every time it reconnects to the network. This ensures that you can always access the camera using the same address.
6. Choose the port number: Decide on a port number to use for accessing the camera remotely. Common choices include port 80 for HTTP or port 443 for HTTPS. Make sure this port is not already used by another device on your network.
7. Port forwarding: If you have a router with security features, you may need to set up port forwarding for the chosen port so that incoming requests can reach the camera. Refer to your router documentation for instructions on how to configure port forwarding.
8. Test the connection: Once all the settings have been configured, test the remote connection by accessing the camera’s IP address and port number from a device on a different network. If everything is set up correctly, you should be able to view the camera’s live feed remotely.
Following these steps will allow you to connect your security cameras to a network and enable remote access so that you can monitor your premises from anywhere with an internet connection.
Step 3: Configuring your network for remote access
Once you have set up your security cameras and connected them to your network, you will need to configure your network settings to allow for remote access. This will enable you to view the camera feeds from anywhere using a smartphone, tablet, or computer.
1. Assign a static IP address
To ensure that your security cameras have a consistent IP address, it is recommended to assign them static IP addresses. This will prevent the IP address from changing and interrupting your remote access.
You can assign a static IP address by accessing your router’s settings. Open a web browser and enter your router’s IP address, which is typically found on the bottom of the router. Once you are logged into the router’s settings, look for the section that allows you to assign static IP addresses. Enter the MAC address of each camera and the IP address you want to assign to it.
2. Port forward your router
In order for your security cameras to be accessible from outside your local network, you will need to set up port forwarding on your router. Port forwarding allows incoming traffic on a specific port to be directed to a specific device on your network.
To port forward your router, you will need to access your router’s settings again. Look for the port forwarding or virtual server section. Add a new port forwarding rule for each security camera, specifying the port number and the IP address of the camera.
3. Create a DDNS account
If you have a dynamic IP address from your internet service provider (ISP), you will need to create a Dynamic Domain Name System (DDNS) account. A DDNS account will assign a domain name to your IP address, allowing you to access your security cameras even if the IP address changes.
There are several free DDNS services available, such as No-IP, DynDNS, and Duck DNS. Sign up for an account with one of these services and follow their instructions to set up DDNS for your network.
4. Test remote access
Finally, you can test your remote access setup by accessing the security camera feed from a device outside your local network. Open a web browser and enter the DDNS domain name or your static IP address followed by the port number. You should be able to view the live camera feed and access the camera’s settings remotely.
| Note: | Depending on your specific router model, the steps to configure your network for remote access may vary. Consult your router’s user manual or the manufacturer’s website for detailed instructions. |
Setting up port forwarding on your router
Port forwarding is an essential step in setting up remote access to your security camera. It allows you to access your camera footage from outside the local network, using a mobile device or computer.
To set up port forwarding, you need to access the settings of your router. Here are the steps to follow:
Step 1: Find your router’s IP address
Open a web browser on your computer and enter your router’s IP address in the address bar. Common router IP addresses are 192.168.0.1 or 192.168.1.1. If none of these work, consult your router’s manual or contact your internet service provider.
Step 2: Log in to your router’s settings
Enter your router’s username and password to log in to the settings page. If you haven’t changed them, the default username and password can usually be found on a sticker on the router or in the user manual.
Step 3: Locate the port forwarding settings
The location of the port forwarding settings may vary depending on the router brand and model. Look for a section called “Port Forwarding” or “Virtual Server”. If you’re having trouble finding it, consult your router’s manual or the manufacturer’s website.
Step 4: Add a new port forwarding rule
Click on “Add” or “New”, then enter a name for the rule (e.g., “Camera Port Forwarding”). Specify the port range (e.g., 8000-8000) and select the protocol (usually TCP or UDP). Enter the local IP address of your security camera. Save the settings.
Note: If you’re unsure of the camera’s local IP address, you can usually find it in the camera’s settings or consult the camera’s manual.
Step 5: Test the port forwarding
Once you’ve saved the port forwarding settings, you can test if it’s working correctly. Open a web browser on another device connected to a different network and enter your router’s public IP address, followed by the port number you specified (e.g., 123.456.789.123:8000). If the camera’s login page appears, congratulations! You’ve successfully set up port forwarding.
Keep in mind that the process of setting up port forwarding may differ slightly depending on your router’s make and model. If you’re unsure about any steps, it’s always a good idea to consult your router’s manual or contact the manufacturer for assistance.
Enabling remote access on your security camera system
Setting up remote access for your security camera system allows you to monitor your property from anywhere in the world using your smartphone, tablet, or computer. This means you can keep an eye on your home or business even when you’re not there, giving you peace of mind and enhancing the security of your property.
Step 1: Choose a camera system with remote access capabilities
Not all security camera systems offer remote access, so it’s important to choose one that has this feature. Look for a system that is compatible with remote viewing apps or software.
Step 2: Connect your camera system to the internet
To enable remote access, your security camera system needs to be connected to the internet. This can typically be done by connecting the system to your home or business Wi-Fi network. Follow the manufacturer’s instructions for connecting your system to the internet.
Step 3: Set up port forwarding
Port forwarding allows incoming connections from the internet to reach your camera system. You will need to access your router’s settings and configure port forwarding for the specific ports used by your camera system. Consult your router’s manual or the manufacturer’s website for instructions on how to do this.
Step 4: Create an account with the manufacturer’s remote access service
Most security camera systems that offer remote access require you to create an account with the manufacturer’s remote access service. This account will allow you to access your camera system remotely using a smartphone app or computer software.
Step 5: Configure remote access settings
Once you have created an account, you will need to configure the remote access settings on your camera system. This typically involves entering your account information and allowing the system to connect to the manufacturer’s remote access service.
Note: It’s important to use strong, unique passwords for your camera system and remote access account to ensure the security of your system.
Step 6: Test remote access
After you have completed the setup process, it’s important to test remote access to ensure it is working properly. Use the remote viewing app or software and log in to your account to view the live feed from your security cameras. If everything is working correctly, you should be able to view your cameras remotely.
By following these steps, you can easily enable remote access on your security camera system, allowing you to monitor your property from anywhere at any time.
Step 4: Accessing your security cameras remotely
Once you have set up your security cameras and connected them to the Internet, you can now access them remotely. This allows you to monitor your premises from anywhere, using a computer, smartphone, or tablet.
1. Set up port forwarding
To access your security cameras remotely, you need to set up port forwarding on your router. This allows incoming traffic to reach your cameras from the Internet. Each camera may require a different port number, so make sure to assign unique port numbers to each camera. Consult your camera’s user manual or manufacturer’s website for specific instructions on how to set up port forwarding for your particular camera model.
2. Enable remote access on your security camera system
After setting up port forwarding, you need to enable remote access on your security camera system. This typically involves accessing the camera’s settings through a web browser or a dedicated software provided by the manufacturer. Look for an option like “Remote Access” or “Remote Viewing” and follow the instructions to enable it. You may need to create an account or provide your camera’s unique identifier (UID) for authentication purposes.
Once remote access is enabled, you can access your cameras by typing the external IP address of your network (which you can find by searching “what is my IP address” in a search engine) followed by the port number assigned to your camera. For example, if your external IP address is 123.456.789 and your camera’s port number is 8080, you would enter “123.456.789:8080” in your web browser or dedicated mobile app to access the camera’s live feed.
Remember to secure your remote access by using a strong and unique password for your camera system. Regularly update your passwords and keep your camera’s software up to date to ensure the highest level of security.
FAQ,
What is remote access for a security camera?
Remote access for a security camera allows you to view and control the camera’s feed from anywhere using a computer, smartphone, or tablet, as long as you have an internet connection.
Why do I need remote access for my security camera?
Remote access is important for several reasons. It allows you to monitor your property or business premises in real-time, even when you are not physically present. It also gives you the ability to check the camera feed from anywhere, providing peace of mind and an added layer of security.
How can I set up remote access for my security camera?
To set up remote access for your security camera, you first need to ensure that the camera is connected to a network. Then, you will need to configure the camera’s settings to allow remote access. This typically involves accessing the camera’s web interface or using a mobile app to complete the setup process. Detailed instructions can usually be found in the camera’s user manual or on the manufacturer’s website.
Is remote access secure?
Remote access can be secure if proper measures are taken. It is crucial to follow best practices such as using strong passwords, enabling encryption, and keeping the camera’s firmware up to date. It is also recommended to set up a virtual private network (VPN) for an extra layer of security when accessing the camera remotely.
Can I access my security camera remotely without an internet connection?
No, remote access requires an internet connection. Without internet access, you will not be able to connect to the camera’s feed or control its settings remotely. However, some security cameras offer local storage options, such as an SD card, which allows you to access recorded footage even without an internet connection.


