If you’re looking for an affordable yet reliable home security solution, the Yi Home Camera is a great option. With its sleek design and advanced features, this camera allows you to monitor your home at any time from anywhere using your iPhone. In this article, we will guide you through the process of setting up the Yi Home Camera on your iPhone.
Step 1: Download the Yi Home App
The first step in setting up your Yi Home Camera on your iPhone is to download the Yi Home App from the App Store. Simply search for “Yi Home” in the App Store, and tap on the Download button to install the app on your iPhone.
Step 2: Create an Account
Once the app is installed, open it and create an account using your email address. Make sure to choose a strong password to secure your account. After creating your account, sign in to the app using your credentials.
Step 3: Add Your Camera
After signing in, tap on the “+” icon in the top right corner of the app to add your Yi Home Camera. Follow the on-screen instructions to connect your camera to your Wi-Fi network. Make sure to place the camera within range of your router for a stable connection.
Step 4: Complete the Setup
Once your camera is connected to your Wi-Fi network, the app will prompt you to complete the setup process. Follow the instructions on the screen to personalize your camera settings, such as enabling motion detection or setting up alerts.

Step 5: Start Monitoring
After completing the setup process, you can now start monitoring your home using your iPhone. Simply open the Yi Home App, sign in to your account, and select your camera from the app’s home screen. You can view live footage, review recordings, and even control your camera’s pan and tilt function right from your iPhone.
With these simple steps, you can easily set up your Yi Home Camera on your iPhone and enjoy the peace of mind that comes with knowing your home is safe and secure.
Setting up Yi Home Camera on iPhone
If you have recently purchased a Yi Home Camera and want to set it up on your iPhone, you’ve come to the right place. The Yi Home Camera is a popular choice for home security as it offers high-quality video monitoring and easy setup. Follow the steps below to get started:
1. Download the Yi Home App
The first step is to download the Yi Home app from the App Store. Open the App Store on your iPhone and search for “Yi Home”. Once you find the app, tap on “Get” and then “Install” to download and install it on your iPhone.

2. Create a Yi Home Account
After installing the app, open it on your iPhone. You will be asked to create a Yi Home account or sign in if you already have one. To create a new account, tap on “Sign Up” and follow the on-screen instructions to enter your email address, create a password, and verify your account.
3. Connect the Yi Home Camera to your iPhone
Now it’s time to connect your Yi Home Camera to your iPhone. Make sure the camera is powered on and in setup mode. The setup mode is indicated by a blinking yellow LED light. Open the Yi Home app and tap on the “+” icon in the top right corner to add a new device. Choose “Camera” from the list of devices and follow the on-screen instructions to connect the camera to your Wi-Fi network. Once the camera is successfully connected, you will see a live view of the camera’s feed on your iPhone.
4. Customize Your Camera Settings
After successfully connecting the Yi Home Camera to your iPhone, you can customize its settings according to your preferences. Tap on the camera icon in the Yi Home app to access the camera’s settings. Here, you can adjust the video quality, enable motion detection, set up notifications, and much more. Take some time to explore the available options and configure your camera to suit your needs.
5. Mount the Yi Home Camera
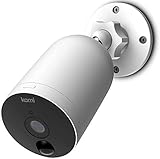
Finally, mount your Yi Home Camera in the desired location. The camera comes with a magnetic base, making it easy to attach to metal surfaces. Alternatively, you can use the included mounting bracket to secure the camera to a wall or ceiling. Ensure the camera is positioned in a way that provides the best view of the area you want to monitor.
Congratulations! You have successfully set up your Yi Home Camera on your iPhone. Now you can enjoy the peace of mind that comes with having a reliable home security camera system.

| Pros | Cons |
|---|---|
| High-quality video monitoring | Requires a stable Wi-Fi connection |
| Easy setup and installation | May experience occasional connectivity issues |
| Customizable settings | Some advanced features require a subscription |
| Wide range of accessories available |
Prepare Your Yi Home Camera
Before setting up your Yi Home Camera on your iPhone, there are a few preliminary steps you need to take to ensure a smooth installation process. Follow these instructions to properly prepare your camera:
Step 1: Unbox and Inspect
Start by unboxing your Yi Home Camera and inspecting its contents. Ensure that you have all the required parts, including the camera itself, power adapter, USB cable, and any other accessories that may have come with it. If anything is missing or damaged, contact the manufacturer for assistance.
Step 2: Choose a Location
Select a suitable location for your Yi Home Camera. Consider the area you want to monitor and the range of view you require. It is recommended to place the camera in a position that provides optimal coverage for its intended purpose.
Step 3: Power Connection
Connect the power adapter to an outlet and plug it into your Yi Home Camera. Ensure that the camera’s power indicator lights up, indicating that it is receiving power successfully.
Step 4: Network Connection
Make sure your iPhone is connected to a stable Wi-Fi network. The Yi Home Camera requires a reliable internet connection to function properly. Verify that your Wi-Fi signal is strong in the location where you plan to install the camera.
| Important Note: | It is recommended to use a Wi-Fi network with WPA/WPA2 encryption for increased security. |
|---|
Now that you have prepared your Yi Home Camera, you are ready to proceed with the setup process on your iPhone. Follow the next steps in the guide to complete the installation and configuration of your camera.
Download and Install the Yi Home App
To set up your Yi Home Camera on your iPhone, you will need to download and install the Yi Home App. The app is available for free on the App Store, and it allows you to easily connect and control your camera from your phone.
Follow these steps to download and install the Yi Home App:
- Open the App Store on your iPhone.
- Tap on the search bar at the bottom of the screen.
- Type “Yi Home” in the search bar and tap on the search button.
- From the search results, locate the Yi Home App and tap on it.
- On the app page, tap on the “Get” button.
- If prompted, enter your Apple ID password or use Touch ID / Face ID to confirm the download.
- Wait for the app to download and install on your iPhone.
Once the app is installed, you can find the Yi Home App on your home screen. Tap on it to open the app.
Now that you have successfully downloaded and installed the Yi Home App, you are ready to start setting up your Yi Home Camera.

Create a Yi Home Account
In order to set up your Yi Home Camera on your iPhone, you will first need to create a Yi Home account. Follow these steps to create your account:
Step 1: Download the Yi Home App
Go to the App Store on your iPhone and search for the Yi Home App. Once you find it, tap on the “Get” button to start the download. Wait for the app to finish downloading and installing on your device.
Step 2: Launch the Yi Home App
Once the app is installed, tap on its icon on your iPhone’s home screen to launch it.
Step 3: Sign up for a Yi Home Account
On the app’s main screen, tap on the “Sign Up” button to create a new account.
| Email Address | Enter your valid email address. This will be used as your username for logging into your Yi Home account. |
|---|---|
| Password | Create a password for your account. Make sure it is a strong and secure password to protect your account. |
| Confirm Password | Re-enter your password to confirm it is correct. |
| Phone Number | Enter your phone number (optional). This will be used for account recovery purposes. |
After filling in all the required fields, tap on the “Sign Up” button to create your Yi Home account.

Congratulations! You have successfully created a Yi Home account. Now you can proceed with setting up your Yi Home Camera on your iPhone.
Connect Yi Home Camera to Wi-Fi
If you have a Yi Home Camera and want to connect it to your Wi-Fi network, please follow the steps below:
Step 1: Download and install the Yi Home app
Before setting up your Yi Home Camera, you need to download and install the Yi Home app from the App Store. Search for “Yi Home” and download the app developed by Xiaoyi Technology Co., Ltd.
Step 2: Create a Yi Home account
After installing the app, open it and create a new account. You will need to provide your email address and set a password to create your account. Make sure to remember these details as you will need them later.
Step 3: Power on your Yi Home Camera
Now, plug in your Yi Home Camera and wait until the camera indicator light turns yellow. This indicates that the camera is in pairing mode and ready to connect to your Wi-Fi network.

Step 4: Add your camera to the app
Open the Yi Home app and tap on the “Add Camera” button. Select the option to add a camera and choose “Yi Home Camera” from the list of available camera models.
Step 5: Connect your camera to Wi-Fi
Follow the on-screen instructions in the app to connect your Yi Home Camera to Wi-Fi. You will need to enter your Wi-Fi network name and password. Make sure to enter them correctly.
Step 6: Wait for the connection
After entering your Wi-Fi credentials, wait for a few moments while the camera connects to your Wi-Fi network. Once the connection is established, the indicator light on your camera should turn blue.
Step 7: Test your camera
Once your Yi Home Camera is connected to Wi-Fi, you can test it by checking the live feed on the app. Make sure your camera is properly positioned and captures the desired area.
Congratulations! You have successfully connected your Yi Home Camera to your Wi-Fi network. Now you can enjoy the benefits of home surveillance and monitoring via the Yi Home app on your iPhone.
Add Yi Home Camera to the App
If you have recently purchased a Yi Home Camera and want to set it up on your iPhone, you can easily do so by following these steps:
Step 1:
Download and install the official Yi Home app from the App Store on your iPhone.
Step 2:
Open the Yi Home app and sign in to your account. If you don’t have an account, create one by tapping on the “Sign Up” button and following the on-screen instructions.

Step 3:
Once you’re signed in, tap on the “+” icon at the top right corner of the app to add a new device.
Step 4:
Select “Yi Home Camera” from the list of available devices.
Step 5:
Plug in your Yi Home Camera and wait for the blue status light to blink. This indicates that the camera is ready to be connected.
Step 6:
Tap on the “Next” button in the app and follow the on-screen instructions to connect your camera to your iPhone’s Wi-Fi network.
Step 7:
Once your camera is connected to the Wi-Fi network, you will be prompted to name the camera and set a password for it. Choose a name and password that are easy for you to remember, but difficult for others to guess.
Step 8:
After you have named your camera and set a password, tap on the “Finish” button to complete the setup process.
Congratulations! You have successfully added your Yi Home Camera to the app on your iPhone. You can now access the live feed from your camera, view recorded videos, and customize settings through the Yi Home app.
Note: It is recommended to keep the Yi Home app up to date to ensure you have access to the latest features and improvements.
Configure and Customize Your Yi Home Camera
Setting up your Yi Home Camera on your iPhone is a straightforward process that allows you to configure and customize the camera according to your preferences. Here’s a step-by-step guide on how to do it:
Step 1: Download the Yi Home App
First, you need to download the Yi Home App from the App Store on your iPhone. The app is free to download and is available for both iPhone and iPad.
Step 2: Connect the Camera to Power
Once you have the app installed, connect your Yi Home Camera to a power source using the provided USB cable and power adapter. Make sure the camera is within the range of your Wi-Fi network.
Step 3: Launch the Yi Home App
After connecting the camera to power, launch the Yi Home App on your iPhone. You will be prompted to sign in or create a new account. If you don’t have an account, you can quickly create one by providing your email address and creating a password.
Step 4: Add Your Camera
Once you are signed in, tap on the “+” icon to add your Yi Home Camera. The app will guide you through the setup process, which involves scanning the QR code on the camera, selecting your Wi-Fi network, and providing the password. Make sure to follow the on-screen instructions carefully.
Step 5: Customize Your Camera Settings
Once your camera is successfully connected to your iPhone, you can customize its settings to suit your needs. In the Yi Home App, you can access the camera settings by tapping on the camera’s thumbnail. Here, you can change the camera’s name, adjust the video quality, configure motion detection settings, set up alerts and notifications, and much more.
By configuring and customizing your Yi Home Camera, you can optimize its performance and make it work exactly the way you want it to. Whether it’s adjusting the camera’s position, enabling night vision, or scheduling recordings, the Yi Home App gives you complete control over your camera’s settings.
With just a few simple steps, you can set up and personalize your Yi Home Camera on your iPhone, ensuring that you can monitor your home or office even when you’re away. Enjoy the peace of mind knowing that you have a reliable and customizable camera at your fingertips.
FAQ
What is the Yi Home Camera?
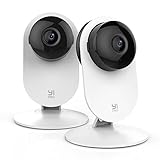
The Yi Home Camera is a wireless security camera that allows you to monitor your home or office remotely using your iPhone.
Can I use multiple Yi Home Cameras with my iPhone?
Yes, you can use multiple Yi Home Cameras with your iPhone. The Yi Home app allows you to add and manage multiple cameras from a single account, so you can monitor different areas of your home or office simultaneously.
Is the Yi Home Camera compatible with other smart home devices?
Yes, the Yi Home Camera is compatible with other smart home devices. It can be integrated with platforms such as Amazon Alexa and Google Assistant, allowing you to control the camera using voice commands and incorporate it into your existing smart home setup.