
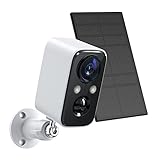
Installing a security camera can help you keep an eye on your property and enhance your home’s safety. However, finding a suitable power source for the camera can sometimes be a challenge. One convenient and efficient solution is to splice the camera’s power supply into an existing exterior light. This method allows you to tap into the electrical wiring of the light fixture, eliminating the need for additional power sources or unsightly cables.
Before proceeding with the splicing process, it’s essential to ensure that you have the necessary tools and equipment, such as wire cutters, wire strippers, electrical tape, and a multimeter to test the electrical connections. Additionally, make sure to turn off the power to the light fixture at the main circuit breaker to prevent any electrical accidents.
To begin the splicing process, you first need to locate the power source for the exterior light. This is typically a junction box located near the light fixture. Carefully remove the cover of the junction box and identify the live and neutral wires. The live wire is usually colored black or red, while the neutral wire is usually white or gray.
Once you have identified the live and neutral wires, cut a section of the wire leading from the exterior light fixture. Use the wire strippers to remove a small portion of the insulation from the cut ends of the live and neutral wires. Take the power supply cable of the security camera and strip off a small section of the insulation from the end of the cable as well.
Next, connect the live wire from the camera’s power supply cable to the live wire coming from the exterior light fixture. Twist the stripped ends of the wires together and cover the exposed portion with electrical tape to ensure a secure connection. Repeat the same process for the neutral wires. After making the connections, use the multimeter to test the electrical continuity and ensure that there are no loose or faulty connections.

Finally, neatly tuck the spliced wires back into the junction box and securely fasten the cover. Restore the power supply to the light fixture at the main circuit breaker and test both the exterior light and the security camera to ensure that they are functioning correctly. If everything is working as expected, you have successfully spliced the exterior light to power the security camera.
Remember, safety should always be your priority when working with electrical connections. If you doubt your abilities or are unsure about any aspect of the splicing process, it’s best to consult a licensed electrician to ensure a safe and proper installation.
Gather the necessary tools
Before you can begin splicing an exterior light to power a security camera, you will need to gather the following tools:
- Wire cutters
- Wire strippers
- Wire connectors
- Electrical tape
- Screwdriver
- Voltage tester
These tools will help ensure a successful and safe installation of your security camera. Make sure to have them on hand before starting the process.
Choose the right location
Choosing the right location for your security camera is crucial to ensure its effectiveness in monitoring your property. Here are some factors to consider when selecting the location:

1. Coverage area
Determine the areas you want to monitor, such as driveways, entrances, or backyard. Make sure the location you choose provides a clear line of sight to these areas.
2. Height
The height at which you mount your security camera can greatly affect its viewing angle and coverage area. Mount it at a height that captures the desired areas without any obstructions.
3. Power source
Ensure that the location you choose is within reach of a power supply. If you are splicing the camera to an exterior light, make sure the light is in close proximity to the desired camera location.
4. Protection from the elements
Consider weather conditions when selecting the location. Choose a spot that provides adequate protection from rain, humidity, and direct sunlight to ensure the camera’s longevity.
5. Accessibility
Ensure easy access for maintenance and adjustments. Mount the camera in a location that allows you to reach it easily for cleaning, battery replacement, or repositioning if needed.
By considering these factors and selecting the right location for your security camera, you can enhance the security of your property and achieve optimal surveillance coverage.
Turn off the power
Before starting any work on the electrical connections, it is important to turn off the power to the exterior light. This will ensure your safety and prevent any damage to the electrical system.
To turn off the power, locate the circuit breaker or fuse box in your home. It is usually located in the basement, garage, or utility room. Open the cover of the circuit breaker box to access the switches or fuses.
Identify the switch or fuse that controls the power to the exterior light. It is usually labeled with the room or area it supplies power to. If you are not sure which switch or fuse controls the light, you can turn off the main switch or remove the main fuse for the entire house.
Once you have identified the correct switch or fuse, switch it off or unscrew the fuse. You can test if the power is off by trying to turn on the light switch or checking if the light is working.

After confirming that the power is off, you can proceed with the splicing process without the risk of electrical shock or damage.
Remove the exterior light
Before splicing the exterior light to power a security camera, you will need to remove the existing light fixture. Follow these steps to safely remove the exterior light:
- Turn off the power to the light fixture at the circuit breaker.
- Using a screwdriver, remove any screws or bolts securing the light fixture to the wall or ceiling.
- Gently pull the light fixture away from the wall or ceiling to expose the wiring.
- Locate the wire nuts connecting the electrical wires of the light fixture.
- Use pliers or a screwdriver to unscrew the wire nuts, separating the electrical wires.
- With the wires disconnected, set aside the old light fixture.
- If necessary, remove any mounting hardware or brackets still attached to the wall or ceiling.
Once the exterior light fixture is removed, you can proceed with splicing the wires to connect your security camera. However, make sure to consult the manufacturer’s instructions for both the light fixture and the security camera to ensure proper installation and to follow any specific requirements or guidelines.
Splice the wires
Now that you have decided on the location for your security camera and have gathered all the necessary tools, it’s time to splice the wires. Here is a step-by-step guide on how to do it:
Step 1: Turn off the power
Before you start working with any electrical wiring, it is crucial to turn off the power to the area where you will be working. This will help prevent any accidents or electrical shocks.

Step 2: Prepare the wires
Start by stripping the ends of the wires that you will be splicing. It is recommended to use wire strippers for this task, as they will provide clean cuts and prevent any damage to the wire itself.
Once the ends of the wires are stripped, you can use a pair of pliers to twist the exposed copper strands together. This will ensure a strong and secure connection.
Step 3: Connect the wires
Now it’s time to make the connection between the wires of the exterior light and the security camera. There are several ways to do this, but the most common method is to use wire connectors.
Simply insert the twisted ends of the wires into the appropriate slots of the wire connector and tighten the screws to secure the connection. Make sure that the wires are properly aligned and that there are no exposed copper strands.
Step 4: Insulate the connection
After making the connection, it is essential to insulate it to protect against any moisture or other elements. You can use electrical tape or heat shrink tubing for this purpose.

Wrap the insulating material tightly around the connection, covering all exposed wires. Make sure that there are no gaps or areas where the wires can be exposed.
Additionally, you can apply a layer of silicone sealant to further protect the connection from water and other environmental factors.
Step 5: Test the connection
Once you have completed the splicing process and have insulated the connection, it’s time to test it. Turn on the power and check if both the exterior light and the security camera are functioning properly.
Make sure to check the video feed from the security camera and ensure that all the lights on the camera are working as intended.
If everything is working correctly, congratulations! You have successfully spliced the wires and powered your security camera using the exterior light.

Remember, if you are unsure about any step of the process, it is always best to consult a professional electrician to ensure a safe and reliable installation.
Connect the camera
Now that the power supply is ready, it’s time to connect the camera. Start by carefully removing the protective cover from the camera’s wiring terminals. You may need to use a small screwdriver or another tool to pry it open.
Next, locate the power and video cables that came with your security camera. These cables usually have color-coded connectors to make installation easier. Connect the power cable to the camera’s power input terminal, making sure it fits securely.
Once the power cable is connected, attach the other end to the power supply you previously installed. Double-check that the positive and negative wires are correctly aligned with the power supply terminals to avoid any electrical issues.
Now it’s time to connect the video cable. Locate the video input terminal on the camera and connect one end of the video cable to it. The other end of the video cable should be connected to the video input terminal on your recording device or monitor.
If you’re using a wireless camera, you may need to follow additional steps to pair it with your recording device or monitor. Refer to the instructions that came with your camera for more information.
Once all the connections are made, test the camera by turning on the power supply. Check if the camera is receiving power and if the video signal is being transmitted properly. Adjust the camera’s position if needed to get the desired view.
Remember to secure all the wiring and cables properly to avoid accidents or damage. Use cable clips or ties to keep them neatly organized and out of the way.
With the camera properly connected, you can now move on to configuring the camera’s settings and linking it to your security system for enhanced surveillance and peace of mind.
Test the connection
After making the necessary splices and connections, it is important to test the connection to ensure everything is working properly. Follow the steps below to test the connection:
- Power on the security camera and exterior light: Make sure both the security camera and the exterior light are receiving power. You can do this by turning on the power source for both devices.
- Check for a live video feed: Use the monitoring system or app connected to the security camera to check if there is a live video feed. If the video feed is clear and stable, it indicates that the connection between the camera and the power source is successful.
- Test the motion detection functionality: If the security camera has motion detection capabilities, trigger the motion sensor and verify that it properly detects and records any motion within the camera’s field of view. This can be done by walking or waving in front of the camera’s lens and checking if the camera captures the movement.
- Test the exterior light: Turn on the exterior light and ensure that it functions properly. If the light turns on and off as expected, it indicates that the connection between the light and the power source is successful.
- Inspect the splices and connections: Visually inspect the splices and connections to ensure they are secure and properly insulated. Any loose or exposed wiring should be addressed immediately to prevent accidents or damage to the devices.
By carefully testing the connection, you can ensure that both the exterior light and the security camera are working as intended, providing you with enhanced security and peace of mind.
Reinstall the exterior light
After successfully splicing the power for the security camera, it is important to reinstall the exterior light to ensure proper functionality and to maintain the aesthetics of your home. Here are the steps to follow:
1. Turn Off the Power
Before reinstalling the exterior light, it is crucial to turn off the power to ensure safety. Locate the circuit breaker or fuse box responsible for the light’s power supply and switch it off. It is recommended to use a voltage tester to validate that the power is indeed off.
2. Remove the Old Fixture
Carefully remove the old exterior light fixture by unscrewing the screws or bolts that hold it in place. Gently disconnect the wiring connections from the fixture and set it aside.
3. Prepare the New Fixture
If you have a new exterior light fixture, prepare it by removing any packaging materials and reading the manufacturer’s instructions. Ensure that all necessary components and wiring are included and in good condition.
4. Connect the Wiring
Using wire connectors, connect the wiring from the spliced security camera power cable to the corresponding wires on the new exterior light fixture. Make sure to match the colors of the wires (black to black, white to white) and tighten the connectors properly to ensure a secure and safe connection.
5. Mount the Fixture
Hold the new exterior light fixture against the wall or ceiling mount and align it with the screw holes. Insert and tighten the screws or bolts to securely mount the fixture. Ensure that it is level and straight.
6. Restore Power and Test
After confirming that the fixture is securely mounted, restore power to the circuit breaker or fuse and turn on the light switch. Test the exterior light to ensure it is functioning correctly. If necessary, make any adjustments to the positioning or tighten the connections further.
By following these steps, you can successfully reinstall the exterior light and complete the splicing process for your security camera power supply.
FAQ,
What tools do I need to splice an exterior light to power a security camera?
To splice an exterior light to power a security camera, you will need a screwdriver, wire strippers, wire connectors, and electrical tape.
Is it safe to splice an exterior light to power a security camera?
Yes, it is safe to splice an exterior light to power a security camera as long as you follow proper electrical wiring guidelines and take necessary precautions. If you are unsure, it is always recommended to consult a licensed electrician.


