
Streaming camera with your iPhone is a convenient and versatile way to share live video footage with others. Whether you want to broadcast your adventures in real-time or simply keep an eye on your home, using your iPhone as a camera streaming device is easier than you may think.
In this article, we will guide you through the process of streaming camera with your iPhone. You will learn about the different methods and apps available, as well as the steps required to set up a successful camera stream. So, let’s dive in and discover how to transform your iPhone into a powerful streaming device!
Before we get started, it’s important to note that streaming camera with your iPhone requires a stable internet connection. Whether you are using Wi-Fi or cellular data, make sure you have a strong and reliable signal to prevent any interruptions or buffering issues during your stream.
Get Started: Streaming Camera with Your iPhone
Streaming your camera feed with your iPhone is a great way to share live video with your friends, family, or followers. Whether you want to broadcast a special event, capture a memorable moment, or simply document your daily adventures, streaming with your iPhone is easy and convenient. Here are some steps to help you get started:
- Download a streaming app: Start by downloading a streaming app from the App Store. There are many options available, such as Periscope, Facebook Live, and YouTube Live. Choose one that suits your needs and preferences.
- Set up your account: After installing the app, create an account or log in with your existing social media credentials. This will allow you to start streaming and interact with your audience.
- Grant necessary permissions: Make sure the app has access to your camera and microphone. This is essential for streaming the video and audio feed from your iPhone.
- Configure your settings: Explore the app’s settings to customize your streaming experience. You can adjust video quality, enable/disable comments, and choose privacy settings.
- Position your iPhone: Mount your iPhone on a stable surface or use a tripod for a steady stream. Ensure that your camera has a clear view of the subject and the lighting is adequate.
- Start streaming: Once everything is set up, tap the “Go Live” or “Start Streaming” button to begin broadcasting. Share a captivating title and description to attract viewers.
- Engage with your audience: Interact with your viewers by responding to their comments and questions. Encourage them to share your stream with others to increase your viewership.
- End your stream: When you’re done streaming, make sure to properly end the session. Thank your viewers for joining and let them know when you’ll be going live again.
Streaming camera with your iPhone is a fantastic way to connect with others and share your experiences in real-time. Experiment with different apps and settings to find the setup that works best for you. Happy streaming!

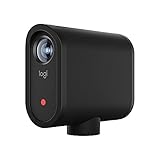
Choose the Right Camera
When it comes to streaming with your iPhone, choosing the right camera is crucial. The camera you select will determine the quality and clarity of the stream, so it’s important to make an informed decision. Here are a few factors to consider when choosing a camera:
Resolution and Image Quality
One of the most important aspects of a camera is its resolution. Higher resolution cameras produce sharper and more detailed images, resulting in a better streaming experience. Look for cameras that offer at least 1080p resolution for optimal results. Additionally, consider the image quality features offered by the camera, such as color accuracy and low-light performance.
Connectivity Options
Another important factor to consider is the camera’s connectivity options. Ensure that the camera you choose can connect to your iPhone, either through a wired or wireless connection. Some cameras offer built-in Wi-Fi or Bluetooth capabilities, allowing for seamless integration with your iPhone. If you plan to use the camera for live streaming, make sure it offers real-time streaming protocol (RTSP) or other streaming capabilities.
Battery Life and Portability
If you plan to use your camera for extended periods or on the go, battery life and portability are essential considerations. Look for cameras with long battery life or options for external power sources. Additionally, consider the size and weight of the camera to ensure it’s easy to carry and set up wherever you go.

Additional Features
Consider any additional features that may enhance your streaming experience. Some cameras offer image stabilization, autofocus, and zoom capabilities, which can be beneficial for capturing smooth and clear footage. Additionally, you may want to look for cameras with a wide-angle lens, adjustable settings, or the ability to connect to external microphones.
By considering these factors and finding a camera that meets your specific needs, you can ensure a high-quality streaming experience with your iPhone. Take your time to research and compare cameras before making a purchase to make the right choice.
Download a Streaming App
If you want to stream the camera with your iPhone, you will need to download a streaming app. There are several options available on the App Store that you can choose from.
Some popular streaming apps include:

- Twitch: This app is primarily used for streaming video games, but you can also use it to stream your camera.
- Periscope: This app allows you to easily stream live video from your camera to your followers.
- Facebook Live: If you want to stream on Facebook, you can use the Facebook Live app to do so.
- YouTube: The YouTube app also has a live streaming feature that you can take advantage of.
Once you have chosen a streaming app, simply search for it in the App Store and download it to your iPhone. Make sure to read the app’s reviews and ratings to ensure that it is reliable and meets your streaming needs.
Connect Your Camera to iPhone
Streaming your camera feed to your iPhone can be a convenient way to monitor your surroundings. To connect your camera to your iPhone, you will need to follow a few simple steps.
Step 1: Check Camera Compatibility
The first step is to ensure that your camera is compatible with your iPhone. Most cameras nowadays come with built-in Wi-Fi or Bluetooth connectivity, which makes them compatible with your iPhone. However, it is essential to check the manufacturer’s website or user manual to verify compatibility.
Step 2: Install the Camera’s Companion App
Once you have confirmed compatibility, you will need to download and install the camera’s companion app on your iPhone. The companion app allows your camera to communicate with your iPhone and enables you to stream the camera feed directly to your device.
Step 3: Connect Camera to iPhone
After installing the companion app, launch it on your iPhone and follow the on-screen instructions to connect your camera. This usually involves selecting your camera model from a list of available devices and entering the required connection details, such as Wi-Fi password or Bluetooth pairing code.
Once your camera is successfully connected to your iPhone, you will be able to access the camera feed within the companion app and start streaming it directly to your device.
Step 4: Adjust Camera Settings
Before you start streaming, it is advisable to check and adjust the camera settings according to your preferences. You can usually access the camera settings within the companion app. This allows you to fine-tune the image quality, adjust resolution, enable motion detection, or set up additional features.
You might also want to consider setting up notifications within the companion app, so you receive alerts on your iPhone when the camera detects motion or any other specified events.
Step 5: Start Streaming
With your camera connected and settings adjusted, you are ready to start streaming. Simply open the companion app on your iPhone, navigate to the camera feed, and tap the play button. You will now be able to view the live camera feed on your iPhone in real-time.
Streaming your camera with your iPhone offers a convenient way to monitor your surroundings remotely. By following these steps and ensuring compatibility, you can easily connect and stream your camera feed directly to your iPhone.
| Benefits of Streaming Camera to iPhone |
|---|
| 1. Remote monitoring |
| 2. Convenient access |
| 3. Real-time view |
| 4. Easy setup process |
| 5. Adjustable settings |
Set Up Your Streaming Preferences
Before you start streaming your camera with your iPhone, it’s important to set up your streaming preferences. These settings will ensure that you have a smooth streaming experience and that your content is optimized for your viewers.
1. Choose a Streaming Platform
The first step is to select a streaming platform that suits your needs. There are many options available, such as YouTube Live, Facebook Live, and Twitch. Consider the features and audience reach of each platform before making your decision. Once you’ve chosen a platform, create an account and familiarize yourself with its streaming guidelines.
2. Check your Internet Connection
A stable internet connection is crucial for a successful streaming session. Before you begin streaming, ensure that you have a reliable Wi-Fi or cellular network connection. You can test your internet speed using online tools or speed testing apps. If your connection is not strong enough, consider moving closer to your router or using a Wi-Fi extender.
3. Adjust Streaming Settings
Next, you’ll need to adjust the streaming settings on your iPhone. Open the camera app and go to the settings menu. Look for the streaming options, which may vary depending on the app version or device model. You can typically find settings for video resolution, frame rate, and audio quality. Adjust these settings based on your preferences and the capabilities of your iPhone.
Additionally, you may want to enable features such as automatic stabilization or noise reduction, depending on your shooting conditions. Experiment with different settings to find the best configuration for your streaming needs.

4. Set up Privacy and Permissions
Consider your privacy preferences and adjust your streaming settings accordingly. Some streaming platforms allow you to control who can view your stream or enable password protection. Ensure that you understand the privacy options available to you and set them up as desired.
Moreover, you may need to grant permissions to the streaming app to access your iPhone’s camera and microphone. Check the app’s settings or your iPhone’s privacy settings to ensure that the necessary permissions are granted.
By following these steps and setting up your streaming preferences, you’ll be well-prepared to stream your camera with your iPhone. Enjoy sharing your experiences with your audience!
Start Streaming and Share Your Camera Feed
Once you have set up your streaming camera on your iPhone, it’s time to start streaming and share your camera feed with others. Here are the steps to get started:
- Open the streaming app on your iPhone and make sure your camera is connected and set up properly.
- Tap on the “Start Streaming” button to begin the streaming process. This will start the live video feed from your camera.
- Once the streaming begins, you will see a URL or a sharing option provided by the app. This will allow you to share the camera feed with others.
- You can choose to share the camera feed by copying the URL and sending it to others via email, messaging apps, or social media platforms.
- If the app provides a sharing option, you can select it and choose the desired method of sharing, such as via email, messaging apps, or social media platforms.
- Make sure to inform the recipients that they can access the camera feed by clicking on the shared URL or the provided link.
By following these steps, you can easily start streaming and share your camera feed with others using your iPhone. It is a great way to connect with people and share your live experiences with them.

Tips for Successful Camera Streaming
Streaming the camera feed from your iPhone can be a great way to share live events, tutorials, or even just keep an eye on your home while you’re away. To ensure a successful streaming experience, consider the following tips:
- Check your internet connection: Before you start streaming, make sure you have a strong and stable internet connection. A weak or unstable connection can result in interrupted streams or poor video quality.
- Use a tripod or stabilizer: To avoid shaky footage, use a tripod or stabilizer for your iPhone. This will help provide a steady and professional-looking stream.
- Frame your shot: Take some time to frame your shot before you start streaming. Make sure the subject is centered and well-lit, and consider the background and any potential distractions.
- Test the audio: Good audio is just as important as good video. Check the audio levels and ensure that the microphone is picking up clear sound. Consider using an external microphone for better audio quality.
- Manage battery life: Streaming can quickly drain your iPhone’s battery. Make sure your device is fully charged, or consider using an external battery pack or charger to keep it powered up throughout the stream.
- Choose the right streaming platform: There are many streaming platforms available, such as YouTube Live, Facebook Live, or Periscope. Consider your audience and their preferred platform, and choose the one that best suits your needs.
- Promote your stream: If you want to attract viewers, promote your stream in advance. Use social media, email newsletters, or other channels to create awareness and build anticipation for your stream.
- Engage with your audience: Streaming is an interactive experience. Encourage viewers to ask questions or leave comments, and be prepared to respond. Engaging with your audience will make the stream more enjoyable for everyone involved.
- Practice and improve: Like any skill, camera streaming takes practice. Take the time to review your streams, analyze what worked well and what didn’t, and make adjustments for future broadcasts. The more you practice, the better you’ll become.
By following these tips, you’ll be well-equipped to successfully stream your camera feed with your iPhone and provide an enjoyable experience for your viewers.
FAQ
Can I use my iPhone to stream camera footage?
Yes, you can use your iPhone to stream camera footage. There are several apps available on the App Store that allow you to connect your iPhone to a camera and stream the footage live.
What apps can I use to stream camera with my iPhone?
There are several apps available for streaming camera footage with your iPhone. Some popular options include “FiLMiC Pro”, “Periscope”, and “GoPro App”. These apps allow you to connect your iPhone to a camera and stream the live footage directly to social media platforms or other devices.
What are the steps to stream camera with my iPhone?
The steps to stream camera with your iPhone may vary depending on the app you are using. Generally, you will need to download and install the app from the App Store, connect your iPhone to the camera using Wi-Fi or a cable, and then follow the app’s instructions to start the streaming process. Make sure to have a strong internet connection for smooth streaming.


